
Tuning Photoshop for speed and fix bugs.
Here are 10 Tips to make Photoshop CC lightning fast and how to fix almost any problem in Photoshop without reinstalling.
Photoshop is a bit like your car. If you don’t keep it maintained and then take it in for a tuning, you are amazed at how well it runs. Many of us never even take the time to set up Photoshop correctly in the first place (or we don’t know how). A lot of this is in setting up a few simple preferences and a couple of ways of working more efficiently. When things go wrong there are 3 things you can do to fix it and these work almost every time.
Please take the time to watch the video to see these tips in action, I will also reference them below so you can bookmark this page as your go to for troubleshooting.
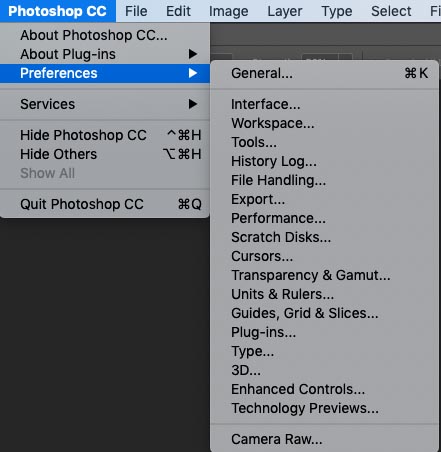
Where are preferences?
NOTE! Ask the preferences ca be found Photoshop>Preferences on Mac and Edit>Preferences on Windows
Please also note, most preferences changes will require a restart of Photoshop to take affect.
Performance
Here is a collection of tips to help make Photoshop run faster and smoother.
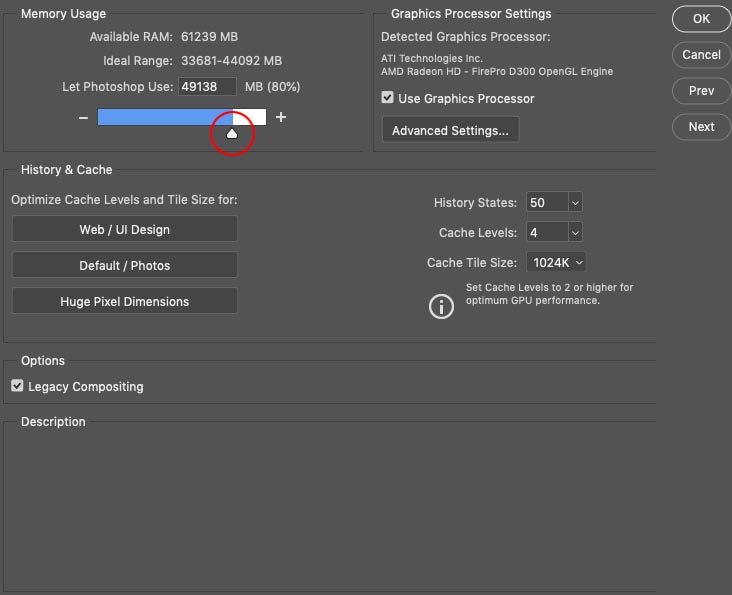
1. Use more RAM
Ram doesn’t magically make Photoshop run faster, but it can remove bottle necks and make it more efficient. If you are running multiple programs or filtering large files, then you will need lots of ram available, You can buy more, or make better use of what you have.
Set your RAM to 80% to get the most to Photoshop while still leaving enough for your OS and utilities, If you have a large amount such as 64GB and don’t run other programs with Photoshop, bump it up to 90%.
This is under Preferences>Performance
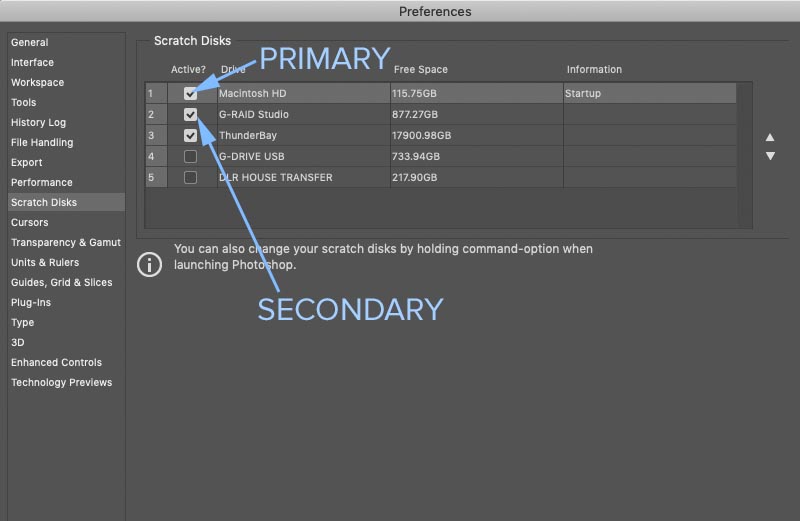
2. Optimize your Scratch Disk(s)
When Photoshop runs out of RAM it moves the tasks to your hard drive. If you have more than one, you can set the fastest drive as your scratch disk.
Use your fastest drive (with free space) as your primary scratch disk and try to attach a second drive as a failsafe in case you run out of space, to avoid the Scratch Disk Full error
If you want maximum performance, install an additional SSD drive that you only use for Photoshop, don’t run your OS or other programs from there, not even Photoshop. Set this as your primary scratch disk and you will find that Photoshop runs smoother, particularly for large files or files with lots of layers.
3. Don’t Copy Paste, ever!
I have seen people Copy and paste images in Photoshop to combine them into 1 document. When you copy, you put that image into your buffer and it will stay there until you restart your computer or you copy something else. It’s better to drag the images from one window to the other and leave that memory free for other things. (See a good demon of this in the video)
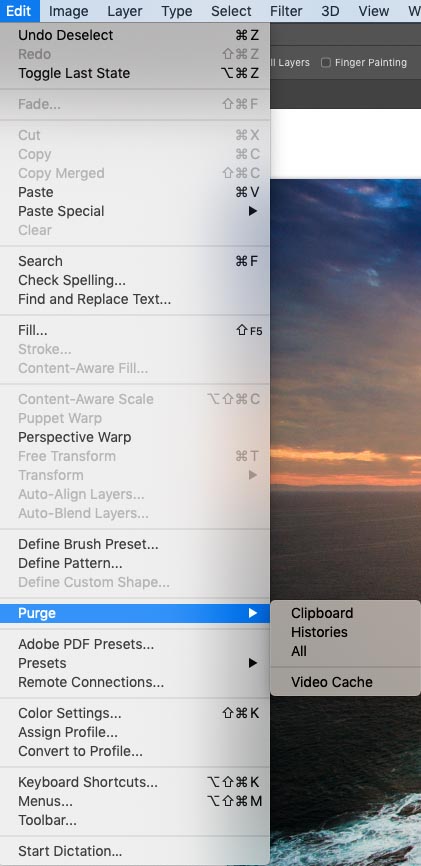
4. Emergency Dump – Purge Photoshop
One good thing about being around for a while (Using Photoshop for 20 years) is that we learned to be super efficient while working because computer resources were very tight. A lot of people newer to the Photoshop games aren’t even aware of this feature. Have you ever worked on a huge file and you can’t run a filter for example because there isn’t enough free memory. (Not enough free memory error message). You can to an emergency dump and actually complete that task.
Choose Edit>Purge>All
Clearing the Clutter In Photoshop
5. Disable huge home screen
When you launch Photoshop you will see a welcome screen that takes over. This can be useful by showing recent files as well as access to your Lightroom photos. However, when you close your document, instead of showing a blank Photoshop, it goes back to this huge screen, If you choose to disable it, it’s easy.
Choose: Preferences>General
Click: Disable the Home Screen

And the Home screen will be gone (after a restart)
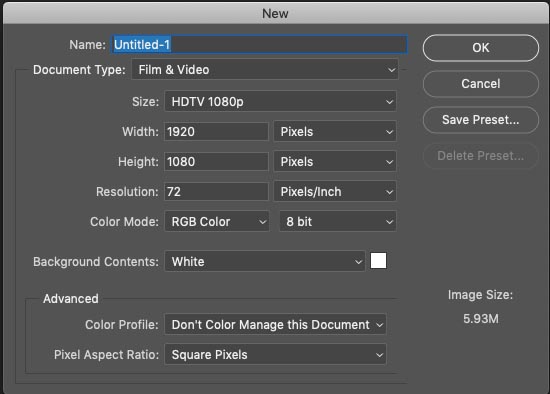
6. New Document Window taking over?
Have you noticed the New Document window keeps growing? If you want to go back to the old one, here is how.

Under General, turn on Use Legacy “New Document” interface

And now the regular dialog box will show. If you want easy access to Templates, use the new dialog box, not the old (legacy) one.
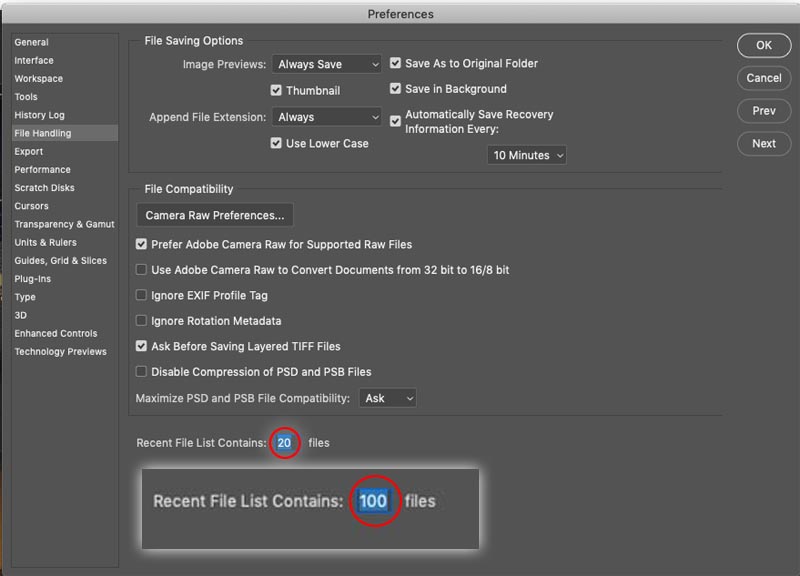
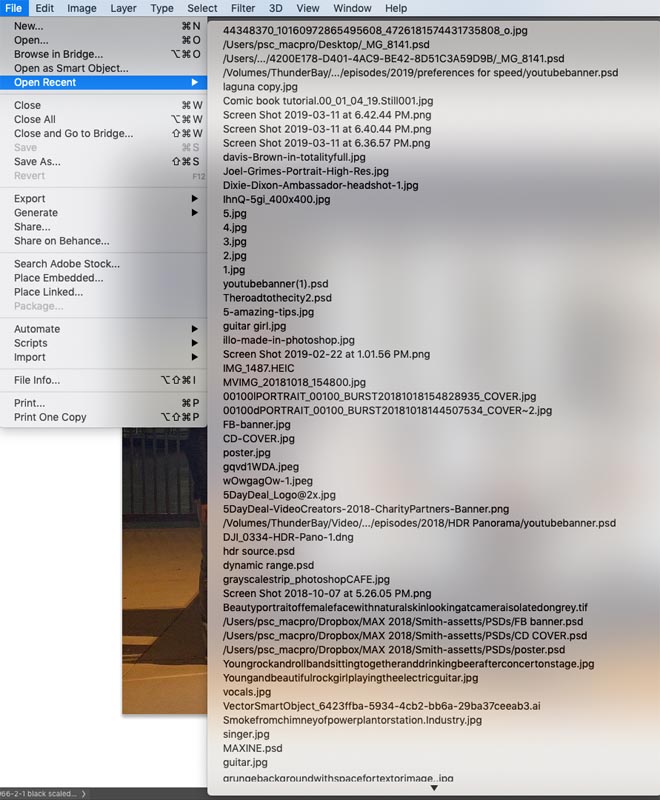
7. Show MAX recent Files in Photoshop
When you choose File>Open Recent, you will see your last 20 images. You can change that to show the last 100.
Choose Preferences>File Handling.
Change recent files to 100. You don’t need to restart for this one, and it will immediately show the last 100 files.
Troubleshooting Photoshop
This section will help you fix almost any problem you will encounter in Photoshop. Some “bugs” can easily be squashed with the following 3 tips.
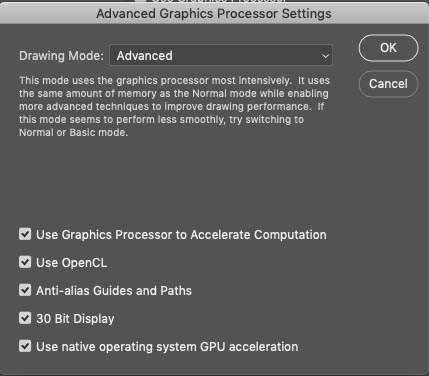
8. Toggle GPU features for a bug free Photoshop
If you are getting display glitches, such as weird interface garble, you can fix that by changing your GPU (Graphic Processing Unit) settings.
Choose Preferences?Performance
First of all turn off Use Graphics Processor (GPU) and see if that fixes the issue.

If it does fix it, go into advanced settings and try disabling features one at a time until you find the culprit.
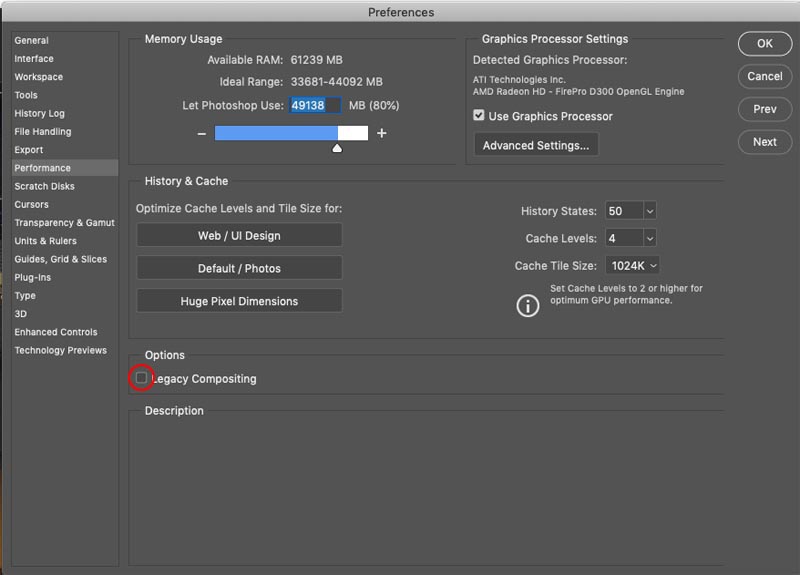
9. Photoshop Legacy Compositing Engine
In the last update some people were complaining that their Blending modes didn’t look right, or the color was weird.
This can be fixed by using the legacy compositing engine. (Make it work like it did in CC 20018 and earlier). This can be found in Preferences>Performance.
10. Reset Photoshop Preferences to fix most problems
This fix has been around as long as Photoshop, it’s just easier to do now.
When all else fails, resetting your preferences can fix most issues. Make sure to back up your presets first, (I show this in the video above).
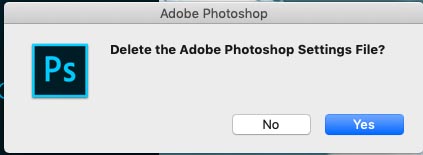
When you trash your preferences file, Photoshop builds a new preferences file as it launches and resets all the settings and libraries to the factory settings. This resets everything and removes bad presets etc. Most of the time this will fix Photoshop problems. Case in point, some people were freaking out (Some youtubers had a melt-down) with some bugs when they upgraded to CC 2019. Resetting the Preferences actually fixed the bugs. (Aren’t you glad you’re part of PhotoshopCAFE CAFE Crew and get the email that showed how to do it, on day 1. Oops, you’re not a member? Sign up here, its free and takes 11 seconds).
Good news, you don’t have to find the prefs file anymore. When you go to launch Photoshop hold down Ctrl+Alt+Shift (Windows), Cmd+Option+Shift (Mac) and click the Photoshop launch icon.
![]()
You will see a dialog box that asks if you want to delete the settings file (Did you back up your presets yet? Make sure you do first) Click ok and Photoshop will launch with the default factory settings.
NOTE: Choose Edit>Presets>Export/Import Presets to back up and reinstall custom presets (shown in the video)
I hope you found this article/tutorial really useful. It seems that people don’t write about this kind of thing much these days. If there are other obscure things in Photoshop you are curious about, let me know in the comments.
Thanks for checking out this weeks tutorial and see you all next week.
Great to see you here at the CAFE
Colin
PS Don’t forget to join our mailing list and follow me on Social Media>
(Ive been posting some fun Instagram and Facebook Stories lately)
You can get my free Layer Blending modes ebook here
The post How to Speed up Photoshop CC + How to fix any problem in Photoshop appeared first on PhotoshopCAFE.