
I realized that as much as I’ve written about Lightroom (Lr) on the different platforms, I didn’t have a “getting started” type post aimed at folks who are already using Lightroom Classic (LrC). I recently got asked about the steps one should follow, so for that person, and everyone else who needs them, here are my recommended steps for getting started with Lightroom on your mobile device if you’re already a LrC user.
Note, if you are only using Lightroom (and not at all using Lightroom Classic), then the short version is just install Lightroom on all of your devices, log in with the same Adobe ID on all of them, and away you go.
With the Creative Cloud Photography plan you get access to Photoshop and Lightroom Classic, which are the main draws to that plan for most people. Additionally, you can install the Lightroom app on all of your devices, but only get 20GB of cloud storage for exploring that cloud-based workflow. I’ve written about how you can manage that 20GB of cloud storage, so don’t let that small amount hold you back from trying this.
What to do in Lightroom Classic
Before you even do anything else, open Lightroom Classic and go to Preferences > Lightroom Sync. This is where you can configure a location for storing any (and all) photos that are downloaded from the Lightroom cloud.
Before going any further, let me make two important points:
- Any photo imported into any Lightroom (Lr) app is uploaded full resolution to the cloud and counts agains your cloud storage (this includes photos taken within the Lr app itself).
- Any photo synced from Lightroom Classic (LrC) to the Lr cloud is only uploaded to the cloud as a smart preview, and these do not count against your cloud storage limit.
So, by configuring a location in the preferences you will know exactly where all photos taken with the Lr camera or any photos you import into any Lr app will be stored on the computer running your LrC catalog. Start by checking the Specify location for Lightroom’s synced images checkbox.
Then, click the Choose button to the right of the checkbox, and navigate to the location where you want these photos to be stored. I keep mine in my Pictures folder, in automatically created date-based folders, and then use LrC to move them to an external drive over time. This way I know the Pictures folder is always accessible and it keeps things simple. You do what makes the most sense to you.
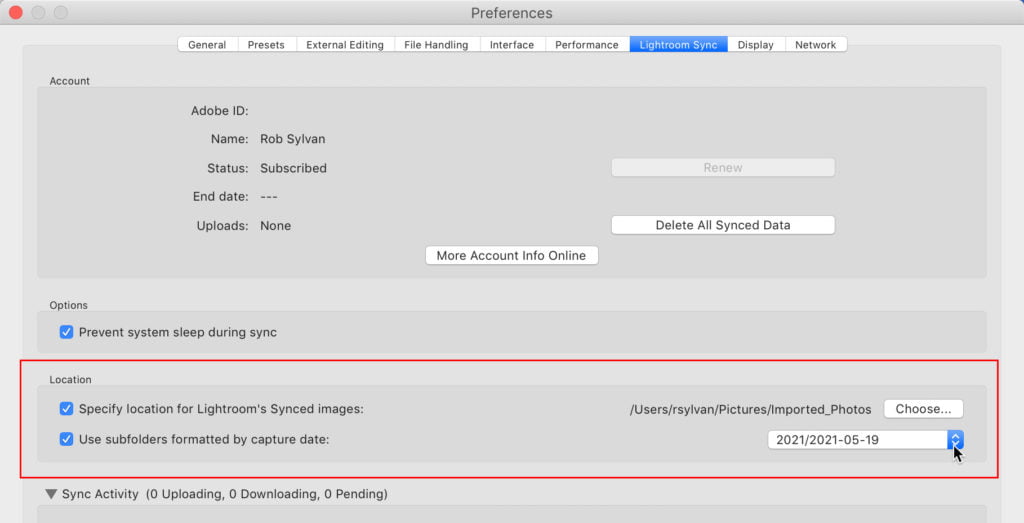
You might get a prompt about moving previously downloaded files to this new location you’ve chosen. That’s entirely up to you.

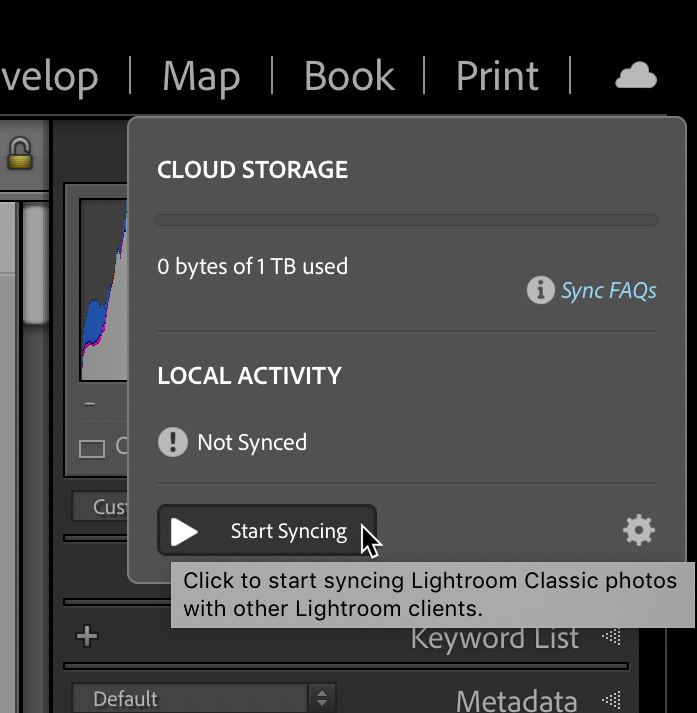
Ok, now you are ready to turn on syncing in LrC. Locate the cloud icon in the upper-right corner of the LrC interface, and click it. This opens the window into the world of syncing to the cloud. Here you can see how much of your cloud storage is being used, find a very handy FAQ link on syncing (go read it), and the button to start the syncing process.
Before you click it, note that if you have already imported photos into any Lr app those photos will start downloading the moment you click Start, which is why I had you configure that location first. When ready, click Start. If you do not have any photos in the Lr cloud, then nothing will happen visibly yet. Well, you will see the Start button change to a Pause button, and you’ll see a green check mark appear on the cloud icon to indicate that syncing is complete (for the moment).
The real change is that now you can mark regular collections to sync to the cloud at your leisure. When starting in LrC, only photos you place in synced regular collections will sync to the cloud. If a photo is not in a synced collection, it will not sync. This gives you total control over what gets synced and what does not. So, I’ll create a regular collection, and show you what I mean.
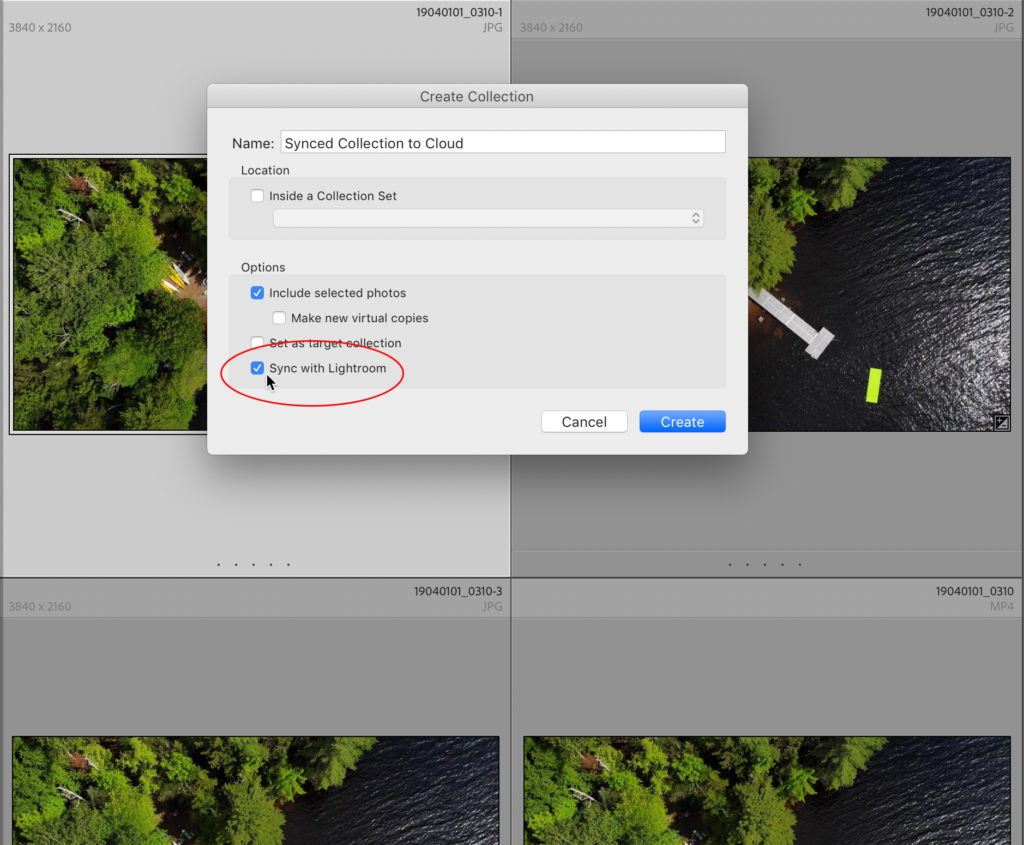
The new option is the Sync with Lightroom checkbox that appears in the Create Collection dialog box. Alternatively, you can hover your cursor over the box that appears to the left of the collection name in the Collections panel, and click to mark that collection for syncing.

I included the one selected photo at the time I created the collection, and in so doing, a smart preview was automatically created by LrC, and that smart preview was uploaded to the cloud. Once syncing is complete, the green checkmark re-appears back on the cloud icon.
I can check to see the synced photo in the cloud by going to Lightroom.adobe.com in my web browser, and logging in with my same Adobe ID. Accessing lightroom.adobe.com in your browser is referred to as Lightroom Web (which has nothing to do with the Web module in Lightroom Classic, so just don’t get me started on how confusing this all is).
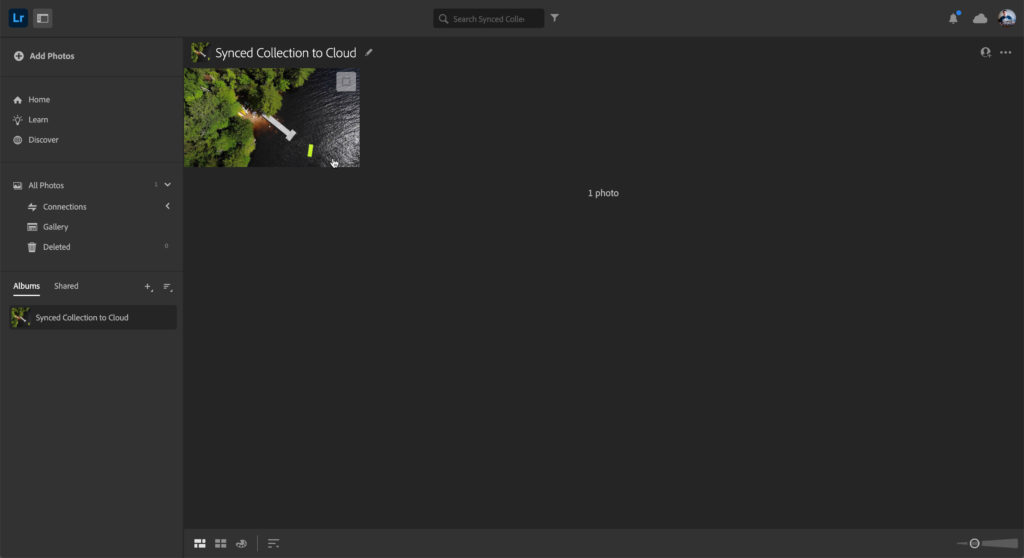
What you see in Lightroom Web is the same as what you will see (content wise) in Lightroom on your phone or tablet. So, let’s head there next.
What to do on your mobile device
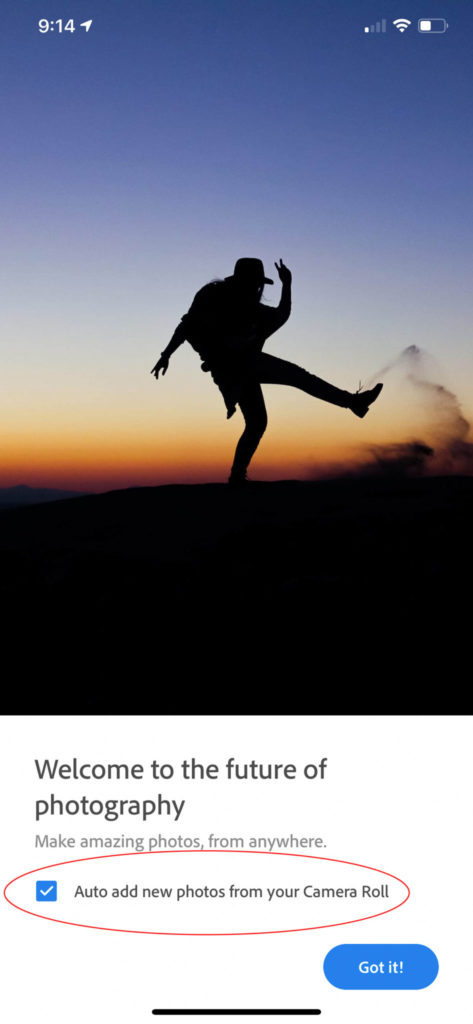
Whether you have an Android or iOS device, go to the respective app store for that device and download/install the Lr app. As you go through the process of logging in with your Adobe ID (and password), please read all the info presented on the screens, and do yourself the favor of unchecking the Auto add from Camera Roll box, please (you can thank me later).
Once logged in, you’ll see any collections you’ve marked to sync from LrC, along with any photos in those collections (note, collections are called albums here, because, you know, reasons).
That’s it. You’ve successfully connected your LrC catalog to the cloud, and opened the pipeline between LrC and Lr. Please be sure to read all of the other articles I’ve linked to here, and I’m happy to answer questions in the comments (and maybe follow up with another post or two on what to do next).
The post Getting Started with Syncing Lightroom Classic to the Lightroom Cloud appeared first on Lightroom Killer Tips.