
Welcome to the second installment of my “Retouching Portraits in Lightroom” column. Last time, I talked about how to remove blemishes, which is a perfect lead-up to what we’re going to do this time because you’d use those blemish-removal techniques before you do the skin-softening technique we’re going to learn today.
One of the best things about applying this skin-softening technique is that it smooths the gradation of skin tones on your subject’s face, so don’t just think of it as a skin smoother; it’s for a better transition between skin tones, and it makes a huge difference (as you’ll see). Here’s how it works:
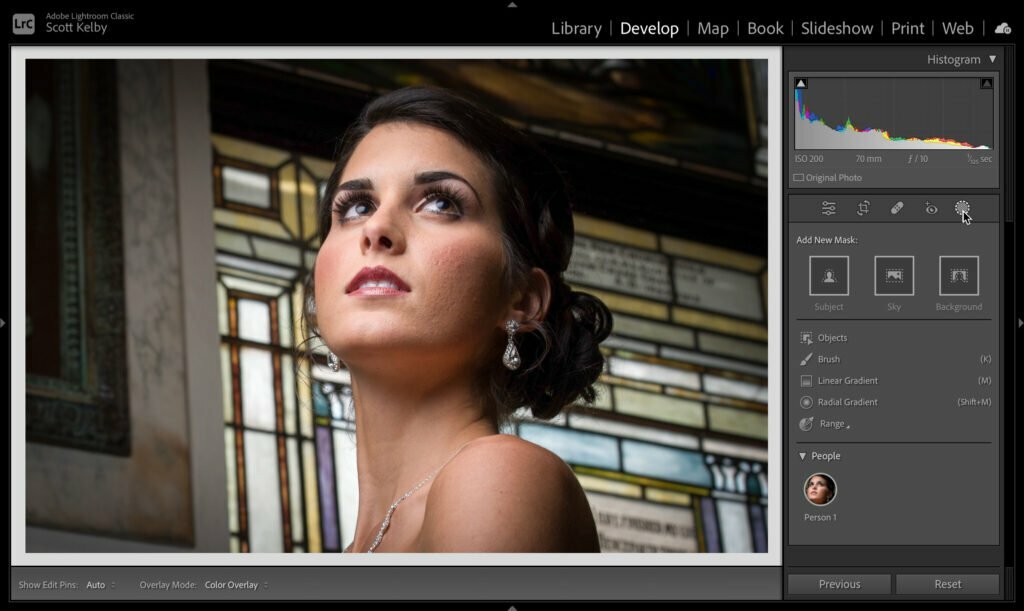
STEP ONE: Here’s our original image. Click on the Masking icon (gray circle with dotted outline) below the Histogram, and wait for a second or two for it to find the People in your shot as shown here. (KelbyOne members can click here to download a JPEG version of this image for practice purposes only.)
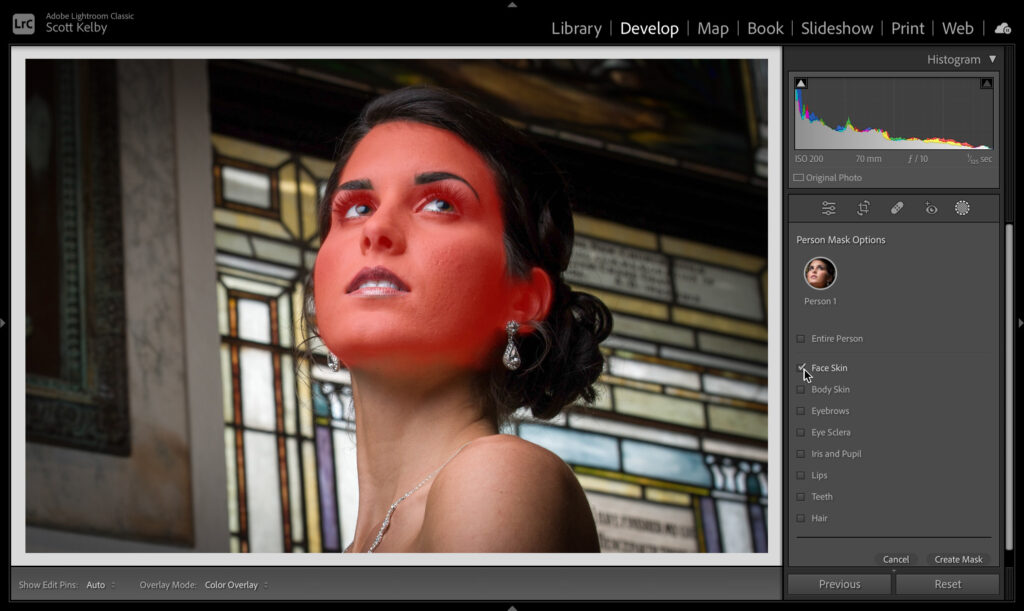
STEP TWO: Click on the thumbnail of your subject in the People section to bring up a list of areas you can mask for portraits. Click directly on Face Skin (as shown above), and a red tint appears over the area it has masked for you (notice how her eyes and lips are excluded from the mask). Click the Create Mask button at the bottom right.
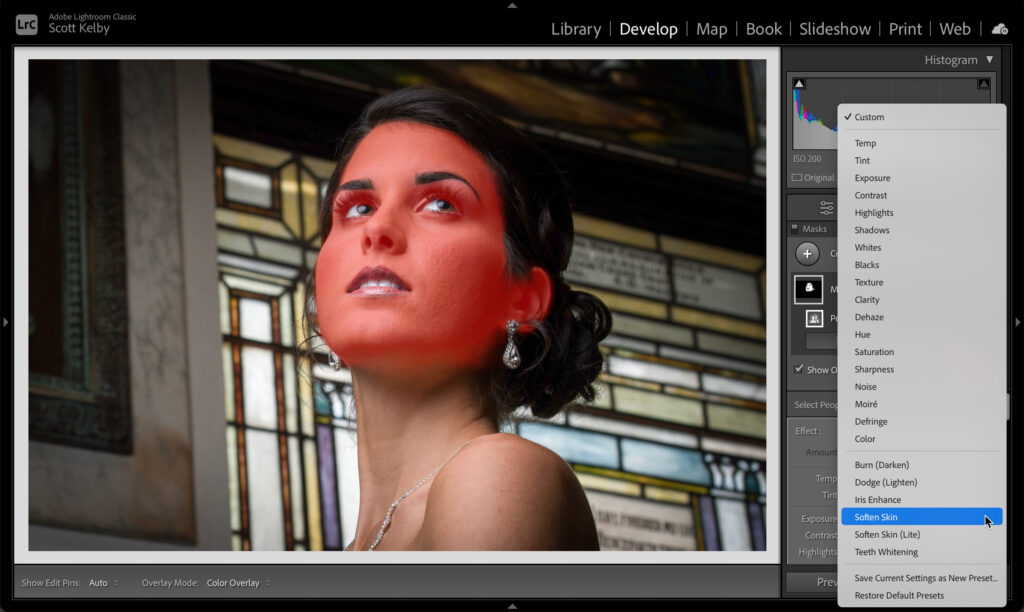
STEP THREE: At the top of the panel with the adjustment sliders, you’ll see the word “Effect,” and to the right of it, it says “Custom.” Click-and-hold on Custom to bring up the list of slider presets you see above. Choose Soften Skin.
STEP FOUR: When you choose Soften Skin, it applies skin softening to the masked area of facial skin (as shown above). You don’t have to paint or do anything else; just choosing Soften Skin from the menu does the trick. You could also choose Skin Soften (Lite) from the preset menu, but I prefer to apply the full skin soft- ening, and then choose the exact amount I want after seeing the results.
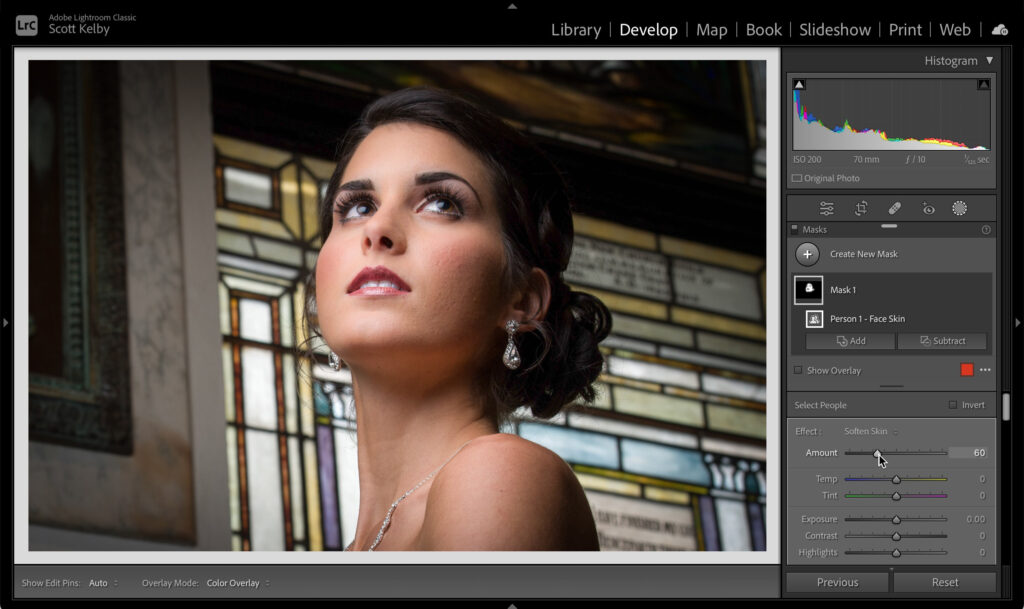
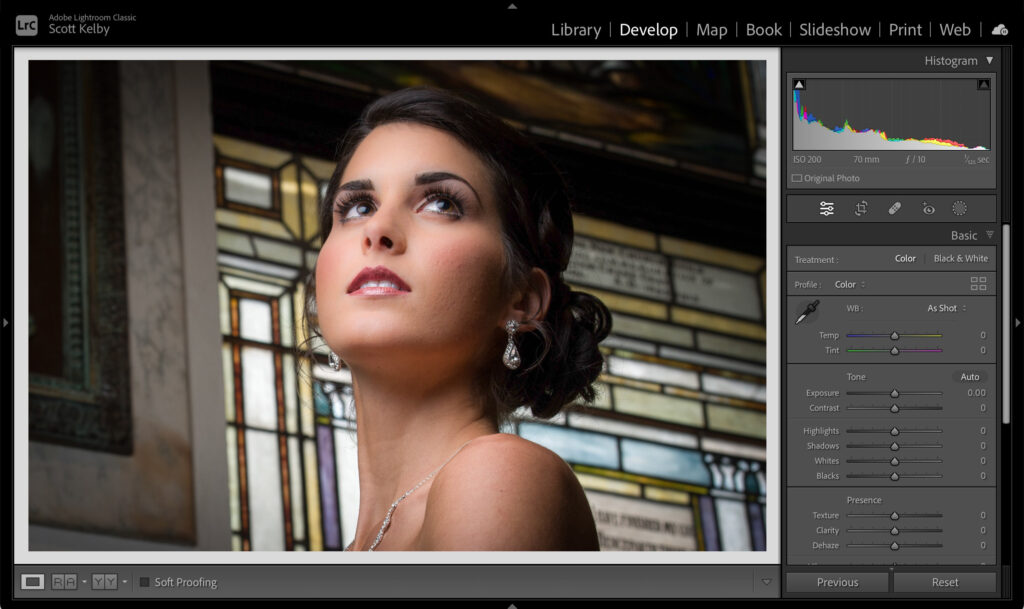
STEP FIVE: The final step happens if you think the softening is a bit too much; just drag the Amount slider up at the top of the panel (right below that preset pop-up menu you used earlier) to the left to reduce the amount of softening so you can dial in just the right amount.
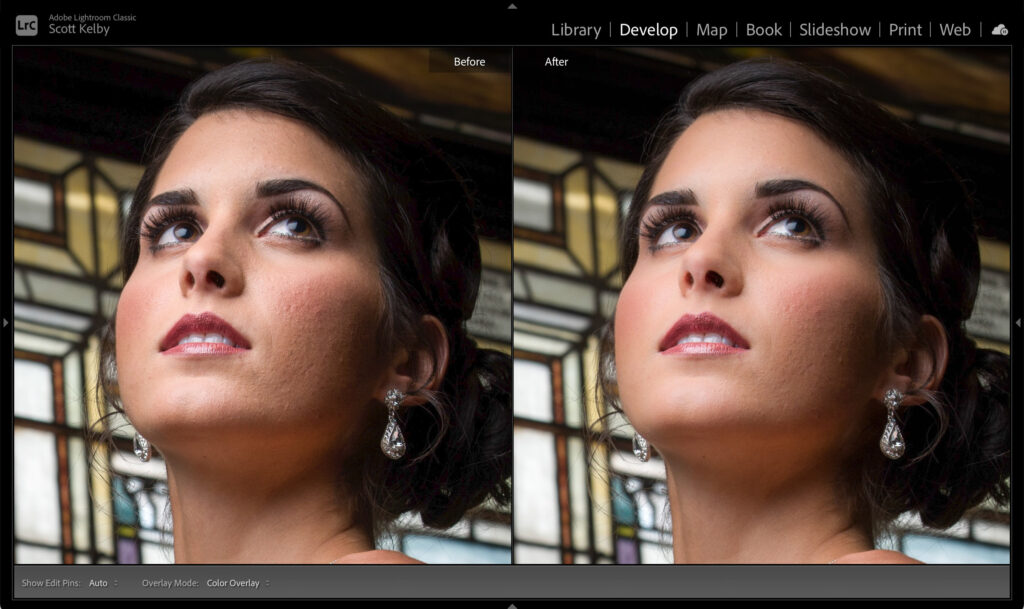
STEP SIX: To see a side-by-side before/after, press the letter Y on your keyboard. Look at the difference in the smooth gradations on the face. That’s what I love about this technique. So don’t just think of it when you need skin softening, use it to smooth those tones.
Okay, there you have it: we dipped our toe a little deeper into the retouching pool. Our journey continues. See you next week.
-Scott
The post Retouching Portraits in Lightroom, Part Two appeared first on Lightroom Killer Tips.