
Morning, everybody! I’m up in Richmond, Virginia for my seminar today, and looking forward to seeing everybody.
I had a Lightroom question at my seminar in Dallas, and it’s one that I get a lot so I thought I’d cover it here today, and that is…
“How do I take an image over to Photoshop for some editing there, and once I’ve taken it over there, how do I get it back?”
Let’s cover the round-trip experience for a typical thing you might need to jump to Photoshop for (in other words, to do something Lightroom can’t do). Here we go:
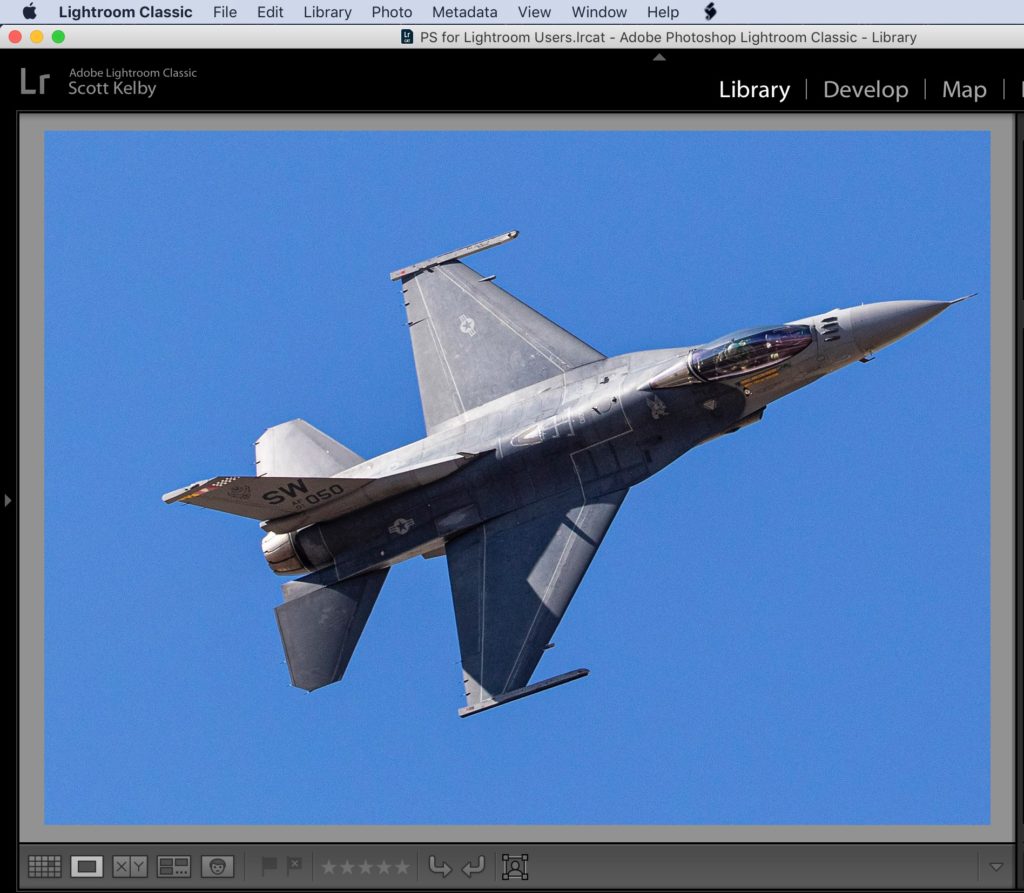
STEP ONE: Here’s our image in Lightroom, and the problem I want to address is the fact that the jet is too close to the edge of the frame on the right side (compositionally, you want to leave some space for the jet to “move into,” and unfortunately, that space is behind the jet on the left, instead of in front of it to the right. Time to head over to Photoshop.
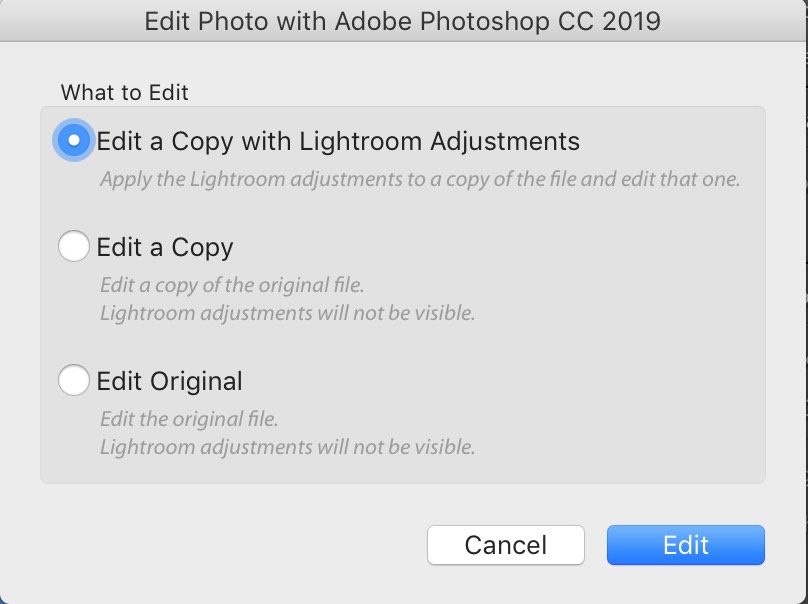
STEP TWO: Press Command-E on Mac, or Ctrl-E on a Windows PC and if you shot in RAW, your image will just appear over in Photoshop (it loans Photoshop a copy of your image). If you shot in JPEG mode (or TIFF), the dialog box you see above will appear, asking you how you want this image to go over to Photoshop. I pretty much always choose the top choice: “Edit a Copy with Lightroom Adjustments.” That way (1) It makes a copy of my image, so my original JPEG is protected; (2) It keep any changes or edits I made in Lightroom intact as it moves over to Photoshop. Again, you will only see this window if you shot in JPEG or TIFF mode on your camera.
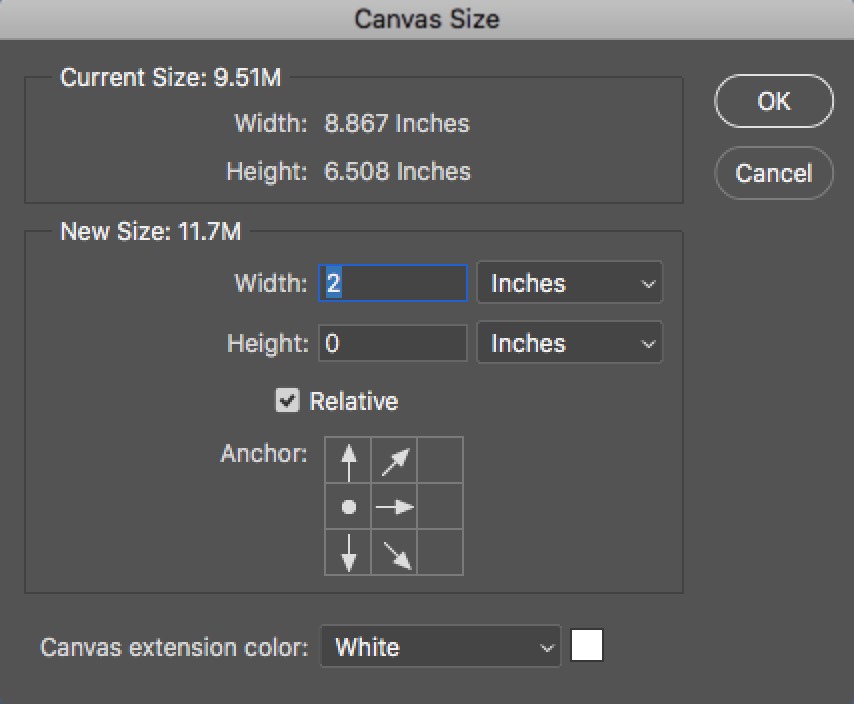
STEP THREE: Once you’re over in Photoshop, to add more space in front of the jet you’ll have to go under Photoshop’s Image menu, and choose Canvas Size, which brings up the window you see here. I chose to add 2-inches to the right side of the image (as seen above).
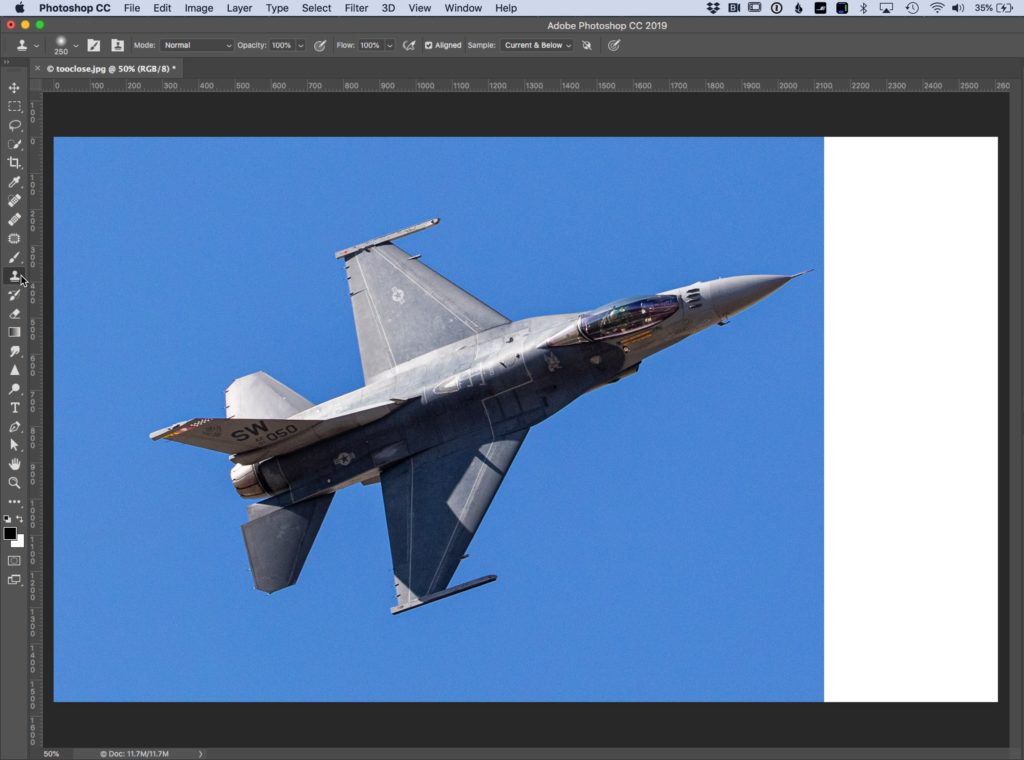
STEP FOUR: When you click ‘OK’ in that Canvas Size dialog, it adds that two-inches of white space you asked for on the right side of the image.
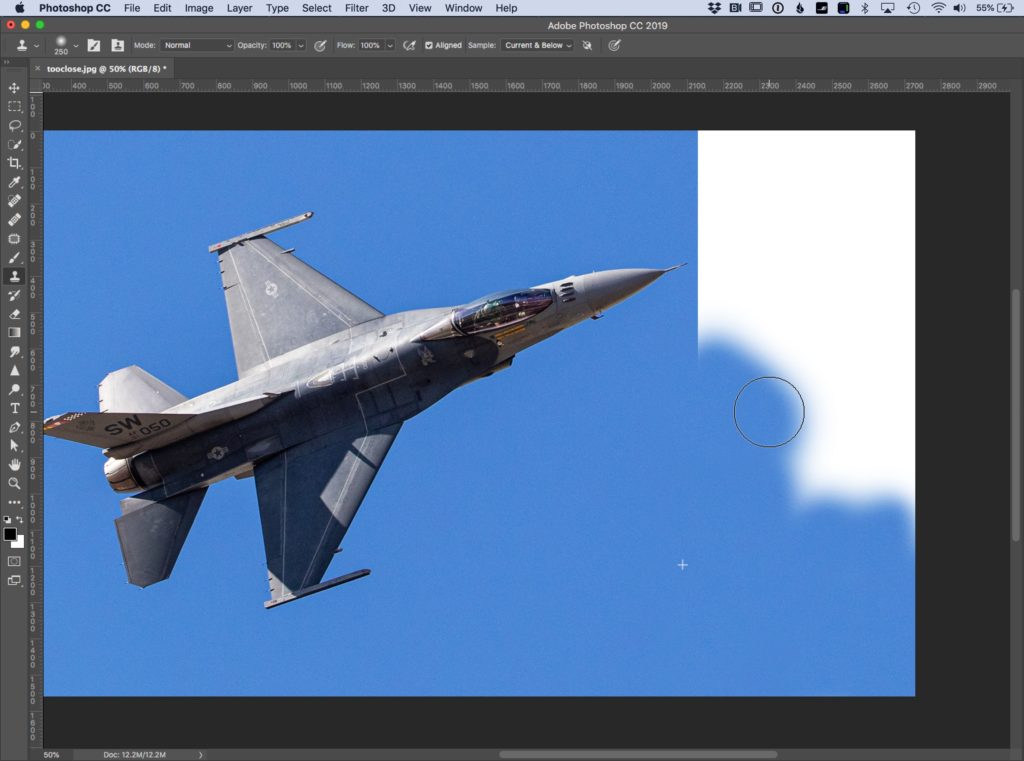
STEP FIVE: We’re going to clone that blue sky over into that white space, so get the Clone Tool (as shown here); Option-click (PC: Alt-click) in a clear area of the sky and paint over that white area, as seen above.
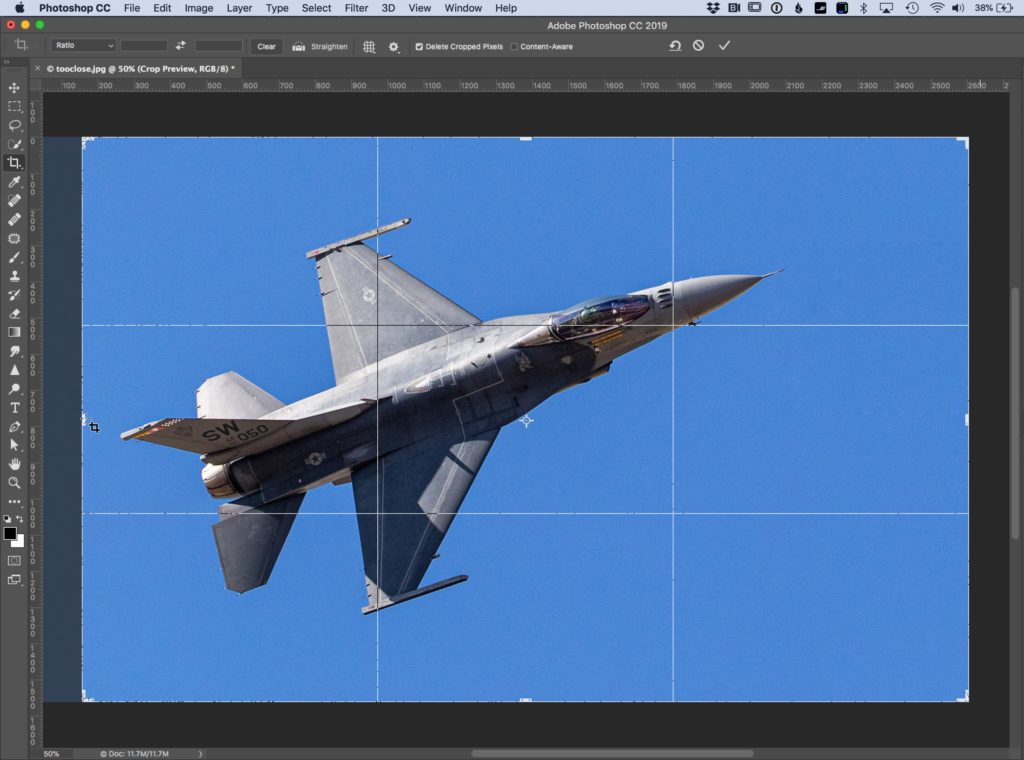
STEP SIX: Once you’re done painting in sky to fill that white canvas area, it’s time to re-crop the image (well, that what I would do anyway, so there’s no so much space behind the jet). Can you use Photoshop’s Crop Tool or you can wait until you get back to Lightroom to do it there (the advantage of doing it later in Lightroom is — you can undo it, or readjust your crop any time), but in this case, I did it in Photoshop.

STEP SEVEN: To get your ‘Edited in Photoshop’ image back to Lightroom is actually super simple: just Save the image (as shown here), and close it. That’s it — save and close.
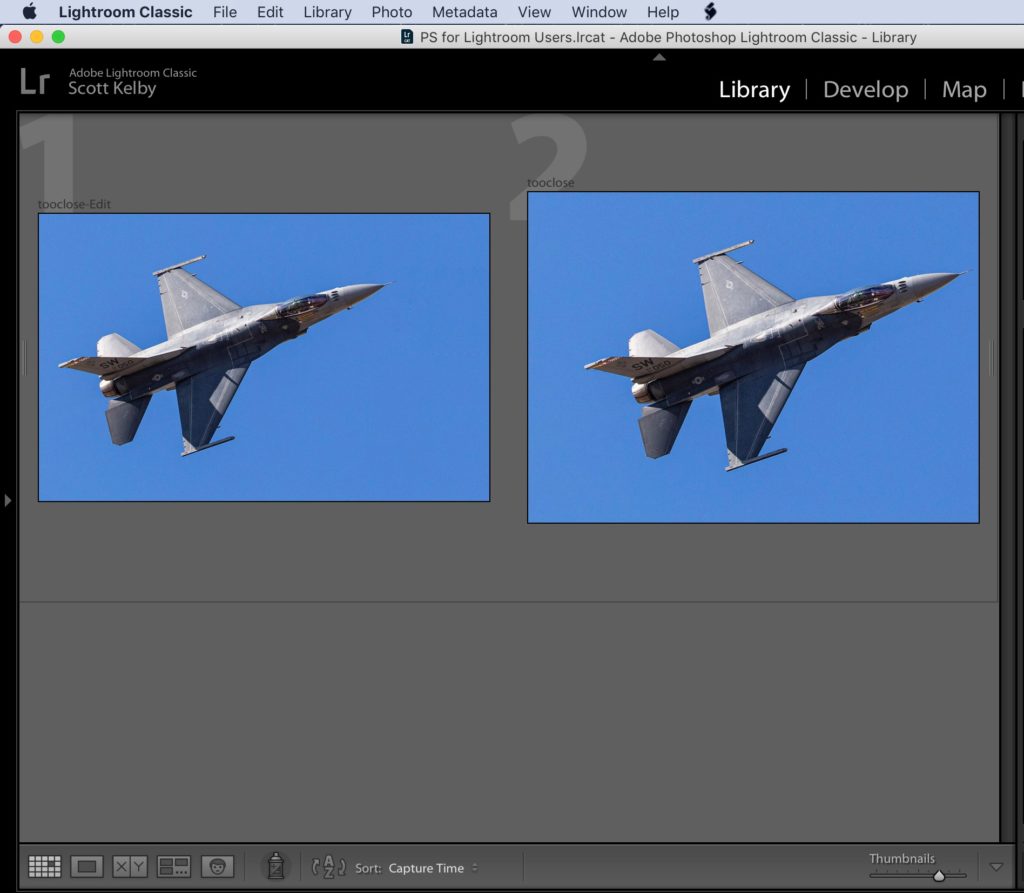
STEP EIGHT: Once you do that, your edited image appears back in Lightroom alongside your original (that’s the edited and cropped version on the left, and the original on the right.
Hope you found that helpful. 
Don’t forget to stop tomorrow for my latest “Lightroom in 60-seconds” video.
-Scott
The post Taking an Image From Lightroom to Photoshop and Back appeared first on Lightroom Killer Tips.