Following up from my post last week on applying color labels to photos, I wanted to share how you can extend that practice to folders and collections too.
Applying Color Labels to Folders and Collections
In the last couple of years Adobe has added the ability to color code folders and collections. Like with photos, you’ll want to give some good thought into how this might make sense to you. In my case, I extended the way I apply color labels to photos to color code the folders and collections that contain those photos. In my case, I’ve decided that red is for focus stack components, yellow is for HDR, green is for HDR panos, blue is for panos, and purple is just for folders that contain more than one type of those groupings (for example, a folder with both HDR sources and pano sources, but no HDR panos). This gives me one more visual cue beyond the date and the name I’ve given a folder as to its contents.

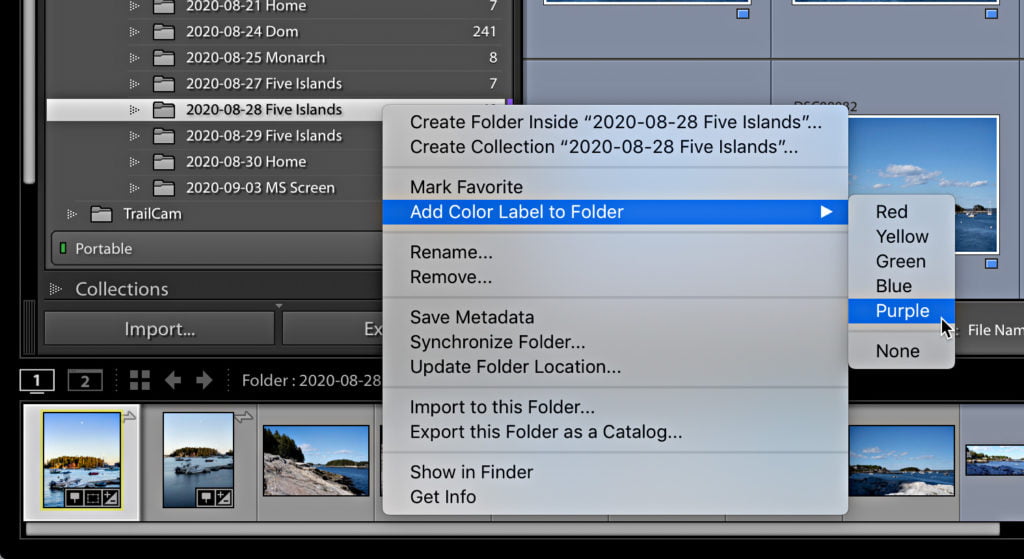
You can apply a color label to a folder or collection by right-clicking the desired folder or collection, and choosing Add Color Label from the contextual menu that appears. You can also remove a color label from that same menu by choosing None at the bottom.
Filtering and Smart Collections
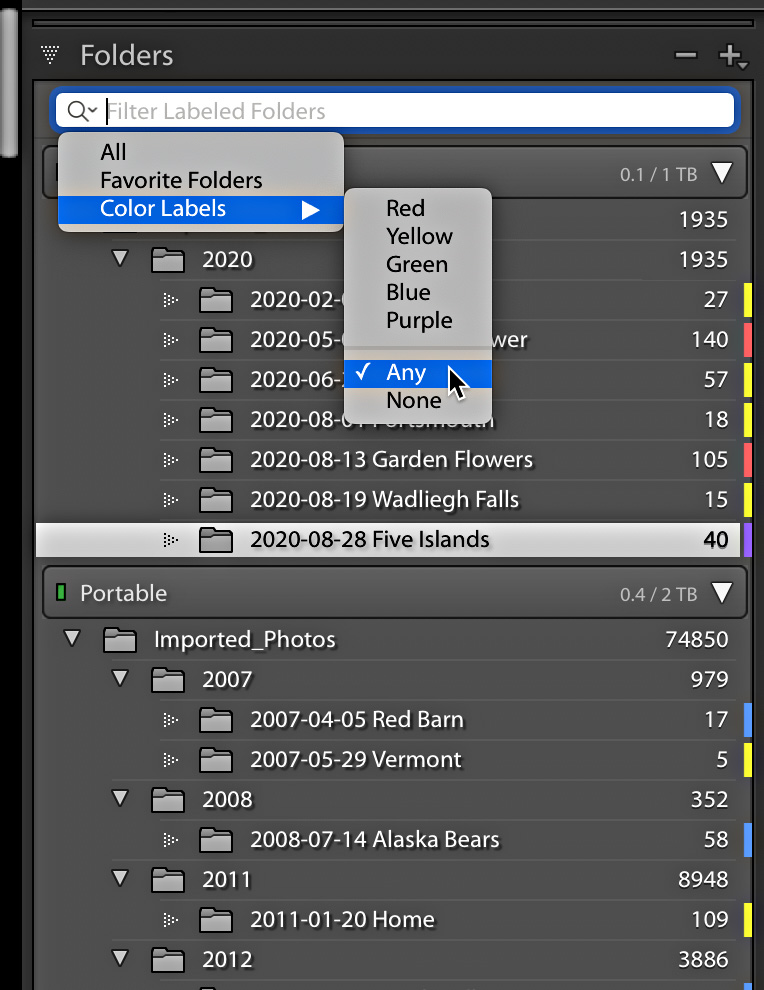
Aside from the visual benefits of color labels you can use Lightroom Classic’s various filters and smart collections to make it easier to find certain types of photos as well as to reduce visual clutter through filtering. For example, at the top of both the Folders and Collections panel is a field for entering text as a way to filter the contents of that panel. In addition, if you click the (tiny) magnifying glass icon in that field you’ll be presented with options for filtering based on color label. You can choose a single color label to only see folders or collections with that label, or you can choose Any to see all folders with any color label, or you can choose None to hide all folders or collections with a color label. This is a hugely powerful way to hide or show folders and collections based on your needs (and possibly your audience at the time). Turn off the filtering by choosing All at the top of the menu options.

For photos, you can use the Library Filter bar that appears above the thumbnails in Grid view to filter the contents of your current view (folder, collection, or search result) using the Attribute button to reveal color label options.

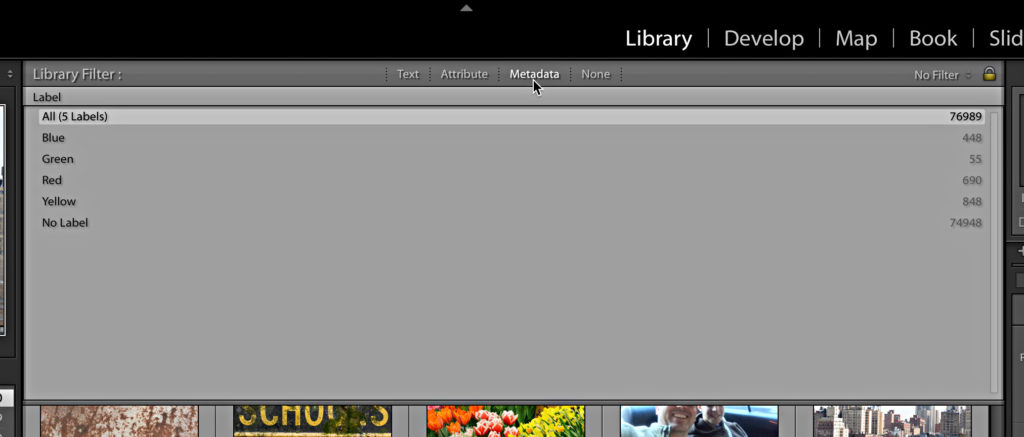
Note, the Metadata button contains the option to use the Label field of the photo’s metadata as a way to filter too. Check out my Lightroom Killer Tips on how to create custom Library Filter presets to save the configurations you use most often.

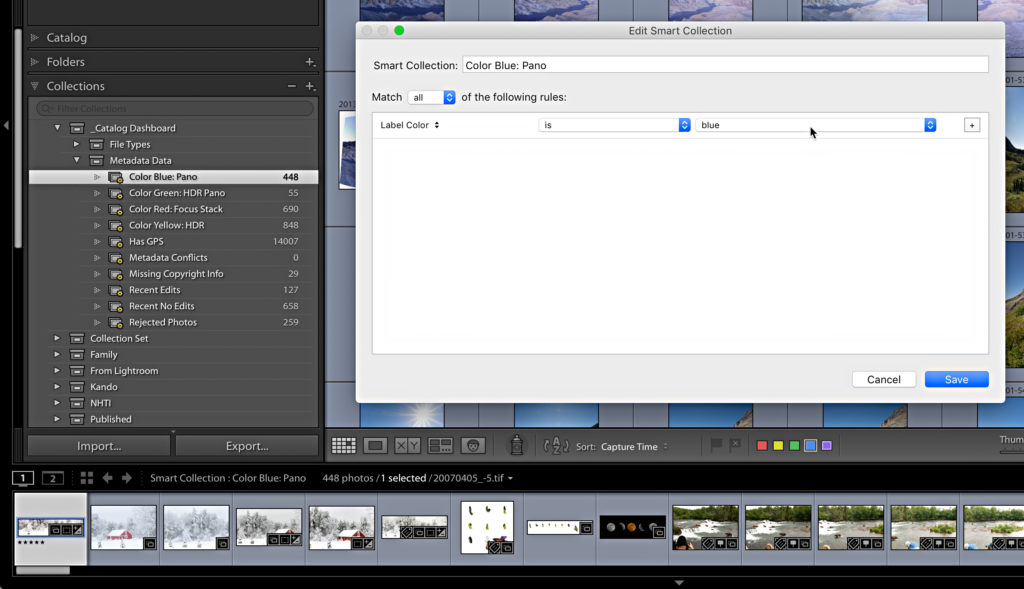
Likewise, smart collections can be useful here too. I’ve written about my so called Catalog Dashboard set of custom smart collections, and in that I have smart collections to track each of my color labels. Smart collections are essentially saved searches containing the criteria you’ve configured.

Lightroom Classic is a database at its heart, and so the more data you apply to your photos, the more powerful that database becomes as a tool for finding, organizing, and managing your photo library over time.
The post Making the Most of Color Labels in Lightroom Classic: Part 2 appeared first on Lightroom Killer Tips.
