Adobe recently added a few little features into Photoshop that makes it a lot easier to cut out hair. They keep refining select and mask with each version of Photoshop. Masking and selecting can really take a lot of time, so any help is appreciated. let me show you how it works. And yes, I know this is a simple background, this way we can focus on how to use the tools. If you want a more challenging selection, see this tutorial.
Let’s jump in and cut out some hair. So we’re going to use this image from Adobe Stock. It’s got lots of curly hair, which can be quite tricky, but I’ll show you how to do it.
How to Select hair in Photoshop 2021and newer.

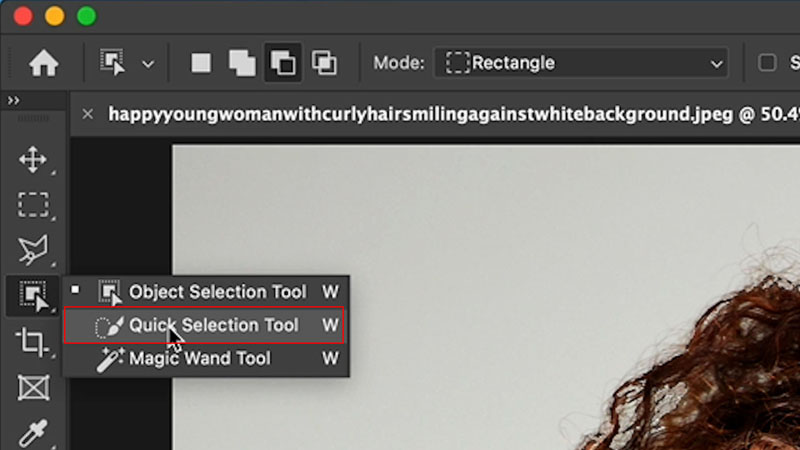
Grab our object selection or quick selection tool.
Click on Select subject. This isn’t a new feature, its been around since Photoshop 2019.
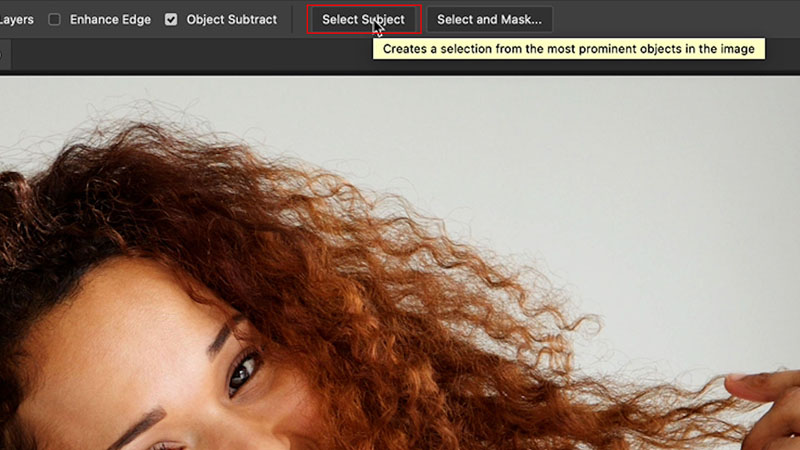
You will see the marching ants selection.

Choose the quick selection tool

Paint over the areas that were missed. make sure that her shirt gets included in there. If you go too far, hold down Alt/Option and click to remove from selection.
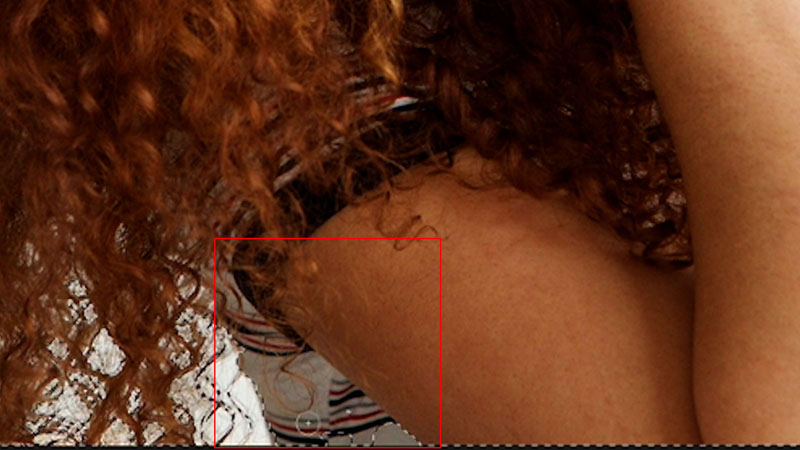
There are two parts in cutting out hair.
- The first one is making the selection, which is sort of the easy part.
- The hard part is getting those edges clean.
Removing edge fringes and halos from selected hair in Photoshop
Next step is to refine it. So we’re going to choose, select and mask. (If you don’t see Select and Mask, make sure the Quick Selection or Object selection tool is the current tool)
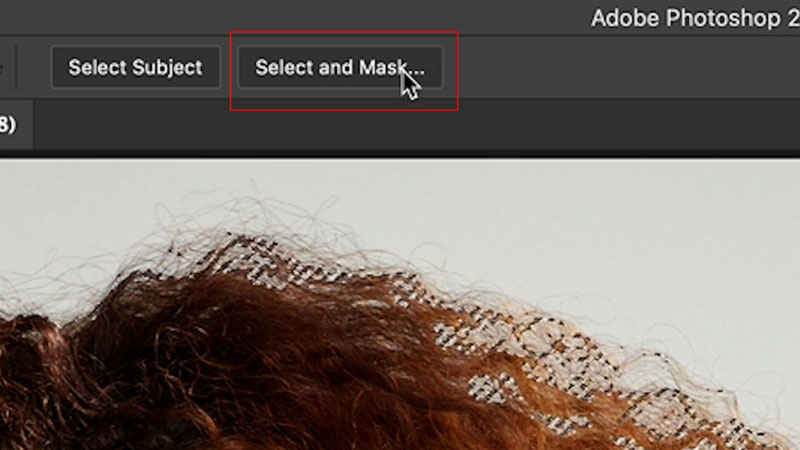
Change the view to preview against either Black or White, depending on the original background. You will use the opposite of the original so you can see the edges easily. 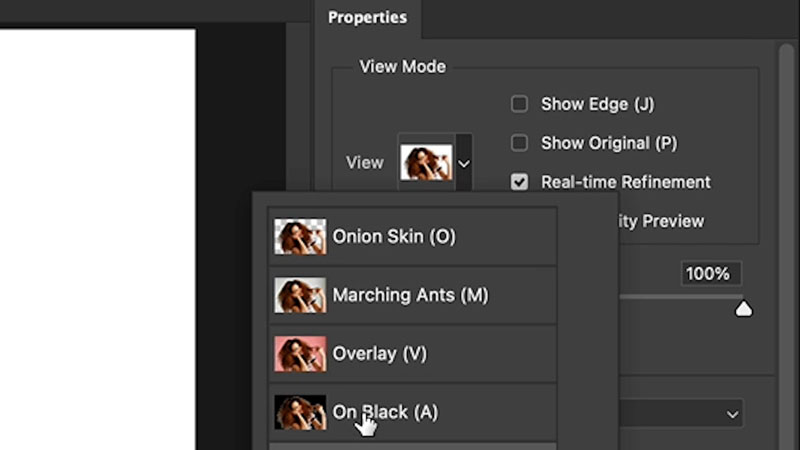
OK, now we can see the problems. Notice the light halos. (If you are placing this image against a light background it won’t matter, but if you are using a darker background they will show.
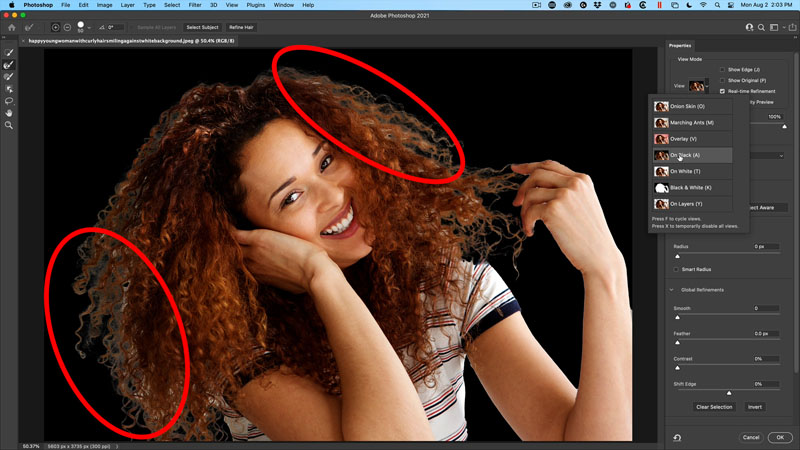
First, new feature is refine Hair, (added late 2020) but there’s newer ones than that, but let’s choose, refine hair.
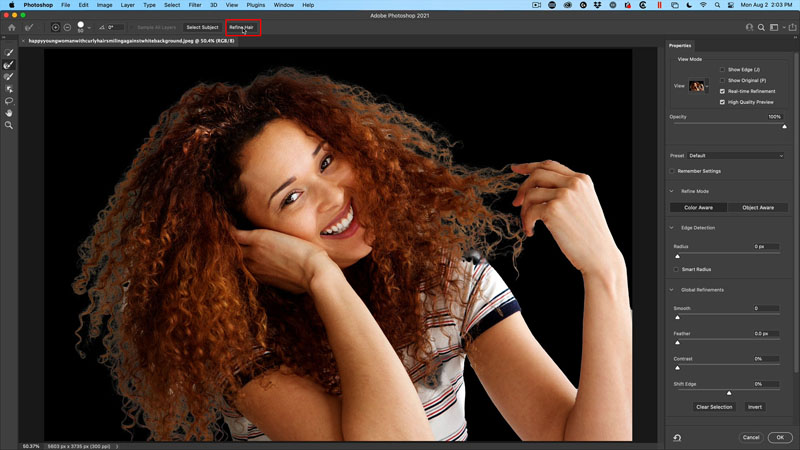
Notice that does a nice job of starting to clean up the edges.
You can manually fix this a little bit using this refine brush, if there’s some areas that have been missed, such as these areas of white.
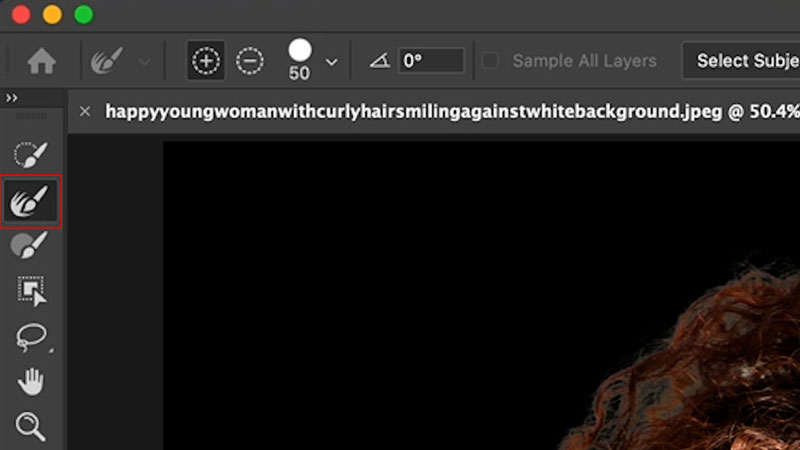
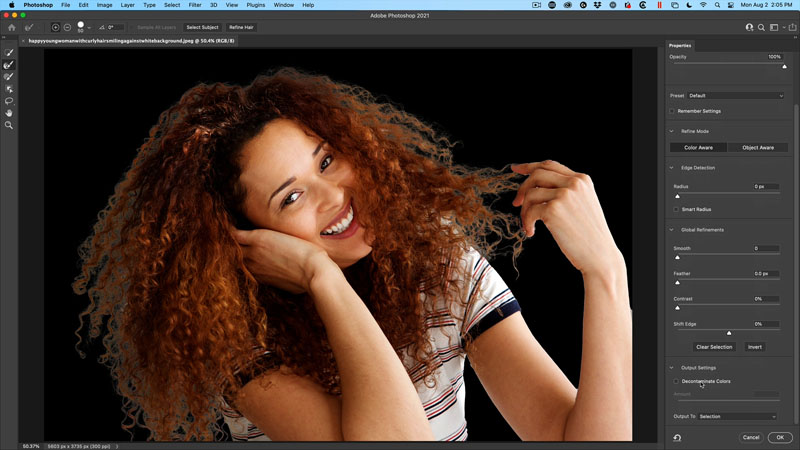
All right, here is where the magic happens. We’ve still got a little bit of white fringing (sometimes it can be colored)
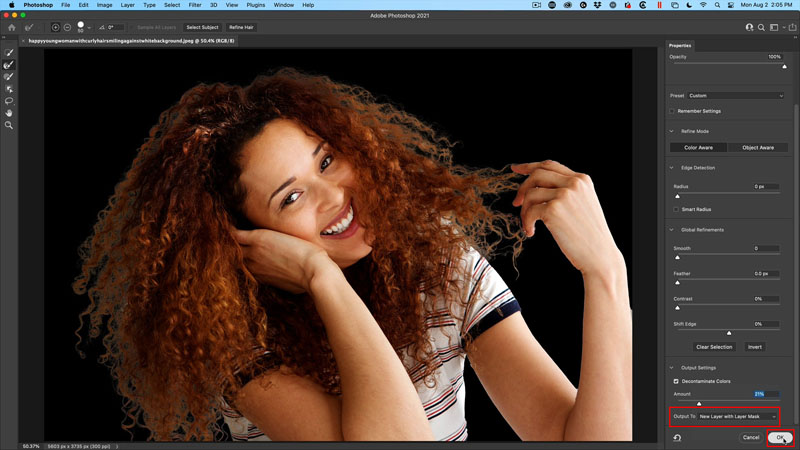
In the right-side panel in Select and Mask, scroll all the way down to the bottom and you see an option called decontaminate colors.
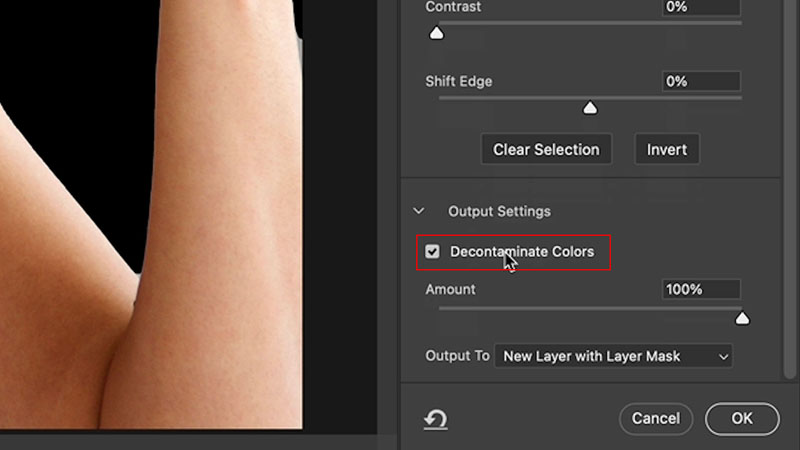
Now, when you turn this on, it gets rid of the fringes. But notice how it almost looks cartoony.
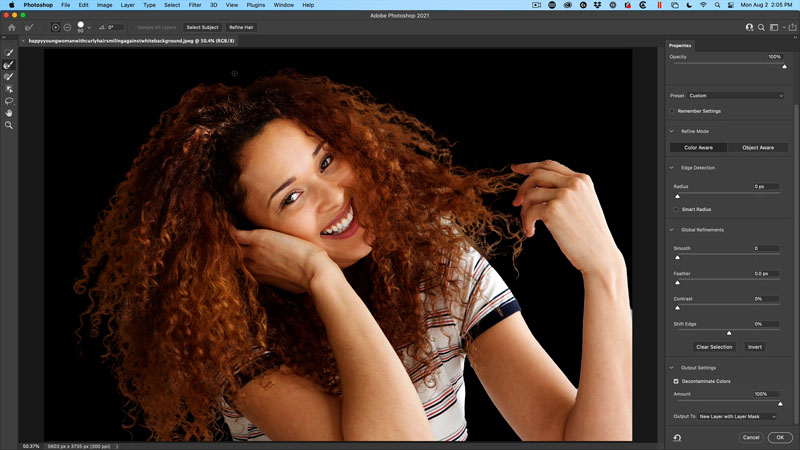
A new feature added in 2021 is an amount slider. (game changing)
If we reduce the amount all the way to zero, notice it’s not doing anything
But then as we increase it just a little bit, we can dial in exactly how much we want.
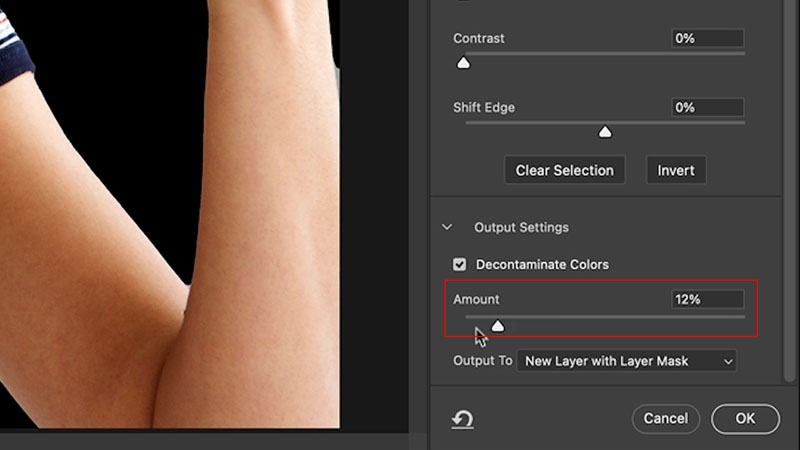

Change output to new Layer with Mask,
Click, OK,
You’ll notice a new Layer Mask on the new Layer. .
Using the Brush tool, paint black or white on the Layer Mask to do further refinements and get it perfect.
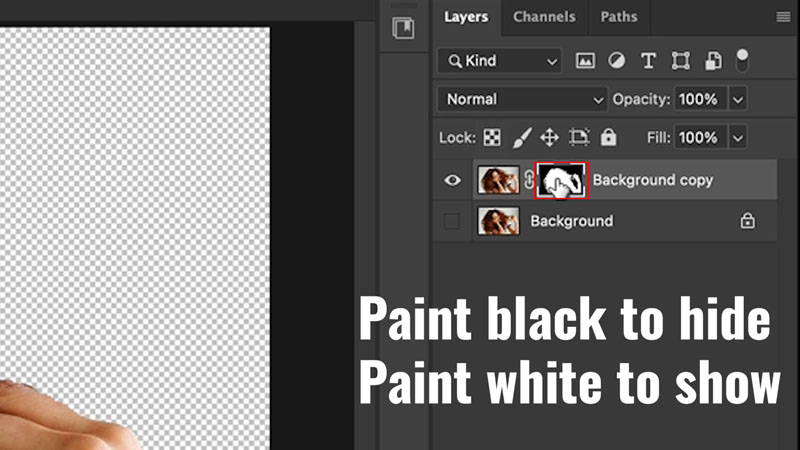
You can see we got most of the way there, just by simply clicking a couple of those buttons.
These new tools that Adobe’s making are amazing for saving time.

So I’m curious, you guys knew about those options? Let me know in the comments underneath and also let me know what you’d like to see me do for next week’s tutorial.
And by the way, if you’re new, welcome to the CAFE. It’s great to have you with us.
Consider Consider joining our mailing list so you don’t miss any of my tutorials.
For more, follow us on Social Media
and until next time, I’ll see you at the CAFE.
Colin
PS: If you want to become a master of selections, I urge you to check out my course on Selection Secrets in Photoshop. You will be able to perfectly cut out anything including transparency and more after completing the downloadable course.
PS, you can grab free goodies here, including Photoshop brushes, actions, presets, sky images, ebooks and a whole bunch more.
The post Use newest Photoshop features to easily cut out and select hair appeared first on PhotoshopCAFE.


