Combine Lightoom Masks to create Ombre and mermaid hair color effects
This tutorial shows you how to use Lightroom or Adobe Camera Raw (they share the same editing tools) to change the color of hair. We will use the AI selection and mask tools and combine masks for this effect. Even if you don’t need to change hair color, this is a great exercise to learn masks deeper.
If you are looking to change hair color in a picture this is the best place to be. If you are looking to change the color for an effect, or maybe your model has different colored har than what you need, no problem. This could also be used to visualize what you might look like if you did change your hair color. We are going to do 3 types of coloring. The first is a basic change of color and tone to something natural or enhanced.The 2nd part we will blend a mask with the original to create an Ombre color effect. The 3rd part, we will create mermaid colored hair, which consists of blending 3 different colors together. This is. great way for you to see how masks can interact with each other. Watch the video for realtime results and lots of different options.

Let’s get started.
Here is our original. I shot this image in my studio with model Callan.
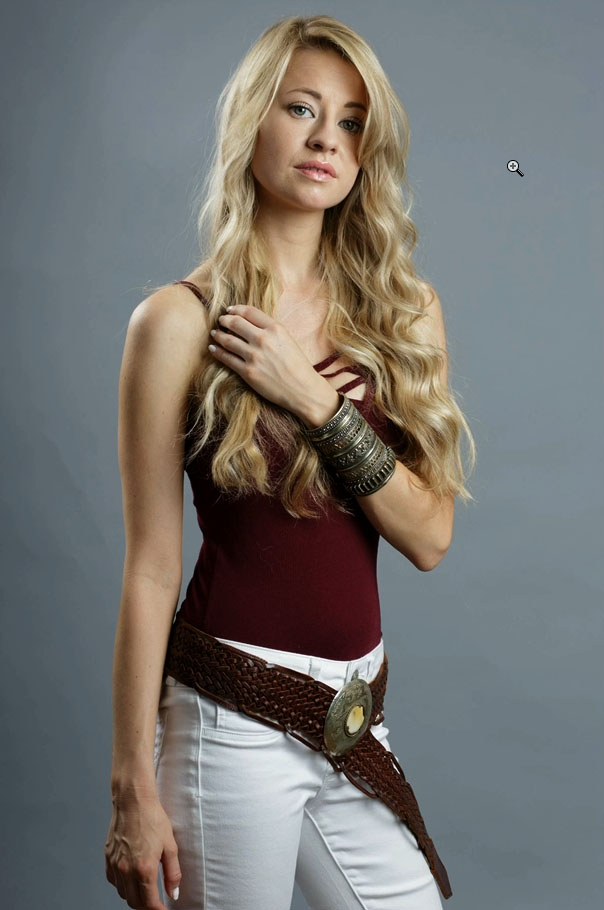
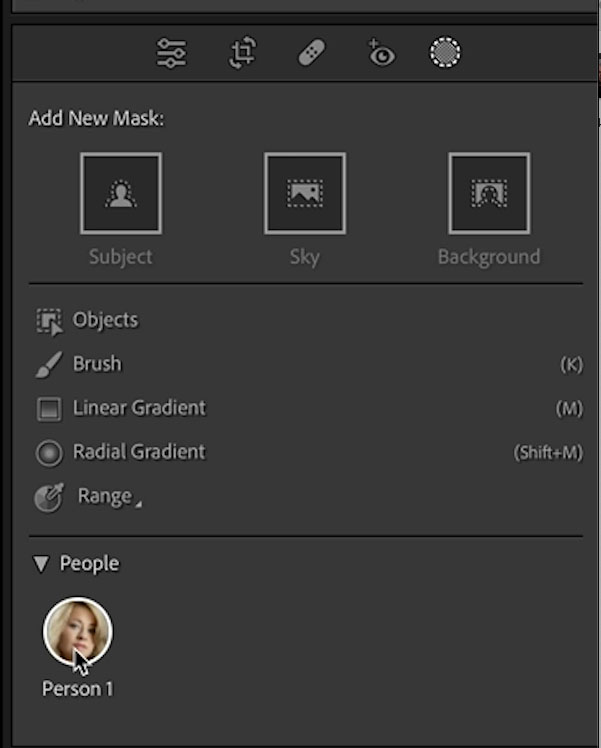
Let select the hair.
Choose the dotted circle in the tool bar in develop module
This will open the mask option panel and show a detected person
Click on the person
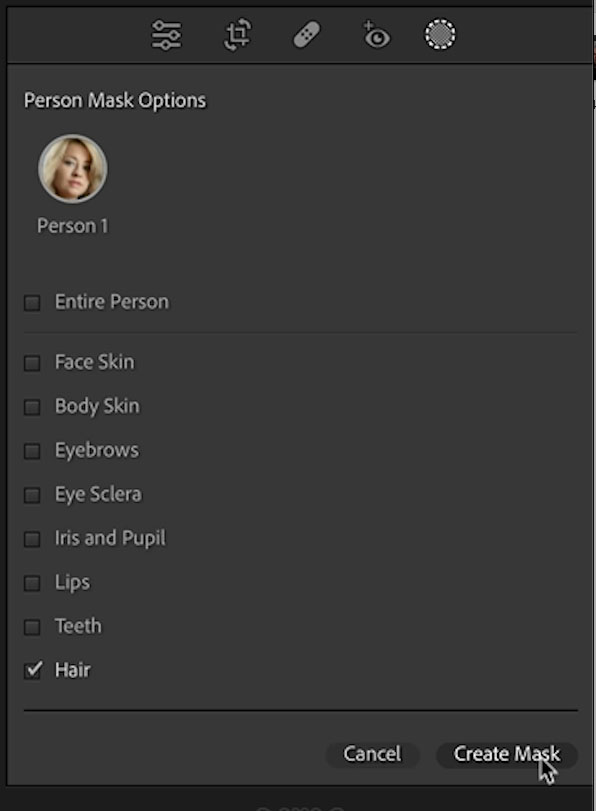
You will now see attributes that can be selected
Choose hair and Create mask
The red area shows the selection mask
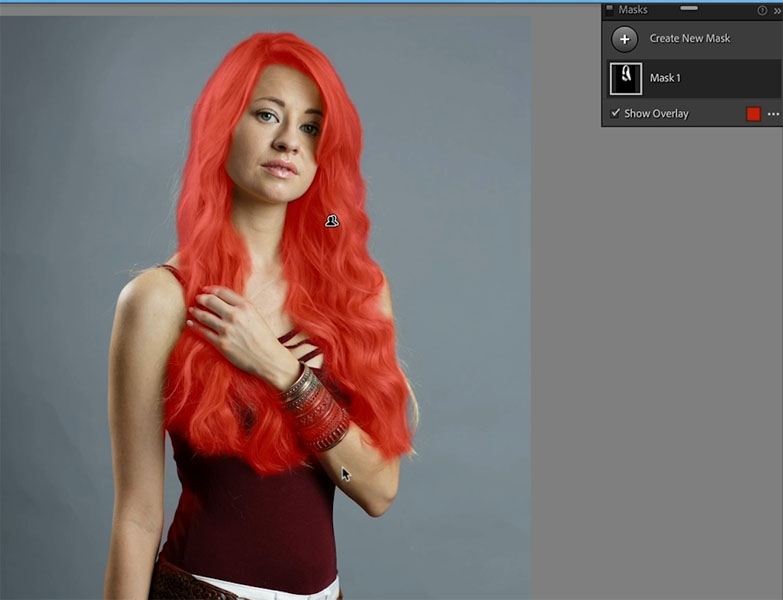
Its gone over in a few places
Lets fix the mask
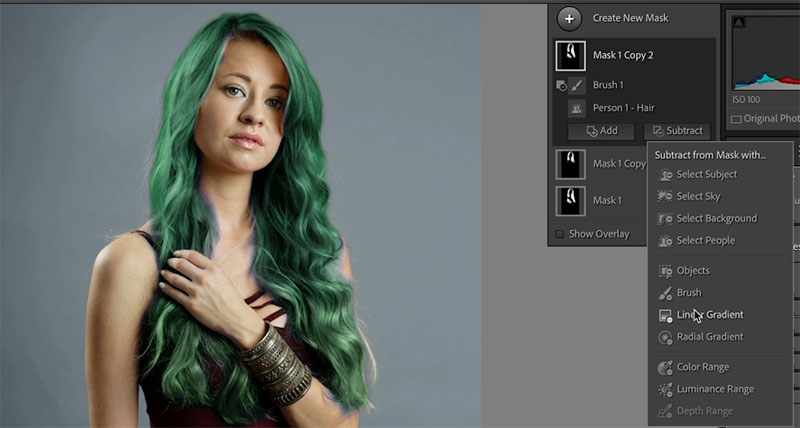
Choose Subtract>Brush
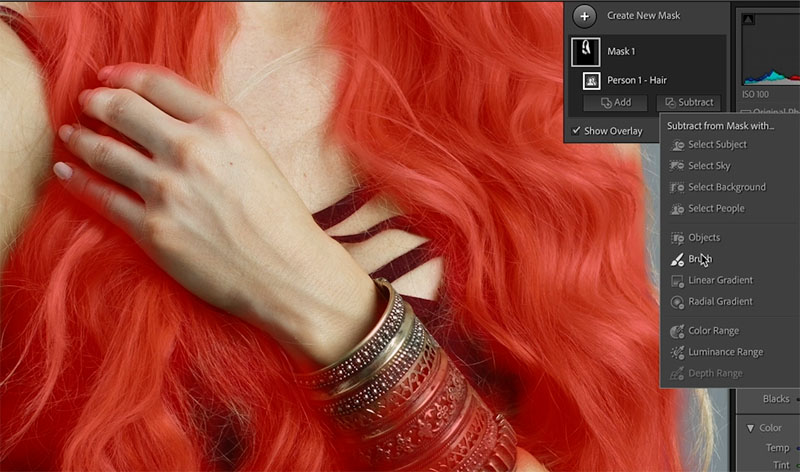
Paint away the areas you don’t want to select
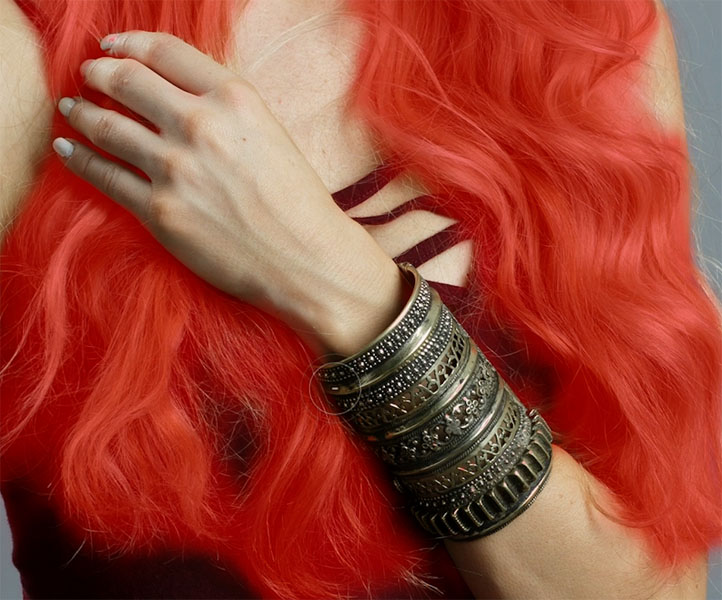
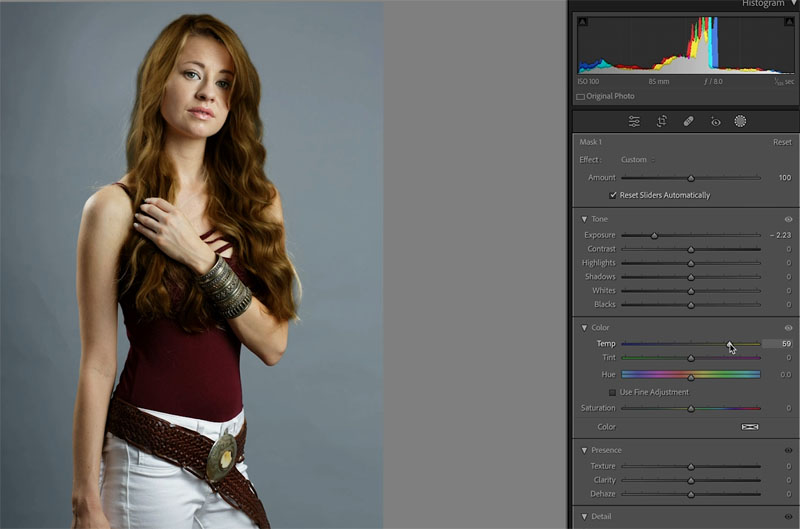
If you lower the Exposure you can get darker tones, increase temp to get natural brown and reds.
Changing the saturation will also have a big effect and enable you to get more realism.
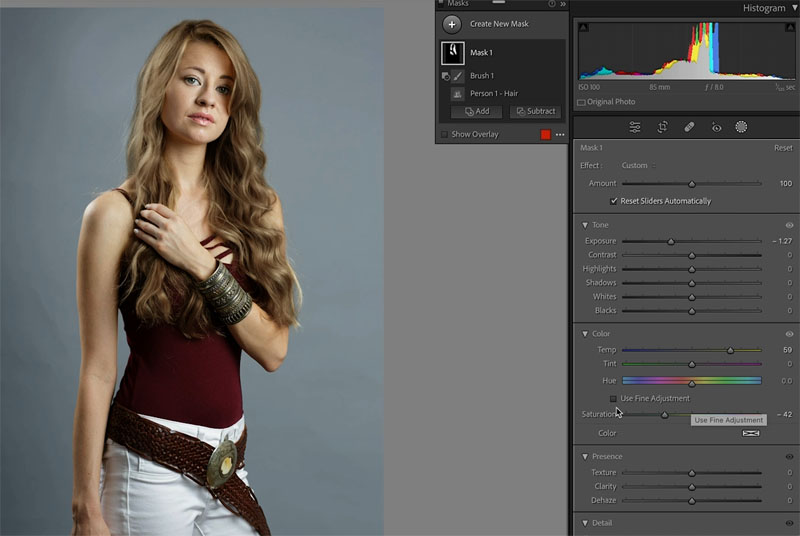
You can change the hair to any color you like

Create Ombre hair effect in Lightroom
A popular hair effect is called Ombre. Means shadow in French and these days it applies to adding a second color, usually to the lower part of the hair.
First of all, using the steps above, choose a dark tone for the hair.
Click Subtract and choose a Linear gradient
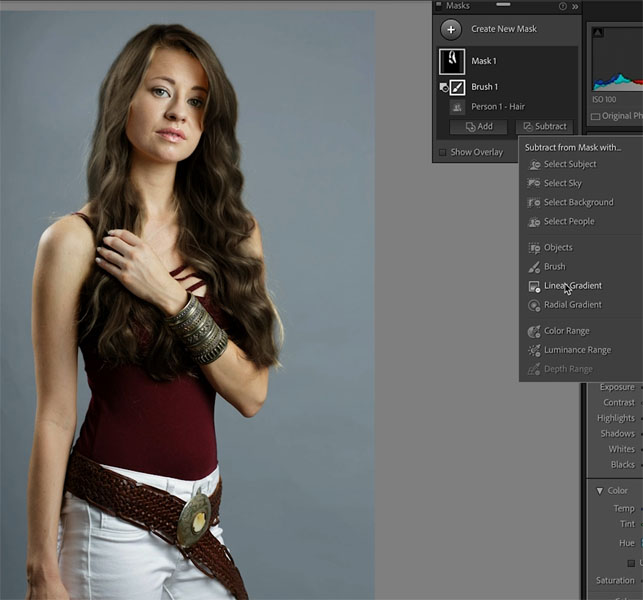
Drag the gradient to blend out the masked area with the original.
This gets the 2 toned Ombre effect.
Think about all the different ways you can blend your masks.
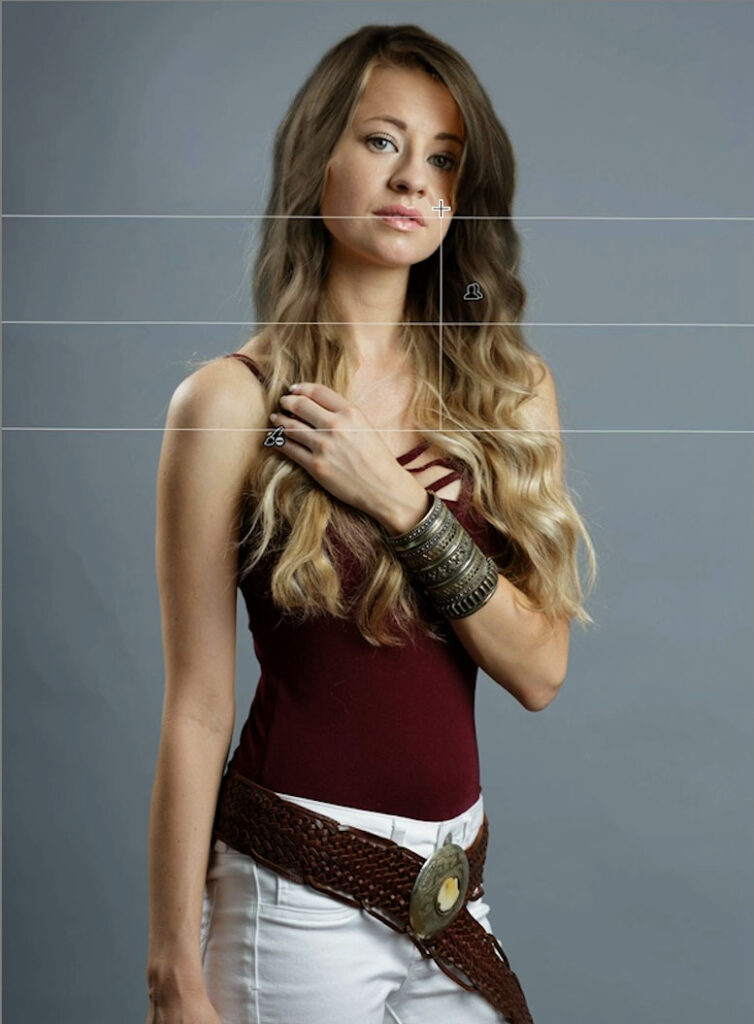
The mermaid, multi colored hair effect
This time, we are going to bled 3 different colors together. Generally with the mermaid, the colors are aquamarines, blues, pinks and greens.
First of all, make the hair a bluish color. This time use the Hue in the color panel. Combine it with tint, temp, Saturation and exposure to get any color you want. (step by step on the video at top)
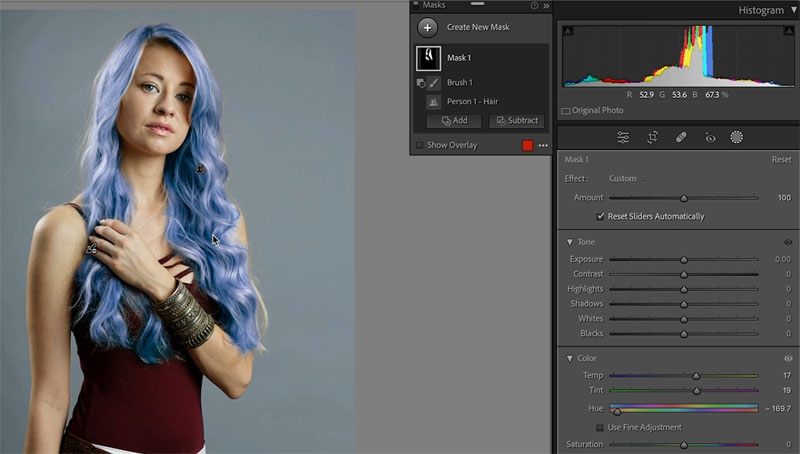
Now, click on the ellipses next to mask and choose Duplicate Mask
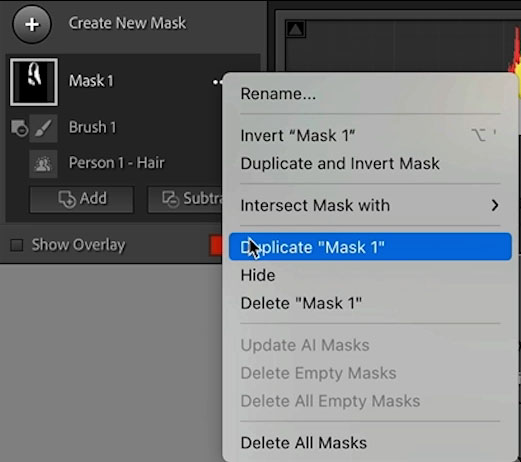
On the duplicate change the color to something else, here I chose a lavender color
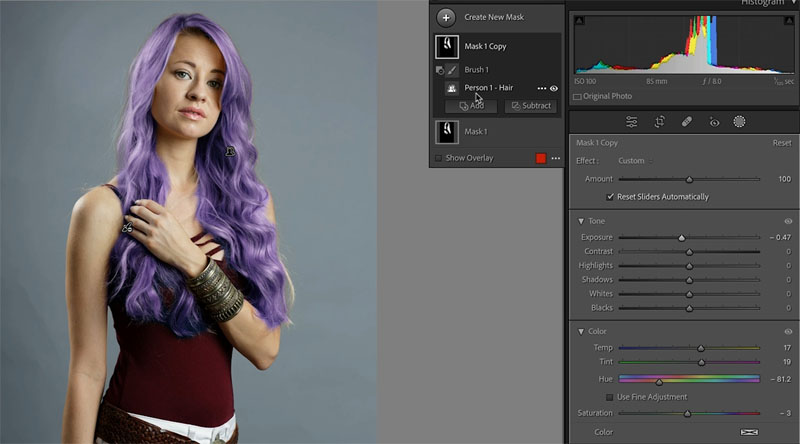
Once again, duplicate the mask
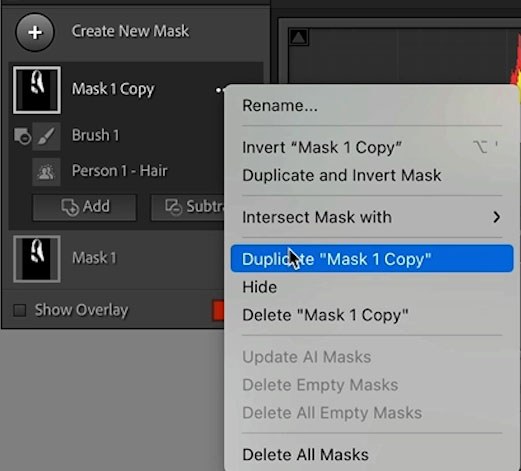
Change the color again, this time I went for a green tone.

Blending the color / layers together
Now we have 3 layers with colors, let’s blend them together.
Hide the top mask by clicking the eyeball
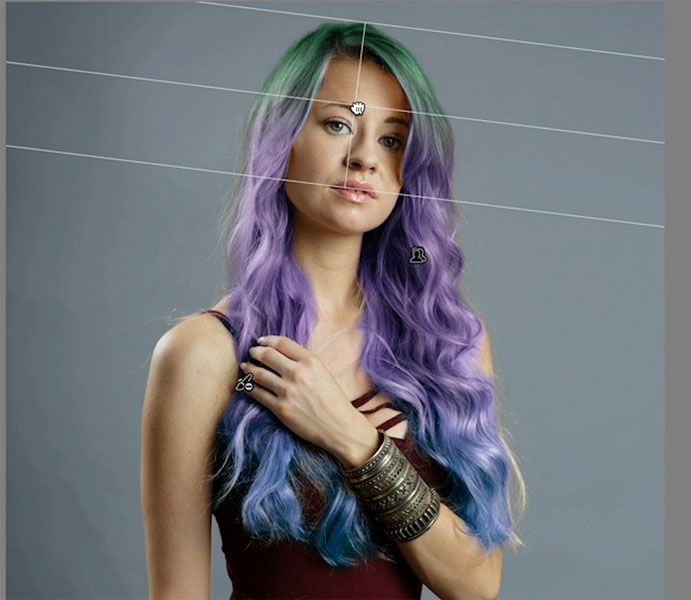
On the 2nd layer (mask) choose Subtract and Linear gradient
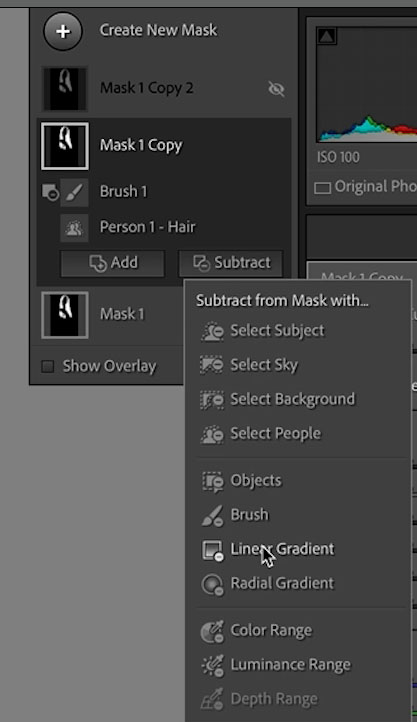
As we did on the Ombre effect, position your gradient to blend the 2 colors.
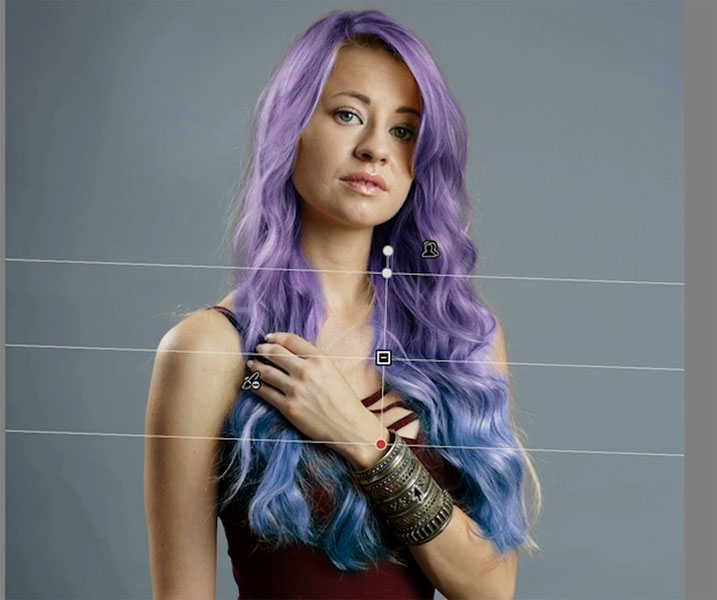
Turn the top layer back on and Choose Subtract and Linear gradient
Position the gradient near the top
You could experiement with different colors and blends because everything in Lightroom is non-destructive, so options are unlimited.
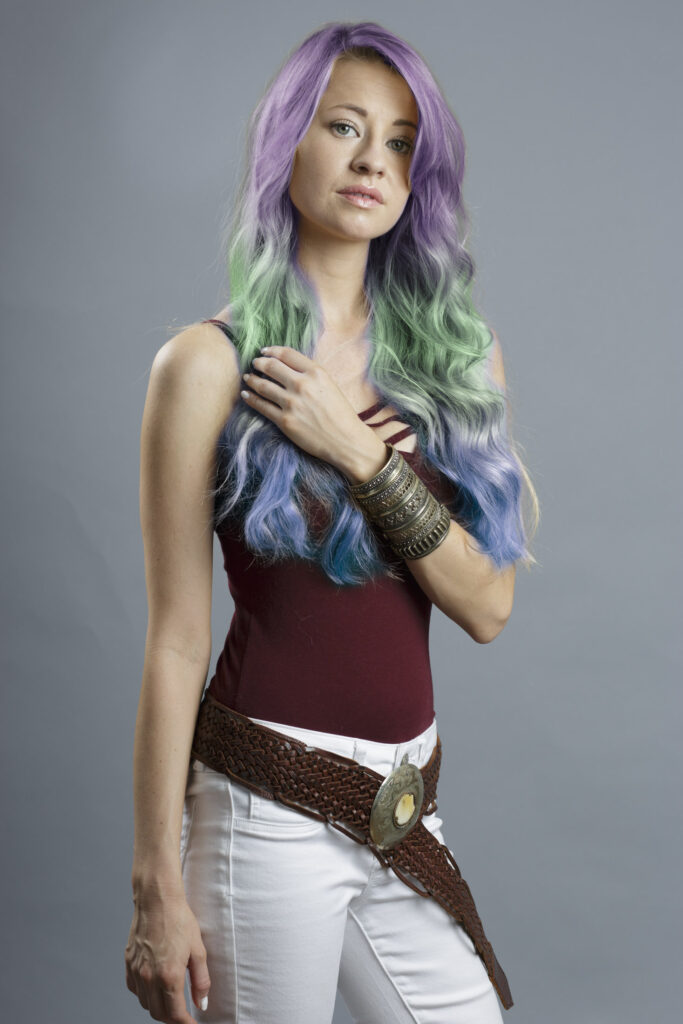
I hope you found this tutorial useful and maybe even a little fun 🙂
Don’t forget to check out or vast library of hundreds of free tutorials and check back each week for a brand new Photoshop or Lightroom tutorial.
Thanks
Colin
The post How to change hair color in Lightroom with masks. Ombre hair effect and advanced masks. appeared first on PhotoshopCAFE.
