
Up until a few months ago, the best tool we had for removing distracting stuff in our images was the ‘Remove Tool,’ which was pretty much hit or miss (in my experience, mostly miss). So, today I’m comparing a simple retouch using just the tool and then the same tool but with the new Generative AI option turned on. Check it out below.
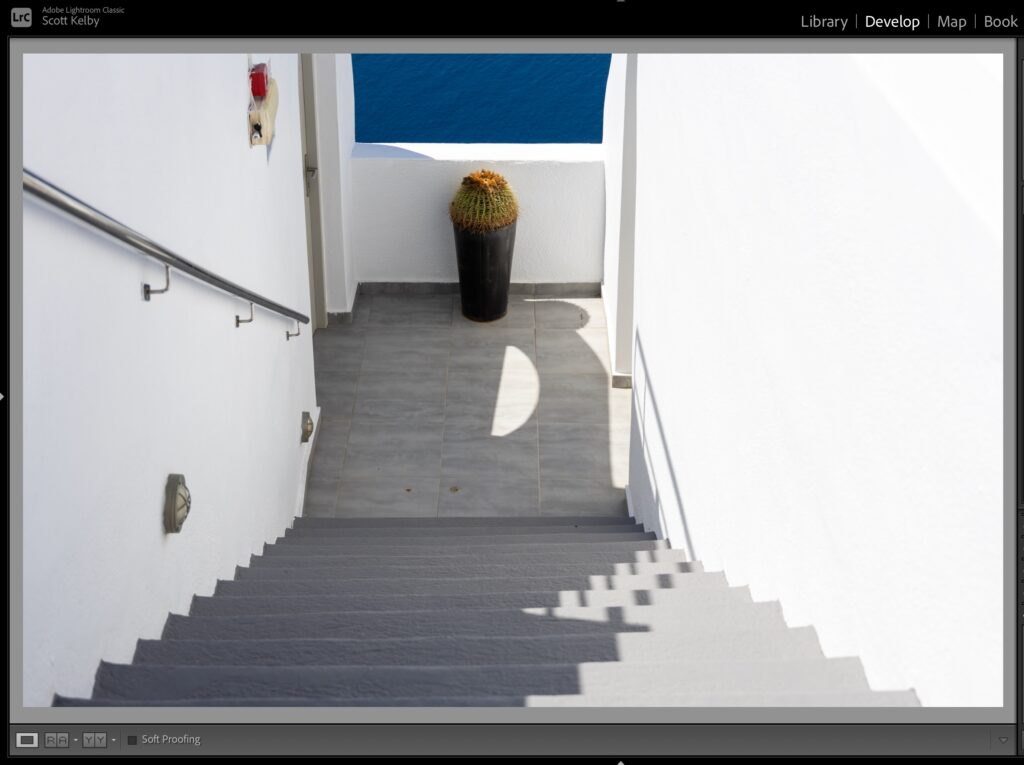
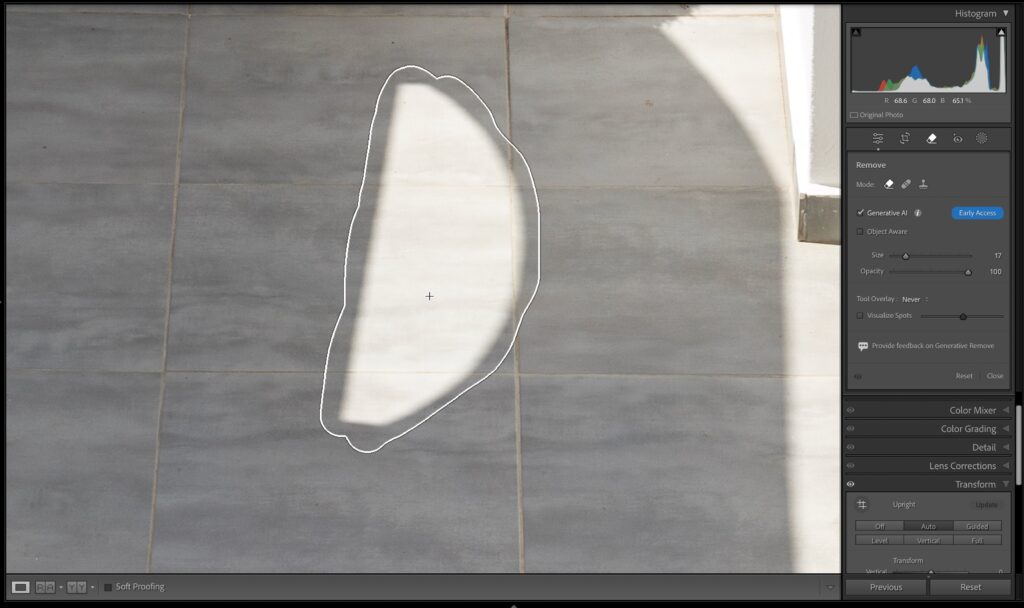
Above: Here’s the image we’re going to work on, and while there are a number of things I would probably remove along that left wall, I’m mostly concerned with that bright spot at the bottom of the stairs, right in front of the vase (it looks like a light beaming through kind of a crescent-shaped opening.
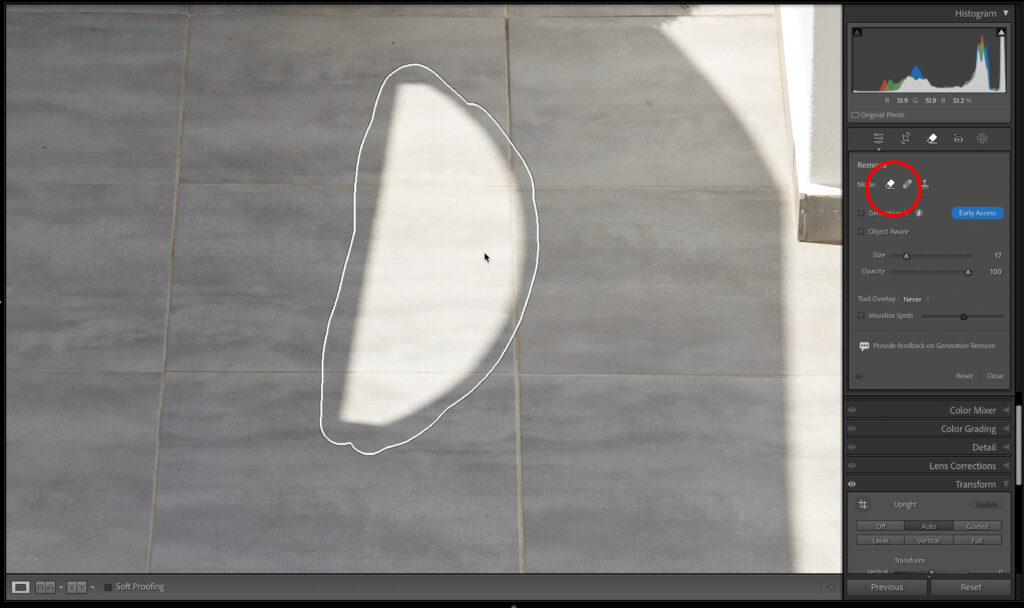
STEP ONE: We head to the Develop Module and I’m going to zoom in tight on the area we’re working on. Next, I click on the Remove Tool in the toolbar (it’s shown as circled here in red. Its icon looks like an eraser). Then, I painted over the bright spot with the tool, as seen above).
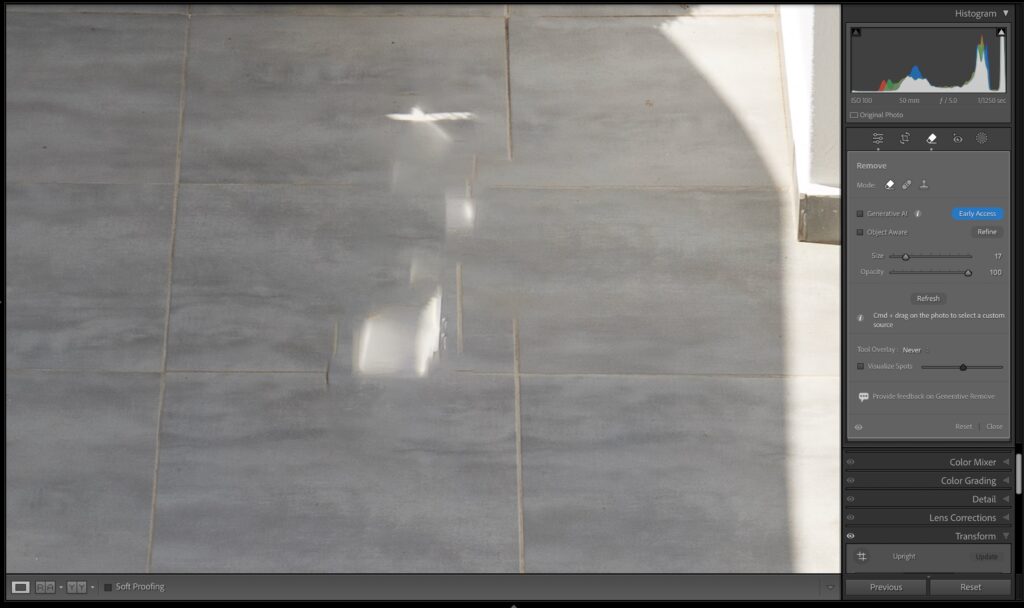
STEP TWO: And here is the result, which is pretty bad, but that’s often what you get with this tool (at least, that’s been my experience. Sometimes, it works pretty well, as long as what you’re removing is really simple, but it really falls down on more complicated fixes.
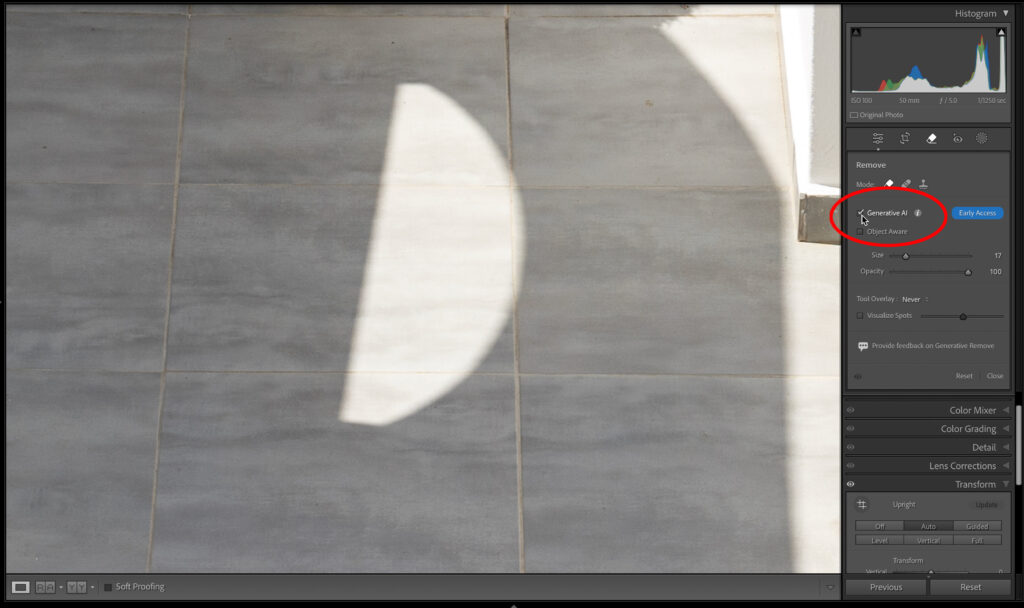
OK, let’s hit “undo” (Command-Z on Mac, Ctrl-Z on Windows) and try again, but this time, we’re going to turn on the Generative AI checkbox (as seen circled above in red).
STEP THREE: With Generative AI turned on, you use the tool like you always would, so I just painted over the bright spot again (as seen above). Now click the ‘Apply’ button to let it do its thing.
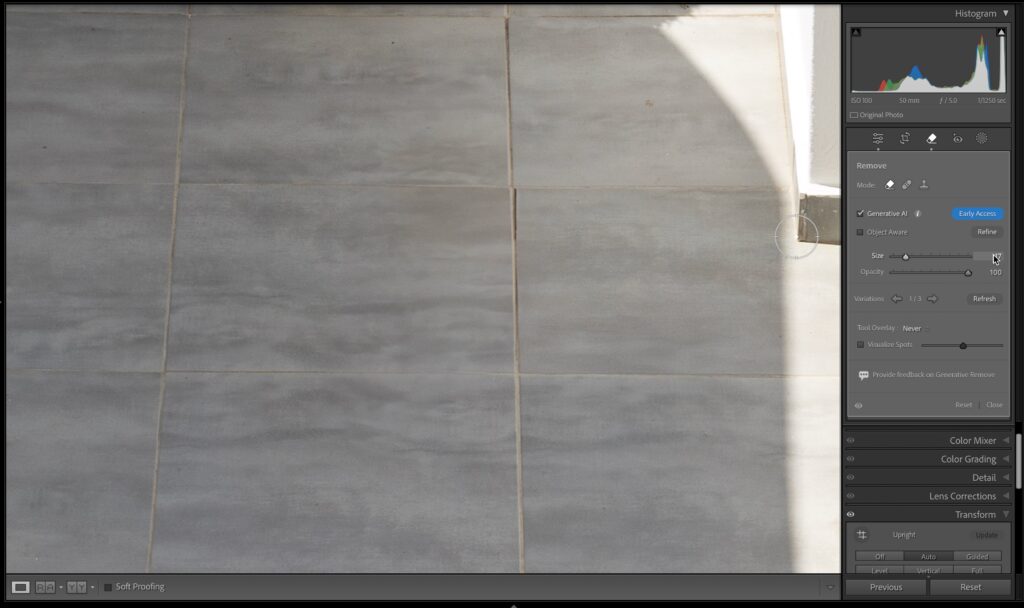
Above: After a few seconds, here’s the first result. I say “first” because it gives you three options. The first result is pretty darn good.

Above: To see one of the other results (called ‘Variations’), click the left and right arrow buttons in the Remove panel (circled here in red). I usually find that the 2nd or 3rd variation looks best, but every once in a while, #1 wins out. That’s why it’s important to view all three.
You can clearly see how vastly better this new AI feature makes the removal process, so I leave that checkbox on all the time—I don’t see any reason to go to the “worse result” version of the tool. High-five to Adobe for bringing this to Lightroom. It’s a game-changer when it comes to removing distractions.
Travel Photographers: How to Shoot Like a Pro On Your Next Vacation
We just released a brand new course on how to shoot travel photography like a pro, and we shot the entire course on location in beautiful Santorini, Greece (even though it’s shot in Santorini, the techniques are not about shooting in Greece – you’d apply these same techniques no matter where your travels take you. Check out the official trailer below (it’s just 60-seconds, but you’ll get the idea):
You can buy the course for $29 or watch it and all our other courses on travel photography (and everything else, including a ton of courses on Lightroom) by becoming a KelbyOne member for just $20 a month (cancel anytime and it’s 100% money-back guaranteed!).
Here’s the link to the course.
That’s it for today – hope you have an awesome Monday!
-Scott
The post Does Lightroom’s Remove Tool’s Generative AI Feature Really Make a Big Difference? appeared first on Lightroom Killer Tips.