
There are a number of powerful tools in Photoshop to make masks. The masks extract images from the background, and isolate them so that you can do compositing or other things. Sometimes the edges aren’t great, or the masks need some extra work. How can you fix it? Here are 5 tips to help you right now.
Here are some other tuts on making the selections.
- Combining Photos for Beginners
- How to use Select and Mask
- How to make auto ai selections in Photoshop
- How to cut out hair and Fur in Photoshop
OK, on with our tips.
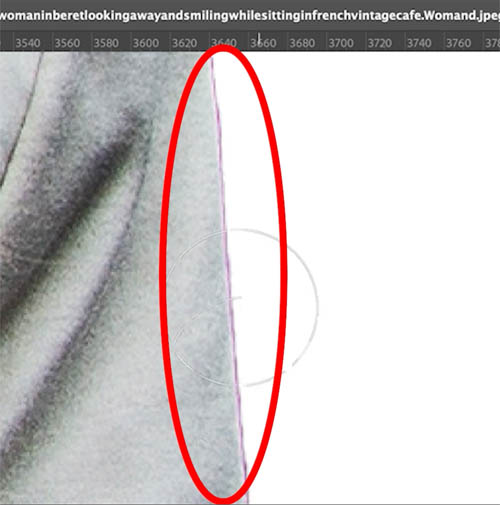
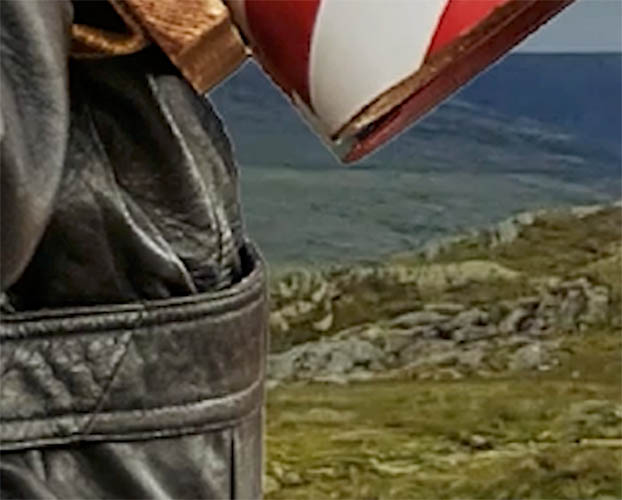
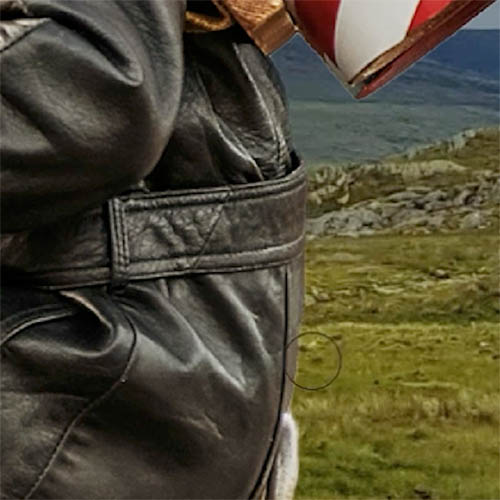
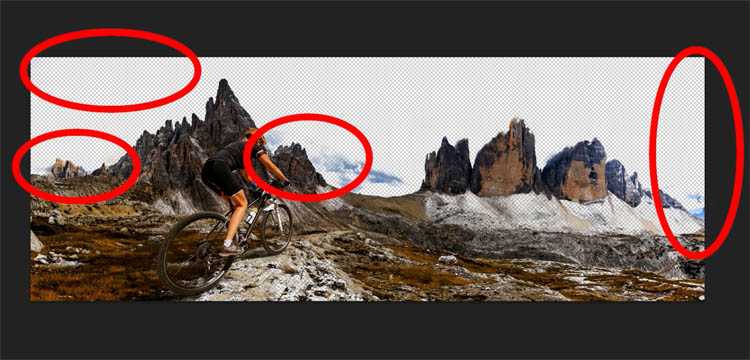
1. Visualizing pixels in an image
When you have the animated marching ants selection, you can see where the pixels are.
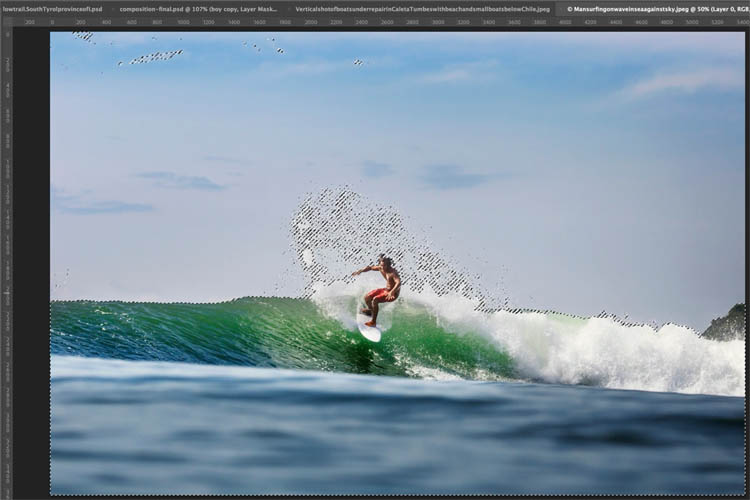
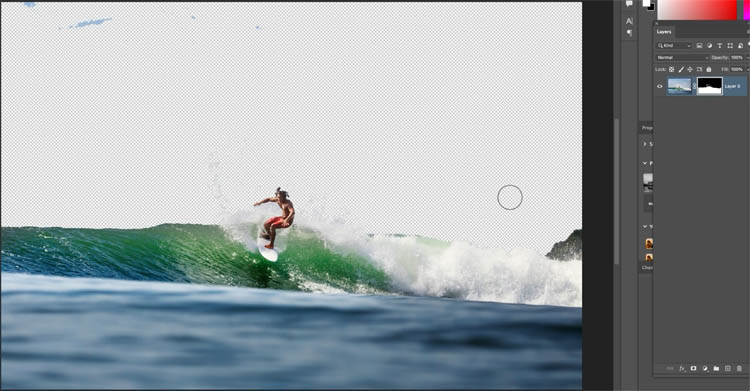
Once you add a mask, it can be difficult to see the pixels and transparency.
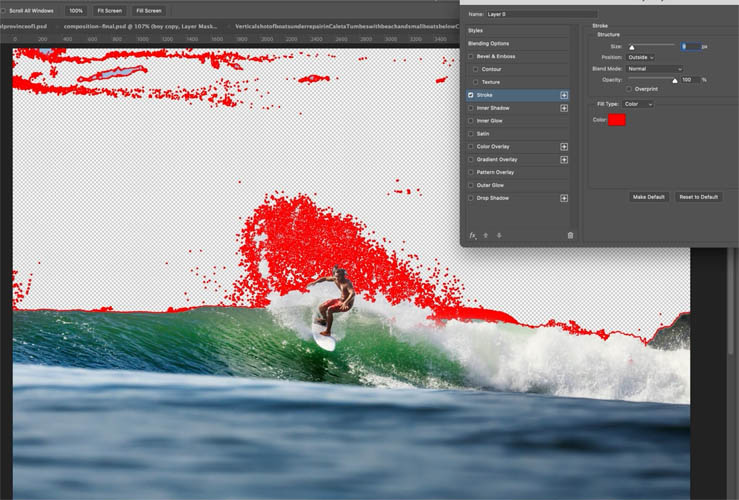
Choose the fx in the layers panel and add a stroke.
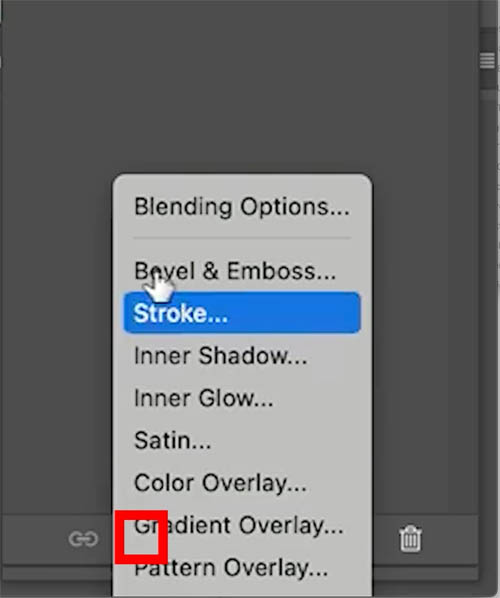
Make it a color that is easy to see, like red
Now you can clearly see the areas that you need to clean up.
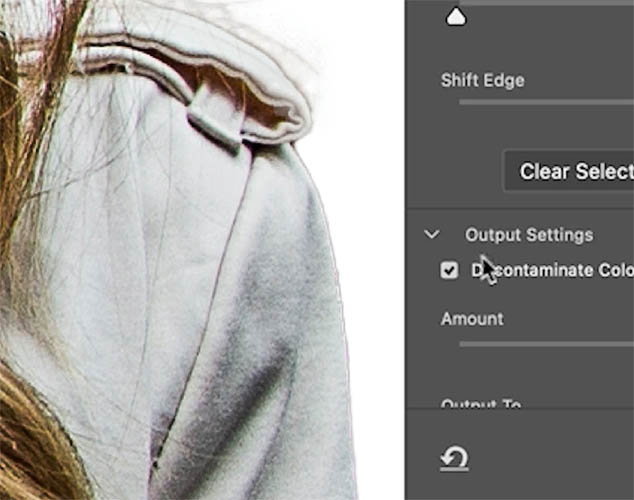
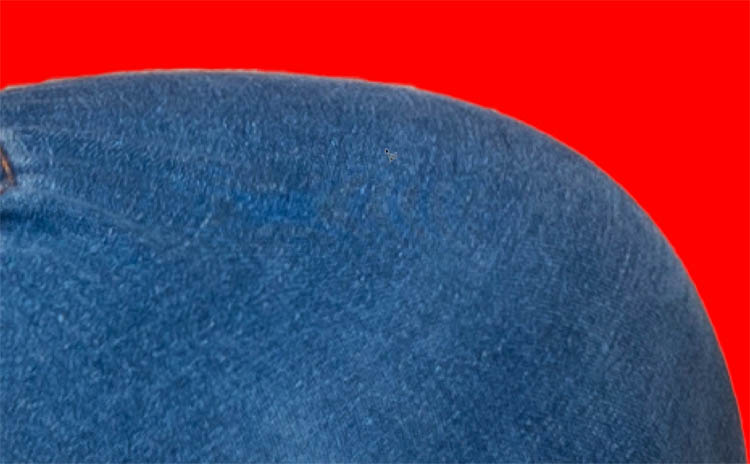
2. Removing Colored Edges
Sometimes when you cut out an object, you can see a colored edge. This is usually left over background color, known as a colored fringe.
With a selection tool active, choose Select and Mask from the top toolbar. (If you don’t see it, make sure a selection tool is the active tool, yup, that’s why I said that at the beginning of this sentence.)

Click on decontaminate colors and the color should disappear from the edge.
3. Blending Edges into the image
Sometimes the edges look too sharp, or even a little serrated and we want to blend them into the background smoothly.
Here are the steps I take.
- Make a selection active, marching ants, add a layer mask.
- Inverse the selection, Ctrl/Cmd+Shift+I
- Select>Modify>Expand, by 1 pixel
- Select>Modify>Feather by 1 pixel
Now we have a single pixel soft selection inside the edge.
Choose a soft edged brush and make the foreground color black.
With the Layer Mask Selected, Paint over the edge and see how nice it looks!
If you want to see the edge while painting, Press Cmd/Ctrl+H to hide the selection. The selection is still working, you just can’t see it.
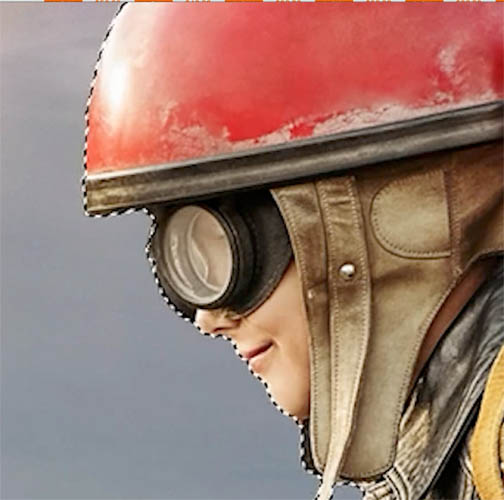
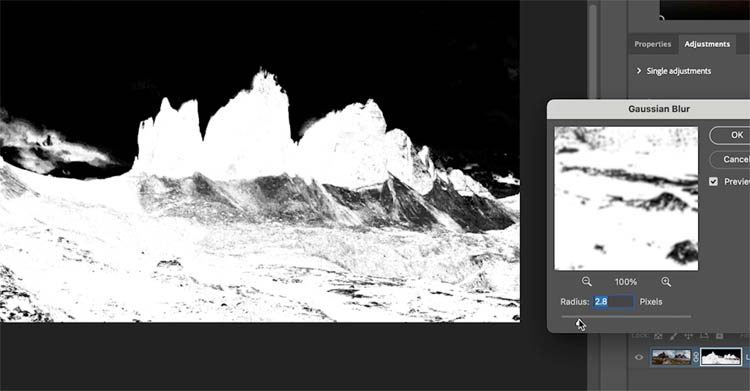
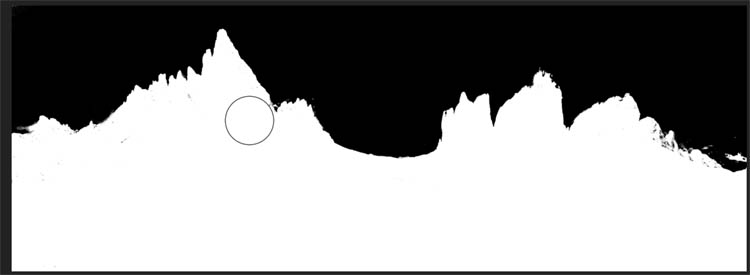
4. moving mask edges. Choking the mask
Sometimes you have a visible edge and maybe you want to contract the mask to hide that edge. In select and Mask, you can use the slider to expand/contract the edge. But this old school tip gives you more control.
With your selection as a mask. Always make a mask out of your selection, never hit the delete key. Why? For a start, you can’t do any of these modifications without a mask.
Click on the Layer mask and choose filter>Blur and apply a small Gaussian blur. You are blurring the mask, not the photo. I zoomed in on the next image which is why it looks blurry now. Just the edge should actually be blurry.
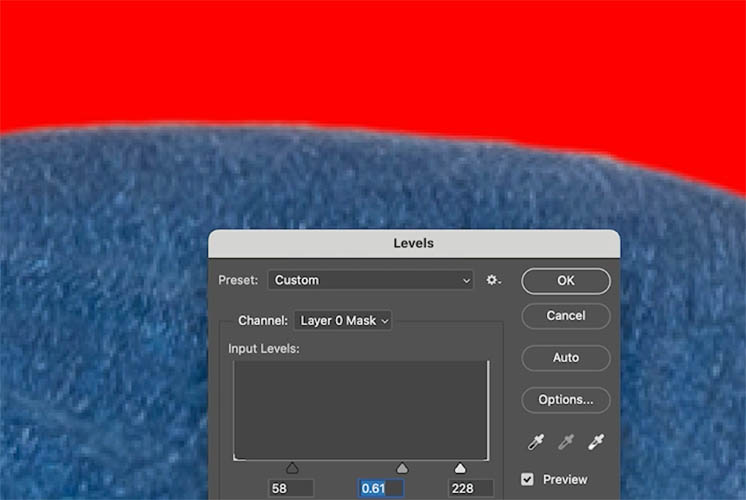
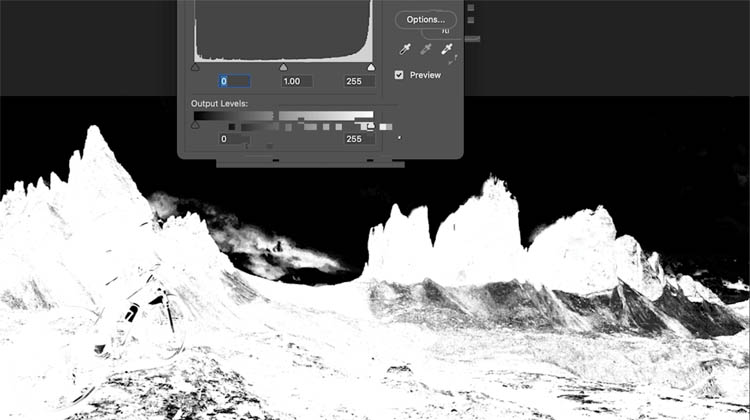
Press Ctrl/Cmd+L for levels. or make a levels adjustment layer.

Notice as you move the black and white sliders you get a nice crisp edge. As you move the gray slider, you can move the edge itself. Move its until the fringe disappears and you have a perfect mask edge.
5. Cleaning up a mask
There are times when there are lots of little spots on your mask, almost like snow, these are left over pixels from certain selection tools.
You can paint them away manually, or you can use this tip to get a head start and fix most of them.
This is actually very similar to the previous tip, but we are working on the mask area, rather than the edge.
Choose the mask. (watch the video to see how to do it, if you don’t know).
Choose Filter>Blur>Gaussian Blur
Choose small Radius
With the Mask selected, choose Ctrl/Cmd+L for levels.
Move the Left, black slider in Levels to clean up the blacks, the white dots and gray will begin to disappear.
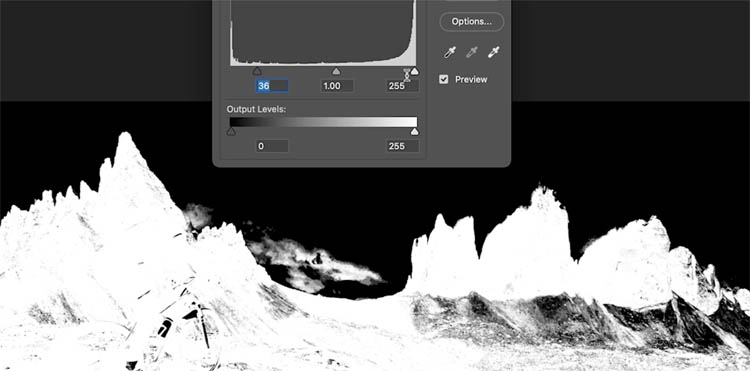
As you move the white, right slider you will notice the whites begin to blend together and the black dots disappear,
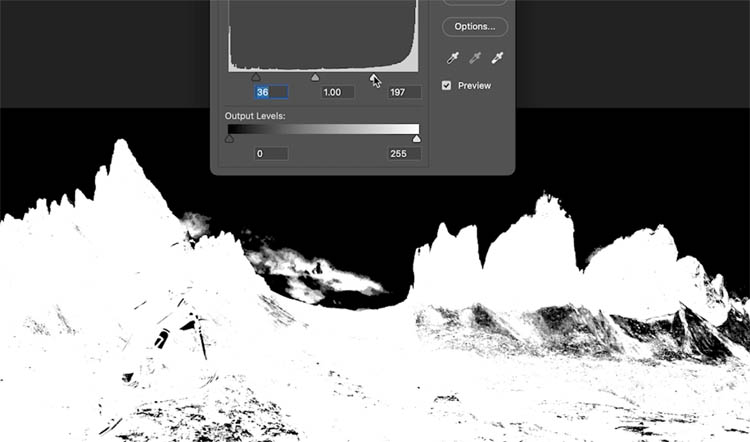
You may still have to do a little manual brushing, but a lot of the cleanup work is handled by Levels.
And you get a nice clean mask, any leftover parts can be fixed with a black or white bush on the mask.
Alright, I hope you find these tips helpful
Colin
PS Don’t forget to follow us on Social Media for more tips..
(I’ve been posting some fun Instagram and Facebook Stories lately)
You can get my free Layer Blending modes ebook along with dozens of exclusive Photoshop Goodies here 
The post 5 Tips to fix mask edges in Photoshop appeared first on PhotoshopCAFE.