
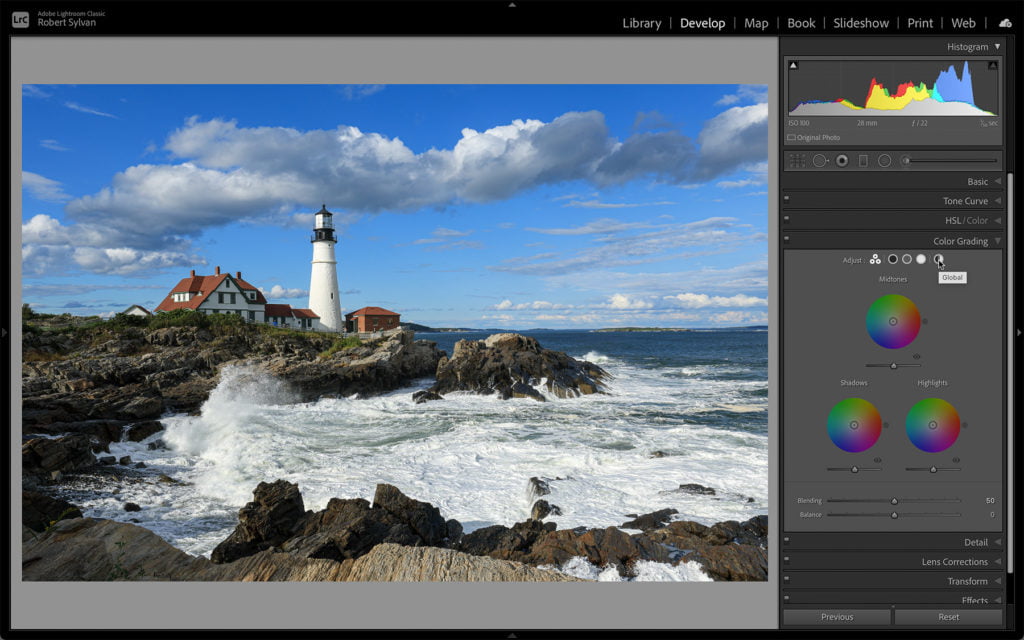
For the most part, when it comes to editing in Lightroom Classic, Lightroom, and Camera Raw, we can find almost all of the same features and tools. However, every now and then you’ll come across one little tool, setting, or option that only exists in one of them. In this case, the feature in question is part of the Color Grading panel.
All three programs have a Color Grading panel, and the core functionality works the same in them all. However, only Lightroom Classic has the ability to sample from the photo itself when choosing the desired hue and saturation for your color grade. It must be a holdover bit of code from the old Split Toning panel that came before Color Grading because I can’t imagine they’d only add it to Lightroom Classic and not the others if it didn’t already exist.
It certainly isn’t required to use Color Grading. I just think it is a cool way to start by sampling right from the photo itself when deciding on the tint you want to apply to the shadows, highlights, midtones, or globally.
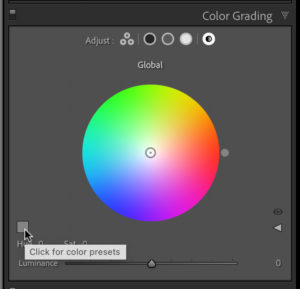
To use this feature you need to choose to zoom into to viewing just the single region you want to color grade. For example, if I wanted to apply a Global color grade to this photo I would click on the icon for Global at the top of the panel to zoom into the settings for that region.
Then, look for the color swatch above the Hue and Saturation sliders. Click that swatch to open the color picker.
This is where it gets a little fiddly. To use the eyedropper, click and hold down the mouse button while you drag the eyedropper over the photo.
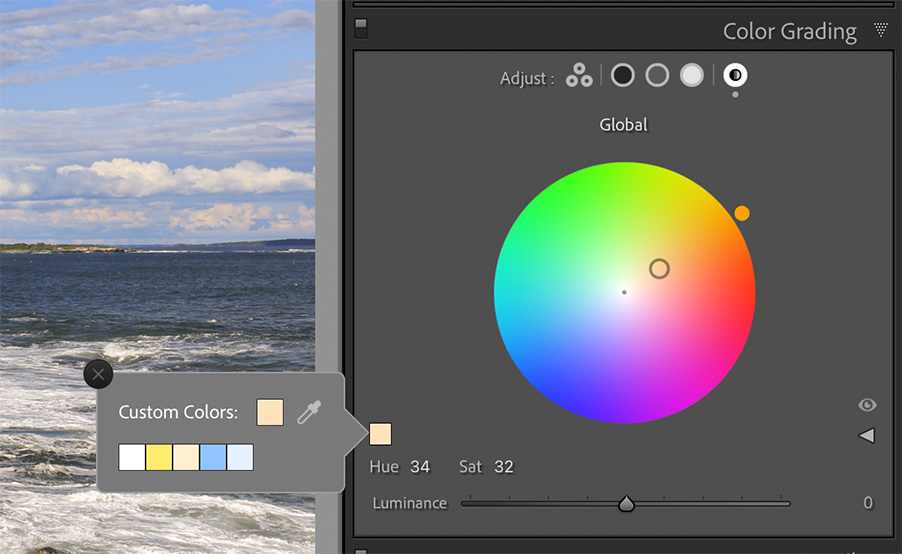
Side note, if this is the first time you use this feature on a Mac running Big Sur don’t be alarmed if you get prompted to allow Lightroom Classic to “record this computer’s screen” to make this work. I asked the developers about this ominous sounding warning and I was told all it does is sample a single pixel to get the color values under the cursor, but that falls under screen recording, hence the need to grant it permission. If you decide to grant it permission, then be prepared to restart Lightroom Classic in order for that to take effect. Just a heads up.

Once you’ve landed on a hue and saturation value you like, just release the mouse button to have those values entered in the Color Grading panel. Now you can use the Hue, Sat, and Luminance sliders to dial in your final look.
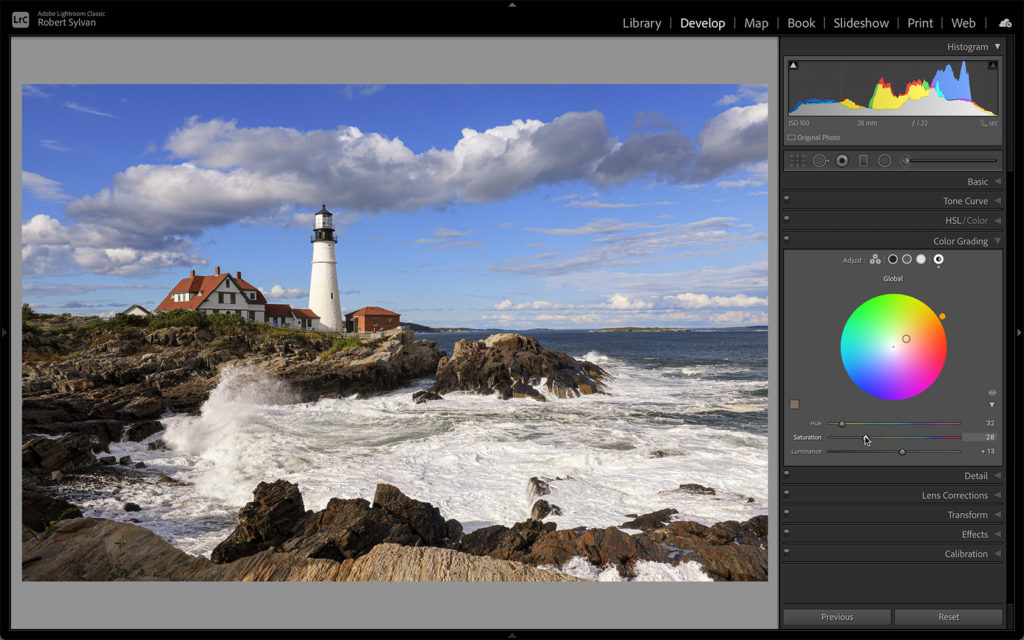
You can of course just use the Color Wheel to arrive at the same exact settings, which is likely why we’ll never see this feature added to Lightroom or Camera Raw. But hey, why not use it if it is there!
The post A Color Grading Feature Only in Lightroom Classic appeared first on Lightroom Killer Tips.