
Before we get to our tip, today we kick off our Black Friday / Cyber Monday deal on a KelbyOne Pro Membership, and it’s our best deal of the year. More people join KelbyOne this week (and next Monday) than any other time, and we’d love to have you join up with us for an incredible year of learning.
Here’s a link to get your deal (and it makes a fantastic Holiday gift for the photographer on your gift list).
Four Clicks To Better Skin
This makes great use of Lightroom’s People masking, and while our subject really doesn’t need skin softening, one of the best things about applying this skin softening technique is that it smoothes the gradation of skin tones on your subject’s face, so don’t just think of using it when someone needs their skin smoothed – it’s for a better transition between skin tones, and it makes a huge difference (as you’ll see). Here’s how it works:

STEP ONE: Here’s our original image. Click on the Masking icon and wait for a second or two for it to find the People in your shot (as shown here).
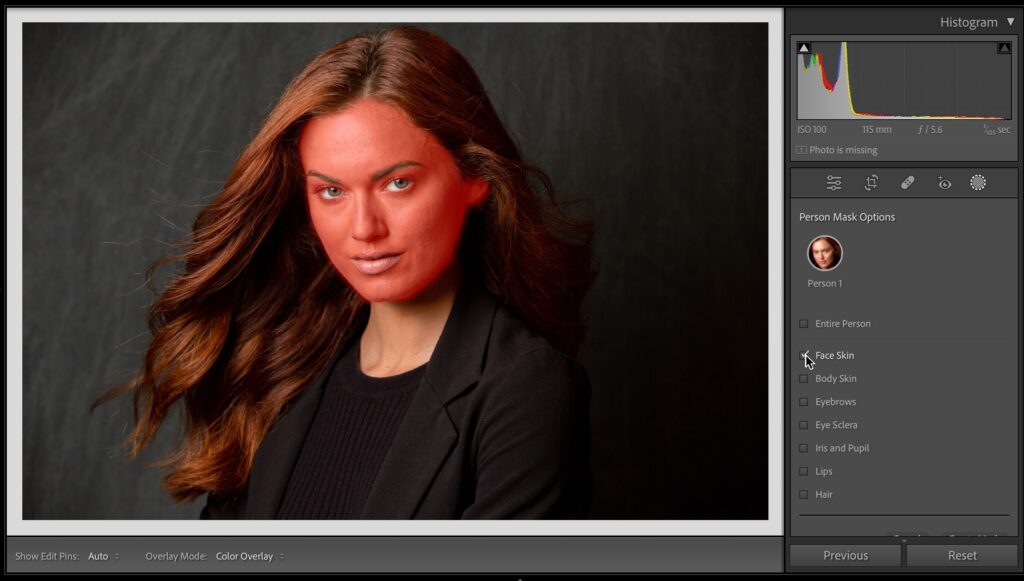
STEP TWO: Click on the thumbnail of your subject in the People section to bring up a list of areas you can mask for portraits. Click directly on Face Skin (as seen here), and a red tint appears over the area it has masked for you (notice how her eyes and lips are excluded from the mask)
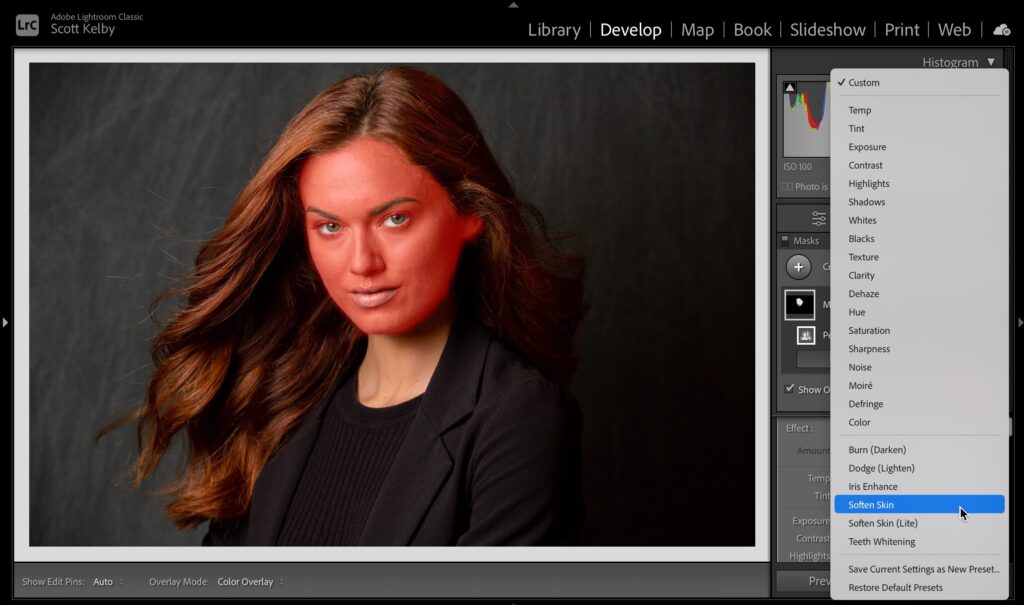
STEP THREE: At the top of the panel with the Adjustment sliders, you’ll see the word “Effect” and to the right of it, it says ‘Custom.’ Click and hold on ‘Custom’ to bring up the list of slider presets you see here. Choose “Soften Skin,” as shown here.
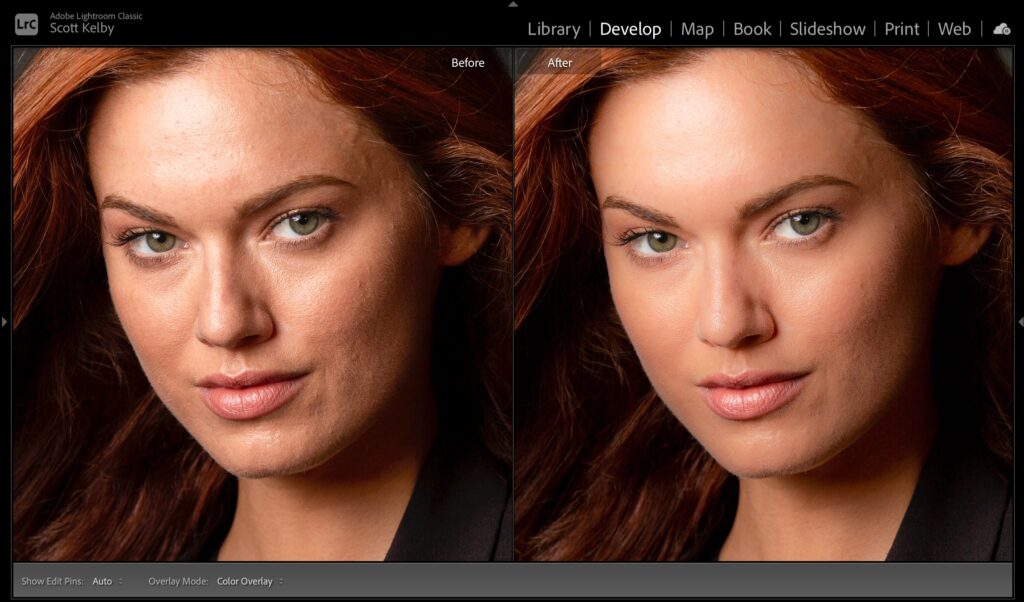
This isn’t actually step (there’s one step left), but I’m going to pause here for a moment because I want you to see what I’m talking about when I talk about smoothing the gradations between tones on the face. So, I stopped here and did a side-by-side before/after (by pressing the letter ‘y’ on your keyboard). Look at the difference. Now, I think it’s softer than we need, but that’s why there’s a fourth step (below).
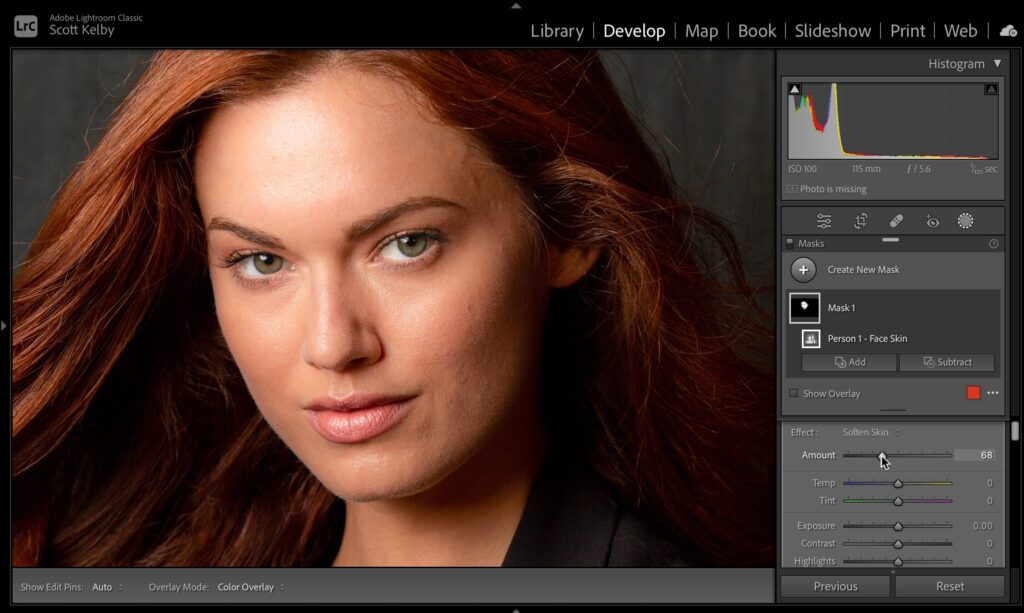
STEP FOUR: The final step happens if you think the softening is a bit too much – just drag the Amount slider up at the top of the panel, right below that preset pop-up menu you used earlier) to the left to reduce the amount of softening so you can dial in just the right amount. That’s it – four clicks to smoother skin (when you need that) or smoother gradations in tone when you need that.
Hope you found that helpful. Also, to everyone who’ll be joining KelbyOne this week, welcome aboard – we are delighted to have you with us in 2023 for an incredible year of learning (with a ton of new Lightroom courses, as always). Have a great Monday!
-Scott
The post A Cool Skin Softening Tip (and a Killer Deal) appeared first on Lightroom Killer Tips.