
This week I wrap up my look at what’s new in shooting tethered in Lightroom Classic, as well as some alternatives to consider depending on your needs and camera bodies. Be sure to check out last week’s post if you missed it.
Shooting Tethered
With the camera connected and the session started, its time to make some photographs. Clearly the main benefits of shooting tethered, whether you have live view or not, is to be able to see the photos on your much larger computer screen right after capture. This allows for checking focus, adjusting composition and lighting, and seeing smaller details while you are shooting as the photos are saved to your computer. An additional benefit is to be able to begin the editing process while you are still shooting.
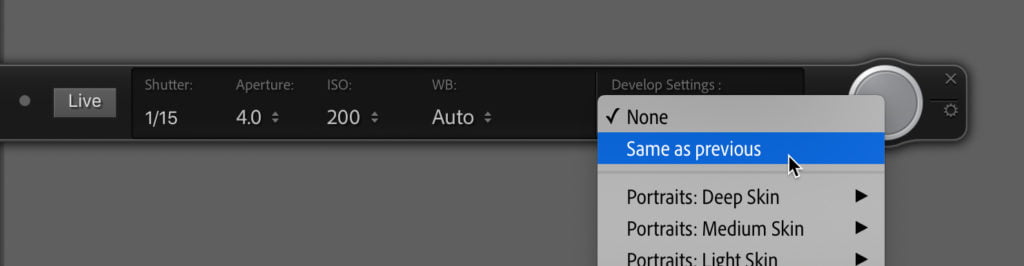
The first step to editing is to customize your Raw Defaults to include desired settings. From there, using the capture bar, you can choose to apply a preset that will be applied as each photo appears on screen. Alternatively, if you are using a gray card, color checker, or some other technique for adjusting white balance, you can take a photo with that in the scene, then use the Develop module to make any adjustments you wish (like white balance), and then choose Same as previous from the menu to have all the settings you applied to the first photo automatically applied to the rest of the photos in the session. This can be a huge time saver.
When the session is complete, click the X on the capture bar to exit tethered capture, turn off your camera, and disconnect the USB cable.
With this latest update, the tethering functionality between supported Canon and Nikon cameras is the same, except for one key feature that I still fail to understand why it is not included. On Canon, the photos taken during the tethered session are saved to the camera’s memory card as well as to your computer, which seems like a no-brainer in a situation as prone to failure as tethering. However, this has never been true for shooting with Nikon, and remains the case today. I do hope this feature is added to Nikon camera tethered shooting at some point in the future.
Shooting Tethered on Apple Silicon
In the June 2021 update Lightroom Classic can now run natively on Macs with the Apple Silicon chip, however there is a caveat when it comes to tethering on a Mac with the M1 chip. To tether you’ll need to run in Rosetta Emulation mode. By default, on an Apple Silicon device you’ll be running in native mode if you just launch Lightroom Classic, which in my experience has been great so far. However, if you try to start a tethering session in this mode you’ll be prompted to relaunch in Rosetta.
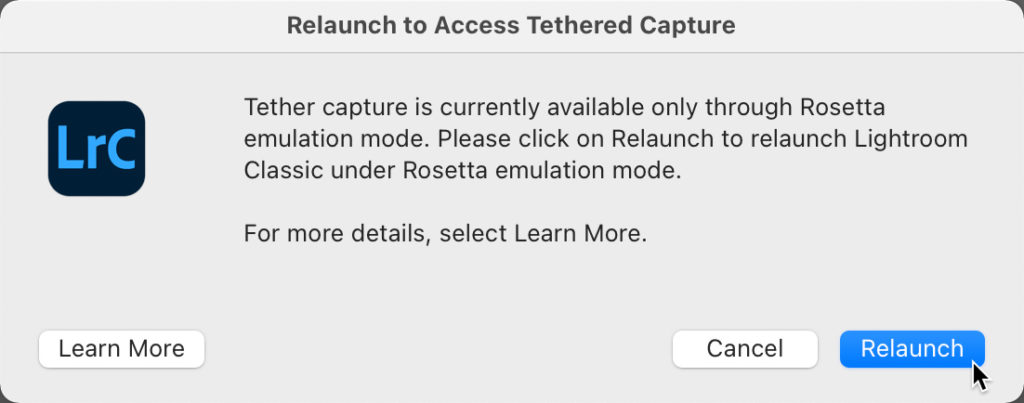
Clicking Relaunch will exit you out of Lightroom Classic and then relaunch (be patient) in Rosetta. Once re-opened, you will have to go start the tethering process from the start (it doesn’t relaunch into tethering), and away you go. Once your tethering session is complete, just exit Lightroom Classic, and the next time you launch it will default back to running natively.
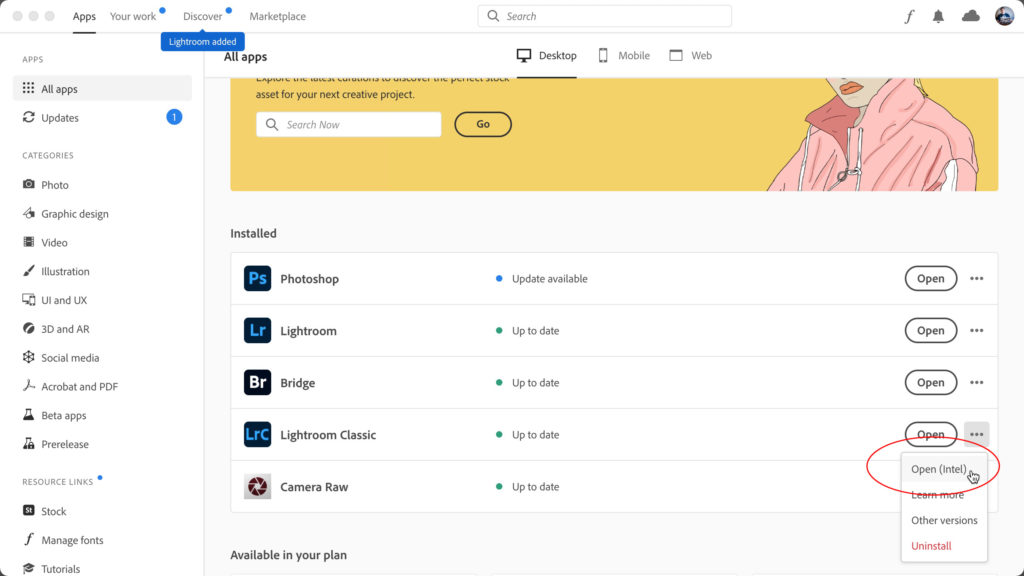
If you know you are going to be shooting tethered, you can launch Lightroom Classic into the Intel version from the Creative Cloud Application Manager directly into Rosetta mode, and then just get on with tethering.
Looking at Alternatives
Native tethering has come a long way in Lightroom Classic, and if it checks all the boxes for you, then look no further and go make pictures. However, if your camera is not supported (yes, my Sony friends, I’m thinking of you), if a feature you need is not included, or perhaps you want to try a third-party solution then there are options out there. One of the most comprehensive lists of tethering software options I’ve seen is maintained by Tether Tools. Yes, their own software solution is included, but so are options from Sony, Panasonic, Canon, Nikon, Hasselblad, etc., as well as other third-party vendors whose products support a variety of camera manufacturers.
In most cases, when using a third-party software solution for tethering you don’t use Lightroom Classic’s tethering function at all. Instead, you use the third-party software to interface with your camera and facilitate the saving of photos to a designated “watched” folder and you configure Lightroom Classic’s Auto Import function to watch that folder (like I mentioned earlier with wireless solutions). There truly are solutions for many, many more cameras than Lightroom Classic supports, as well as a lot of specialized features (like focus stacking or astrophotography). Some are free and some require a fee, so you’ll need to click through to the respective vendor’s site to learn the details.
I was most interested in Tether Tools own Smart Shooter 4 software because it actually plugs directly into Lightroom Classic and it supports Sony as well as Canon and Nikon. Smart Shooter costs $70 (or $196 for the pro version that supports barcode scanning and multiple cameras) but does have a free trial. Tether Tools did give me a copy of the standard version for evaluation purposes, but I am not otherwise affiliated with them.
With Smart Shooter, you can either use it as a standalone third-party tethering solution (using Auto Import) or you can install the plug-in to avoid the need for Auto Import and have the photos automatically added to the catalog just like the native tethering solution. Note, at the time of this writing the Smart Shooter plug-in supports Sony and Nikon, but Canon support is still pending an update from Adobe. You can use the standalone Smart Shooter software with Canon cameras.
Smart Shooter is truly a dedicated tethering solution and has way more features and options than Lightroom Classic’s native tethering capability. One feature I was especially pleased to see is the ability for Nikon cameras to save to the memory card during a tethered session, so clearly it can be done (this has to be enabled in Smart Shooter’s preferences first). If using the plug-in version, you’ll need to install it from Smart Shooter’s preferences (you’ll definitely want to go through the user documentation to get the latest info), and then make sure it is enabled in Lightroom Classic’s Plug-in Manager.
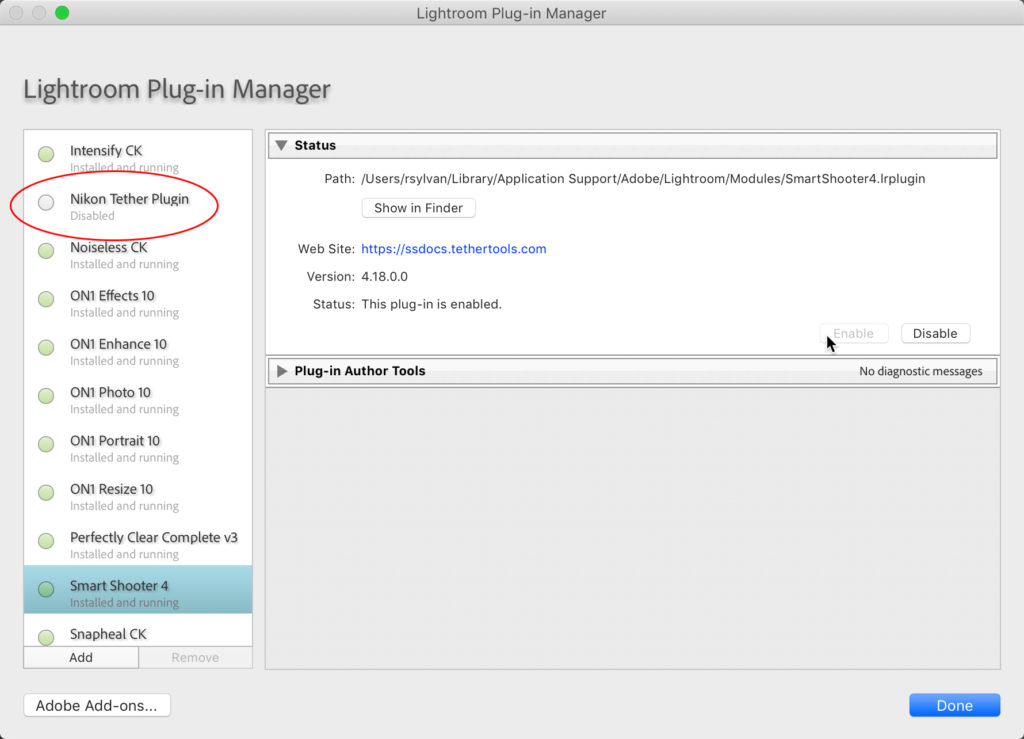
Note, for Nikon cameras you’ll want to disable the Nikon Tether Plug-in so that the Smart Shooter plug-in does the job instead.
Once installed and configured, using the plug-in follows the same steps as native tethering. The exception is that once the tethering connection is made you’ll see Smart Shooter as a service in the Mac Menu bar (PC: Taskbar).
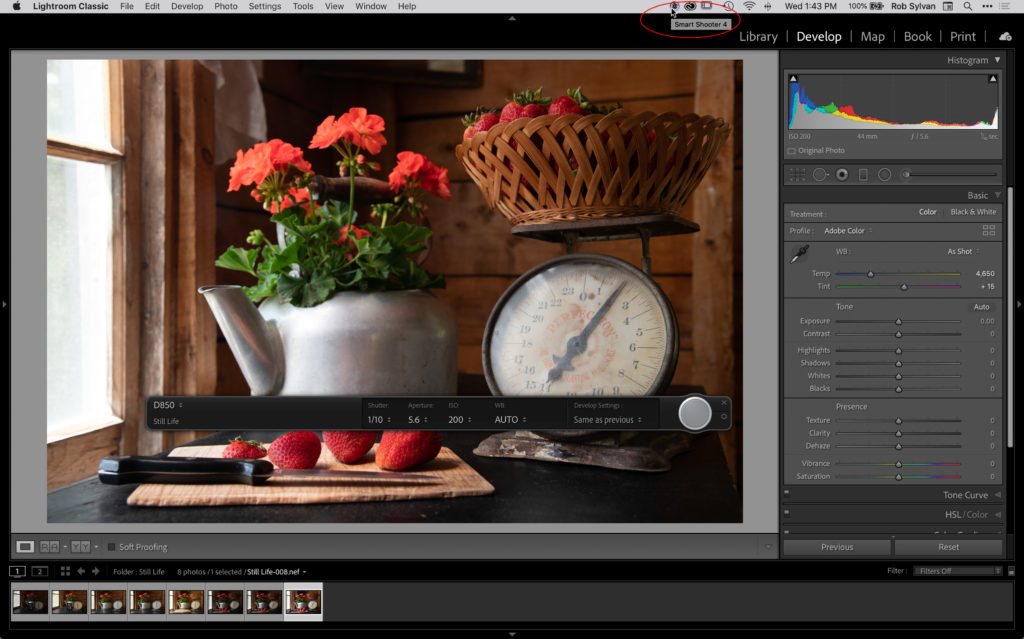
You can either use the floating capture bar or use the Smart Shooter service running in the background (you’ll want to exit Lightroom Classic from Full Screen mode to see the service running) to launch the full version of Smart Shooter to take advantage of all its options.
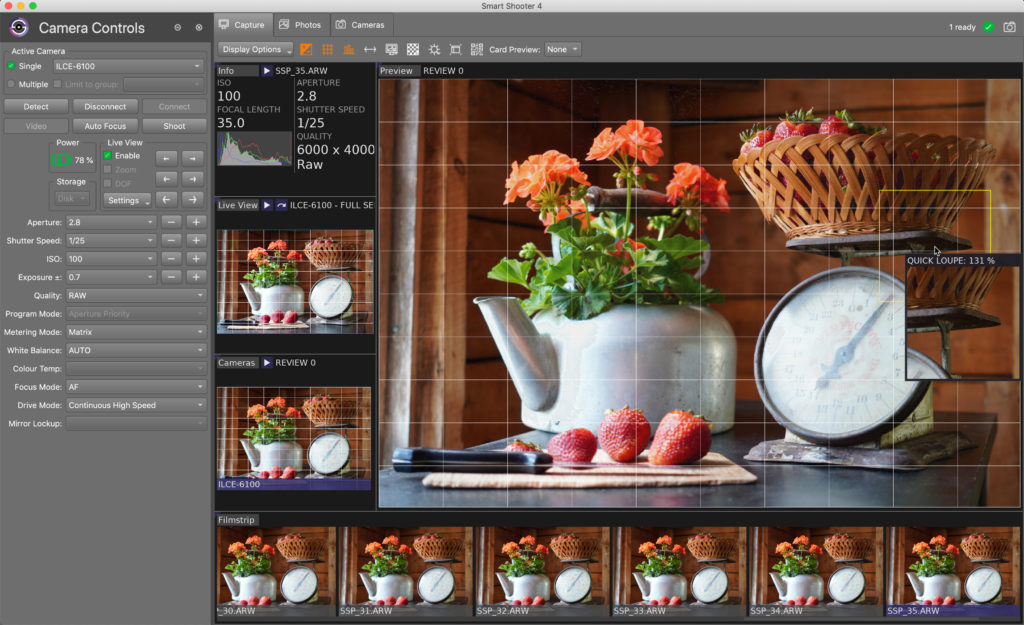
Yes, I did switch to a Sony camera in that last figure to test it out, and it worked great. Even though I used the full Smart Shooter interface all photos were added directly to the catalog because I started from the plug-in, which is the best of both worlds when it comes to features and functionality. I’m hoping the update for Canon users to the plug-in comes soon.
As I said at the beginning (in Part 1), we’re always faced with making the best choice for our needs at the time, and many of these factors are continually evolving (I have to assume that tethering becomes part of the native functionality on Macs with Apple Silicon chips at some point in the future) Luckily, there seems to be a lot of options to consider.
The post A Look at the Latest Updates to Shooting Tethered: Part 2 appeared first on Lightroom Killer Tips.