
Adjusting, enhancing, and correcting color is often a necessary part of editing in Lightroom Classic. While we have been able to modify hue, saturation, and lightness (HSL) on a global level (using the HSL/Color panel), and adjust saturation and lightness (exposure) on a local level (using the Graduated Filter, Radial Filter or Adjustment Brush), we only recently gained the ability to shift the hue locally too. This one small change has opened up a number of exciting new possibilities. Let’s explore some examples of how you can add the use of local hue adjustment to your workflow.
Note, the local hue adjustment was also added to Adobe Camera Raw and the other Lightroom apps too, but I’ll just be focusing on using it in Lightroom Classic here.
The Limitations of Global Adjustments
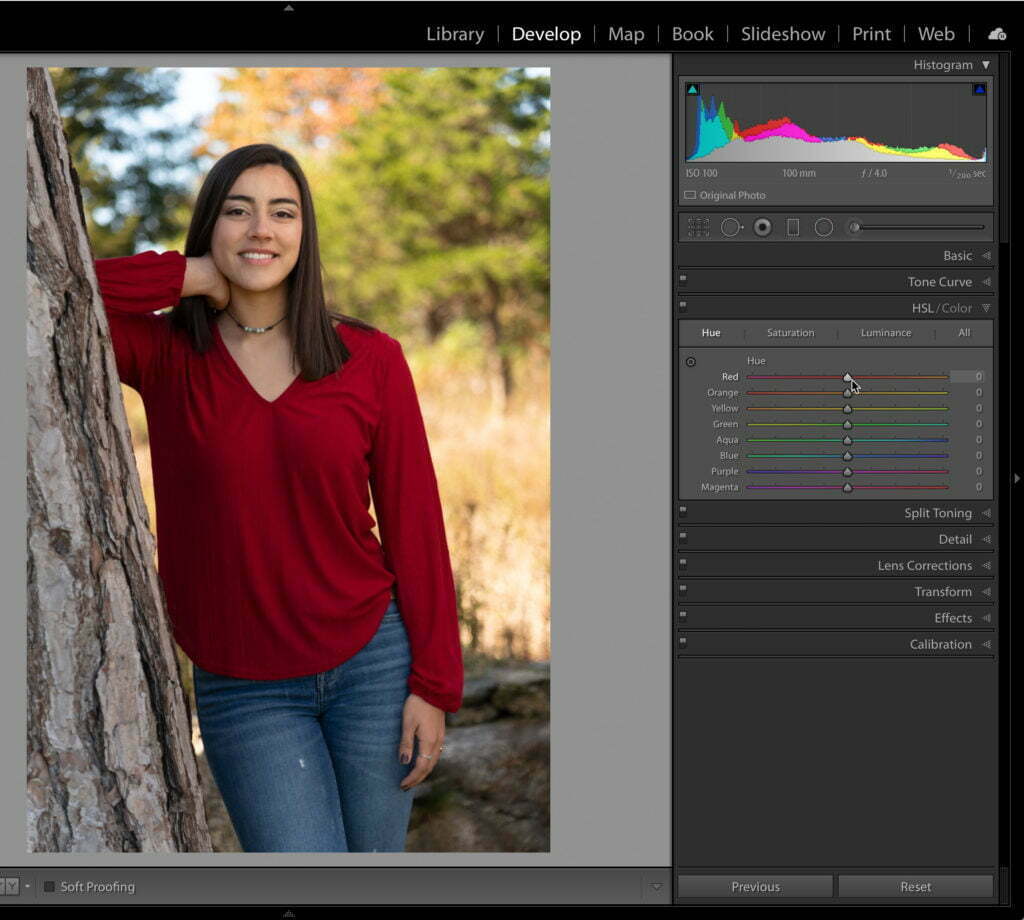
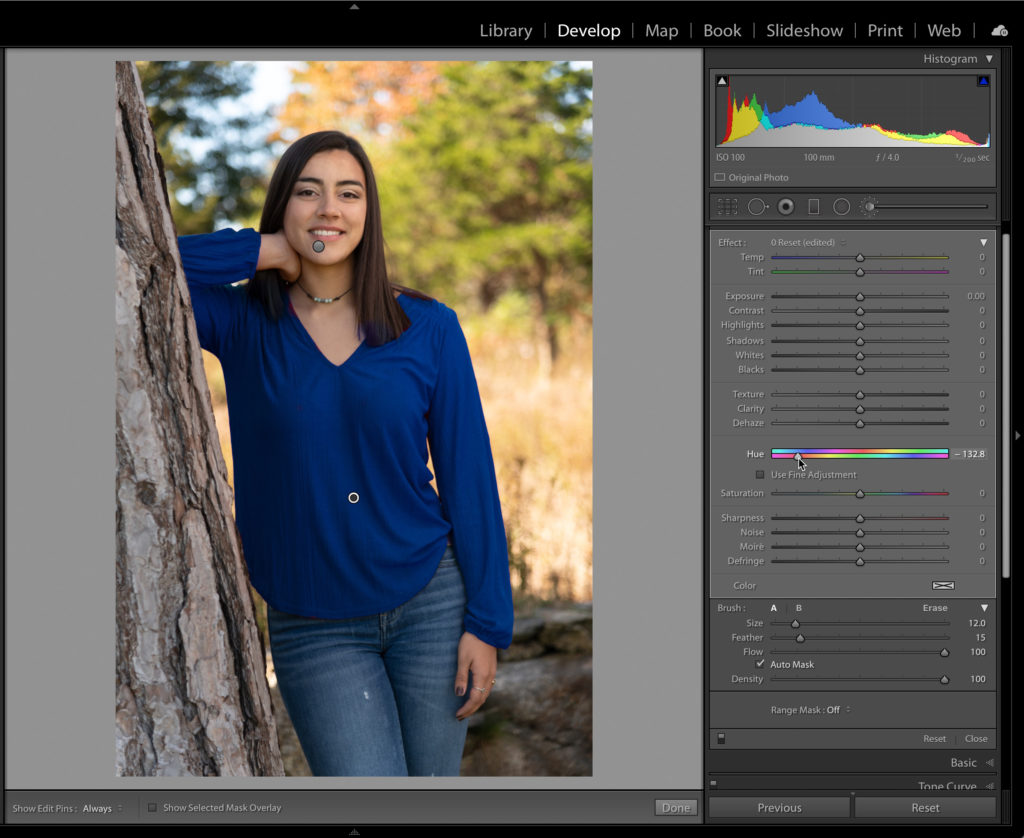
While the HSL/Color panel is incredibly powerful and useful, it has a couple of limitations that up until now we have not had a way to work around in Lightroom Classic. For example, in this senior portrait, I could use the HSL/Color panel to shift the hue of her top from its original red to something more magenta or more orange by shifting the Red Hue slider to the left or right respectively, but that comes with the unintended (and undesirable) consequence of also shifting the reds everywhere else in the photo along with it, like her skin, makeup, and the leaves in the background.
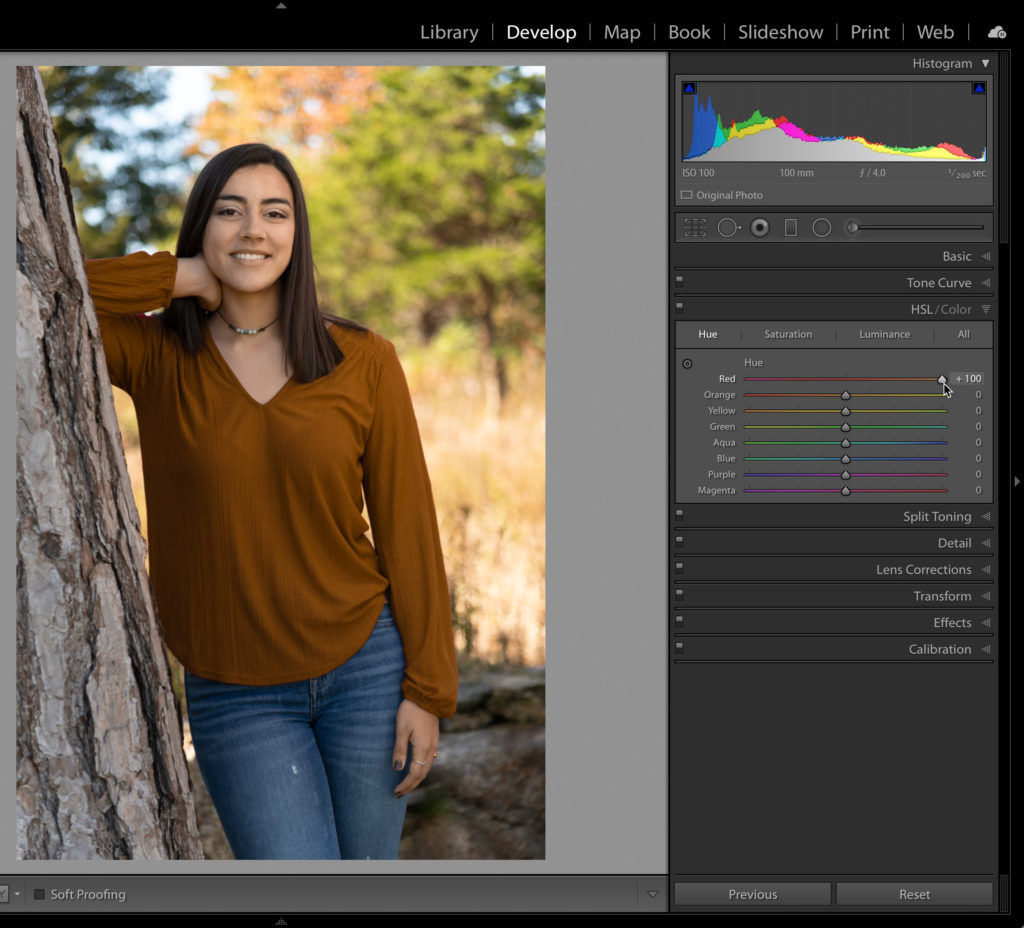
Additionally, I am limited in shifting the hue of her top only to some other shade of red. There’s no way to use the HSL/Color panel to change it to blue or green, as the Hue section of the HSL/Color panel is limited to about a 30-degree shift in hue away from the starting color. This is why adding a hue control to all of the local adjustment tools opens up so many new possibilities that we’d previously have to jump to Photoshop to perform.
The Local Adjustments
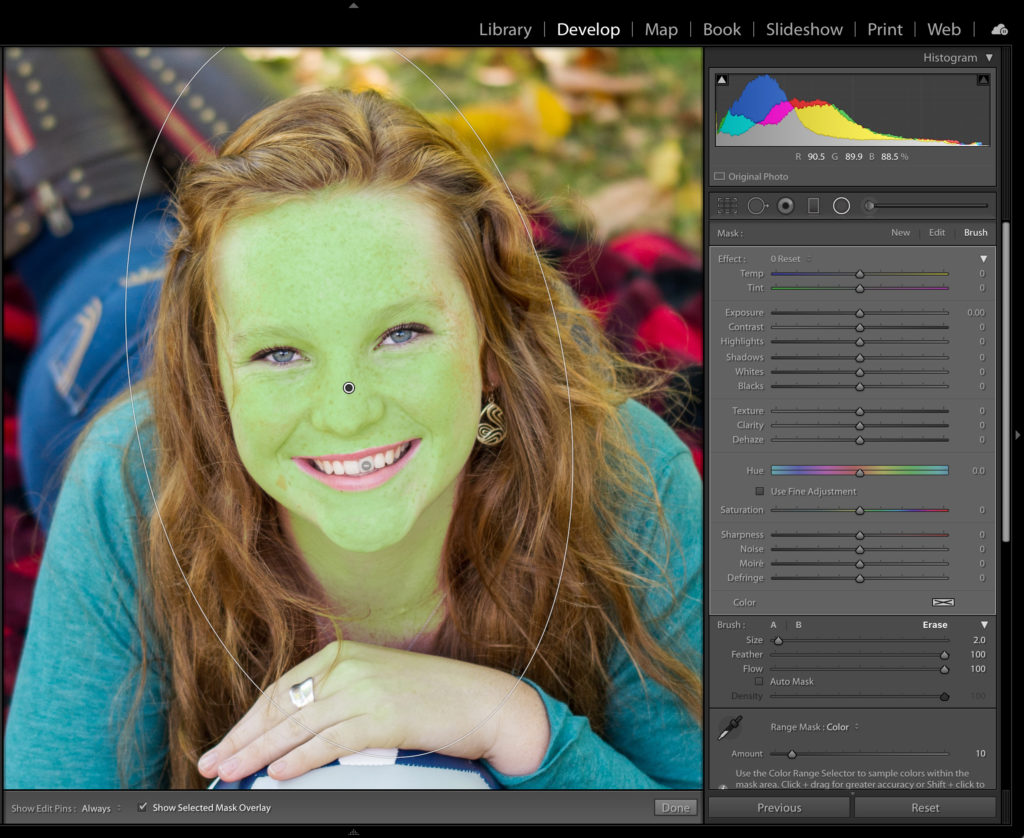
Below the Histogram panel in the Develop module lies a strip of tools that are often referred to as local or selective adjustment tools. In reality, when we say “local adjustments” we are usually just talking about the Graduated Filter, Radial Filter, and Adjustment Brush. Each of these tools share the same panel of controls, which becomes visible when any of those three tools are selected. In this case, I selected the Adjustment Brush.
Hard to miss near the middle of the panel is the new Hue control. It consists of top and bottom color band and a control knob. As you begin using one of the local adjustment tools to select the area of the photo you want to adjust you’ll see the dominant color within your selection shift to be the center point within both bands.
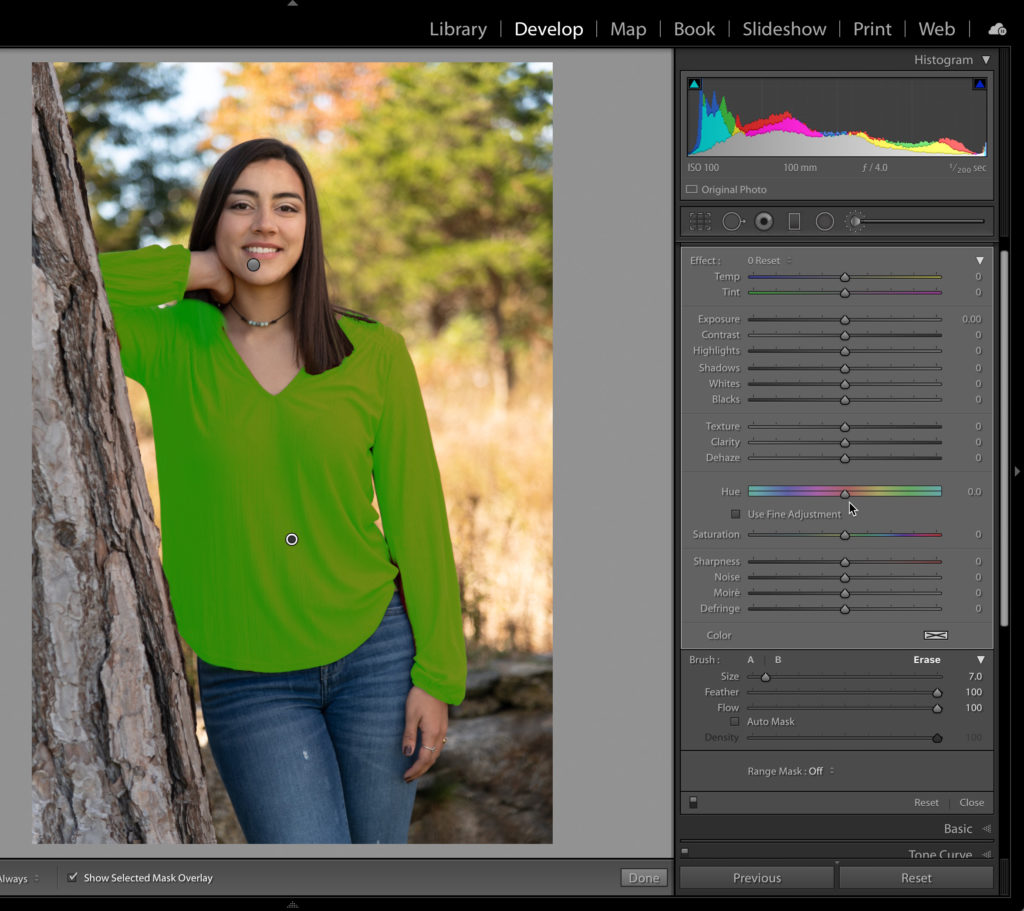
So, if I use the Adjustment Brush to select her red top, we’ll see that the Hue adjustment centers on red (note, I have the selected mask overlay turned on and set to green to make it visible).
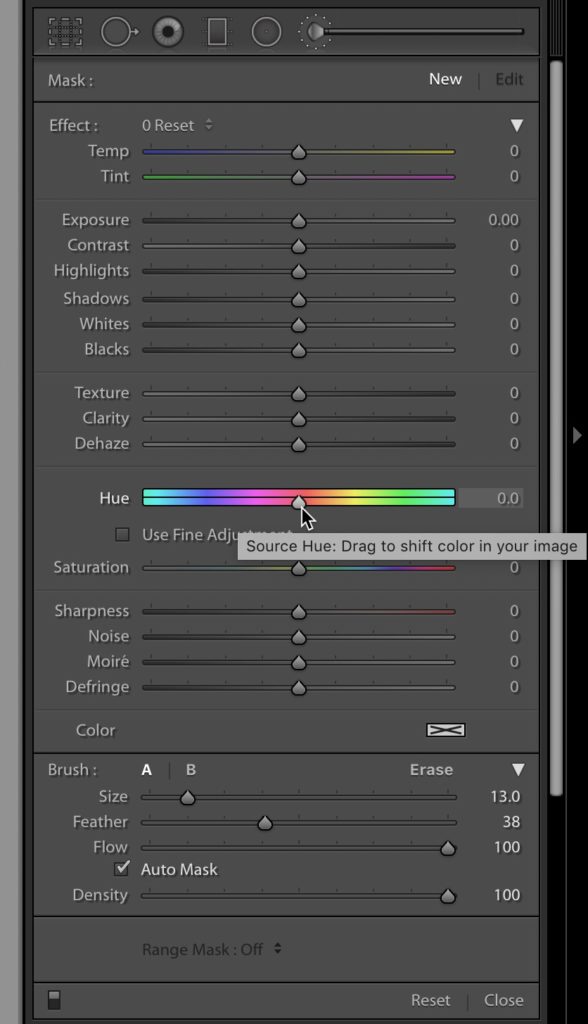
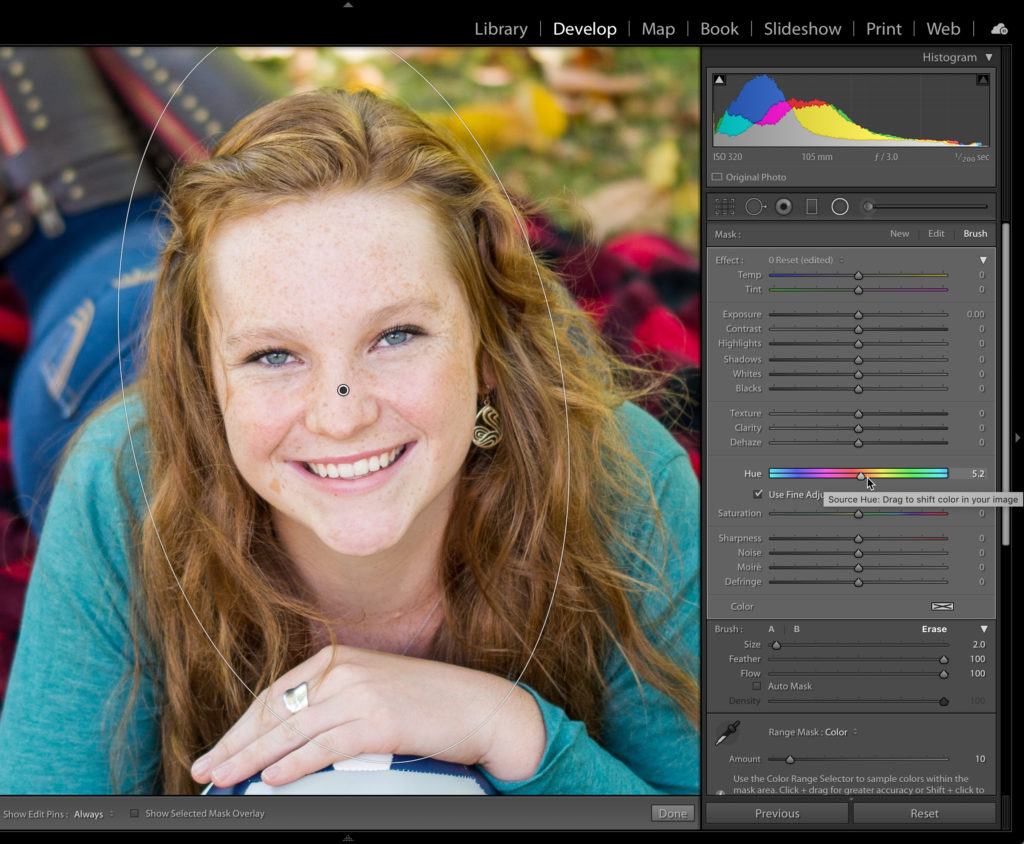
Clicking and dragging the control knob gives me the ability to shift hue a full 359 degrees from where it started. Because I selected only her top, I no longer need to worry about accidentally shifting the colors of other areas in the photo. Now I can change her red top to blue or green, or any other color as needed.
As I moved the control knob you can see that the bottom band still shows the original dominant color as the center point under the knob (the source), but I have slid it over under the blue hues of the top band representing the color I wanted to choose (the target).
Use Fine Adjustment
Sometimes a more subtle shift is what is called for in a given situation. In this photo I wanted to reduce the visibility of the slight red flush from her skin. Instead of the Adjustment Brush I grabbed the Radial Filter and drew out an oval slightly larger than her head and neck. Checking the Invert box switches the area of adjustment to inside the oval instead of outside. All I wanted to do was shift the red of the flushed area away from the magenta side of red toward the more orangey-red hue to make it less visible. However, I didn’t want to affect anything other than her skin tones (excluding hair, eyes, lips, etc.).
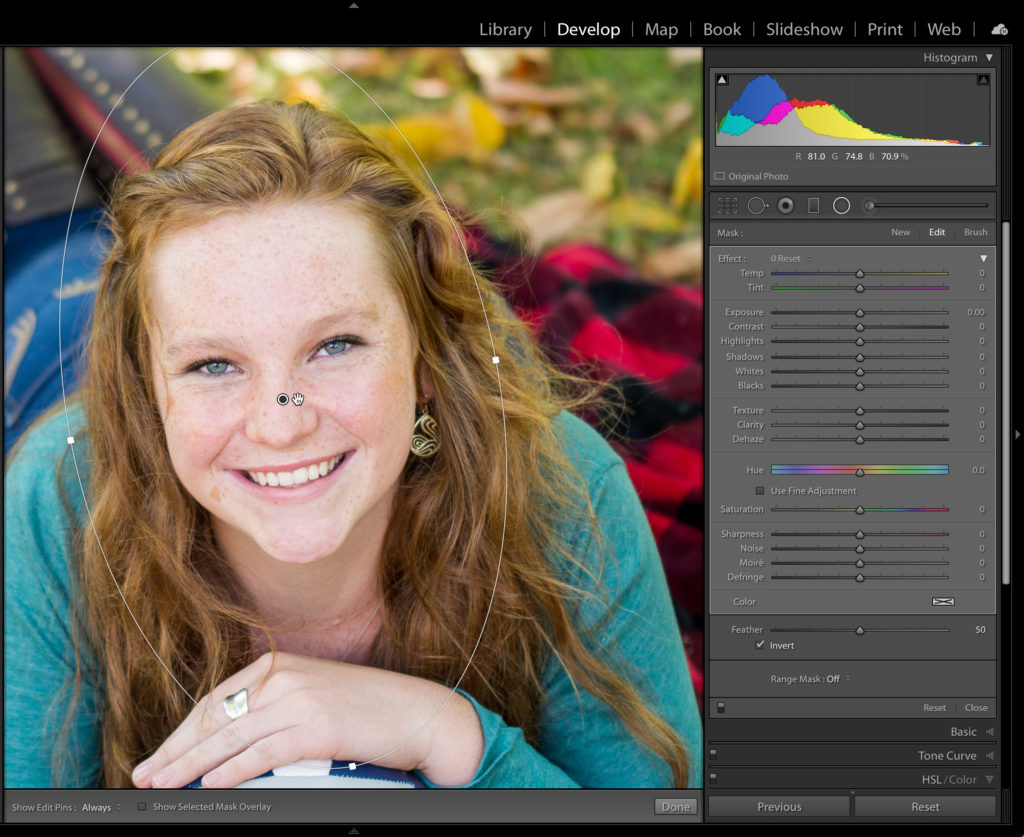
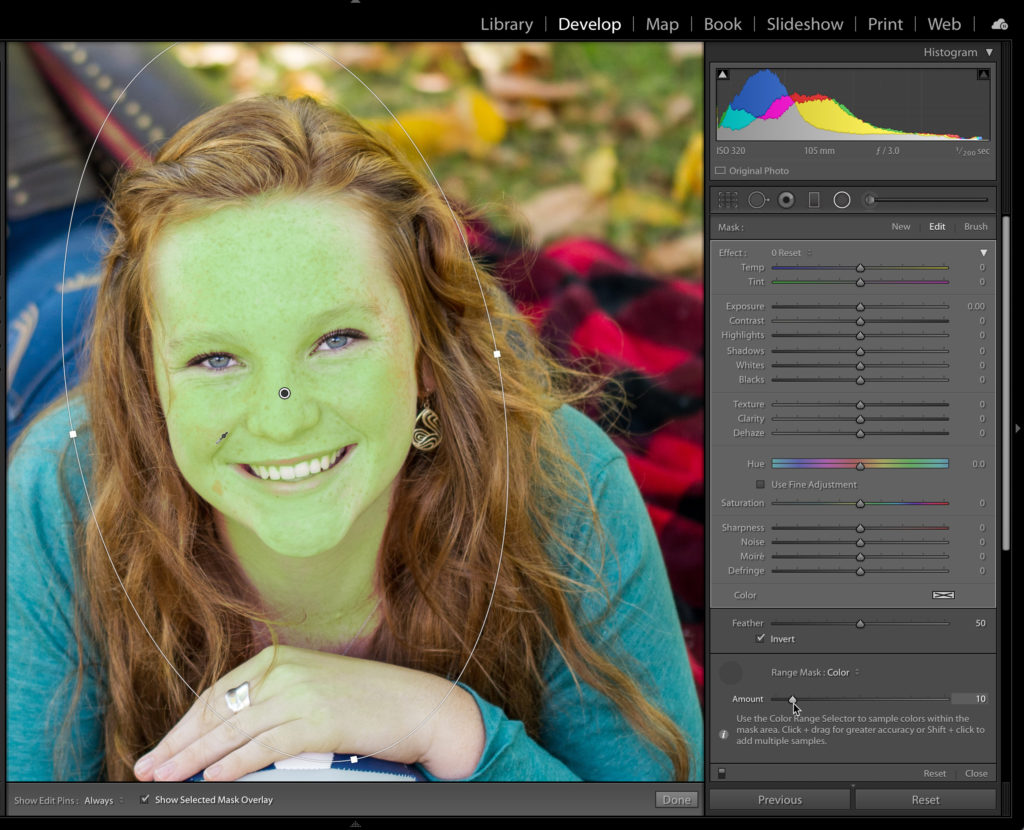
To exclude unwanted areas from this adjustment I used the Color Range Mask function (see my article in Issue 36 of Lightroom Magazine to learn more about Range Mask) to limit the adjustment to just her skin. First, click the Range Mask drop-down menu and choose Color, then grab the Color Range Selector tool (eyedropper) and click the color you want to use for the mask. In this case I single-clicked in the area I saw the most red (her cheeks), and then dragged the Amount slider to the left to restrict the range of colors to just those in her skin.
This removed the adjustment from her hair and eyes, but left a little around her lips and gums. That was easily removed by selecting the Brush option within the Radial Filter, setting it to Erase, and erasing the adjustment from her mouth entirely.
With skin tones, it is very easy to make things look bad with too large of a hue shift (ignoring the green mask overlay). This is when you want to check the Use Fine Adjustment option associated with the Hue adjustment, as it drastically slows the rate of change as you move the control knob, and allows for a simple refinement of the original hue instead of a huge change. I settled on a very slight shift toward orange-red, which I thought suited her complexion a little better.
For Creative Effect
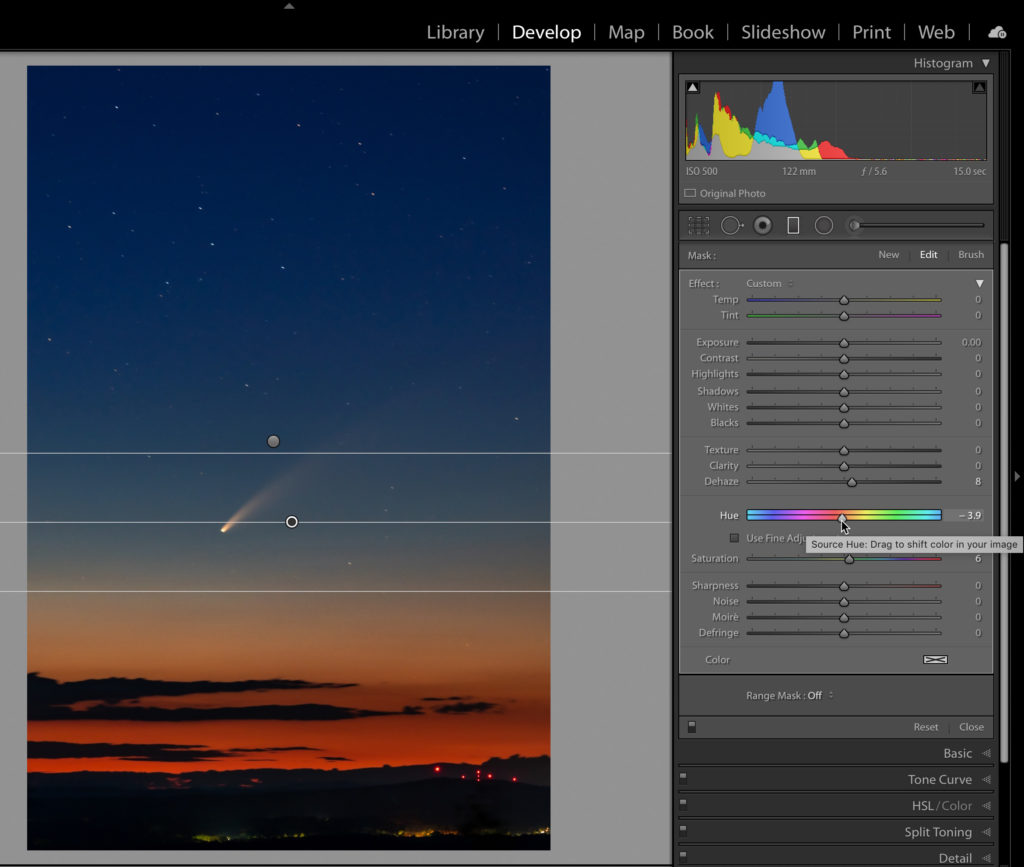
This new Hue adjustment also opens up all kinds of creative uses that I look forward to exploring over time. I was recently able to observe and photograph the Comet C/2020 F3 (commonly called NEOWISE). Although I didn’t have an amazing foreground from my viewpoint (Stonehenge was a bit too far away), I was very pleased with the experience and resulting photograph. As I was editing the final raw image I experimented with using a Graduated Filter and the new hue adjustment to enhance the colors in the sunset below and darkening sky above. I chose the Graduated Filter so that I could control the area of transition between my adjustment and the unadjusted area of the photo to better blend them together. I started by dragging out an adjustment that affected the darkening sky above the comet (hold the Shift key while you drag to constrain to a perfect horizontal or vertical line).
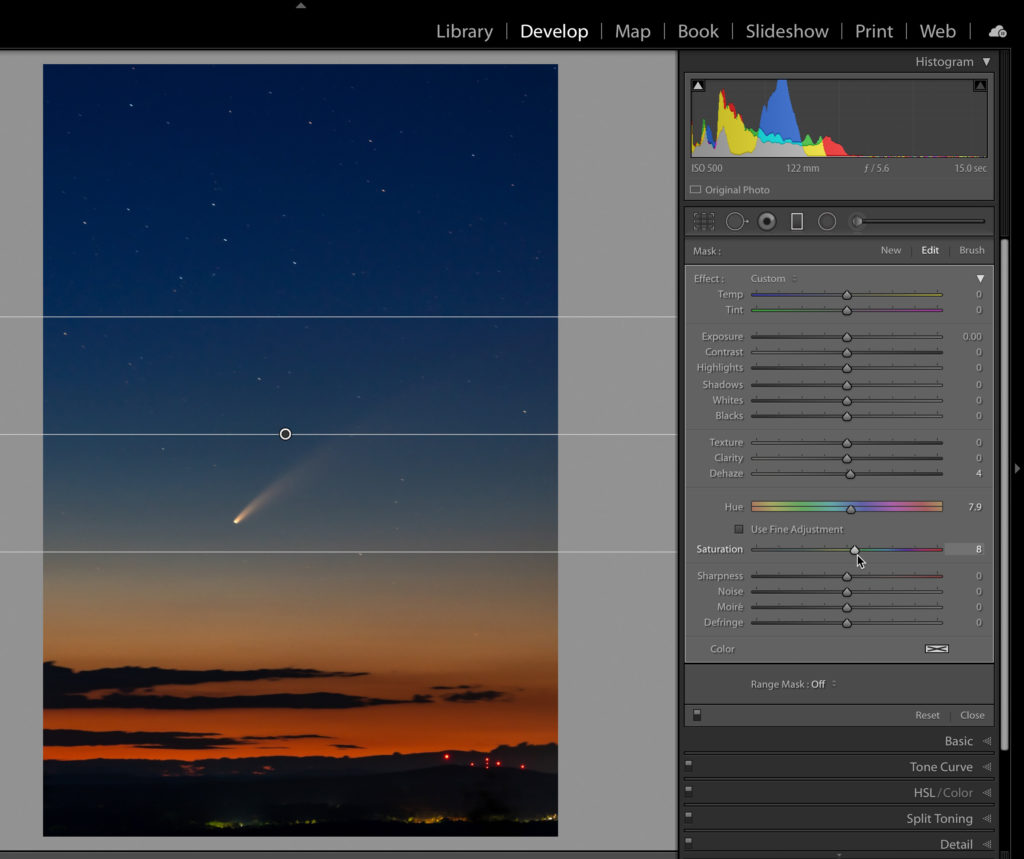
Then I used the Hue adjustment to shift the colors further toward deep purple-blues. In addition, I slightly increased Saturation and Dehaze to give it a deeper richness. Then I drew a second Graduated Filter that affected the sunset area below the comet, and shifted the hue in a negative direction into the reds, along with a similar Saturation and Dehaze adjustment to make it match more closely to how I felt when I was viewing that wonderful scene.
While the hue adjustment is new, we’ve always had the ability to adjust saturation and exposure in local adjustments, and using hue in combination with other controls is an extremely powerful combination. Keeping in mind that all of these local adjustments can be used together with global color adjustments and profiles means that we have an incredible array of color changing tools at our disposal. The challenge, and fun, is discovering new ways to bring our creative vision to life.
The post Explore the New Hue Controls in the Local Adjustment Tools appeared first on Lightroom Killer Tips.