This one works in either Lightroom Classic or ‘LR cloud’ and it’s a great tool for getting rid of those nasty green and purple or magenta fringe around the edges of things (it’s a common lens issue called “Chromatic Aberration”).
Here’s how to use the Defringe Eyedropper to get rid of it fast:
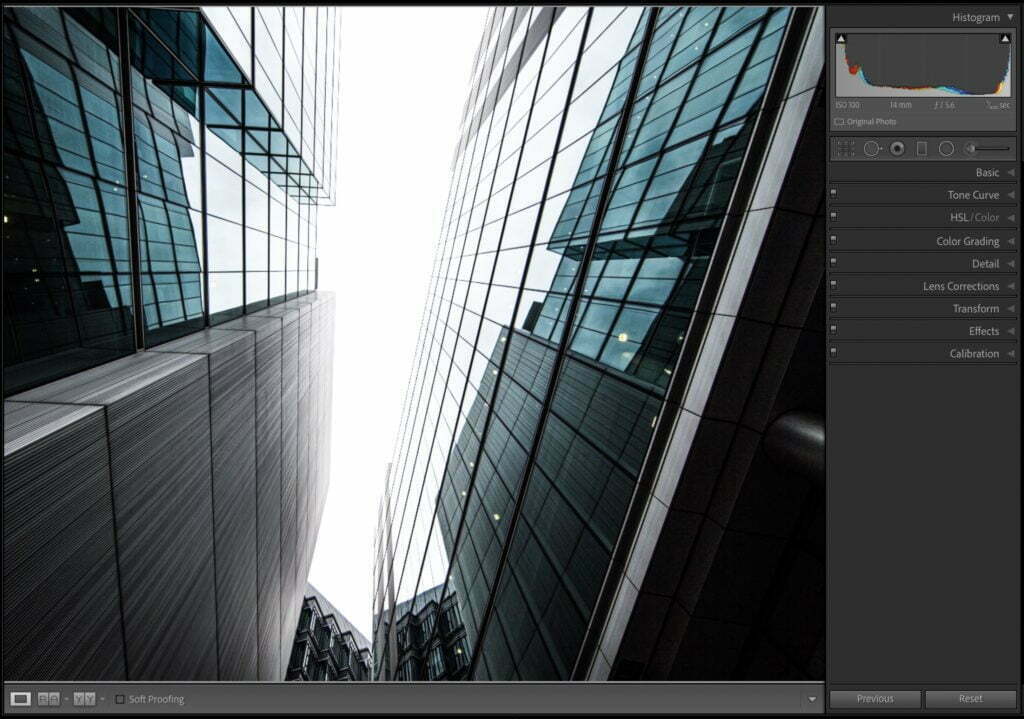
Above: Here’s our original image, and when its zoomed out like you see here, you can’t really see the fringe, but it’s there — lurking — just waiting for you to zoom in on the image.
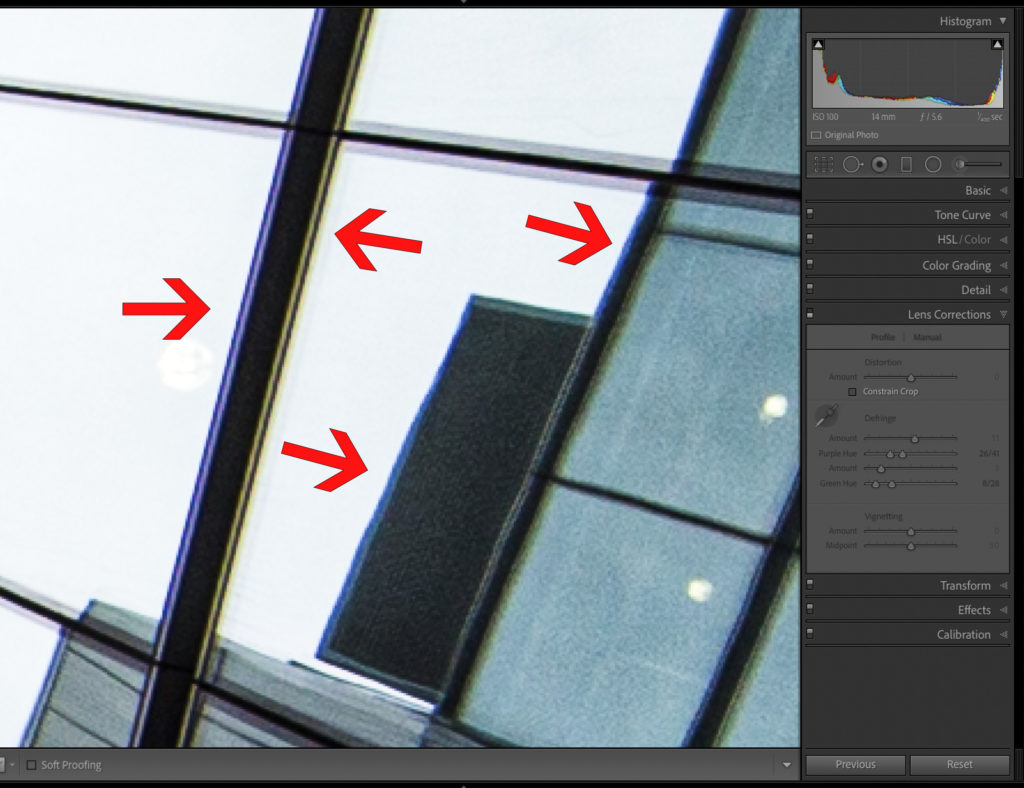
Above: Zoom in and you see it big time. Yeah, it’s like all over — purple, greens, and blues that shouldn’t be there.
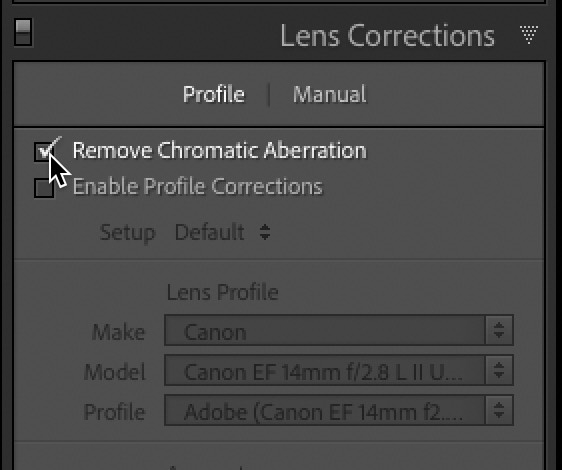
STEP ONE: Adobe recommends for the best results using the Defringe Eyedropper, go the Lens Corrections panel (called the Optics panel in LR cloud) and turn on the “Remove Chromatic Aberration” checkbox (as shown above). Just doing this alone might fix the entire issue, so once you turn it on, check your image to see if the color fringe is gone (this works more often than you might think). If it doesn’t, at least turning it on it helps with the next step.
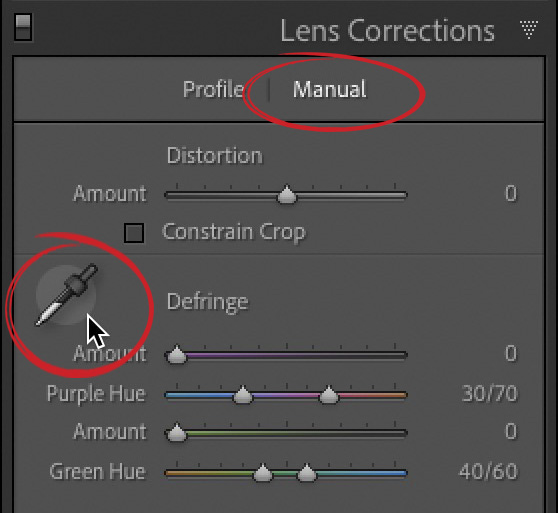
STEP TWO: At the top of that panel, click right on the word “Manual” to bring up the manual correction controls (seen above), and there you’ll see the Defringe eyedropper and sliders below it.
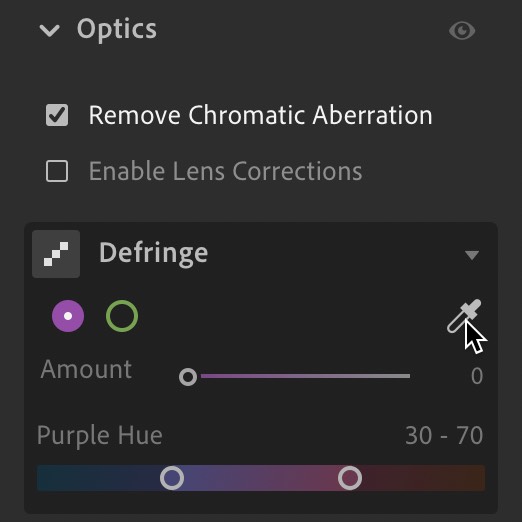
NOTE: If you’re using LR cloud, after you’ve turned on “Remove Chromatic Aberration in the Optics panel (seen above) you’ll see the word Defringe down a little lower. Click the little triangle over to its right to reveal the Defringe eyedropper (seen here).
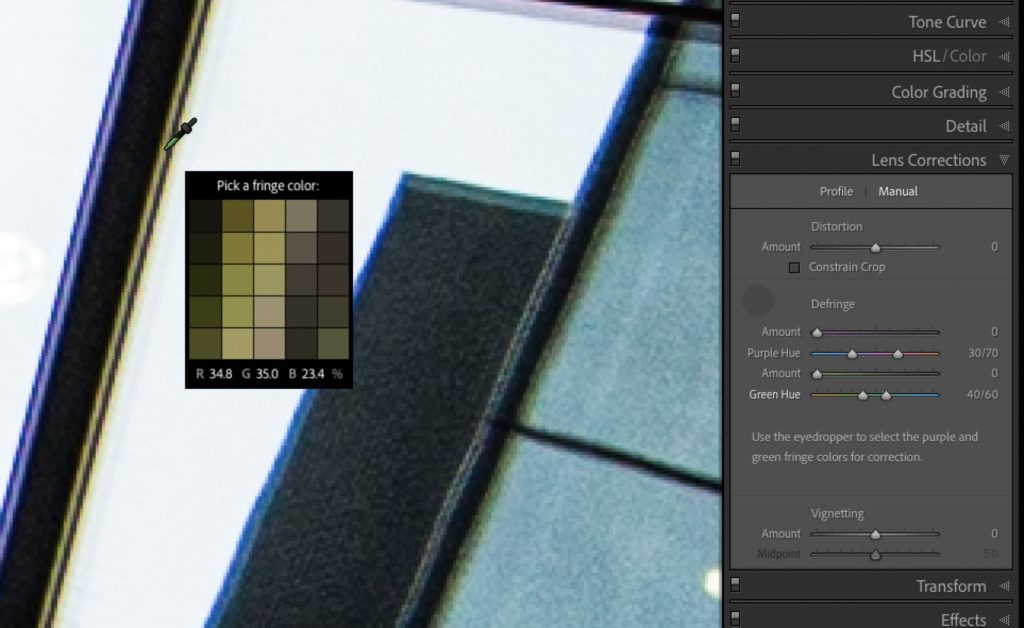
STEP THREE: Click on the Eyedropper tool to activate it and now move your cursor out over a color fringe area (they happen along the edges of things in your image), and as you pass over that color fringe area you’ll be able to see the out of whack colors easily thanks to the floating color magnifier grid that follows the eyedropper around. Now just click the eyedropper in that greenish area to have Lightroom get rid of that fringe (what it does really is move the Defringe sliders to the exact right colors for you to neutralize that fringe).
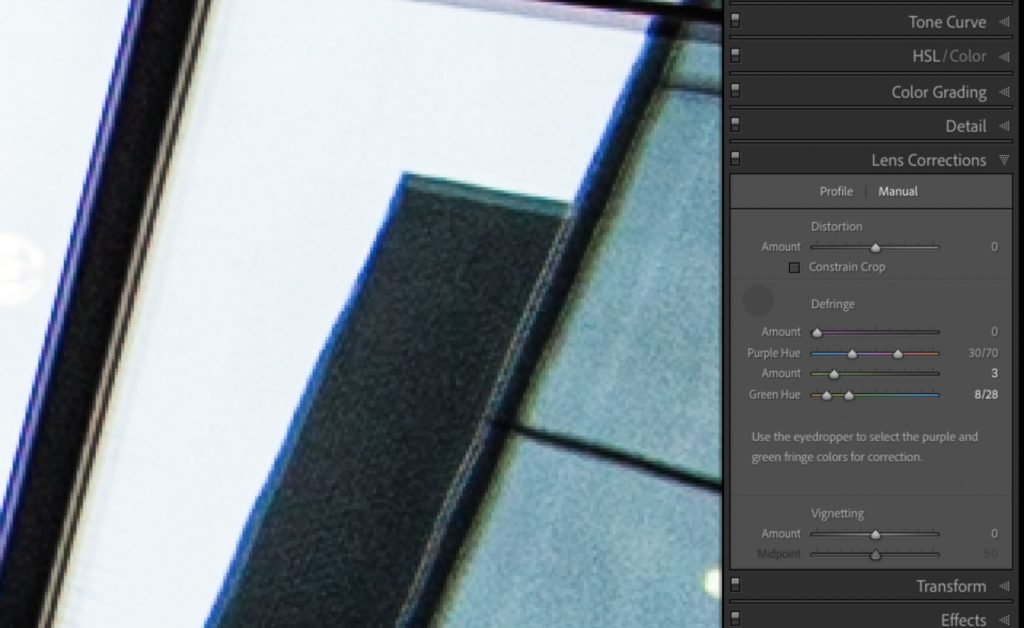
Above: you can see that one click removed the greenish fringe and replaced it with a neutral gray, and you can see the adjustments it made to the Hue sliders and the Amount slider right there in the Lens Correction panel.
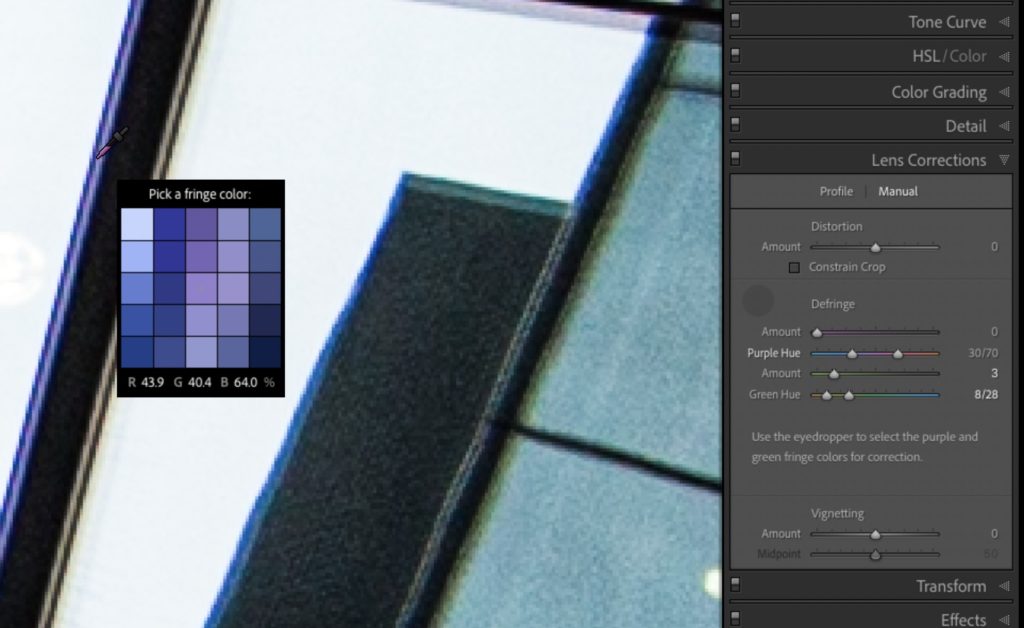
STEP FOUR: Now let’s get rid of that purple/bluish fringe by moving the Eyedropper tool over that blue area (as seen here). Again, once you’re over a big area of blue, just click once to neutralize that color.
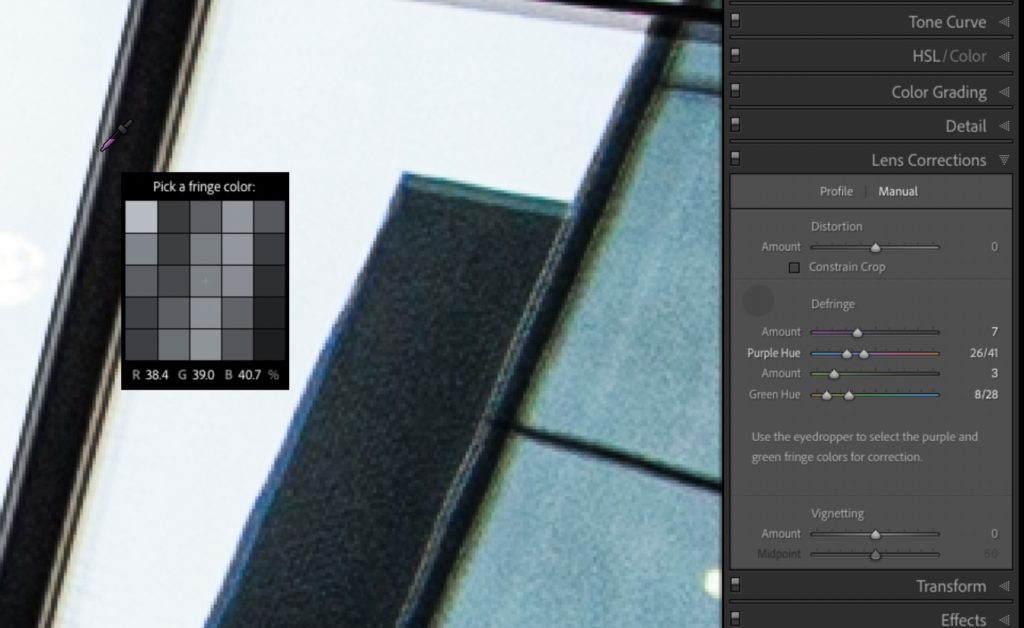
Above: Here the greenish and purple fringes are both gone and you can see the eyedropper now shows neutral grays where there was purple fringe just a moment ago.
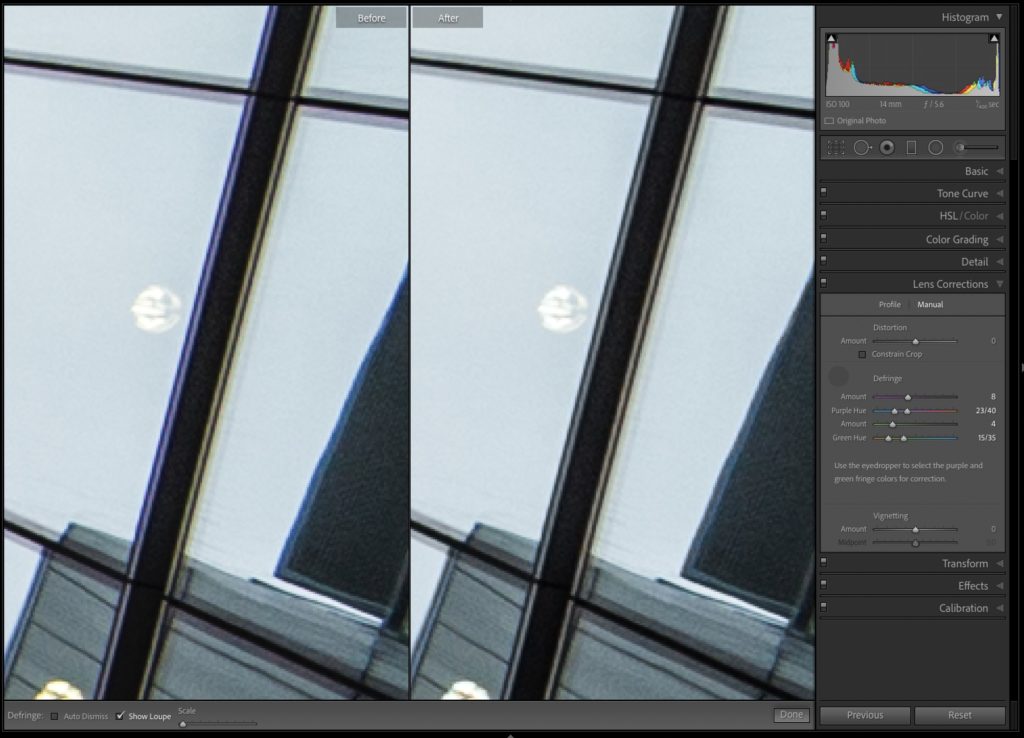
Above: Here’s a before/after after removing the Chromatic Aberrations (the fix is much more obvious when you see it large on your own screen in Lightroom).
Hope you found that helpful.
I have two big revelations over on my other blog today…
The first one may shock and surprise you (some may even unfollow me), and yet the second one, sadly, probably won’t surprise you at all. Here’s the link.
Hope you all have a fantastic, safe and fun weekend, and I invite you to come back next week and spend a few Lightroom learnin’ moments with Rob and me. 
-Scott
The post Getting Rid of Green and Purple Fringe Using Lightroom’s Defringe Eyedropper appeared first on Lightroom Killer Tips.
