In this Photoshop tutorial, I’ll show you 2 ways to combine images and 4 ways to seamlessly blend them together.
This is a great starting place to create composites, collages and digital Art in Photoshop. Also check out he 3-minute video above.
How to combine Photos in Photoshop
Right now we will look at 2 ways to combine images into a single image in Photoshop.
We are using 2 images. If you want to combine more, just repeat.
Choose the move tool (V Key)
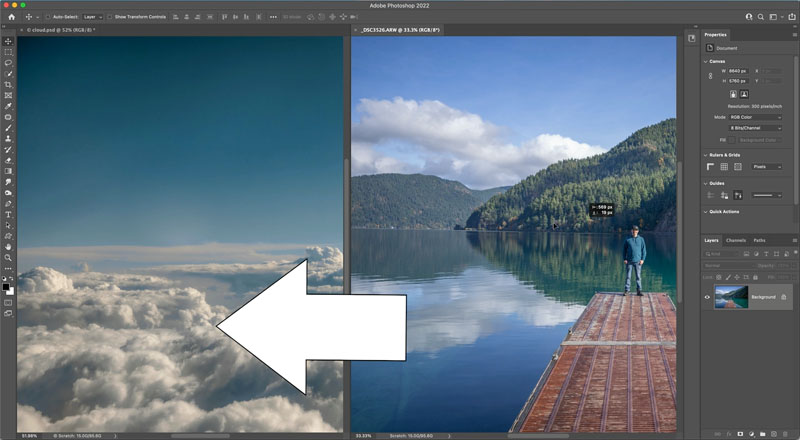
Drag in the image you want to move (source)
Drag up to the tab of the image you want to move to (Destination)
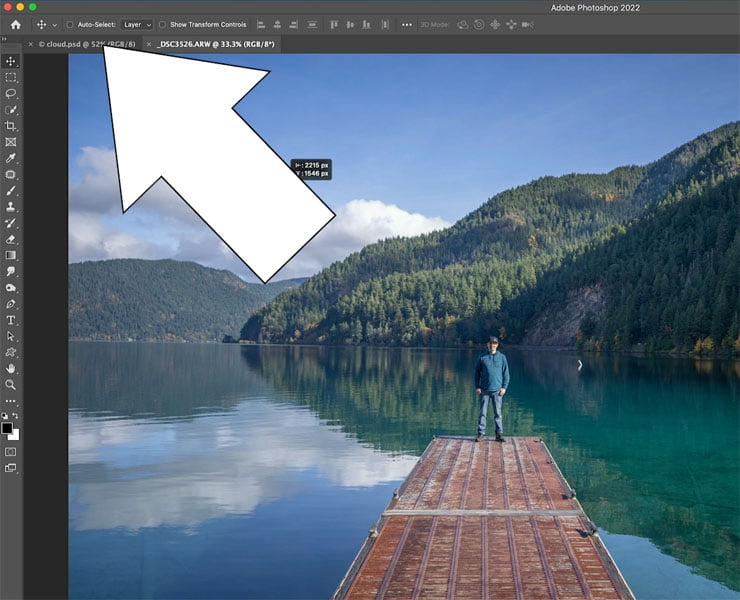
As you hover over the tab, the destination image will appear. Don’t let go yet.
Drag into the center of the the new image and then release.
Tip: if you want to center the image, hold down the Shift Key as you release.
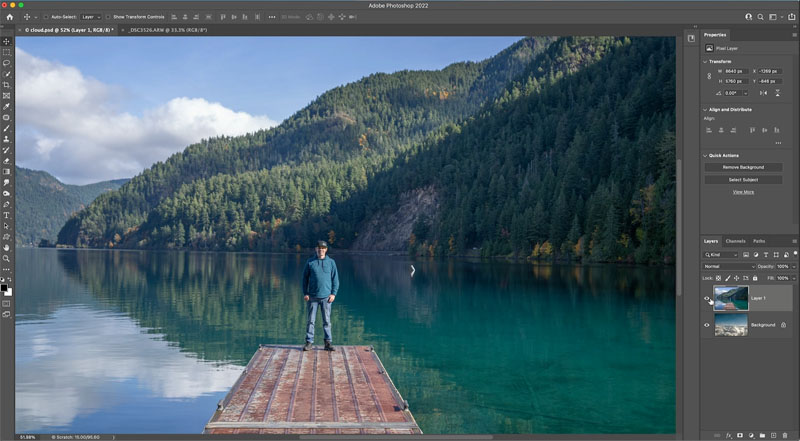
Combining images in Photoshop using tiled windows
The 2nd method of combining images. Both methods produce the same result. Use whichever works best for you.
Choose Window>Arrange>Tile
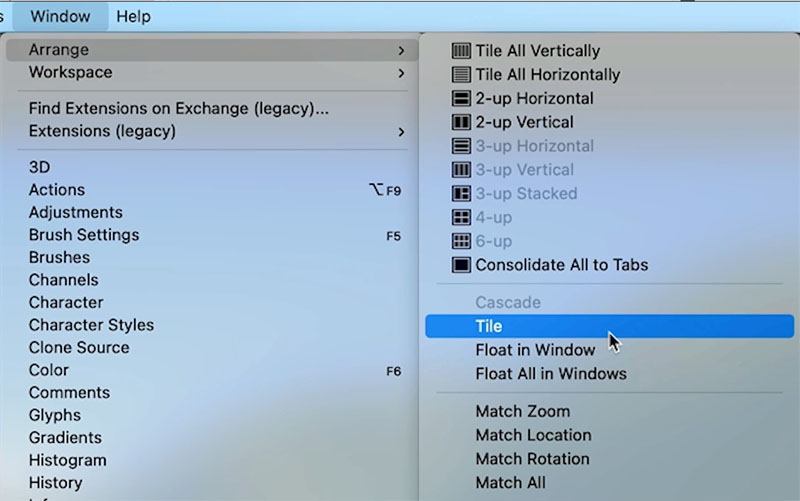
You will now see the different images in different tiled windows.
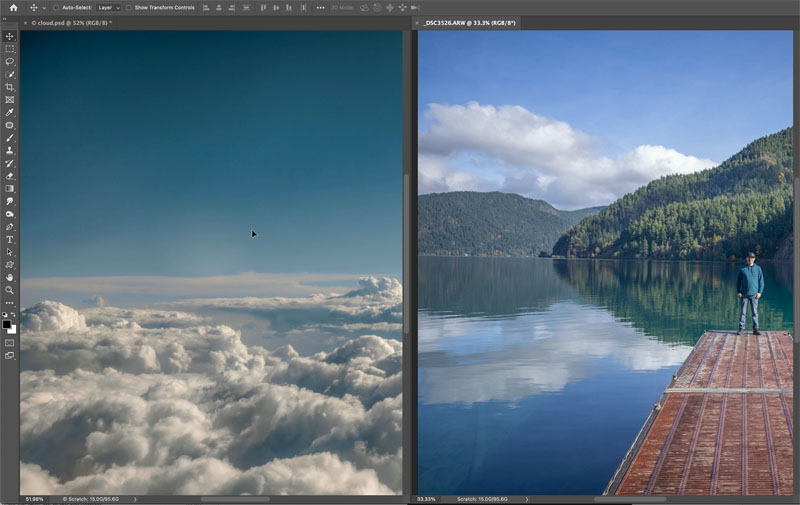
With the move tool (Tap V key) Drag from one window to the next, the image will appear on top as a new layer.
4 Ways to Blend Layers in Photoshop
I’ll now show you 4-ways to blend the layers together (really 3, plus a bonus, so I guess its really 4).

#1 Blend Layers using Layer Blending Modes
For all the examples, we will use a simple document with 2 layers and we will blend the top layer into the bottom one.
Click where it says normal in the layers panel.
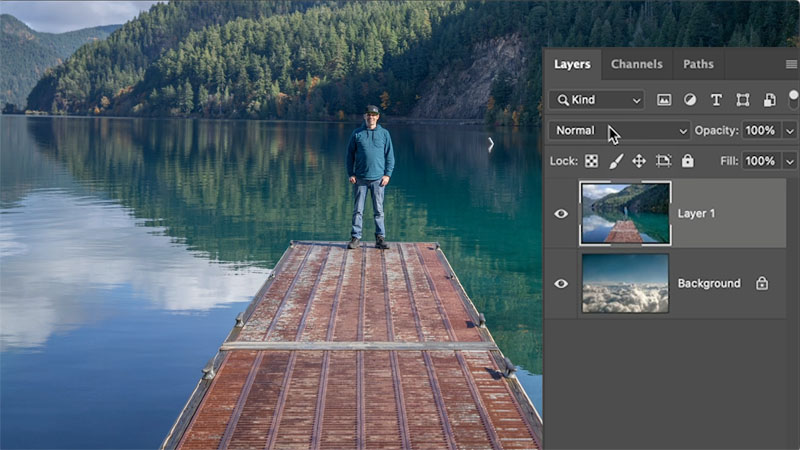
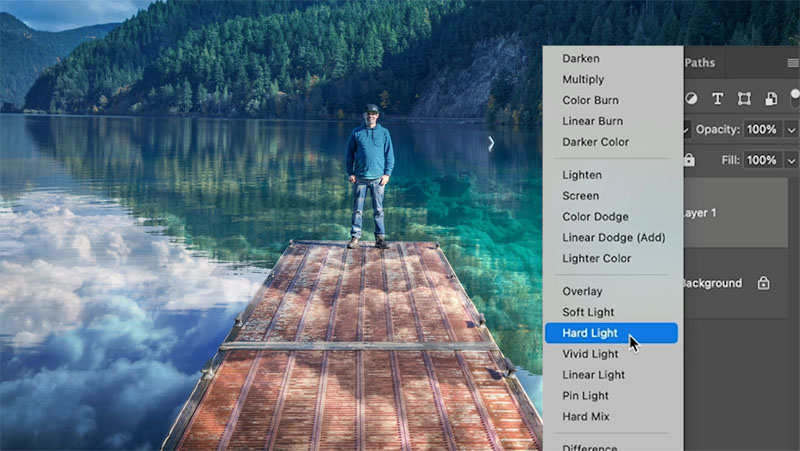
Try the different modes and see how they look. Hard Light is good in this case.
See the in depth tutorial on Layer Blending modes here.
#2 Blend Layers using Layer Masks
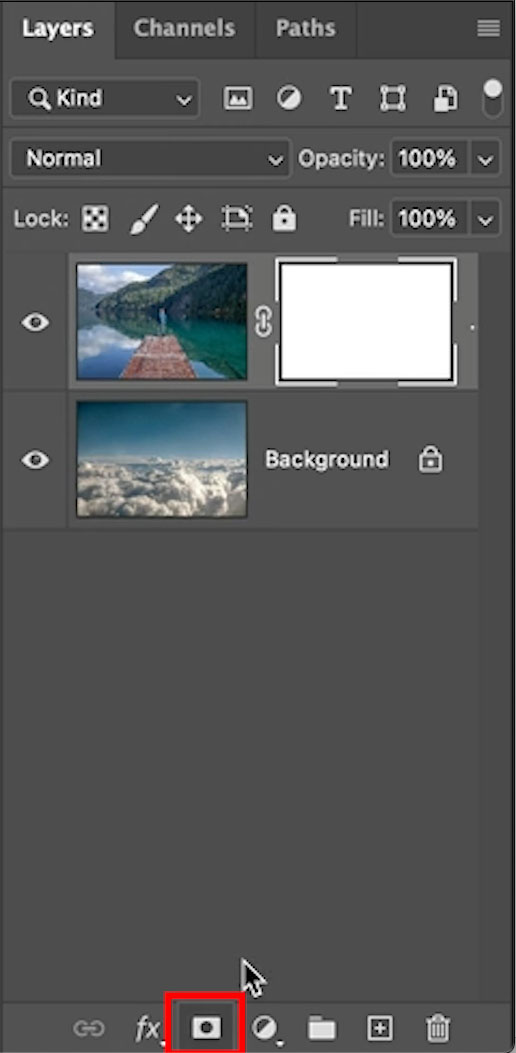
Click the new Layer mask button in the Layers panel to add a mask.
Here is a tutorial on how layer masks work, with tips.
Choose the gradient tool (G key)
At the top, select the black to white gradient
Type:Linear; mode:normal; Opacity:100%
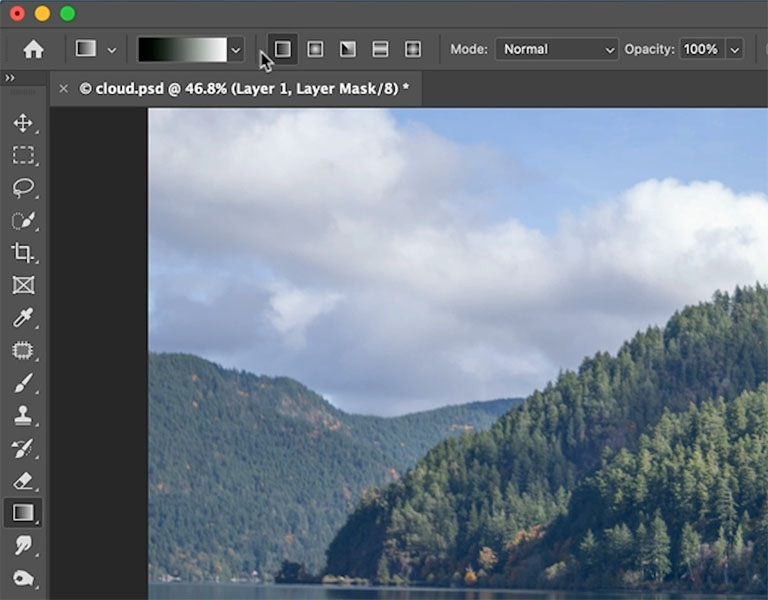
Drag up on the image to apply the gradient. The black and gray areas will be hidden and white will show.
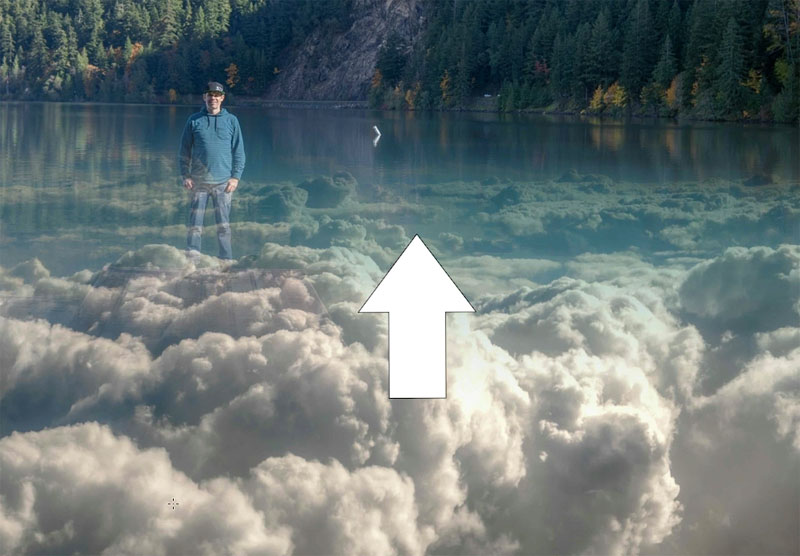
Try starting and ending your dragging movement in different places to see how this changes the result.
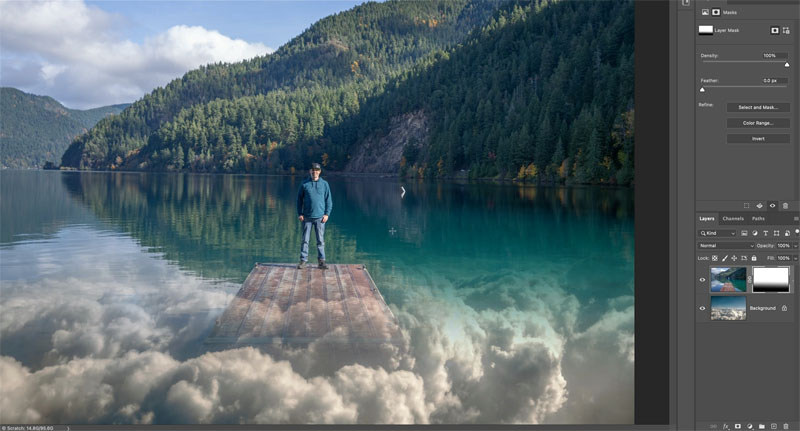
#3 Blend Layers by cutting out the background
Choose the quick selection tool (You can use any of the selection tools, here is a tutorial on selections)
Choose Select Subject
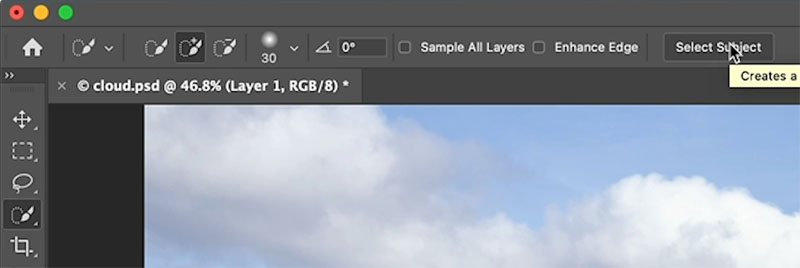
You will see a selection. You may have to refine the selection with the quick selection tool.
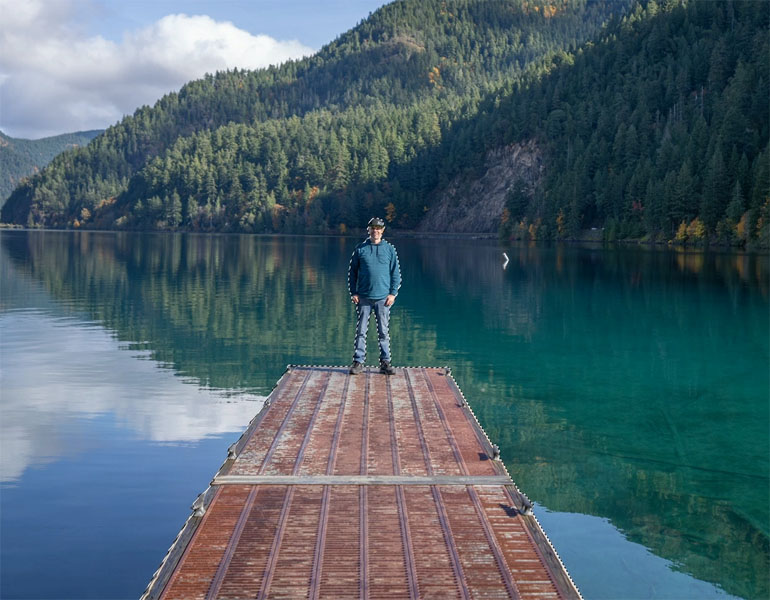
With the selection active, click add a layer mask in the layers panel
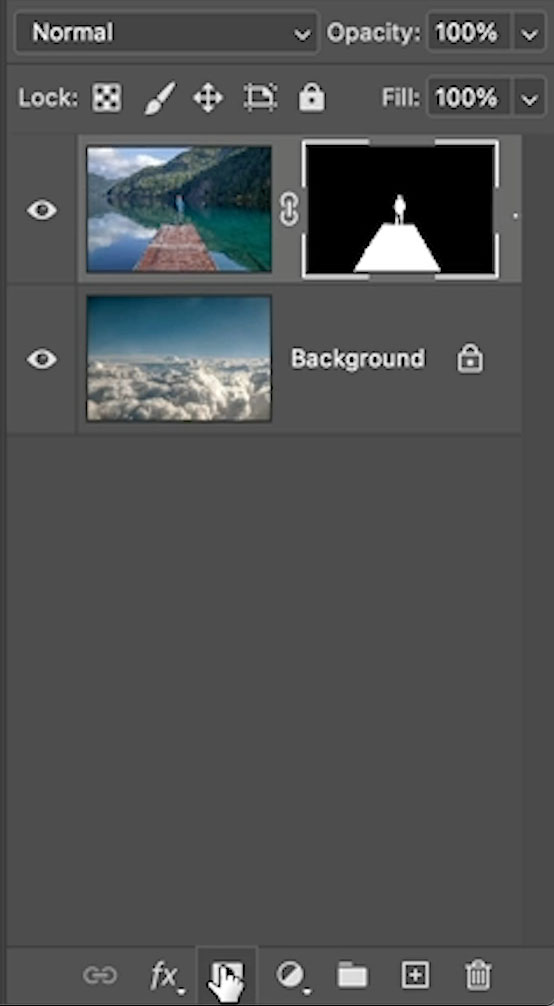
Now you can see the background shows through.
I have many tutorials here on the site that show you different ways of making selections, cut out and cleaning up the edges.
Also check out my Sky city compositing project

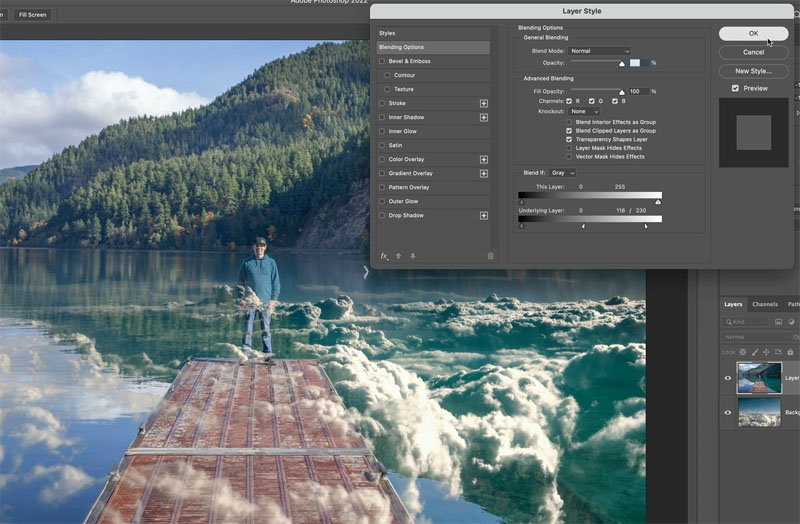
#4 Blend Layers using blend if
With the top layer selected, choose the FX at the bottom of the layers panel
Click Blending Options at the top.
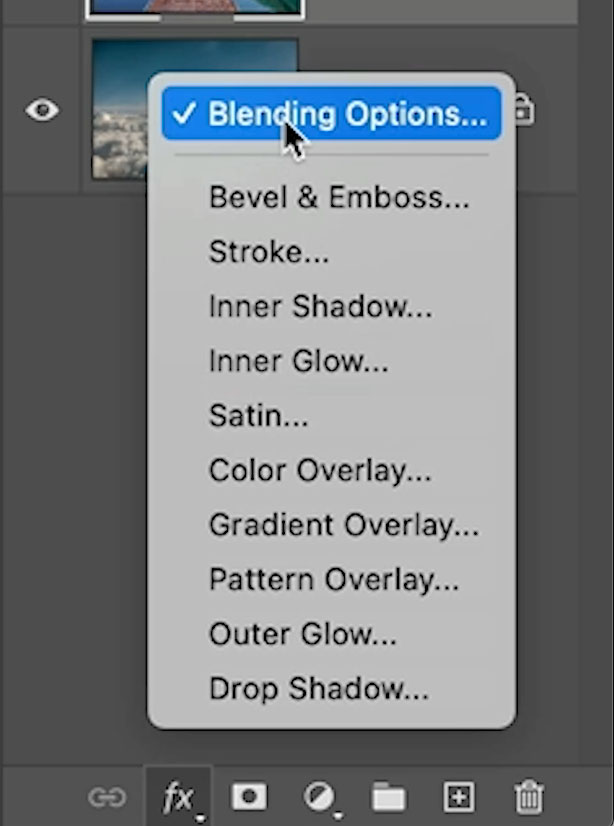
The Layer Style window will appear.
Under blend if, slide the white slider on underlaying layer to the left.
Notice the white areas on the bottom layer start to show.
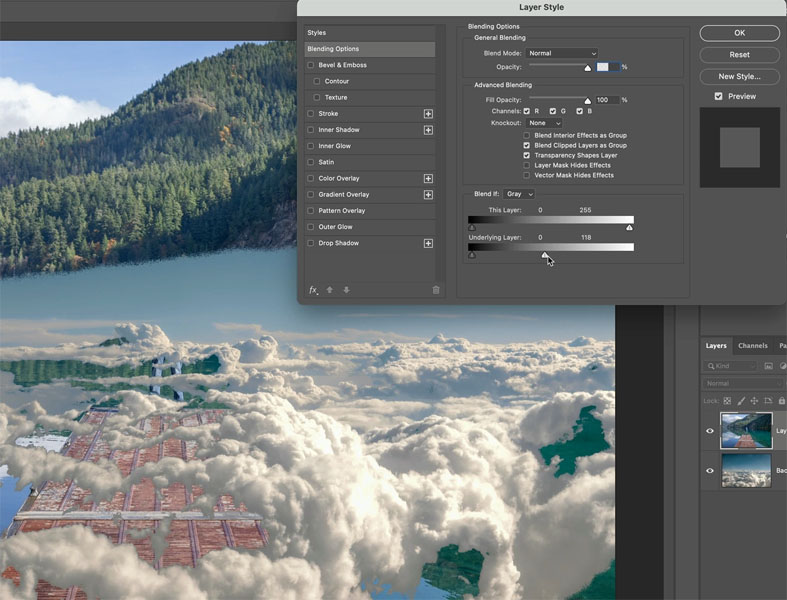
To smoothen out the blend, hold down the alt/option key and split the white triangle.
Move one side of the triangle to the left and the other to the right. Notice how it creates a neat effect.
All these methods are good springboards to get you started with composites and digital art. There are many more tutorials here at PhotoshopCAFE to help you complete these composits and turn them into works of art. As always, check out the short video at the top to see all this in action.
The post How to combine images and blend them together in Photoshop appeared first on PhotoshopCAFE.
