Opening Photoshop in Photoshop from Lightroom Classic.
This tutorial shows you how to work with photoshop between Lightroom Classic and Photoshop. Definitely watch the video at the top, as it will help to see this, but the written steps also provide more details. Most of this will work on all versions of Lightroom, I have noted where it’s specific only to the newest versions. This gets a little bit more advanced about 1/2 way through. he beginning part is useful for all users both advanced and beginning. If you are new to Lightroom check out my Learn Lightroom in 15 minutes tutorial
If you are using Lightroom to manage your photos, there are times you want to send a photo to Photoshop. You should make your main adjustments in Lightroom first. Then go to Photoshop to use layers and filters. It’s common to use Photoshop for retouching, Dodging and Burning, Layered composites and special effects. We are going to look at the different ways for working with Photoshop and Lightroom. There are many options, you will learn which are the best options for your needs, and there may be some you aren’t aware of yet.
Opening a Lightroom Photo in Photoshop for the first time
You have made some adits in Lightroom, now you want to move the photo to Photoshop. You will want to bring it into Photoshop as a Smart Object, because you will maintain quality and flexibility.
In Lightroom Classic Right click on the photo and choose Edit>Open as Smart Object In Photoshop.
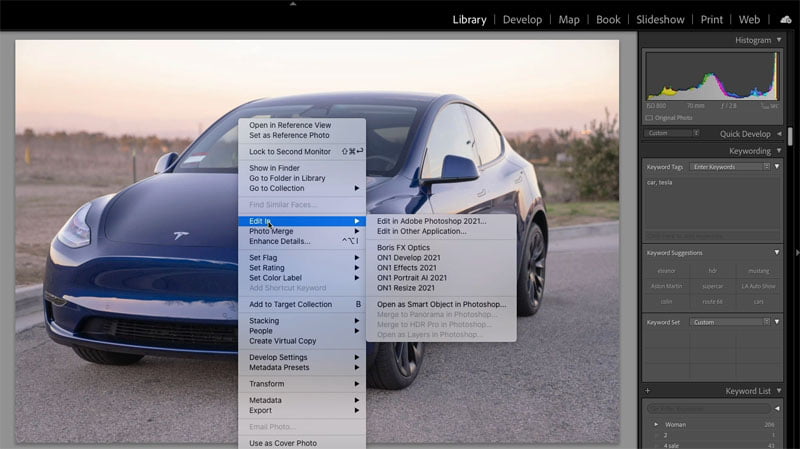
You will see the Photo opens in Photoshop.
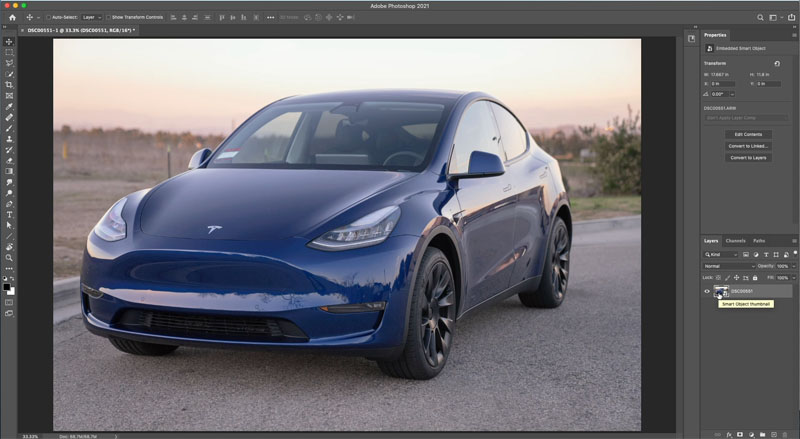
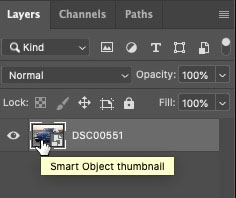
Look at the layer thumbnail. The badge in the lower right indicates this is a Smart Object.
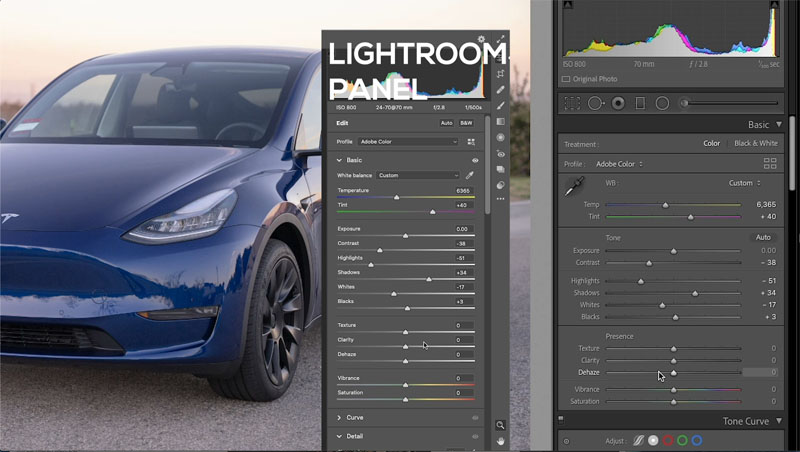
Double Click the thumbnail to Open the Raw file in Camera Raw
Notice it maintains all the settings from Lightroom.
Make any adjustments and click ok and the image in Photoshop will be updated.
Once you choose Save in Photoshop (Ctrl/Cmd+S) and go back to Lightoom, notice the image has updated to look like the one in Photoshop. This isn’t the original raw file though
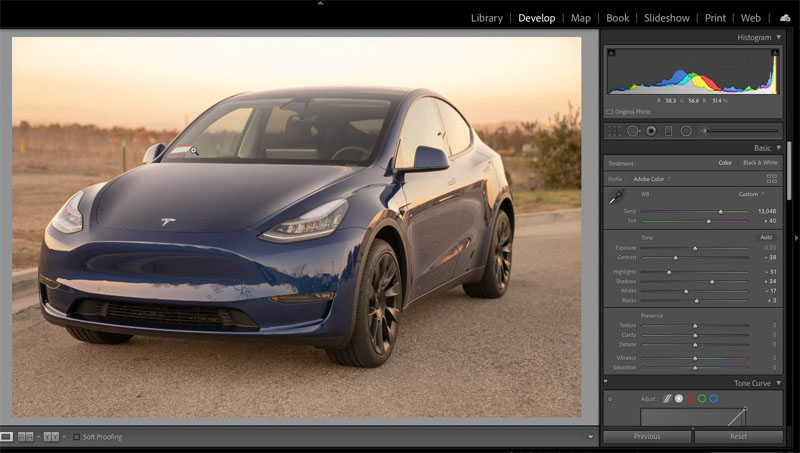
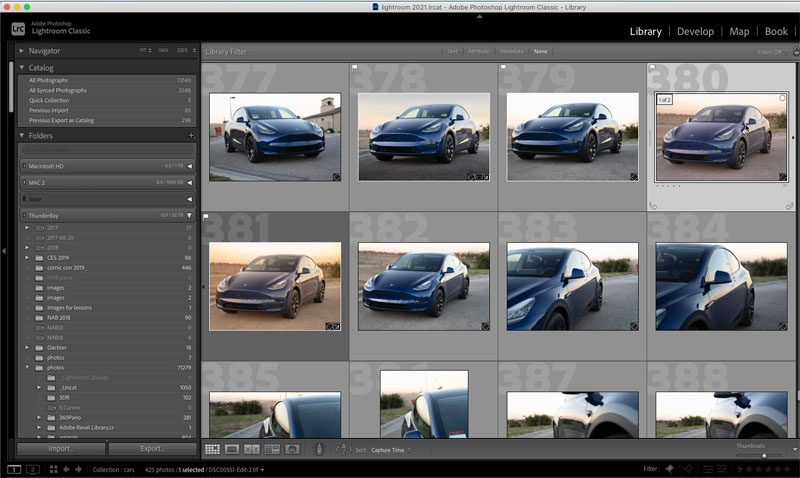
A new file is created on your hard drive next to the original Raw file and it it’s automatically imported to Lightroom and put in a Stack with the original raw file.
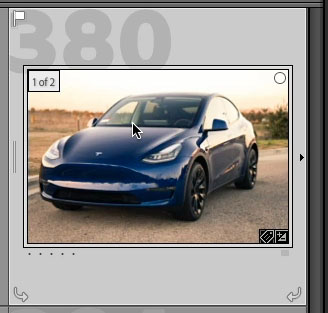
See there are 2 images now.
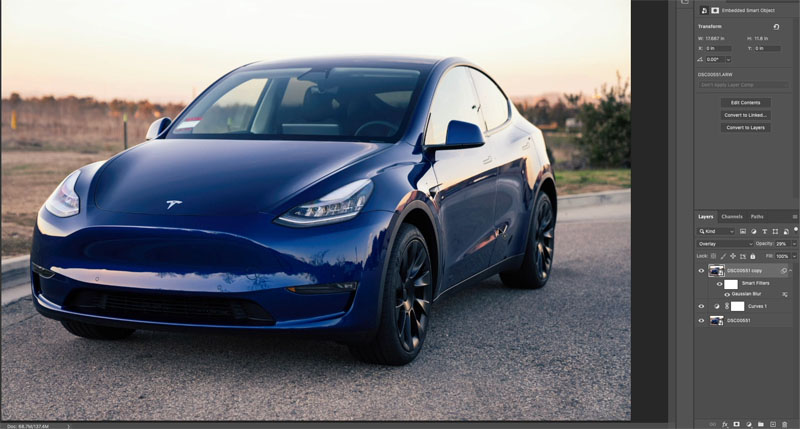
Go back to Photoshop and Make more changes, even work with Layers.
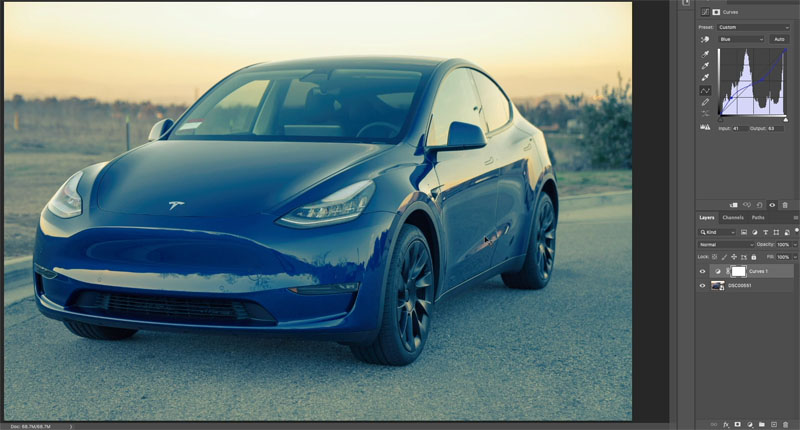
Choose Save in Photoshop and now the image will be updated in Lightroom. It won’t create a new copy each time, just the one time and then it will update that image (Tif).
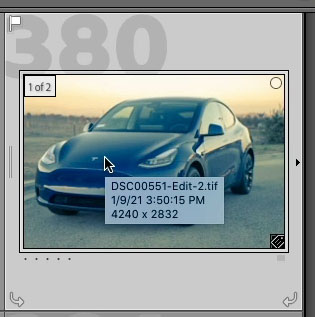
You can now go back and forth as much as you like and keep working in Photoshop. But Don’t make further changes in Lightroom on this image, double click the Smart Object in Photoshop to make those changes in Camera Raw. Camera Raw and Lightroom adjustments are the same.
If you want to make further changes in Lightroom, thats possible and we cover that later in this tutorial.
Opening a Photoshop Image from Lightroom.
Once Lightroom has created a new File from Photoshop, we don’t want to open this as a Smart Object anymore, this will make it hard to access the Raw copy in Camera Raw. We only open the original Raw file as a Smart object, not the copy.
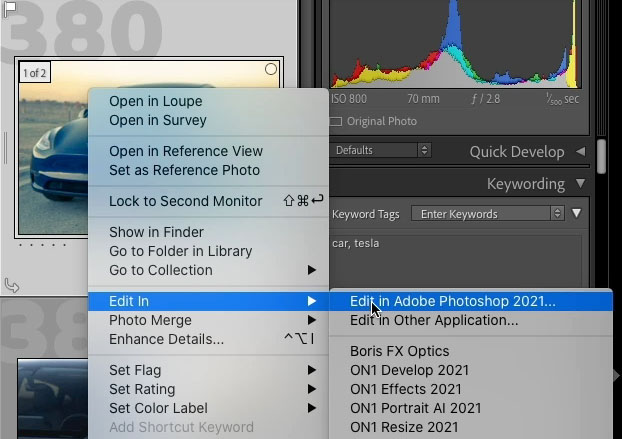
When you are working on the Photoshop created Tif file in Lightroom, right click and choose Edit in>Edit in Adobe Photoshop
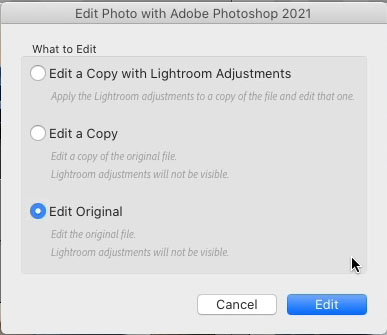
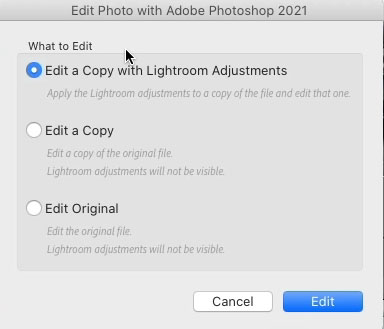
You will now see a pop up with 3 options. We will cover all 3.
Most of the time you will choose Edit original.
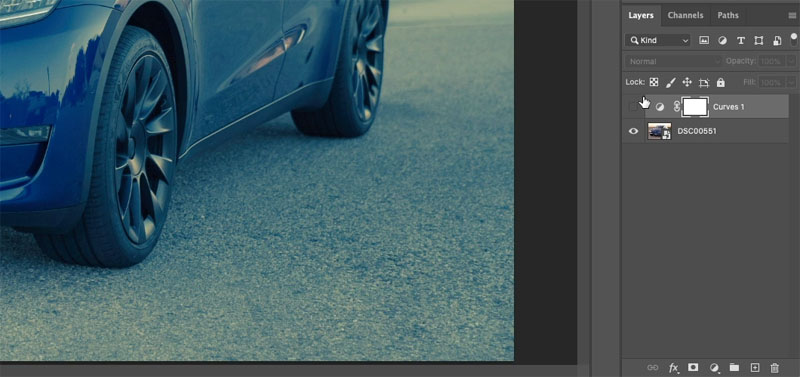
As you see here, when it opens in Photoshop the Layers are still there. This is good, Edit original doesn’t flatten the file.
Opening an existing Photoshop image with Lightroom adjustments applied.
Remember, we are working with the copy from Photoshop here, not the RAW file, if we were working with a RAW file we would choose the Smart Object Option.
We have made adjustments, opened in Photoshop, worked in Photoshop and then closed out. Now we make an adjustment in Lightroom after Photoshop. Maybe we used a preset, or just wanted a quick tweak.
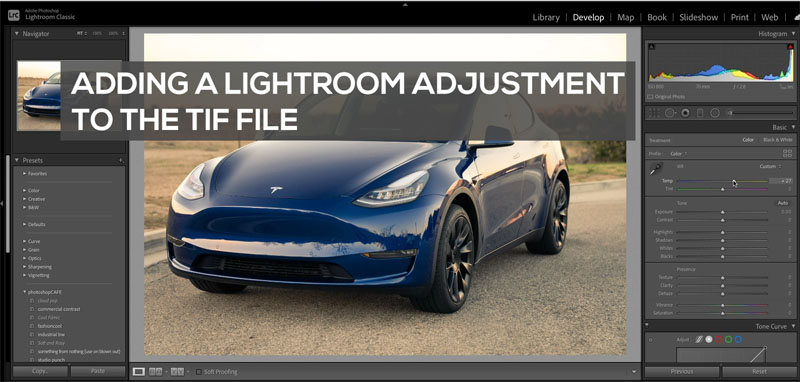
Lets see our options,
If you choose Edit Original
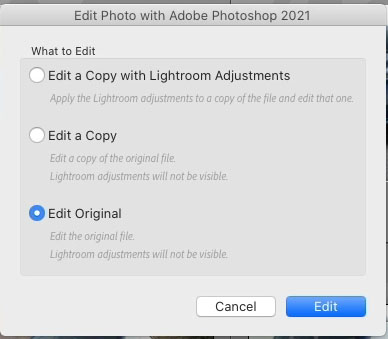
The original File will open in Photoshop as before. The Lightroom changes don’t show.
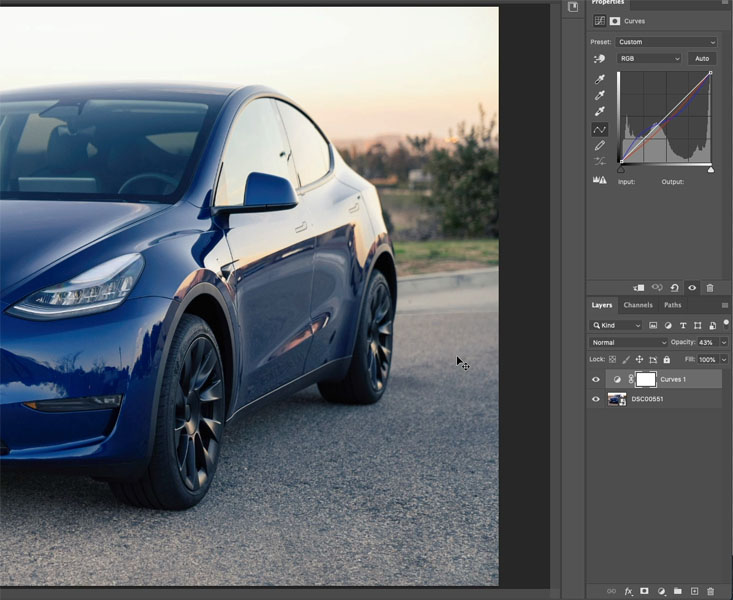
Make your changes in Photoshop and save.
Lightroom reflects the changes,
Lightroom adds adjustments back (see the Temp). So the adjustments are temporarily disabled.
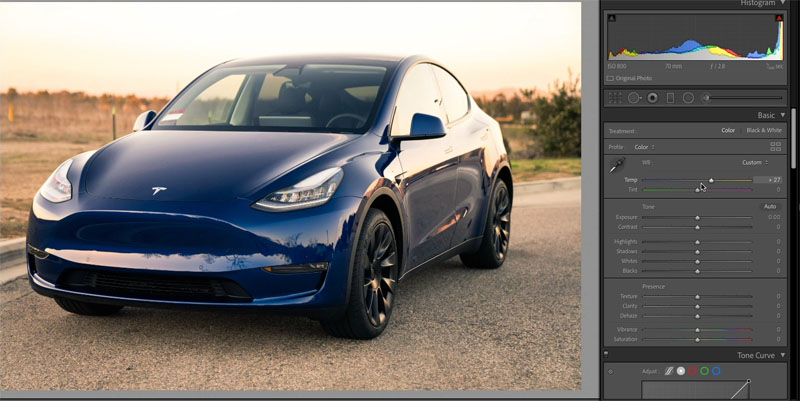
Keeping the Lightroom adjustments in Photoshop
Ok, say we just want to open the image in Photoshop and don’t need all the layers. Maybe we are going to tun it into a composite, print it, or do other work that doesn’t require the original layers anymore.
Chose Edit a Copy with Lightroom Adjustments.
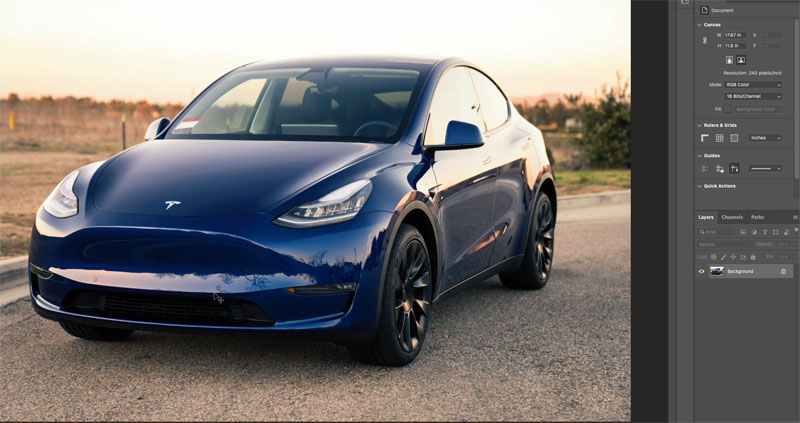
Now the image will open in Photoshop and look just like it did in Lightroom. Also notice that the image is flattened. So be very careful of hitting the same button, or you will loose the layers.
Opening in Photoshop and transferring the Lightroom Adjustments.
Let’s look at how to open the image in Photoshop, keep all the layers, but get the Lightroom adjustments onto the photo.
Choose Edit a Copy
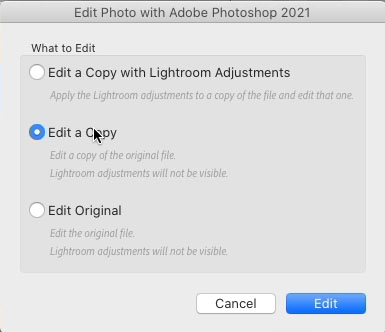
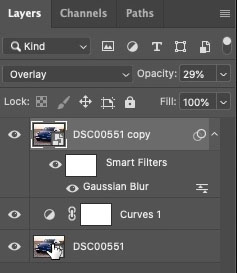
It will open with the layers intact, Lightroom adjustments are hidden. It looks just like the Edit Original, and it is, with one difference..
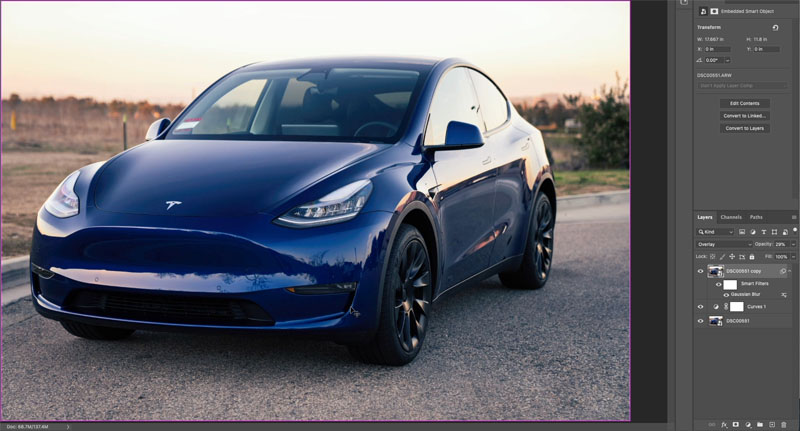
In Lightroom, notice a third version of the image now exists. This allows you to make adjustments without changing the original raw file or the copy that Photoshop Made.
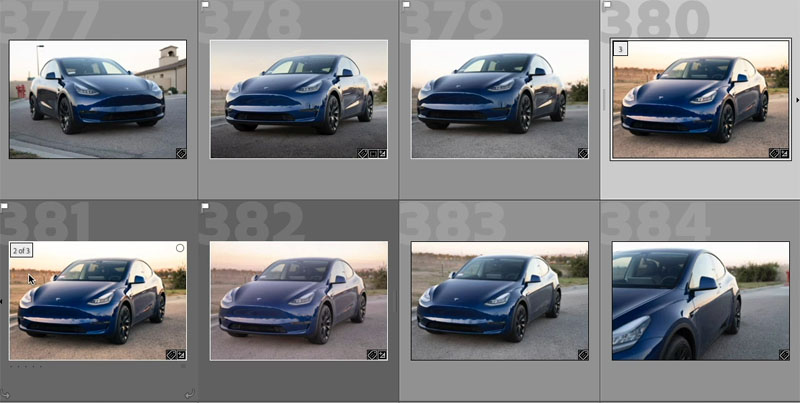
Let’s get those adjustments over to Photoshop.
In the Develop Module, click on Presets>Create Prest

Give the preset a name
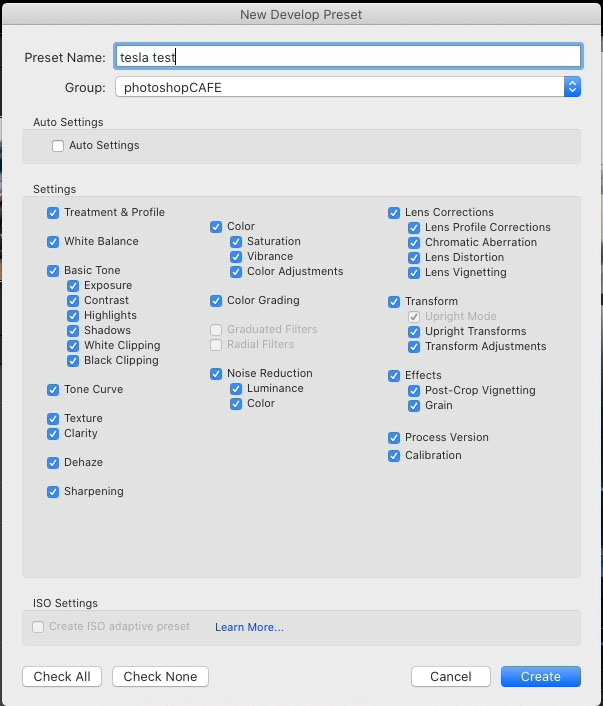
Return to Photoshop
Double click the Smart Object Thumbnail to open in Camera Raw
In Camera Raw choose the Presets button on the left (On a tab on older versions of Camera Raw)
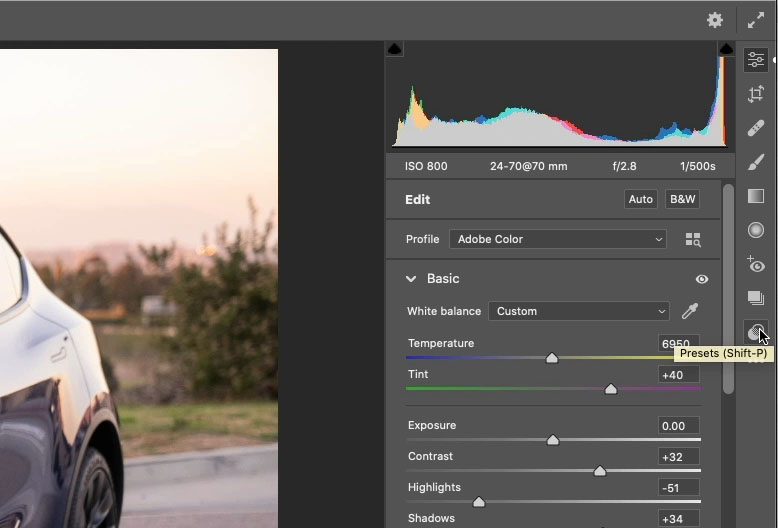
You will see the preset we made. Yes, Camera Raw now shares presets with Lightroom Classic. If you are on an older version of Camera Raw, you will have to create a separate preset first.
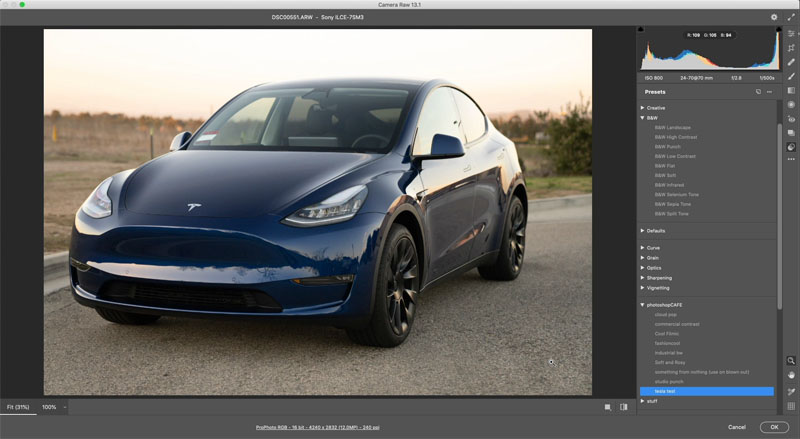
And now you see the image now looks like it did in Lightroom.
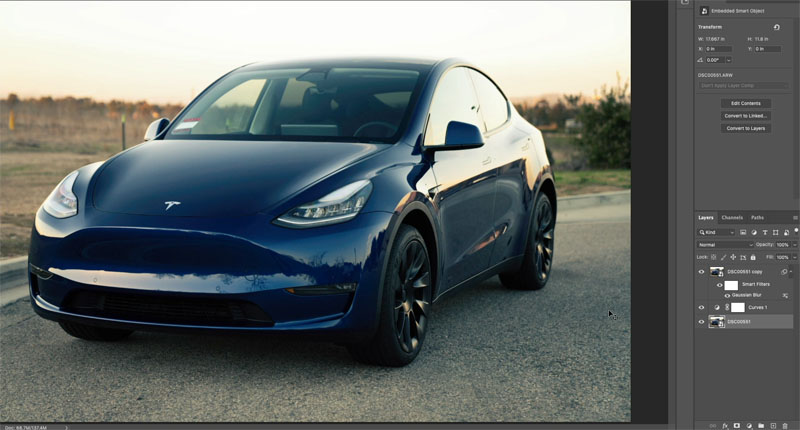
Once you save the image and look in Lightroom is doesn’t look that same anymore. This is because of double processing. It now has the original Lightroom adjustment as well as the preset we applied in ACR (Adobe Camera RAW).
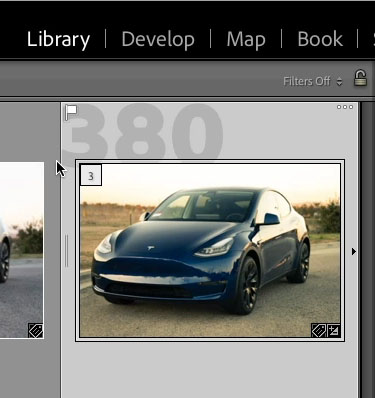
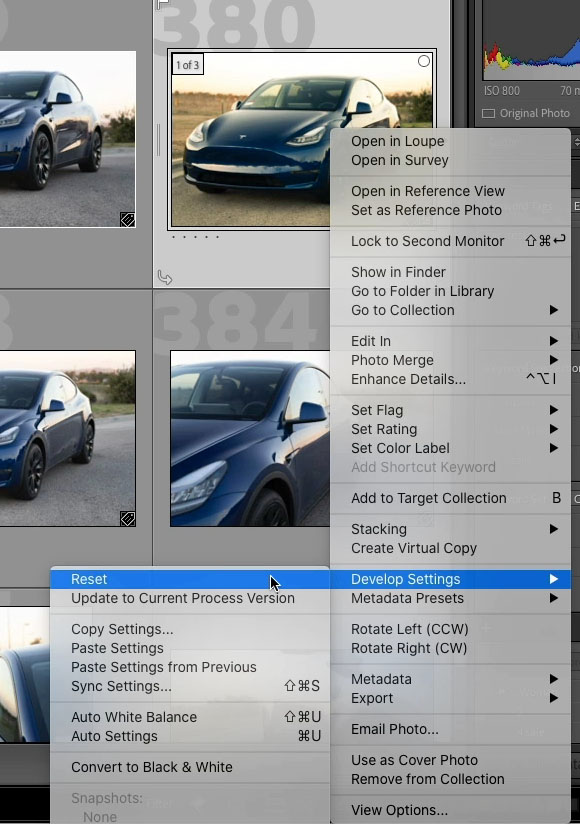
This is easily fixed, Righ click on the thumbnail and choose Develop Settings>Reset
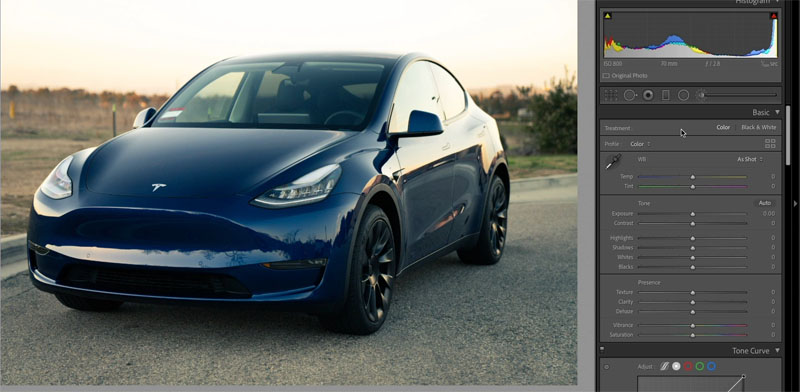
And now the image is looking they way it should again.
Alright, we have looked at different ways of working between Lightroom and Photoshop.
Quick recap:
Make your initial adjustments in Lightroom.
Right Click, Edit in> Open as a Smart Object in Photoshop. Apply Photoshop Adjustments and choose Save.
If you want to work on that Photoshop Layered File again, choose Edit In>Open in Photoshop. (Edit Original)
If you want to change the RAW settings, its best to open the Smart Object in Photoshop, however if you make changes in Lightroom to the Photoshop image..
If you want to keep the Lightroom adjustments (Adjustments made after you bring the images back from Photoshop) choose Edit In>Open in Photoshop (Edit a Copy with Lightroom Adjustments)
If you want to create a copy of the Photoshop file and preserve the original, choose Edit In>Open in Photoshop (Edit a Copy with Lightroom Adjustments)
Great to see you here at the CAFE
Colin
Browse our hundreds of other free tutorials here, or search for what you are looking for in the search at the top of the page.
You can also browse by topics in the free tutorials menu.
If you are ready to get serious about Photoshop, see our full length courses here
PS Don’t forget to join our mailing list and follow me on Social Media>
(Ive been posting some fun Instagram and Facebook Stories lately)
The post How to Open Photos from Lightroom in Photoshop appeared first on PhotoshopCAFE.
