One of the first things people want to know how to do in Photoshop, is to sharpen a photo. This would seen pretty easy, right? It’s not really clear to a beginner, because, they would choose the sharpen filter. Strangely this isn’t the best option. In this tutorial I’ll show you the best option along with explanations of what the different sliders do when you sharpen in Photoshop. As well as this easy sharpening technique, I’ll show a second more advanced, sharpening technique in Photoshop.
Let’s start with this photo I shot of musician, Taylor Davis. Notice that Taylor is in focus and the foreground and background are out of focus. We want to sharpen the in focus area.

1.
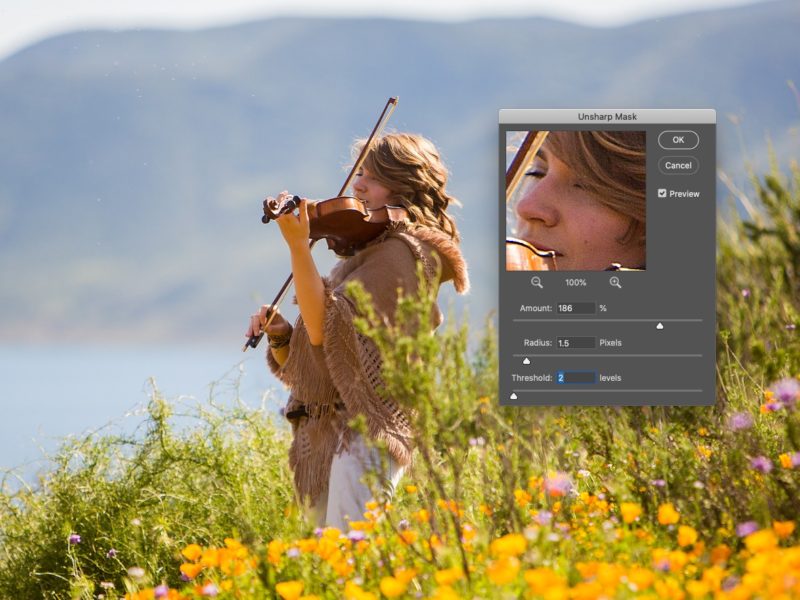
Choose Filter>Sharpen>Unsharp Mask
This is the easiest tool to sharpen photos in Photoshop. (The video explains its name and how it works).
2.
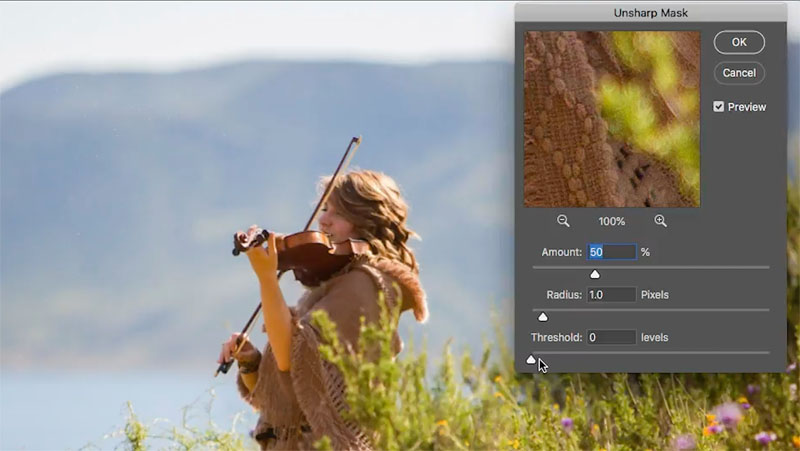
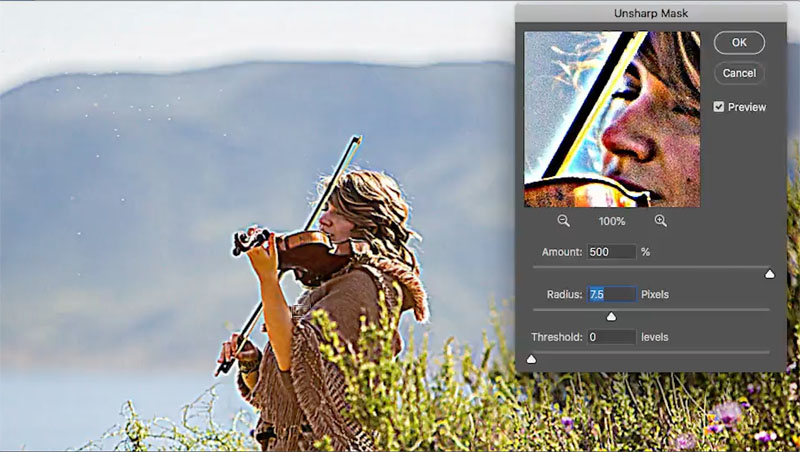
Let’s look at the 3 sliders one at a time, I will overdo then, so you can see what they do, then I’ll show you the actual settings to use.
The Amount is how strong the sharpening effectis

3.
The radius puts a halo around the edges, this adds contrast, which makes things look sharper. (Almost like clarity in Lightroom / ACR)
4.
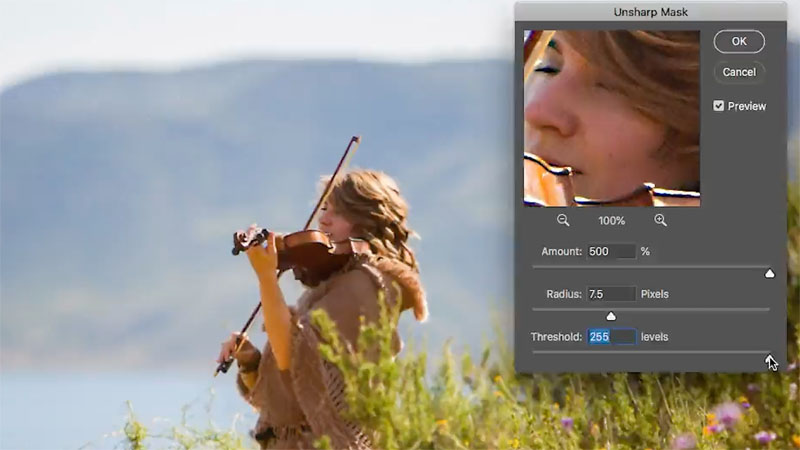
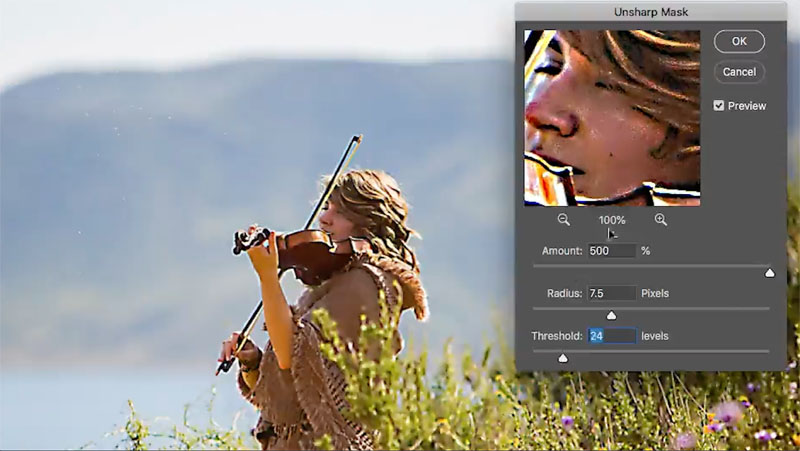
The threshold is how you adjust what gets sharpened.
- 0 threshold: Everything is sharpened
- 255 threshold: Nothing is sharpened is sharpened
5.
24 threshold: Now it’s more the details, but the surfaces are largely not sharpened.
6.
In reality, we wouldn’t use such aggressive settings, as over sharpened photos don’t look good. Watch the edges for a “sizzling” appearance or obvious halos, we don’t want that.
Here are the final settings I used on this photograph. 186 / 1.5 /2 (I don’t usually go above 2.0 on the radius)
This is working well.
High Pass Sharpening
Right now, we are going to look at an additional way of sharpening in Photoshop, this is called High Pass Sharpening and it allows us to selectively sharpen. (The proceeding method also can be selective if you use Smart Objects)
1.
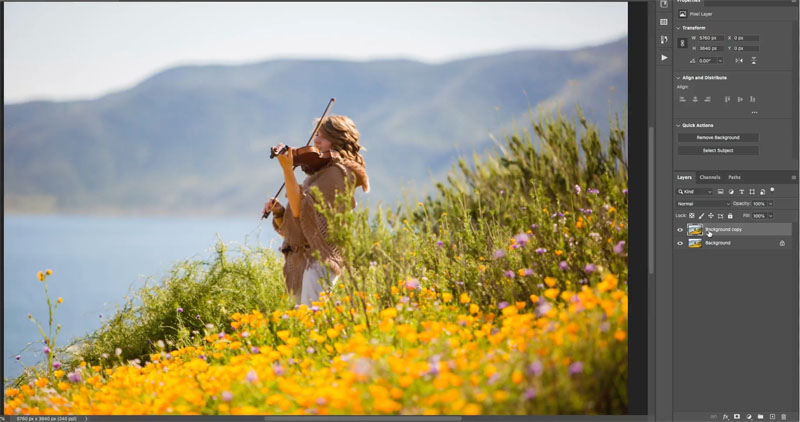
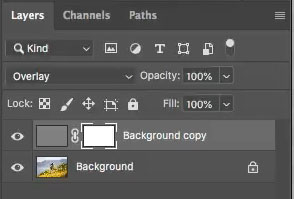
Begin by duplicating the layer
2.
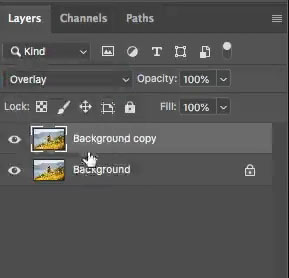
Change the Layer blending mode to overlay (More on Blending modes here)
It will look different, but don’t worry, this is just an intermediate step, it will look normal in a second.
3.
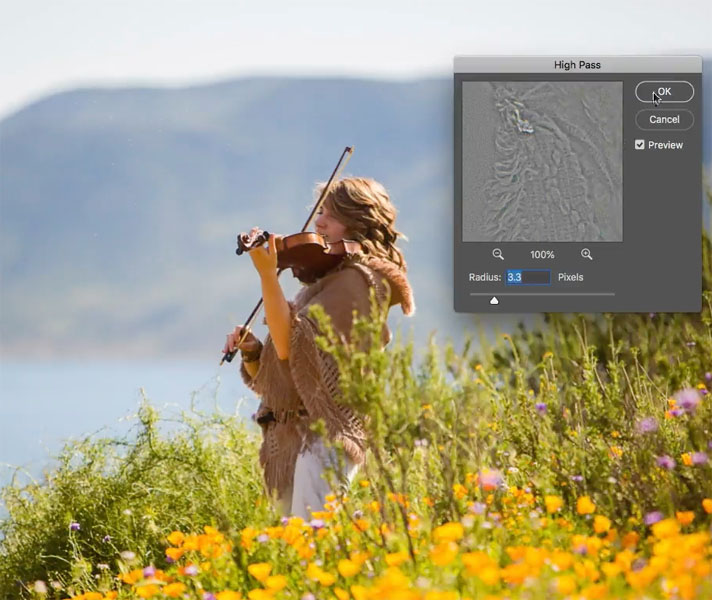
Choose Filter>Other>High Pass
As you move the slider, you can see the effects of the sharpening. In a way this is also how the unsharp mask works, but you can see it more clearly here.
4. Now, I want to remove the sharpening effect from the hair; Sharpening hair can make it look dry and brittle.
Click on the new Layer Mask icon in the layers panel. (The rectangle with a circle in it).
5.
Choose the brush tool (B) key. Use a soft edged brush.
Choose black as the foreground color.
Paint away the sharpening from the hair, and also the face.

I hope you enjoyed this fundamental tutorial, from our fundamentals series. For more of these types of tutorials, choose the Photoshop basics category from out free tutorials here at PhotoshopCAFE.com.
By the way, if you would like to learn these types of thing throughout Photoshop, you really should check out my Flagship Photoshop training. Photoshop Secrets, Photoshop 2020 For Digital Photographers is the best investment you will ever make in learning and mastering Photoshop. It will take your knowledge leaps and bounds ahead.
Browse our hundreds of other free tutorials here, or search for what you are looking for in the search at the top of the page.
You can also browse by topics in the free tutorials menu.
If you are ready to get serious about Photoshop, see our full length courses here
PS Don’t forget to join our mailing list and follow me on Social Media>
(Ive been posting some fun Instagram and Facebook Stories lately)
Great to see you here at the CAFE,
Colin
The post How to Sharpen a photo in Photoshop appeared first on PhotoshopCAFE.

