
In case you missed it, Photoshop and Camera Raw got a new update. Typically, ACR gets updated at the same time as Lightroom Classic and Lightroom, but that didn’t happen this time. When will it happen? Adobe doesn’t announce those things in advance, but I’d have to think it will be around the corner. So, until that day comes I thought I’d look at how a Lightroom Classic user could try out this new Super Resolution feature in ACR, by starting in LrC. Unfortunately, at the time of this writing, Lightroom 10.1.1 does not seem able to import these new super resolution files. I’ll update when I know more.
Super What?
Super Resolution is an evolution of the Enhanced Details functionality that allows one to enlarge a low resolution photo to a resolution four times its original size (meaning that the vertical resolution doubles as does the horizontal resolution). Eric Chan, one of the super geniuses that works on the ACR team has a super informative article that explains it way better than I can, so take it from him. Here’s the short version:
- Only exist in ACR (13.2) right now.
- Works with raw, JPG, and TIF files.
- Essentially a very intelligent digital enlargement (powered by machine learning).
- Results in a DNG file that you can edit as you would any photo.
So, could you take a high resolution photo and enlarge that to insane sizes? Yes, yes you can, though it does currently have an upper limit of 65000 pixels on the long side and 500 megapixels, which seems pretty reasonable (though I am sure there are some who will want more, don’t we always?).
I first got into digital photography back in 2000 when I learned I was about to be a dad, and so I picked up one of these new digital cameras I’d been hearing about. It was a 3.1MP Kodak point and shoot camera that I absolutely loved. So, I went back to a favorite shot from soon after my son’s arrival, and threw it into ACR to see what would happen. Here’s the Fit View and 100% view of the new 12.4MP version of that photo.

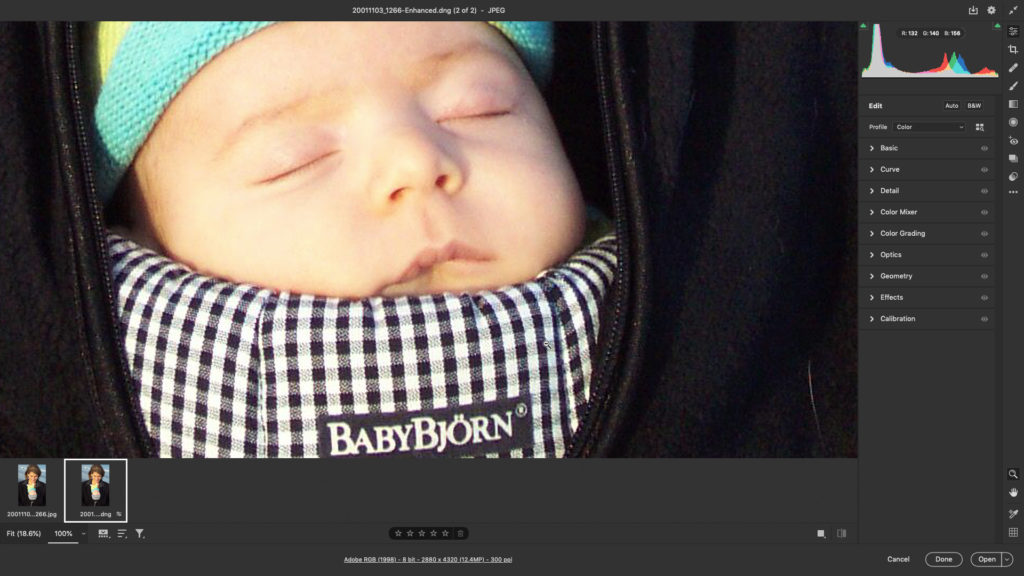
Consider me super impressed!
How Do I Get There From Here?
Eric does say in that article linked above that this feature will be coming to LrC and Lr in time, so until then, here’s a little workaround for you to give this a try. Of course, I am assuming you have a current CC subscription so that you have access to the latest version of Photoshop, and that you’ve installed the update. While you are at it, install Bridge too. I’ll wait.
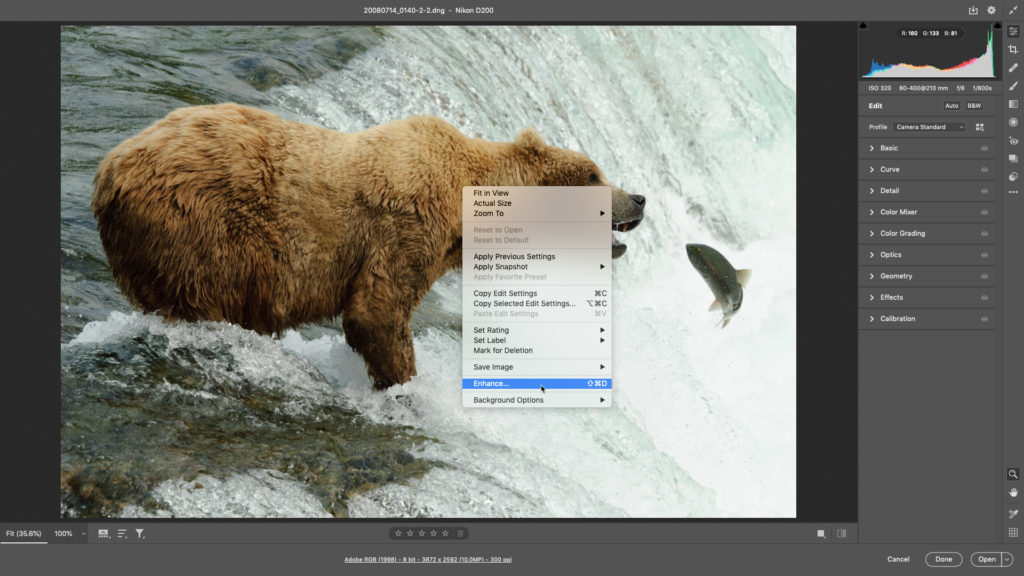
Great, next, open LrC and find the photo you want to test this with. Eric suggests you’ll get the best results from a raw photo, but short of that, the cleanest version of what you have will have to do. Since we are testing, throw whatever you want at it and see how it does. I’ll take a 10MP raw photo from my trusty old Nikon D200 circa 2008, and see what it can do.
Step One: Starting in LrC, select the photo you want to super size. If you want your LrC edits to appear in ACR, then press CMD/Ctrl+S to have LrC write settings to the photo’s metadata. I’m taking an unedited version.
Step Two: Press CMD+R (PC: Ctrl+R) to open your file browser to that photo. Same as right-click, Show in Finder/Explorer.
Step Three A: If it is a raw photo, like this one, Adobe Camera Raw is likely the default program on your system for raw photos, so just double-click the photo to open it into ACR. If it is not a raw photo or ACR is not the default program for raw photos, see the next step, Three B, if it opened in ACR, skip to Step Four.
Step Three B: Drag the photo from the file browser onto the Adobe Bridge icon in the Dock/Taskbar and that should open Adobe Bridge to that folder with that photo selected. I know that works on Mac, but I’m not able to test that on Windows at the moment, but give it a try.
Step Three C: From Bridge, go to File > Open in Camera Raw.
Step Four: In Camera Raw, right-click the photo and click the Enhance command in the contextual menu (and note the shortcut).
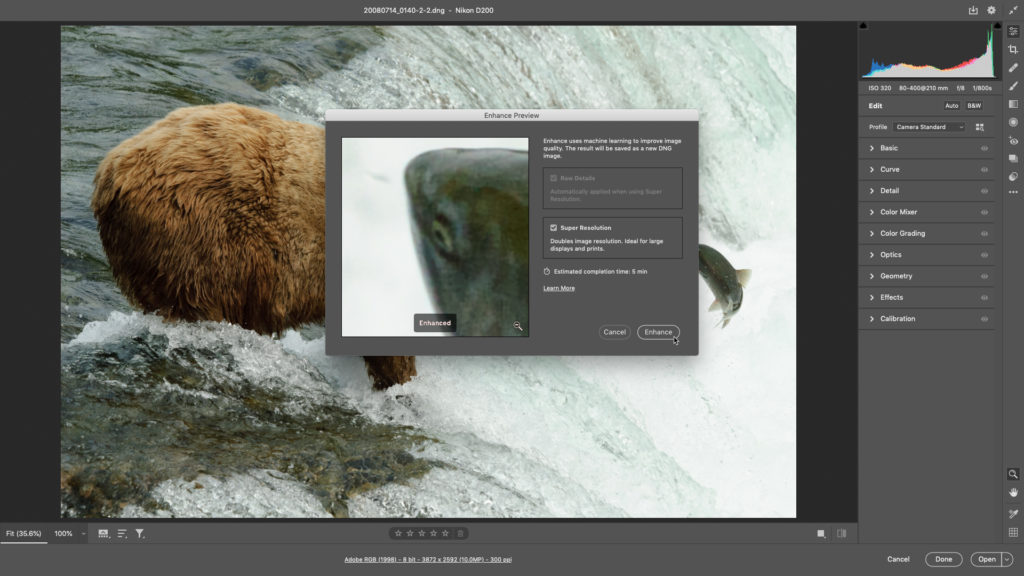
Step Five: This will open the Enhance Preview window where you can see a sneak peek of the results and, if you choose, the option to proceed to enlarge the photo by clicking Enhance. This is a resource intensive process, so be prepared for that. Especially if you are throwing already large files at it.
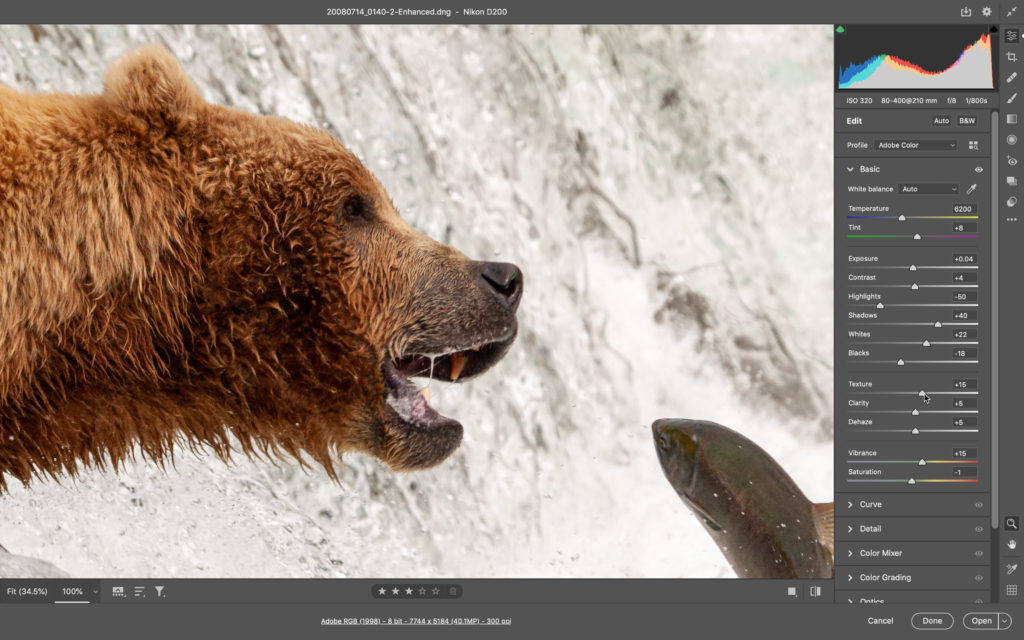
Once the process has run, you may not notice it if the Filmstrip is hidden, so click the Filmstrip icon (or press the / key to show it). The new version will have the word Enhanced appended to the end of the file name. Kick the tires and check it out while in ACR since you can even edit it like any DNG file, and then open a copy into Photoshop. Seeing my 10MP file transform into a 40MP file with pretty clear detail is impressive.
Step Six: When finished, click the Done button to save any ACR edits if you want, or click Cancel to close out of ACR. The copy has been saved to the same folder as your source photo. Hopefully we’ll soon be able to import these into our LrC catalogs (or just create them in there from scratch).
Clearly that is not an optimal workflow for a LrC user, and yes, you can absolutely just start and end in Adobe Bridge if that is simpler, but not every LrC user is savvy with Bridge (and I might recommend my earlier article if you are new to Bridge). So until this makes its way to LrC we can at least give it a test drive. Enjoy!
The post How to Take Advantage of Super Resolution from Lightroom Classic appeared first on Lightroom Killer Tips.