
We’ve covered how you can import your Lightroom Classic presets into the cloud based Lightroom for desktop app, which then sync across all of the Lightroom cloud apps, and even how to create custom presets within Lightroom mobile directly, but what if you don’t have the cloud based Lightroom desktop app?
Many people first get acquainted with the cloud based Lightroom app on their mobile device (Android or iOS phone or tablet) using the free Lightroom mobile app. You don’t need a subscription to use the free mobile app, which is great. However, without a subscription you don’t get the desktop version the Lightroom app or the ability to sync photos and presets across devices.
So, how can you import develop presets into the Lightroom mobile app itself? Well, you can’t, exactly. At least you can’t import the preset files specifically. You have to use a bit of a workaround by importing a photo that has Lightroom (or Adobe Camera Raw) settings applied to the photo, then manually make your own preset from those settings, which you can then apply to your other photos when needed. Let’s walk through the steps.
Importing a DNG with Settings
To begin, you’ll need a photo with settings applied to it that you want to save as a preset. Here’s a DNG file with some settings applied that you can download (and unzip after downloading) and use to follow along.
Before preset:

After preset:

The first trick is to get the DNG file to your mobile device. I used AirDrop to transfer it from my Mac to my iPhone, but you could use Dropbox, OneDrive, or some other service to transfer the DNG file. Note, many times the DNG files provided for creating presets will be compressed in a Zip file (such as the one I provided), as this makes it easier for downloading. It is easier to unzip a file on your computer than your mobile device, but there are apps for both iOS and Android that allow file unzipping on their respective platforms (search for them in the respective app stores).
With the DNG file transferred to your mobile device, here are the steps to creating a preset from the settings stored in the DNG file’s metadata:
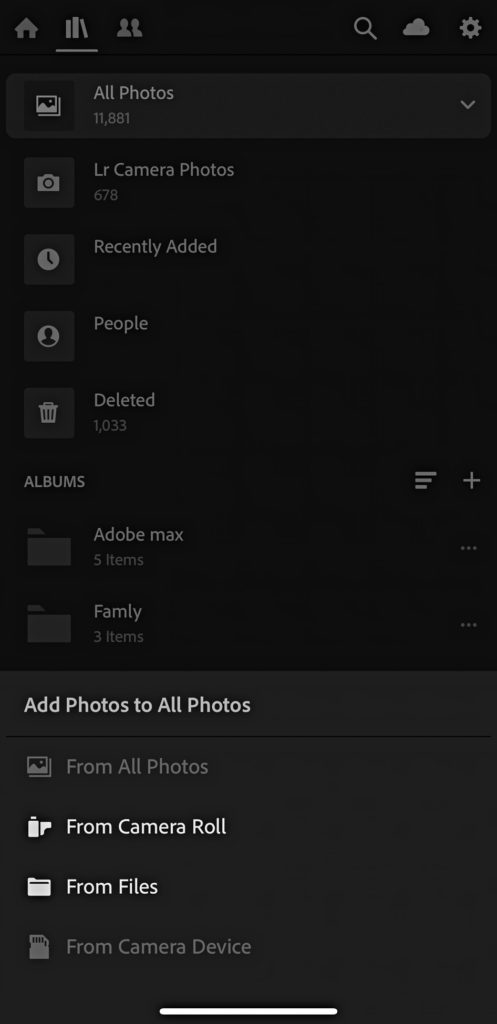
Step One: Import the DNG file into Lightroom mobile app. You import this photo just like you would import any other photo from your camera roll or files location on your device.
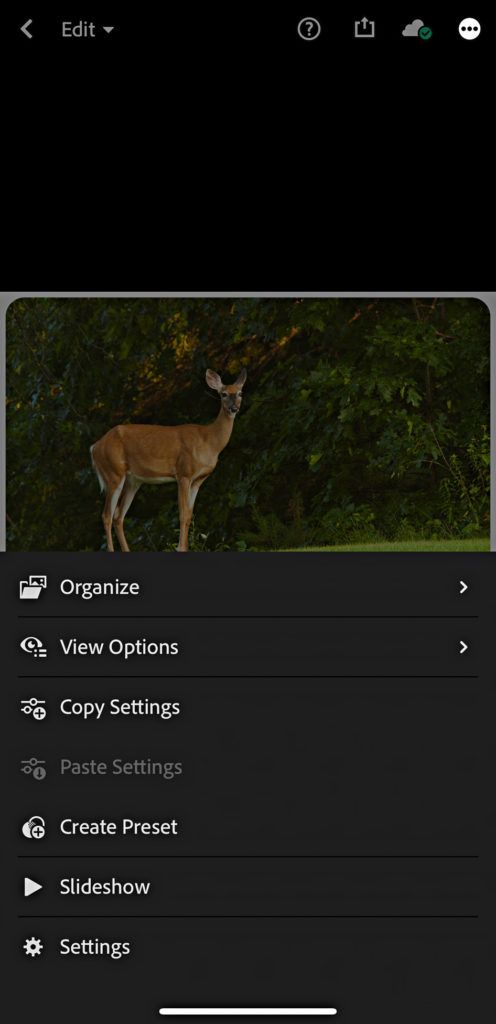
Step Two: Once the photo is imported into Lightroom mobile you should see the settings that have been applied to it (as the original DNG may not show it when viewing it on your device’s Camera Roll). That means the settings are waiting for you to transform them into a preset. Switch to the Edit view.
Step Three: Tap the three-dot menu at the top of the screen and choose Create Preset from the menu that appears.
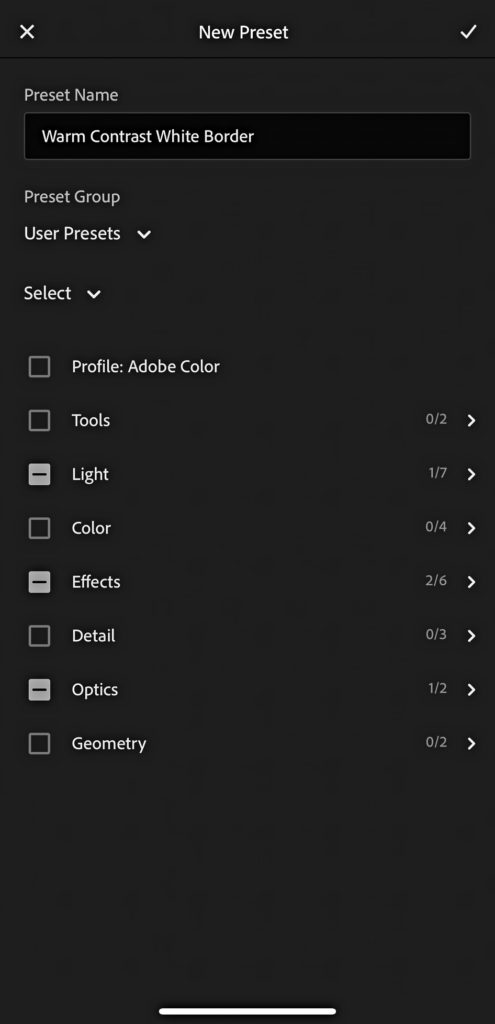
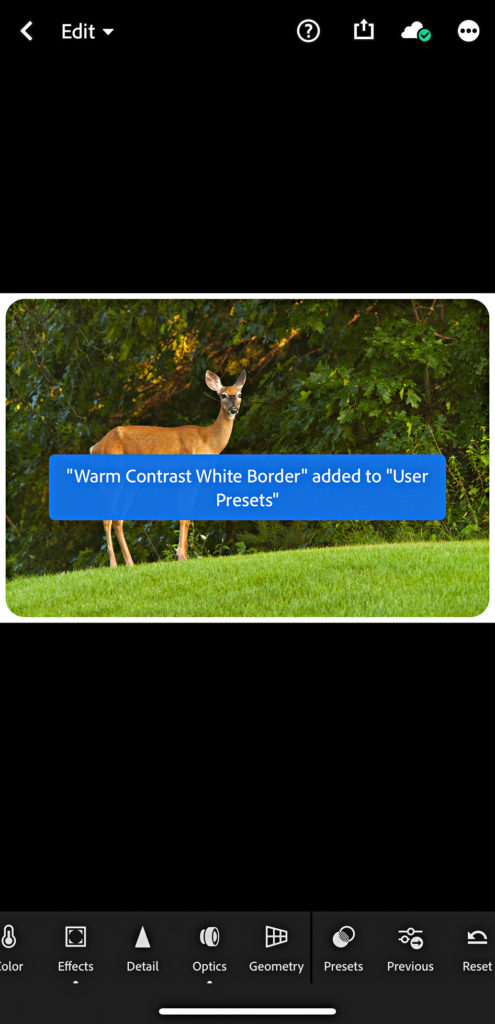
Step Four: This opens the New Preset dialog. You’ll need to make a few decisions here. The first decision is to give the preset a name. Depending on where you got the original DNG file from, it may have been named based on the preset/settings applied, but you can call the preset anything you want (its all yours now!). In this case, I named it “Warm Contrast White Border” because the settings warm up the photo using Split Tone, add contrast with a Tone Curve, and add a white border using the Vignette.
The second decision is how to organize your presets. By default, it will be placed in the User Preset group. Nothing wrong with that, but as you add more you may want to group them in a way that makes sense to you. I’ll leave it in the default for now.
The third, and most important decision is what boxes to check for deciding what settings to include. The simplest choice is to just check all the boxes. This way you ensure you are including the important settings (the ones that provide the “look” the preset is trying to achieve). The more daring choice is to only check boxes that have settings applied to them, but how do you know what settings to include? Lightroom tries to help you via the Select drop-down menu under the Preset Group choice you made earlier. Tap Select to see its options, which are All, Modified, Default, and None.
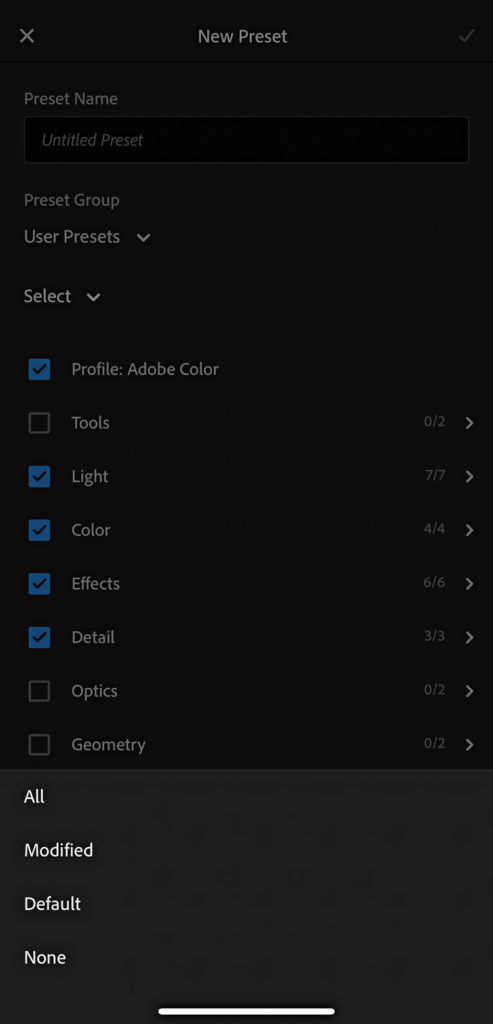
So you can choose All and just get on with your life, or you can choose Modified and have it only check the settings that shifted from their default settings. In my case, I chose Modified and see that it only checked boxes in the Light (for the Tone Curve), Effects (for the Vignette and Split Tone), and Optics (because I have my preferences set to include lens profile correction by default, which is not relevant to this preset, but it is a setting that was applied).
The benefit of only including settings in the preset is that it allows you to apply other settings to the photo first, and then apply the preset without necessarily changing the settings you previously applied (assuming you didn’t change any of the settings included in the preset).
Once you’ve made all of those decisions, tap the checkmark in the upper-right corner to complete the preset creation process.
The preset has now been added to the preset group you chose and you can apply it to any other photo in your library as you wish. While it may seem like there is a lot involved in this process, once you go through it the first time you’ll see it is not a big deal. That said, I’d love for Adobe to find a way to make it easier to just import the presets directly. However, if you find using Lightroom mobile useful, go ahead and and try the subscription so that you can sync across all of your devices and see how that works for your lifestyle.
The post Importing Presets into Lightroom Mobile Directly appeared first on Lightroom Killer Tips.