
I was doing a project recently where I was saving photos outside of Lightroom Classic, but decided I wanted them all to end up in my catalog for keeping track of them over time, and I remembered good old Auto Import.
The way Auto Import works is you set up what is called a “Watched Folder” and then any photo you save or even drag/drop into that folder will automatically be imported into LrC. As part of the import process it also has to move the photo out of the Watched Folder and put it in a different folder of your choice. Here’s how to set it up.
Step One: Create a new empty folder on your desktop, pictures folder, or wherever it makes the most sense for your project. This folder has to be empty and not even contain any subfolders. It is a temporary storage location.
Step Two: Open LrC, and go to File > Auto Import > Auto Import Settings to open the Auto Import Settings dialog box.
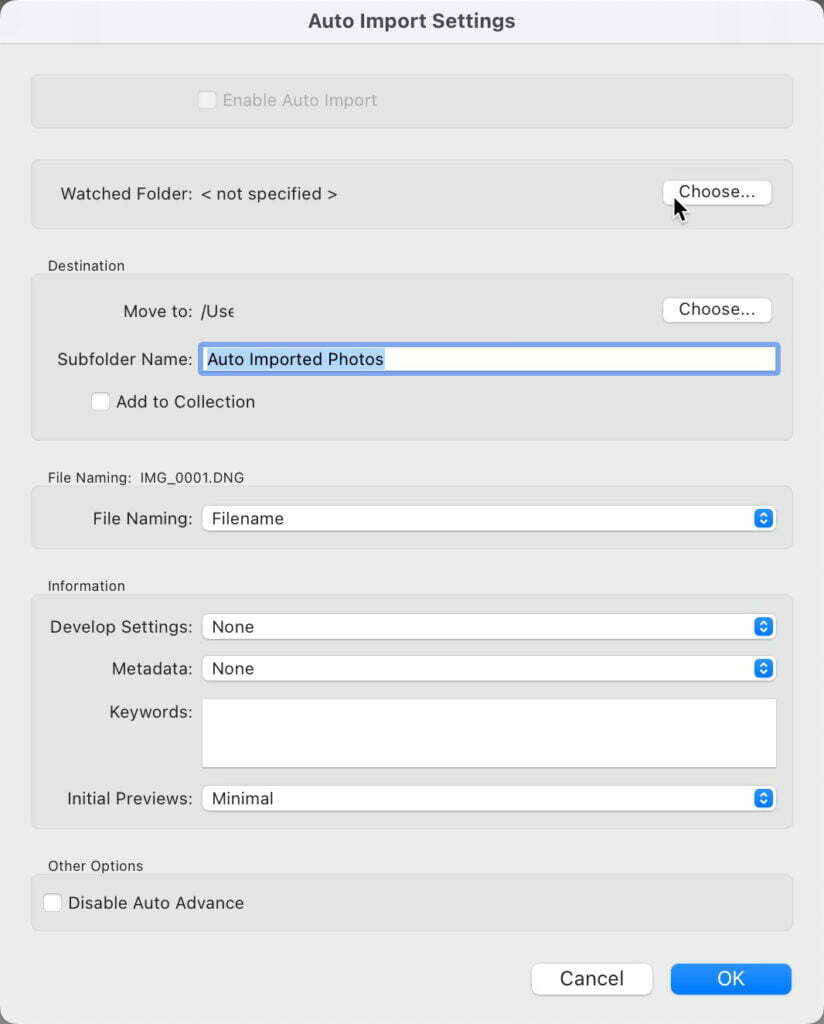
Step Three: Click the Choose button in the Watched Folder section and navigate to and select the empty folder you just created.
Step Four: In the Destination section, select an existing folder or create a new folder for where you want these imported photos moved into. This doesn’t have to be the final storage location as you can always use LrC to move them somewhere else at any time. Just pick a good location for now.
Step Five: Configure options for file naming, develop settings, and metadata as desired, then click Ok.
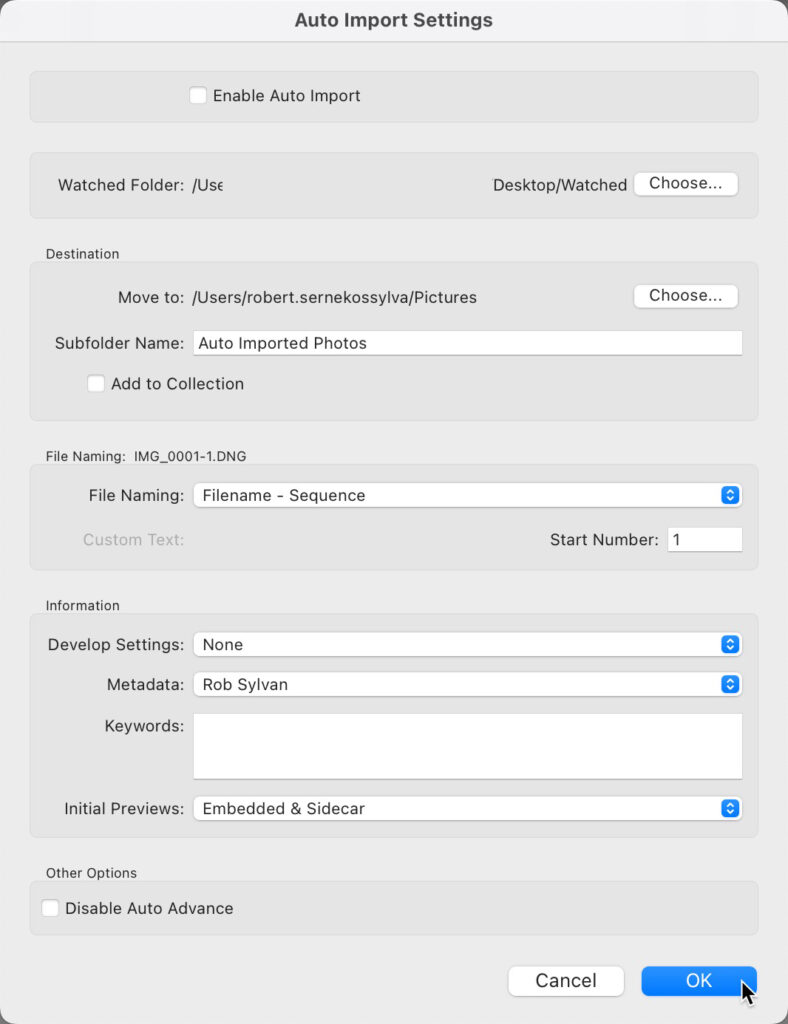
Step Six: Go to go to File > Auto Import > Enable Auto Import.
Once enabled, any photo that is dropped or saved into that folder will be automatically imported. This is great for shooting tethered with other software than LrC, when scanning photos, or any other project where you are creating photos outside of LrC, but want the final versions to be imported into your catalog. Give it a try!
The post Keep Auto Import In Your Back Pocket appeared first on Lightroom Killer Tips.