
Happy Friday, everybody. Here’s a quick little tip that is really helpful if you want to brighten your subject’s skin — not just their face — all their skin, and without having to paint or mask. Works in LR Classic or LR Cloud version. Here’s how it works:
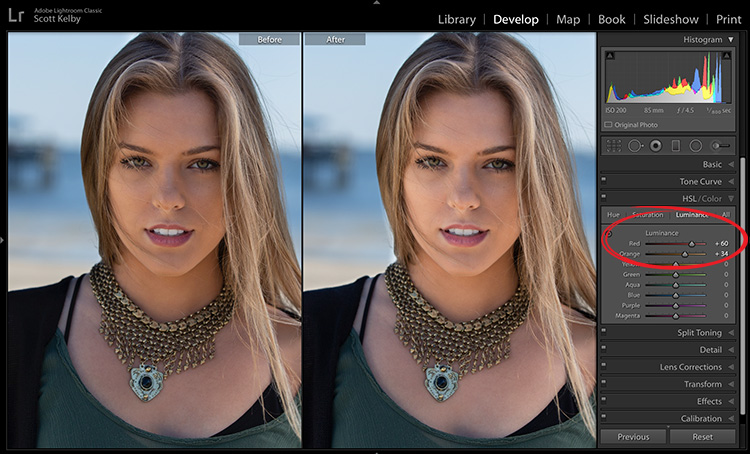
There’s only one step: In the Develop module, scroll down to the HSR / Color panel; click on the Luminosity tab, and then drag the Red and Orange sliders over to the right. Those two sliders control the brightness of the skin, and drag them to the right brightens things right up. Conversely, dragging them to the left would darken the skin.
Note: These sliders do have an effect on all the Reds and Oranges in the image, but I’ve been using this trick for a while and I haven’t run into many situations where it affected the rest of the image so much I couldn’t use it. Wanted to give you a heads up either way.
Come spend the day with me in Nashville in a few weeks
My “Ultimate Photography Crash Course” full-day seminar is coming to Nashville on Wednesday, Sept. 25th at the Music City Center. It’s just $99 for the full day – includes a detailed workbook of my note, plus
Have a great, safe, dry weekend everybody!
-Scott
P.S. Lots of news over on my blog today — here’s the link if you’ve got a sec.
The post Kick Butt Little Lightroom Tip For Brightening Skin appeared first on Lightroom Killer Tips.