
What better way to learn how to install a Lightroom Develop Module preset than for me to give a cool one away for free, and then I can do a tutorial for you on how to install it, along with how to manage your presets? Pretty fun idea, right? (you did just nod, didn’t you)?  Well, either way; here goes:
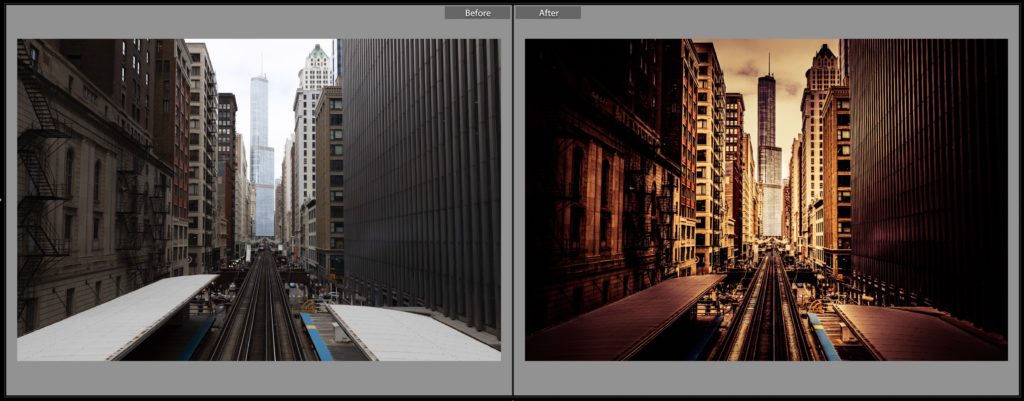
First, here’s where to download the free Lightroom preset you see above:
Now, here’s how to install it:
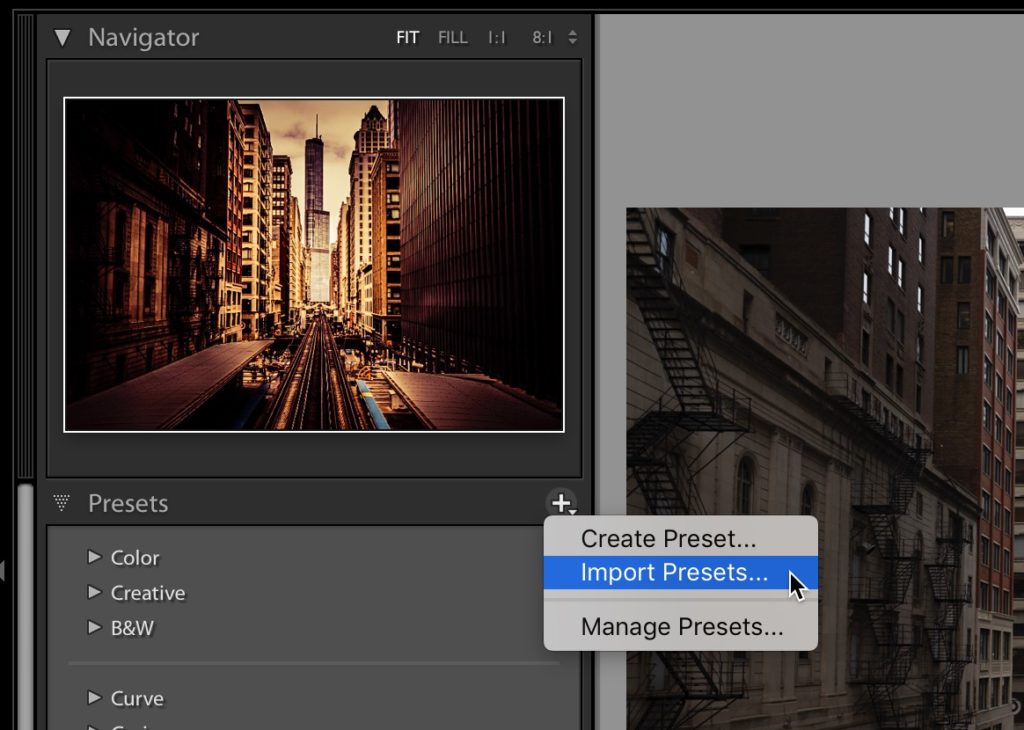
STEP ONE: In Lightroom’s Develop Module, go to the top right of the Presets panel and click on the +-sign icon, and from the pop-out menu that appears, choose ‘Import Presets…’ as shown above.
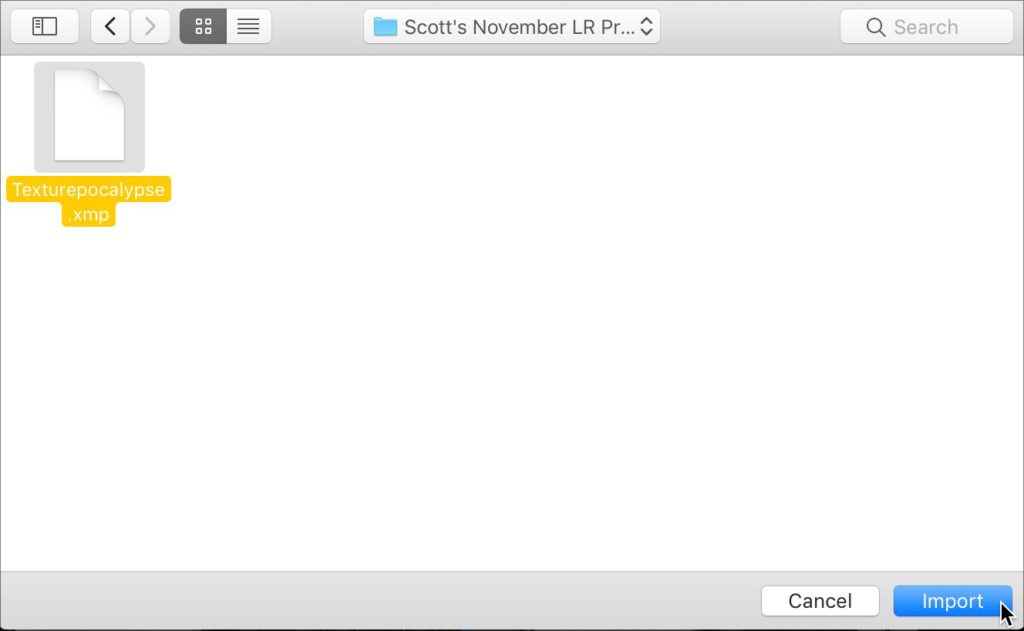
STEP TWO: Navigate your way to the preset you just downloaded (I had to make it a .zip file or WordPress wouldn’t have created the download link). Un-zip the file (it’s if it’s already unzipped) and click on the file with .xmp as the file extension (as seen here), then click the Import button in the bottom right corner (as shown here).
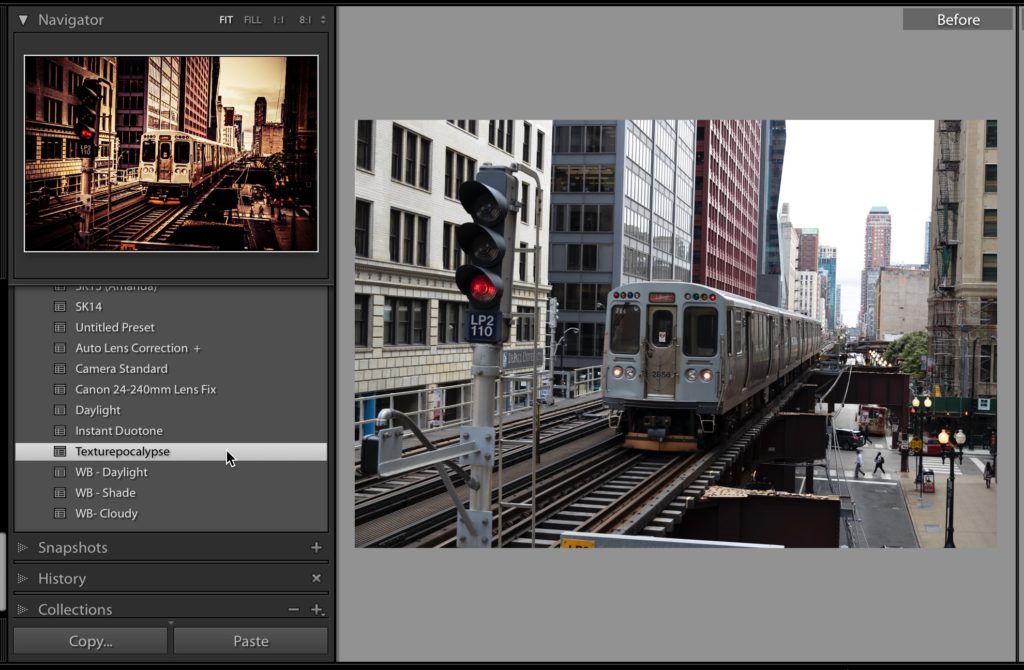
STEP THREE: In the Presets panel, scroll down to the User Presets section and you’ll find my Lightroom preset listed there alphabetically (again, its name is “Texturepocolypse.” Just hover your cursor over the preset and you’ll see a preview of what it will look like in the Navigator panel at the top of the left side panels. That’s all there is to it unless you want to create a separate folder for this preset and other’s I’ll be posting, or for other presets you download from other sources (gasp!). In case you do, let’s look at Managing your Presets.
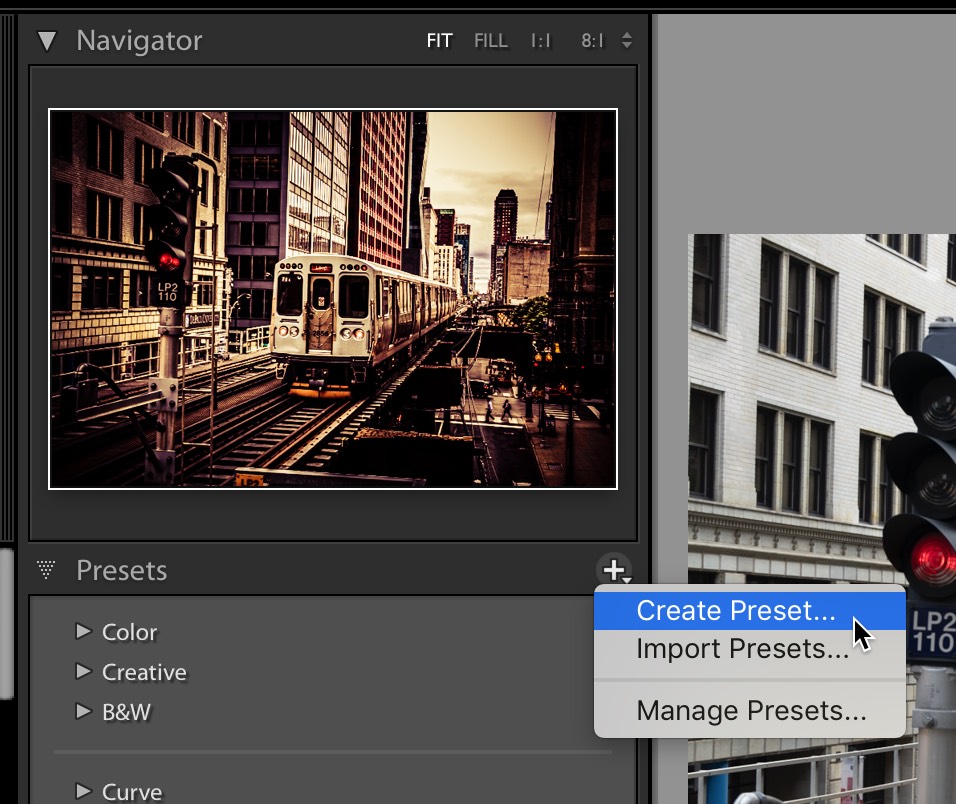
STEP FOUR: To create a Preset Group (it’s essentially a folder where you can sort your presets), go back to that same Presets panel; click on that +-sign button and from the pop-out menu choose Create Preset (don’t worry — we’re not going to actually create a preset — but this is how we get to the command that creates new folders).
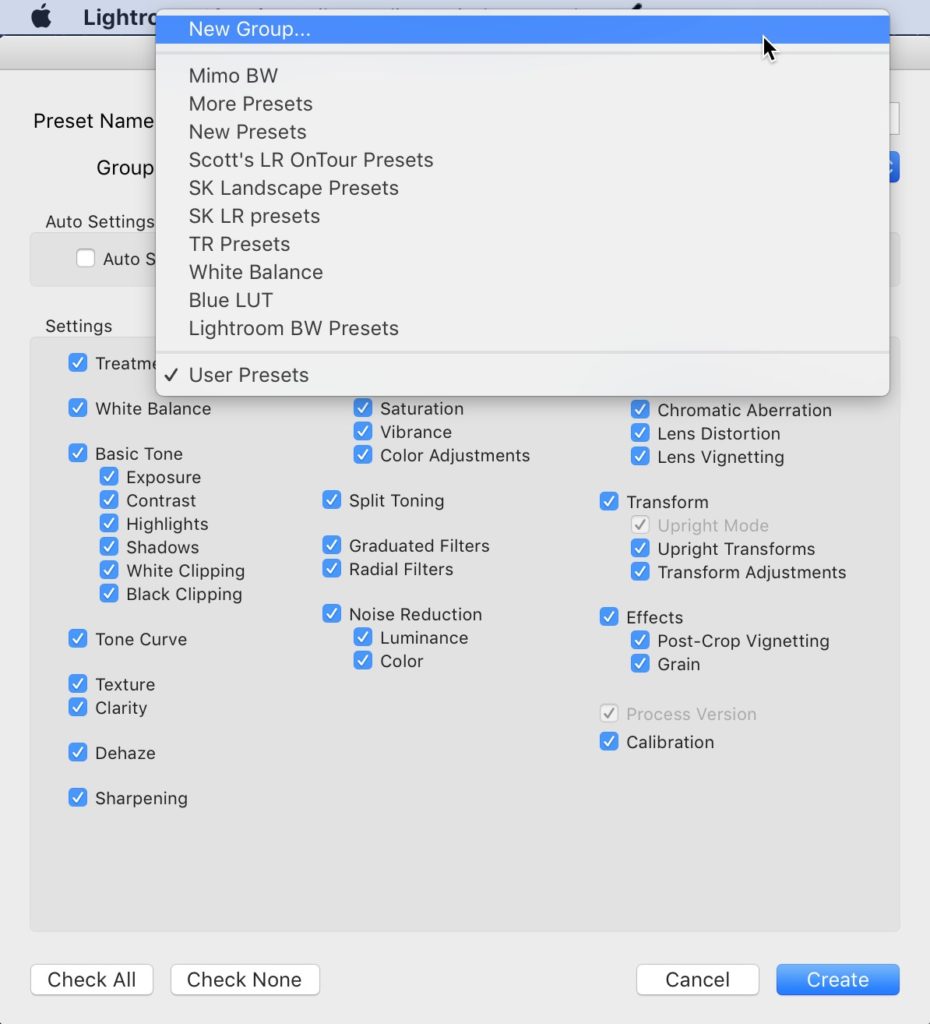
STEP FIVE: When the New Preset window appears, click and hold on the ‘Group” pop-up menu (near the top of the window) and from the pop-up menu that appears, go all the way to the top of the list and choose “New Group.”
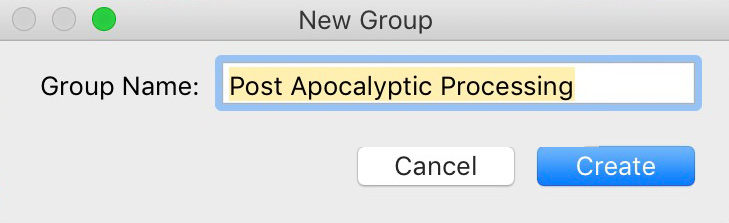
STEP SIX: This brings up the New Group dialog (shown above) where you can name your new Group (again, it’s really just a folder where you can store similar presets) and click the Create button. Now, we don’t need the preset we’re going to create (we went thru all this just to create a new group), so in the naming field for this preset, just name it “Delete me” so you know which one to delete in just a moment. Now click the ‘Create’ button and it creates a new folder (OK, a ‘Group’) in your Presets panel called “Post Apocalyptic Processing.” Find the “Texturepocalypse” preset we imported previously; click and hold on it, and drag it onto the “Post Apocalyptic Processing” folder to add this preset to that group. Yup, it’s all drag and drop from here.
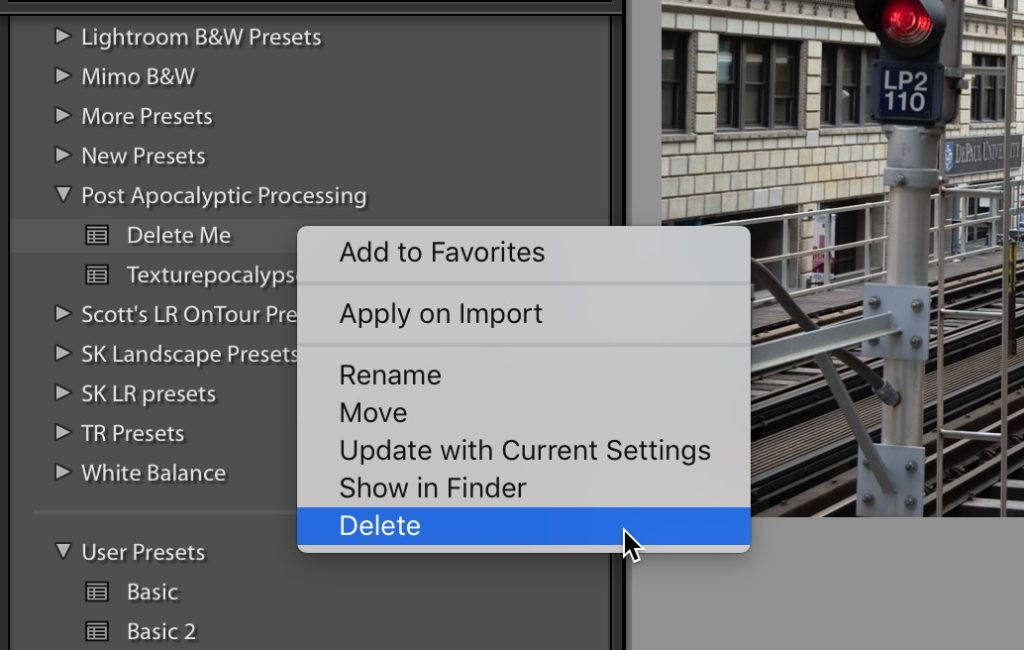
STEP SEVEN: Now let’s go get rid of that fake preset we created. Go to the new Group named “Post Apocalyptic Processing” that we just created, and click on the white disclosure triangle to the immediate left of its name to display what’s inside that Group. You’ll see two presets “Delete Me” and “Texturepocalypse”. Right-click directly on the preset “Delete Me” and from the pop-up menu that appears, choose Delete (as shown here). It’ll then display a scary sounding “Permanently Delete this Preset?” warning — just click “Delete’ and your fake preset is gone, but your new Preset Group remains (with “Texturepocalypse” still inside it).
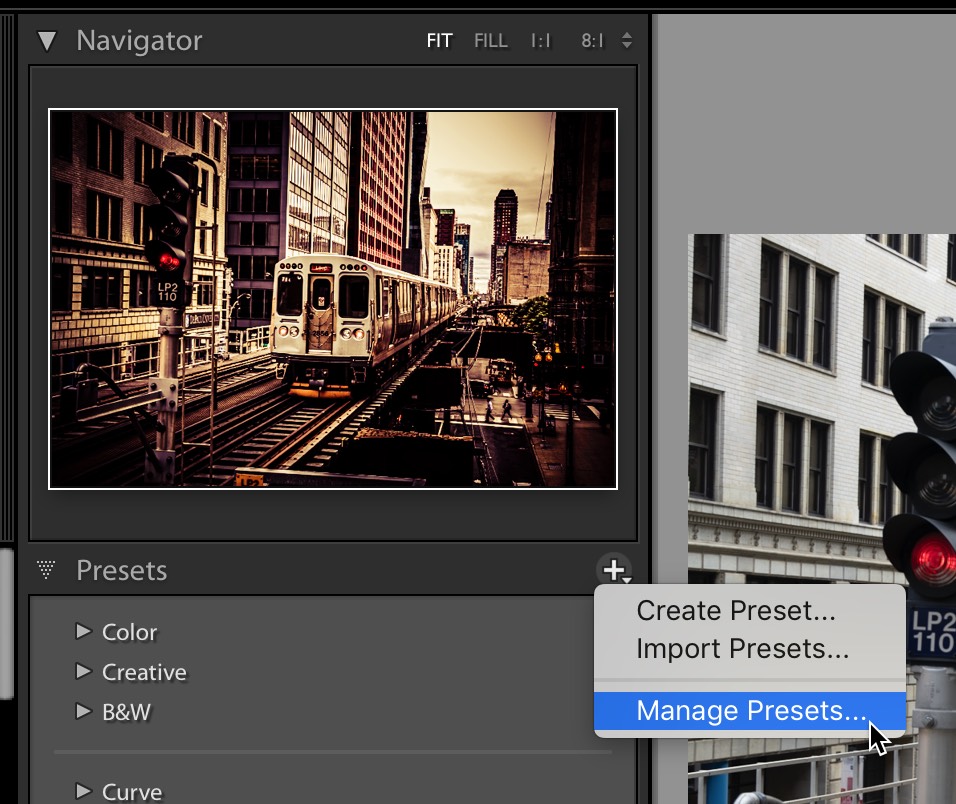
STEP NINE: If there are groups you don’t need and want to hide them from view (just to keep your menus and your workflow short, neat and tidy), you can do that in the Manage Presets window. To get there, go back to that same menu at the top right of the Presets panel, but this time from the pop-out menu choose “Manage Presets” (as shown above).
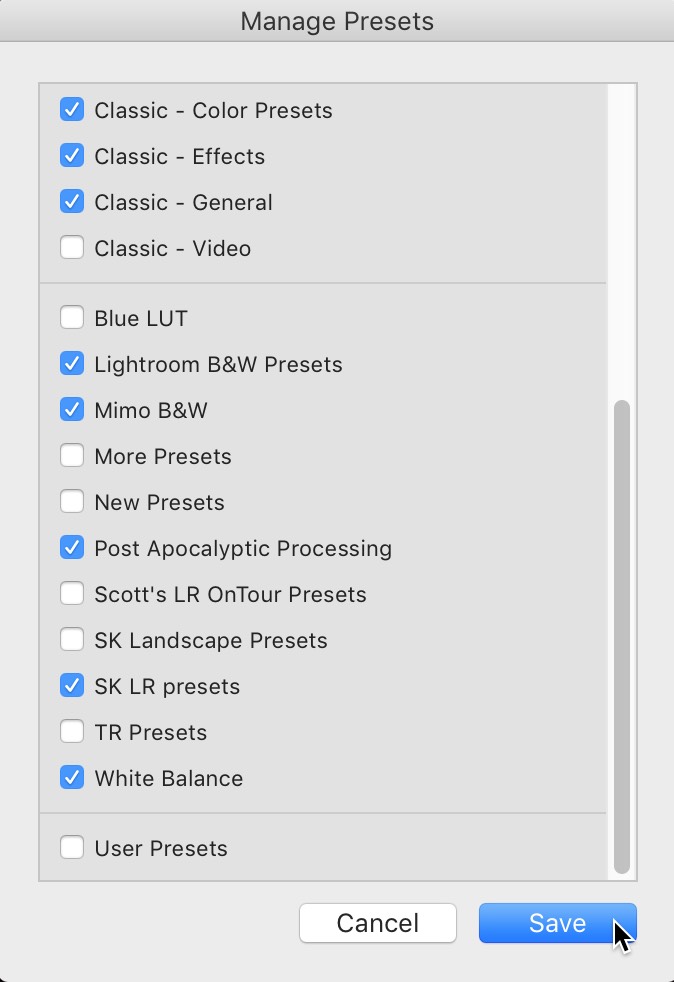
STEP 10: This brings up Lightroom’s Manage Presets window (shown above). To hide any groups of presets, just un-check their checkboxes. When you’re done making choices, click the Save button at the bottom of the window. Now only groups with a checkmark by them will be visible in the Preset panel.
There ya have it!
Hope you found that helpful (and I hope you put that preset to good use. It looks great on the right image. On the flip side: it looks pretty bad on the wrong image. Just sayin’.
Have a totally kick-butt weekend, everybody! 
-Scott
P.S. Next Wednesday I’m teaching my “Ultimate Photography Crash Course” Seminar in San Francisco. Come on out and spend the day with me! Tickets and info here.
The post Let’s Start November With a Free Lightroom Preset From Me (and how to install it) appeared first on Lightroom Killer Tips.