
I love my job answering Lightroom related questions for KelbyOne as it has allowed me to learn far more about the program than I ever would have just using it for my own photography. One of the big lesson’s I’ve learned from being exposed to so many different photographer’s workflows is that there are a lot of right ways to do things (meaning many roads can lead to the same destination) and a lot of things we all stumble over at some point. My hope in sharing these little roundups is that perhaps we can all learn from each other and avoid some of these common pitfalls.
The Grid Icon is Missing
The Toolbar that appears under the main workspace in each module contains a number of icons representing useful tools relative to the module you are in. Sometimes the Toolbar itself goes missing, but that’s as easy as pressing the T key to show it again or hide it to give more screen real estate to your photos.
However, sometimes the Toolbar itself is showing, but that certain tool we’re looking for has gone missing. The first thing to remember is that depending on what module (and what view within the Library module) you are in, some tools just aren’t available, so switching modules may make the tool you are looking for available. For example, the Painter tool will only show in Grid view of the Library module, and not any other view.
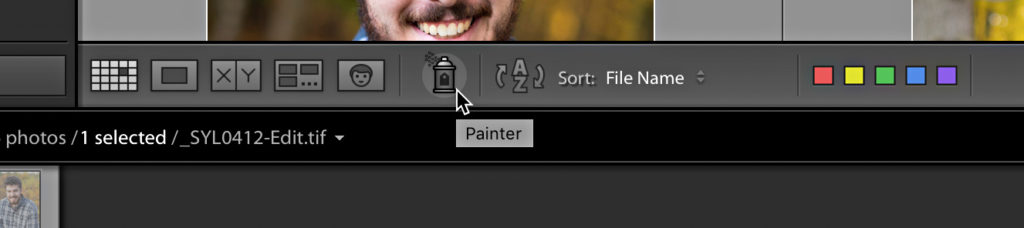
If you are in the right module and the tool you want is still not showing, click that white disclosure triangle at the far-right side of the Toolbar and click on all the tools you want to see (and hide any you don’t).

The icons for the different Library module views are all included in View Modes.

I Only See Raw Files and not the Associated JPGs
This happens to a lot of people who are both new to Lightroom Classic and new to shooting in raw. A common (and useful) way to transition from shooting only JPG to shooting only raw is to set your camera to raw+JPG and have both options at your disposal until you are comfortable with editing raw.
However, by default Lightroom Classic hides JPG files when they have the same file name as an accompanying raw file in the folder or memory card you are importing. This is an easy preference setting to overlook because why would you ever go looking for it?
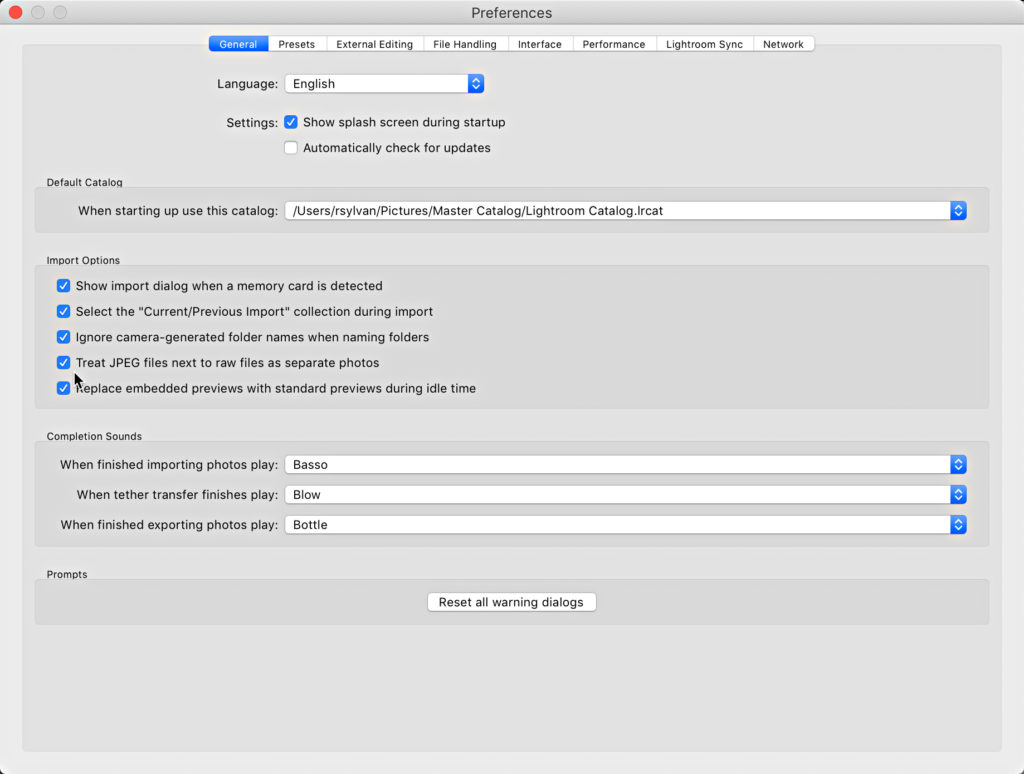
If you’d like to see the raw file and the JPG file side-by-side in Lightroom Classic, just head over to Lightroom Classic > Preferences > General (PC: look under the Edit menu for Preferences), and check the Treat JPEG files next to raw files as separate photos box. From that point forward, you will see both file types on all subsequent imports.
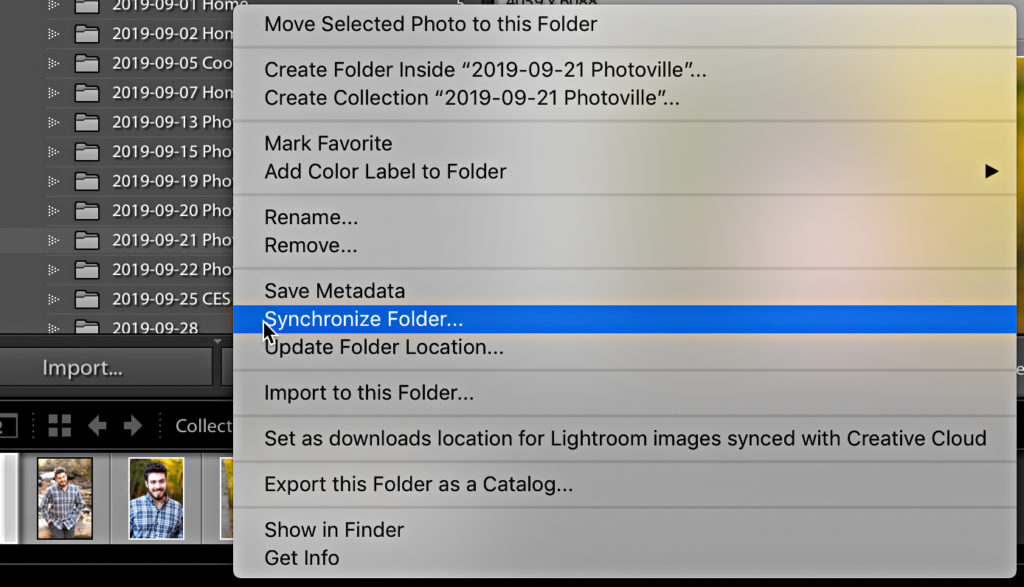
If you’ve already imported a folder full of both raw+JPG files, and you want to be able to see those JPGs too, then you just need to synchronize the folder to make the JPGs visible. Right-click the folder (in the Folders panel) containing the files, and choose Synchronize Folder from the contextual menu. You can opt to show the import dialog or not, and Lightroom Classic will import the JPGs as separate files. Repeat that process on any other folders containing previously imported raw+JPG files.
Hope those little tips help you move forward without slowing down.
The post Lightroom Classic Help Desk Roundup appeared first on Lightroom Killer Tips.