
Lightroom’s masking Brush tool is incredibly useful, and its Auto Mask feature, which helps to keep you “painting inside the lines” (so to speak), makes it even more helpful as it tries to “sense” the edges of areas where you’re painting with the brush to keep you from accidentally painting over something you didn’t want to paint over.
Here’s an example:
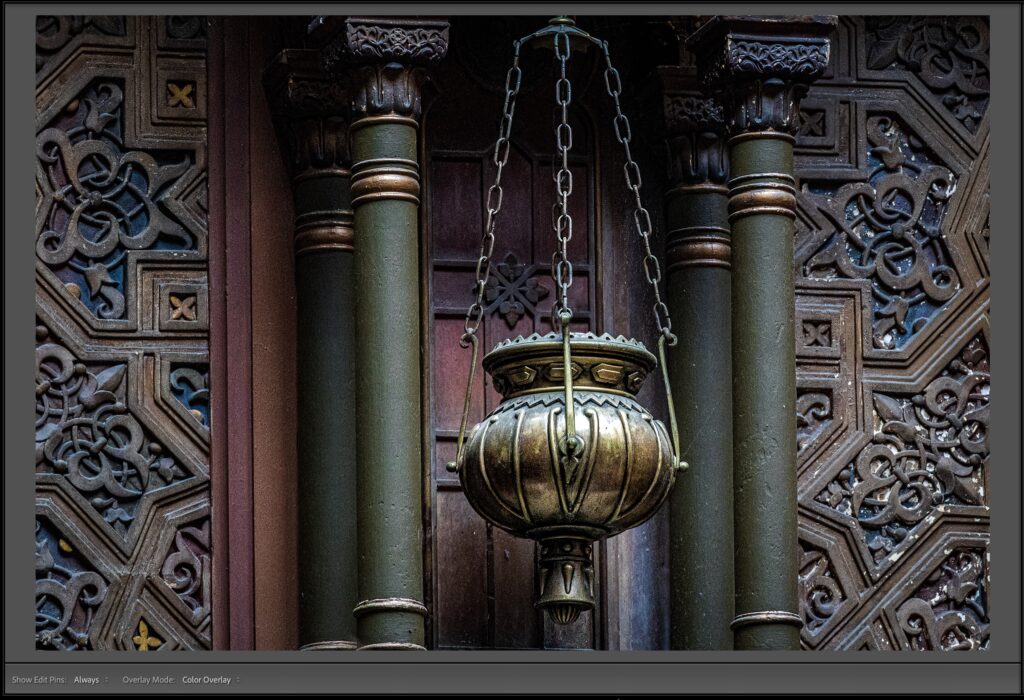
In the image above, I want to brighten just the column in the back on the left side (it’s kind of buried a bit in the shadows), and the Masking Brush would be perfect for this, so you would click on the Masking icon, then choose ‘Brush’ from the list of masking tools that appears.
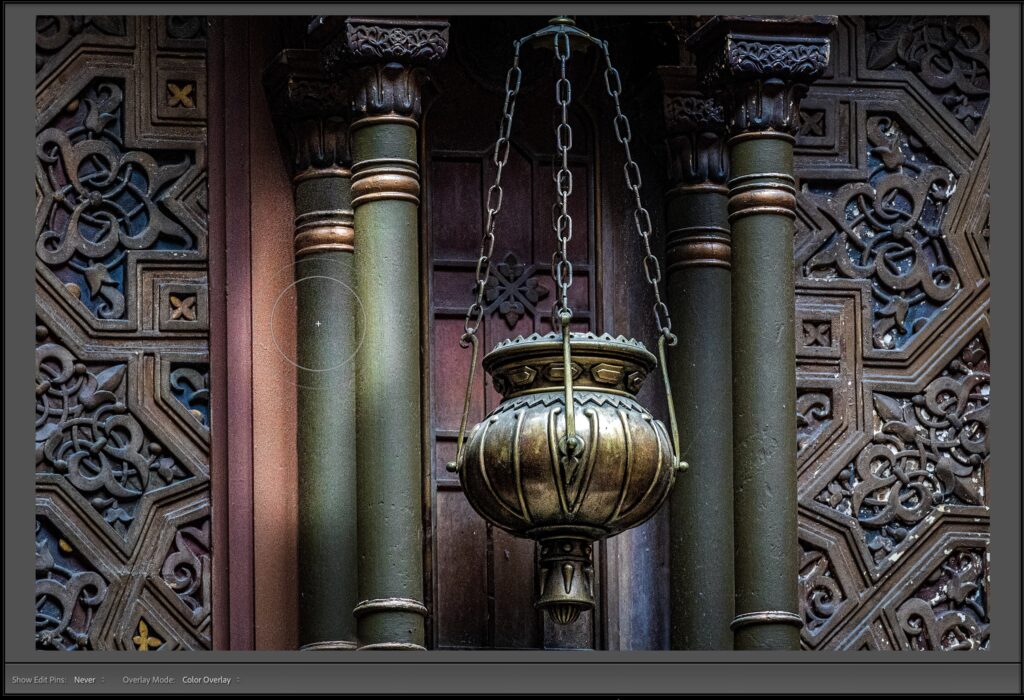
I increased the Exposure amount to +2.45 and painted over the column in the back, and you can see the result – the brightness I applied spilled over onto the wall behind it and the column in front of it. I could undo, try again with a smaller brush and paint very carefully and slowly, but this is where Auto Mask works so wonderfully well.
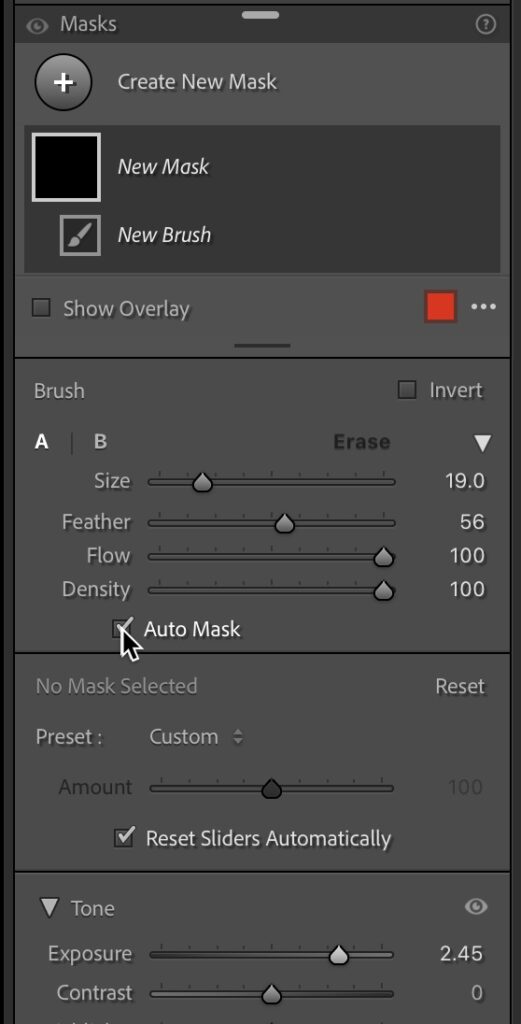
You turn it on by clicking the Auto Mask checkbox near the bottom of the Brush options section (as seen above). To turn it off, you can either uncheck the Auto Mask checkbox , or just press the letter “a” on your keyboard.
Now let’s undo our last brush stroke, and try again but this time with Auto Mask turned on.
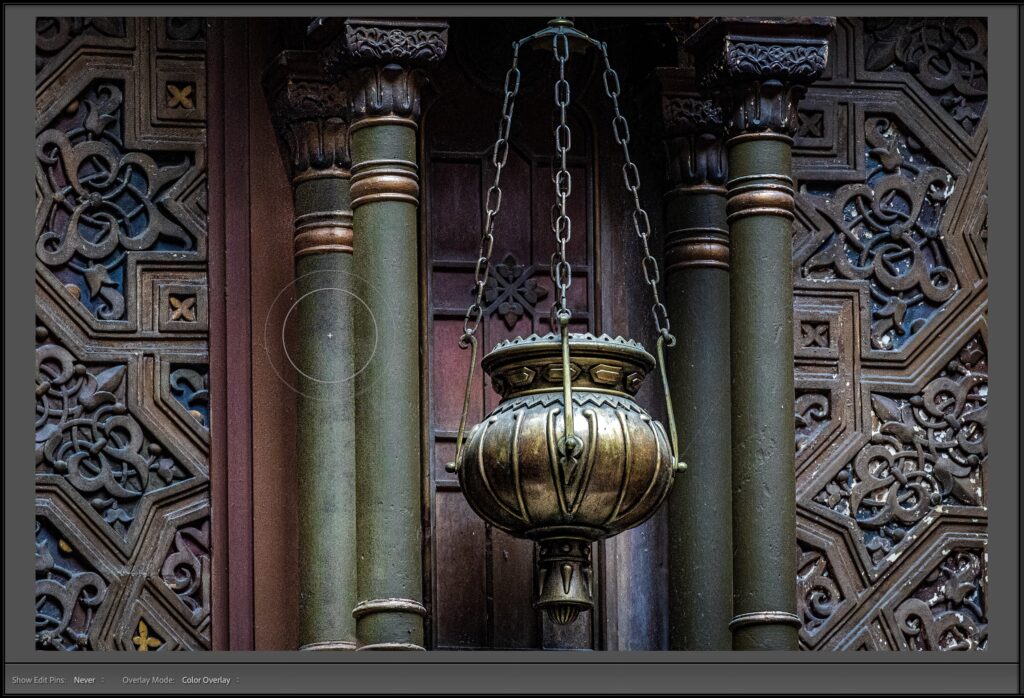
Here, I’m painting over the column in the back and brightening it at +2.45 it without brightening the other column or the wall behind (this makes me want to fix the column on the right side now). This is what I meant earlier when I talked about how Auto Mask helps you “paint inside the lines.” As long as the center of your brush cursor (the + crosshair in the center of the brush) doesn’t pass over onto the background or other column, you’ll only paint over that one column (and as you can see above, the outside edges of your brush can extend right over the background and the other column, but as long as that crosshair stays in that column, it won’t affect those other areas, and that’s what makes it so helpful).
If you make a mistake (or Auto Mask makes a mistake – hey, it happens), or you let that center crosshair stray over onto an area you didn’t mean to, you can “paint away” those areas you didn’t mean to mask. Just hold the Option key (on Mac) or the Alt key (on a Windows PC) and it temporarily changes your brush into an Erase Mask brush. Now, shrink the size of your brush (using the left and right bracket keys on your keyboard), and paint over those areas you didn’t want effected, and as you paint it removes the spillover.
OK, What’s the 10% Where It’s Not Awesome?
This sounds pretty great – why not always leave Auto Mask turned on? Well, it works great when you’re near the edges of stuff (like we were here), but if you’re using the Brush to paint over large areas, having Auto Mask on will not only show your brush’s performance because now it’s searching for edges as you paint, so it tends to “lag” a little (or a lot), but also since it’s trying to sense edges, it can also leave small gaps and not paint as smoothly over areas. So, my simple rule is this: leave it off until you get near an edge. Then press the letter “a” to toggle Auto Mask on when you need it, and when you’re done painting near the edges of things, and you’re back to large open areas, hit “a” again to turn Auto Mask back off. Easy peasy.
Hope you find that helpful. Have a great Monday everybody! 
-Scott
P.S. I know a lot of you use On1 Software’s plug-ins to extend what Lightroom Classic can do. If that’s you, check out full two-day, two-track conference coming up next month on getting the most of your plug-ins and your Lightroom/On1 workflow. Here’s the link with details.
The post Lightroom’s Auto Mask Feature: 90% of the time, it’s awesome! appeared first on Lightroom Killer Tips.