Lightroom Classic’s interface isn’t as customizable as Photoshop’s, but it can be changed in a number of ways to maximize the space devoted to your photos, to make your workflow more efficient, and to hide the parts you just don’t use very often.
Panel Groups
There are four main panels that appear in all Lightroom Classic modules. They can be manipulated as needed to allow you to control the size of the center workspace where your photos appear, as well as to only reveal the set of tools required for the task at hand. These four panels are called the Left Panel Group, Right Panel Group, Module Picker (top), and Filmstrip (bottom).
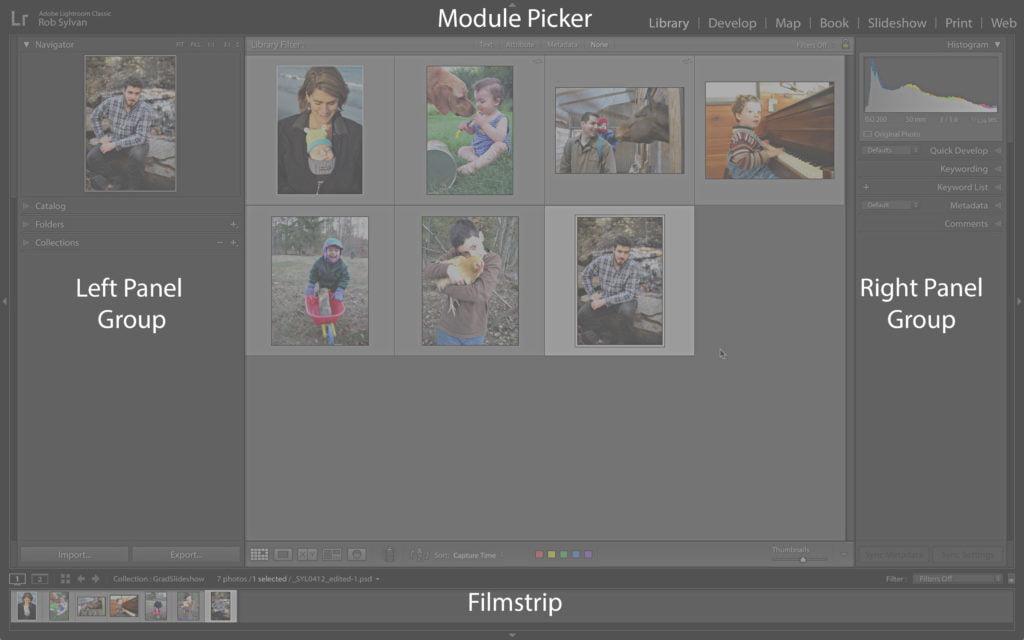
Each of these panels can be collapsed completely by clicking the outside edge of the panel (you don’t need to click the actual arrow on the outside edge). However, if you right-click the outside edge you’ll get a contextual menu that gives you a greater level of control.
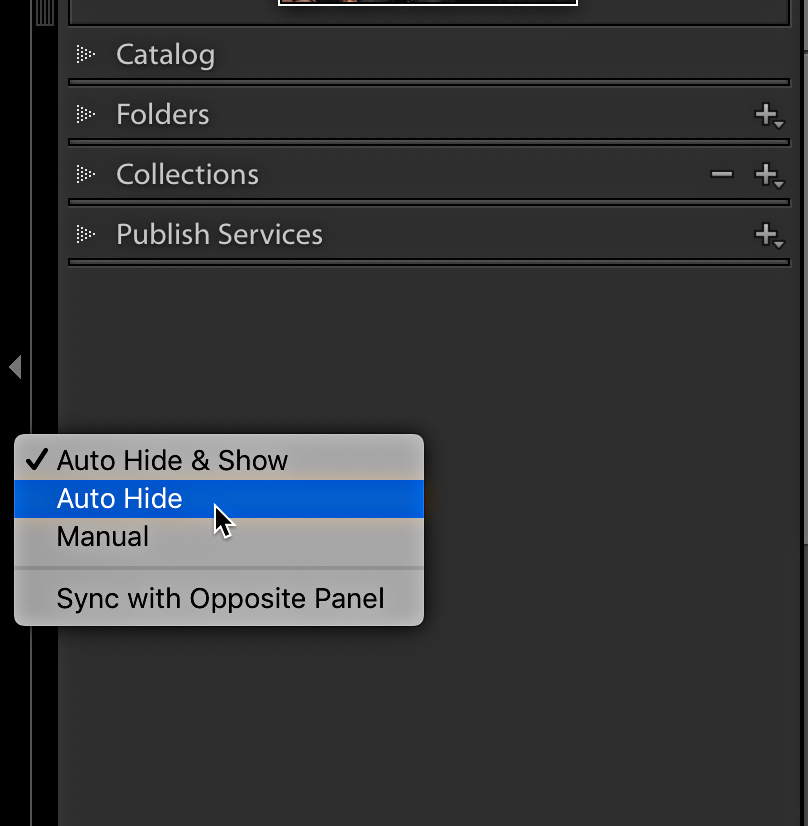
I find the default option of Auto Hide & Show a little annoying as it will automatically show the panel if your cursor gets too close to the edge, and this happens too often for my taste. If I need to collapse a panel group, I prefer to set each panel to Auto Hide instead. When you choose Auto Hide the panel automatically collapses and it won’t expand again until you manually click that panel’s outside edge. The panel will then appear at a low opacity and allow you to access everything inside that panel, but as soon as you move your cursor off the panel it automatically hides again. This really helps me maximize the space devoted to my photos.
Of course, as with most things in Lightroom, there’s more than one way to get the job done. There are keyboard shortcuts for hiding/showing each panel group, but instead of giving you each one I recommend checking out the complete list of all shortcuts. You can also go to the Window > Help menu, where you’ll find the keyboard shortcuts listed for the module you are viewing.
That said, there are two keyboard shortcuts I use all the time that are easy to remember. The first is pressing Tab to show/hide both the left and right panel groups simultaneously. The second is pressing Shift+Tab to show/hide all four main panels at once.
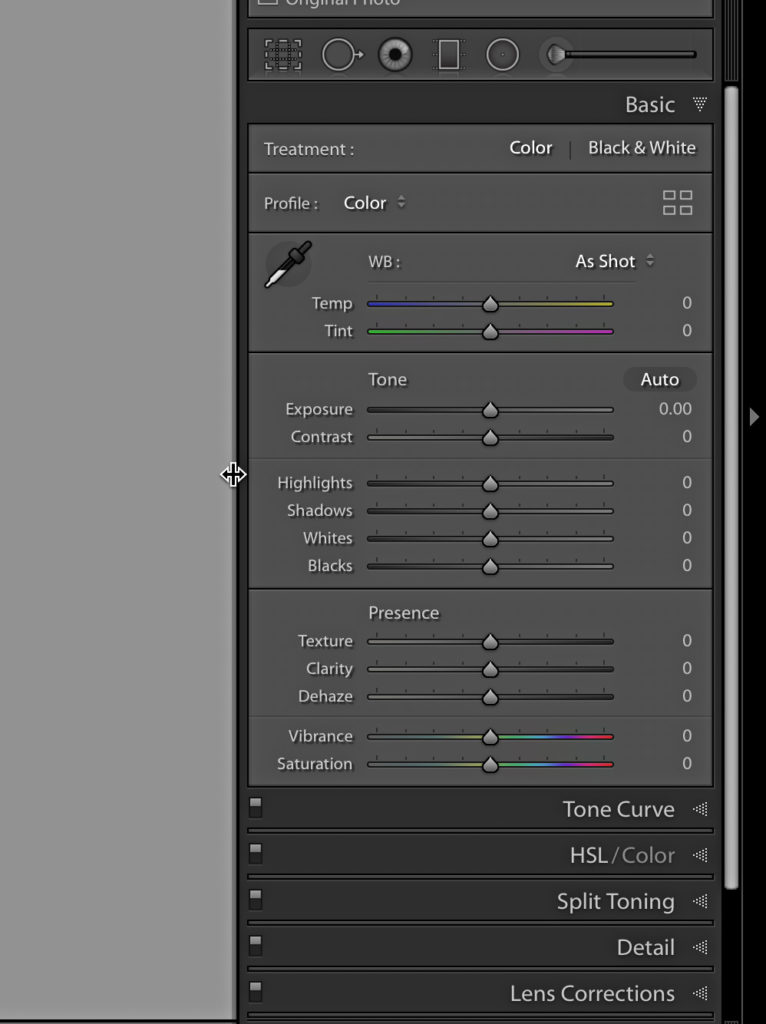
While you may most often want to collapse panels to get them out of the way you can also click the inside edge and drag inward to make the left and/or right panels wider. I often make the right panel group in the Develop module wider to get a finer level of control on the sliders.
Similarly, you can make the Filmstrip taller or shorter by clicking the edge just below the Toolbar and dragging up or down (respectively). Note, if you make the Filmstrip too small the icons that appear on the thumbnails will go away.
Individual Panels
Now that you have a handle on how to manage the larger panels, let’s take a look at what you can do with the smaller panels contained within the Left and Right Panel Groups.
To cut down on the amount of scrolling you do in a day, as well as to only reveal the tools you need for a given job, you can expand or collapse each individual panel by clicking on each panel header (not just the arrow). As an alternative, you can Mac: CMD-click / Win: Ctrl-click any panel header to expand or collapse all the panels on that side in one fell swoop.
A really neat trick is to Mac: Option-click / Win: Alt-click any panel header to engage what is called Solo Mode. With Solo Mode enabled you’ll only be able to open a single panel within the larger panel group at a time. This makes it very easy to switch between panels with a minimum amount (if any) scrolling. As soon as you expand a new panel the last one you were using automatically collapses. Mac: Option-click / Win: Alt-click any panel header a second time to disengage Solo Mode. Note that while the Navigator, Histogram, and Preview panels within the various modules can be collapsed or expanded individually, they are not included in Solo Mode or the expand all/hide all commands.
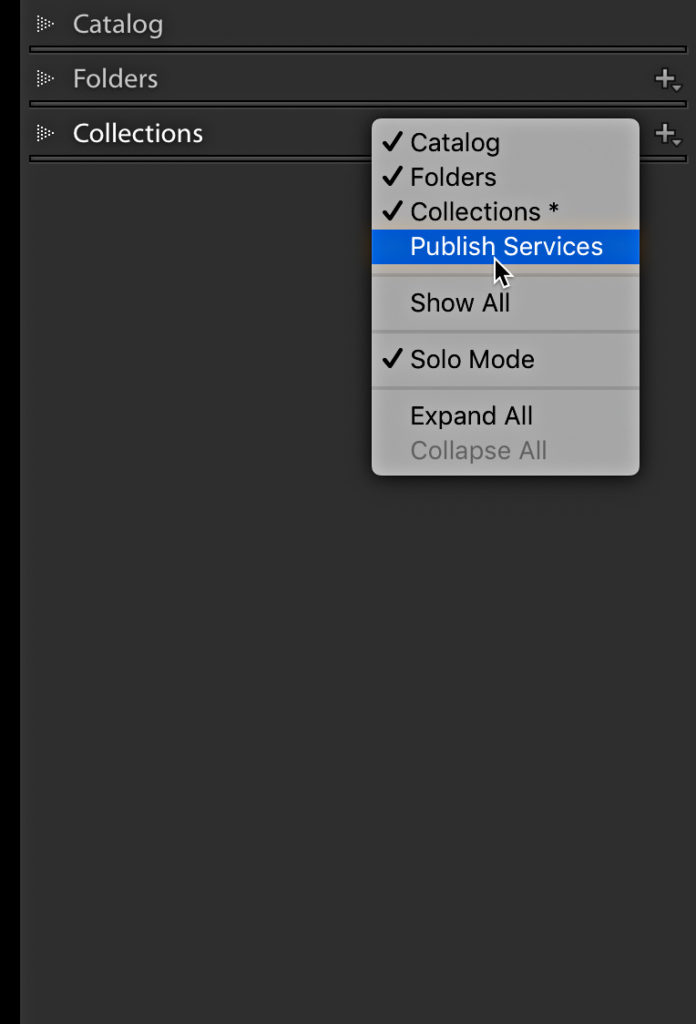
One panel option that most people seem to find by accident is the ability to completely remove a given panel from the panel group so that you no longer even see its header label. If you right-click any panel header—except the ones noted above—you can simply uncheck any panel from the contextual menu that appears and it will disappear from the group. Just re-check that panel in the menu to bring it back. You can also restore panels from the Window > Panels menu. If you haven’t seen it, there is also a special trick for reordering panels in the Develop module.
You have the same level of control up in the Module Picker too. Just ctrl-click right-click the Module Picker and uncheck any module you no longer want to see listed there.
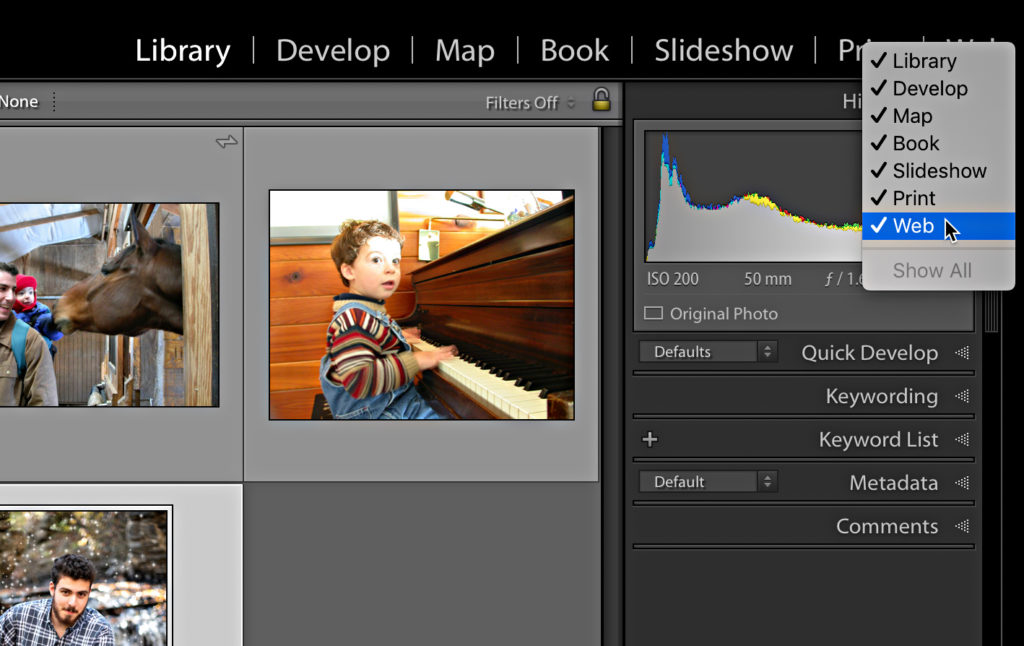
This doesn’t remove the module completely, just removes its button from the Module Picker.
Screen Modes
Taking a step back to look at the interface as a whole we also have the ability to switch between a few different screen modes. You can find all of the modes listed under Window > Screen Mode, along with their respective keyboard shortcuts. The most important thing you need to know is that you can cycle through them all one at a time by pressing Shift+F. I also want to point out that you can still access the menu bar while in Full Screen mode.
Just move your cursor to the very top of the screen and the menu bar will pop down automatically. To see a single image full screen (called, “Full Screen Preview”) press the F key, which is really handy when you want to clear all clutter and just see nothing but your photo filling the screen.
Lights Out
One last trick up your interface sleeve is Lights Out mode. Lights Out comes in three flavors; Lights On, Lights Dim, and Lights Off. Lights On is the default and what you use all the time. Press the L key once to transition to Lights Dim, where the selected photo(s) remains at full brightness, but the interface dims. Press the L key again to transition to Lights Off where the interface fades to black completely. I love using Lights Off in conjunction with the Crop Tool to get a real time preview of the final crop. On the Interface tab of the Preferences, you can set the Dim Level and even change the Lights Out color from black if you wish. Press L one last time to turn the lights back on.
The post Making the Most of Lightroom Classic’s Interface appeared first on Lightroom Killer Tips.
