
How to use the Adjustment Brush in Photoshop
There is a new feature in Photoshop, which is only available in the public beta of Photoshop 2024 at the time of this writing. How to get the Photoshop beta
The adjustment brush basically brings an easier way to paint on your image and do things like brighten the areas you are painting non-destructively.
It will apply an adjustment layer and a mask to your image. This doesn’t offer any new functionality over what you can currently do with an adjustment layer and painting on the adjustment mask with a brush. It just makes it quicker and easier to do. This tool will be popular with less experienced Photoshop users, and also useful for a super quick fix for more experienced users if they choose to use this method.
With that said, let me show you how to use the Adjustment brush on a practical example of a photo. Then, at the end, I’ll tell you exactly how it works.
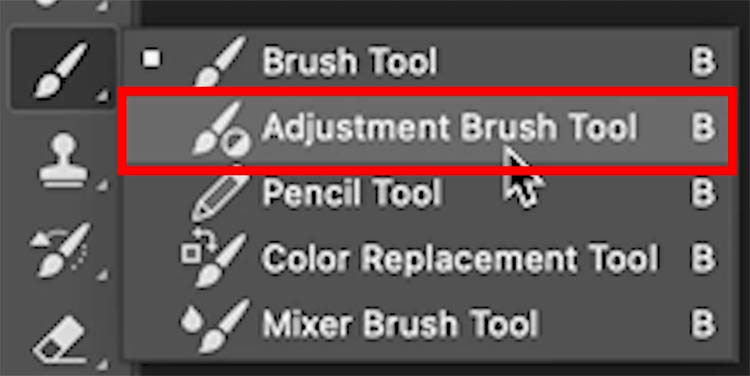
How to Use the Adjustment Brush Tool in Photoshop
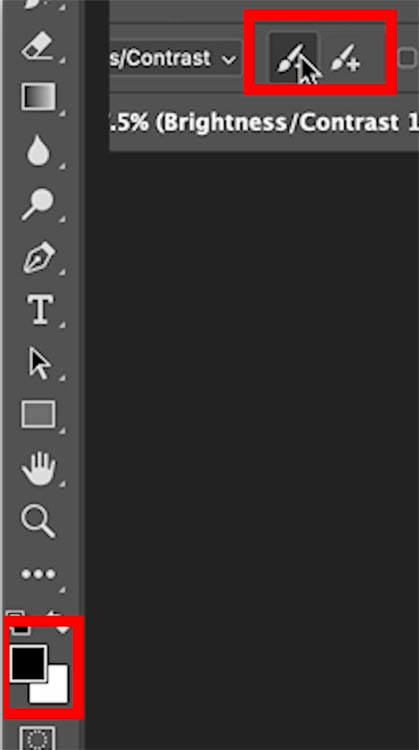
Click and hold on the brush tool to reveal the adjustment brush.
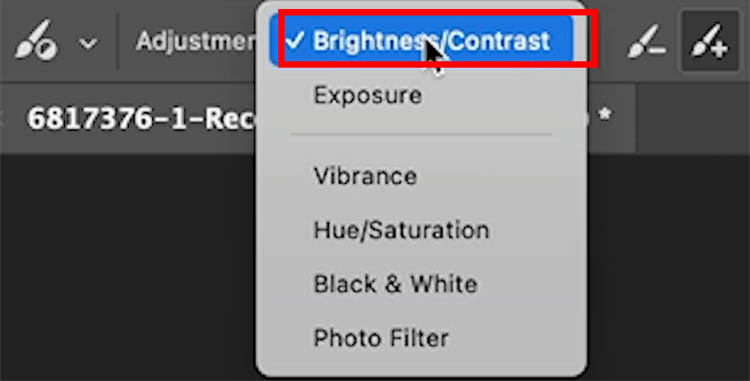
Click on Adjustments at the top of the interface.
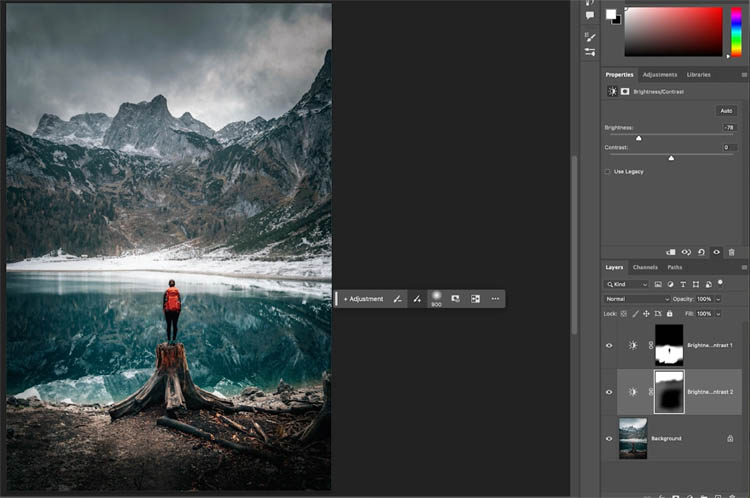
There are 6 different options, we will use Brightness/Contrast
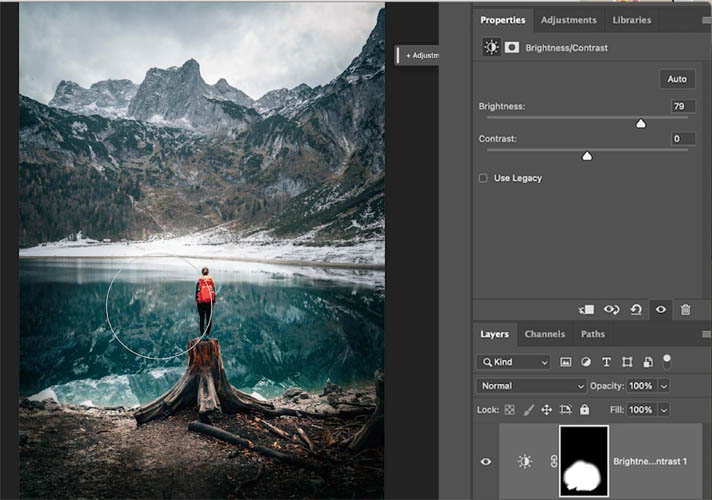
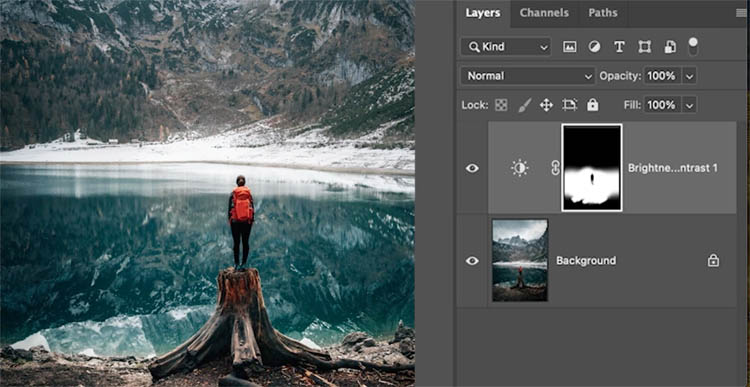
Then you just paint on your image to apply the adjustment wherever you paint. Really simple.
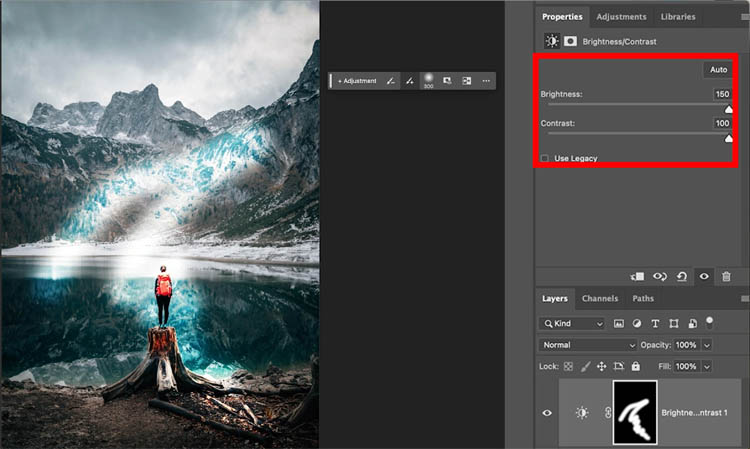
Use the [ and ] bracket keys to change the size of the brush. You can change the settings of the adjustment in the Properties panel.
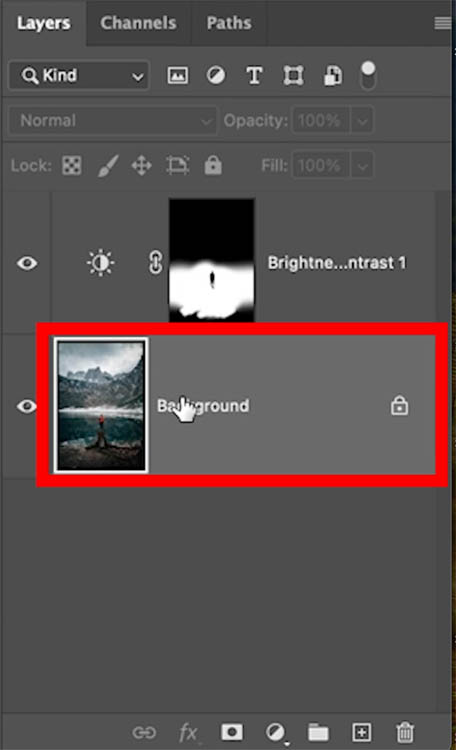
Maybe we want to remove the adjustment from the person in the photo.
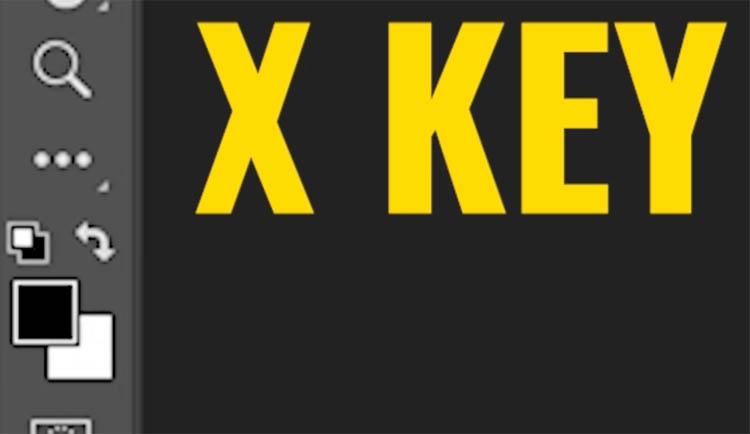
Switch to the minus brush. (X key)

Its hard to see where you have painted sometimes.
Click the Display mask button in the Floating toolbar. (You will also notice the – and + bush options are there too).
Now you can see the mask
with the – brush, paint away from the person

Now the adjustment is applied just where we want it.
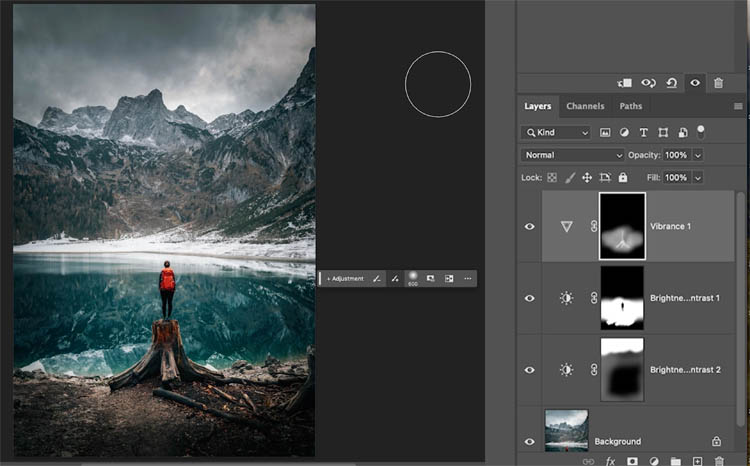
Notice the mask in the layers panel, I’ll explain that in a moment, let’s finish the image first.
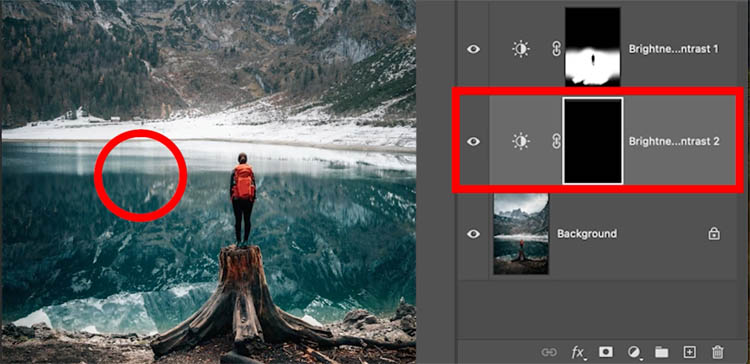
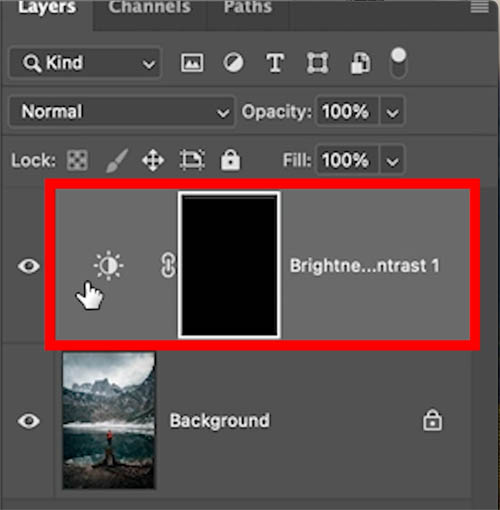
Now I want to darken some areas.
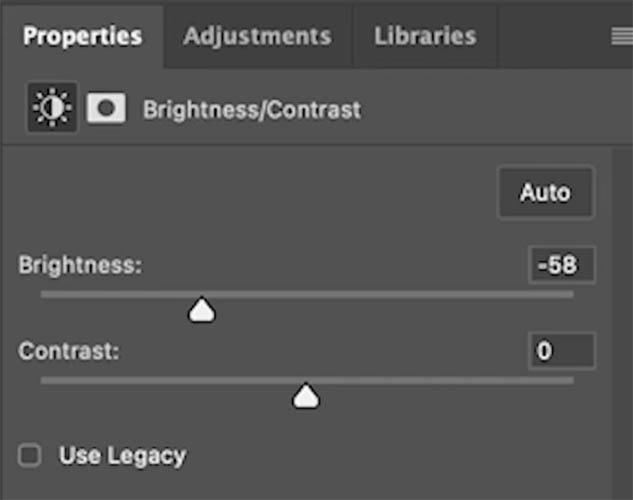
You cannot both lighten and darken on the same adjustment, we need to create an additional Brightness/Contrast adjustment.
To add another of the same adjustment we are currently working on, we need to click a different layer first.
As soon as you start to paint, you will get a second Brightness/Contrast adjustment layer
This time, make it darker
Paint on the sky and edges to darken those areas of the photo.
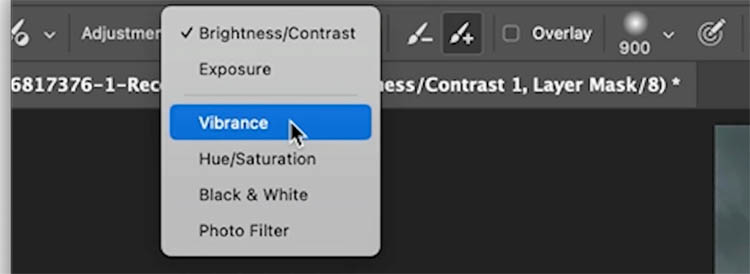
Let’s add a different Adjustment.
When adding a different adjustment, you don’t have to select a different layer.
Choose Vobrance
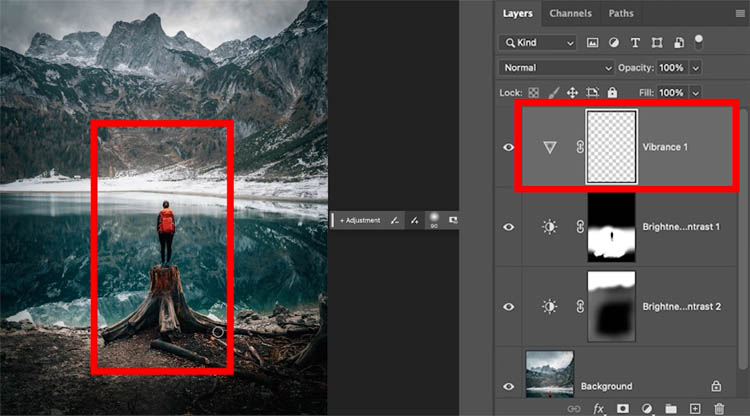
As soon as you start painting, a new layer will be created automatically.
Paint on the person, to pop their colors.
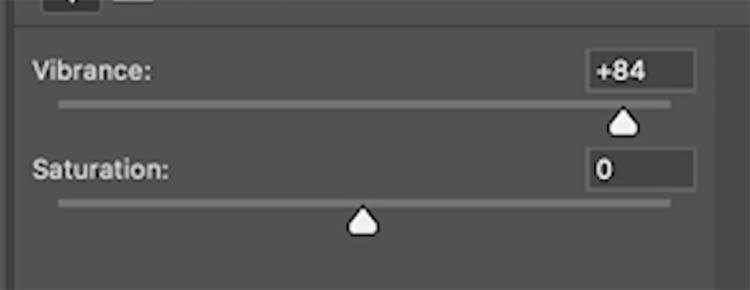
Make adjustments to control the amount of vibrance.
And here is the photo. If you want, you can change the opacity of the different layers to reduce the effects of each adjustment if you choose.
If you want to increase the effects, duplicate the layers you want to increase.
If you want to Learn How to use Layer Masks in Photoshop, see this tutorial.
What does the Adjustment Brush do?
Let me show you what’s happening and how this tool works, along with accessing more settings and options.
As soon as you begin to paint a new adjustment layer will be created in the layers panel with a black mask. The black mask hides the adjustment.
The adjustment brush sets the foreground color to white. When you paint on a black mask with white, it will show the contents of that layer (the brightness adjustment) wherever you paint. This is how the adjustment brush works.
You can change the settings of the adjustment layer in the properties panel, like any adjustment layer.
This will change the brightness of the areas you are painting. (Or other settings, depending on the type of adjustment).
If you have painted too much and want to undo some areas, change the brush to the subtract brush. the – brush.
notice as you change the brush, it changes the foreground color between black and white.
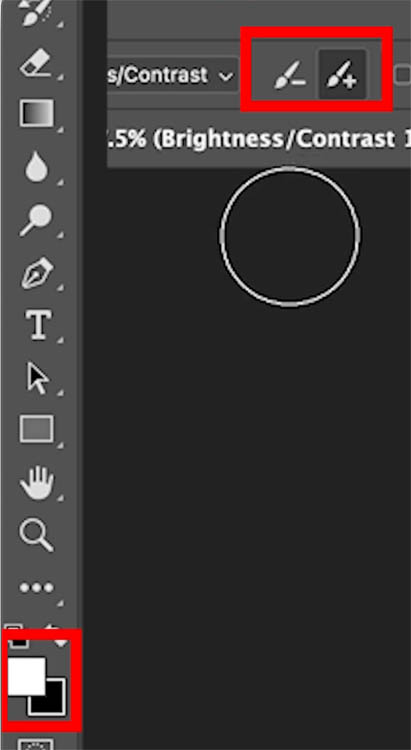
You can also switch between + and – by tapping the X key on the keyboard.
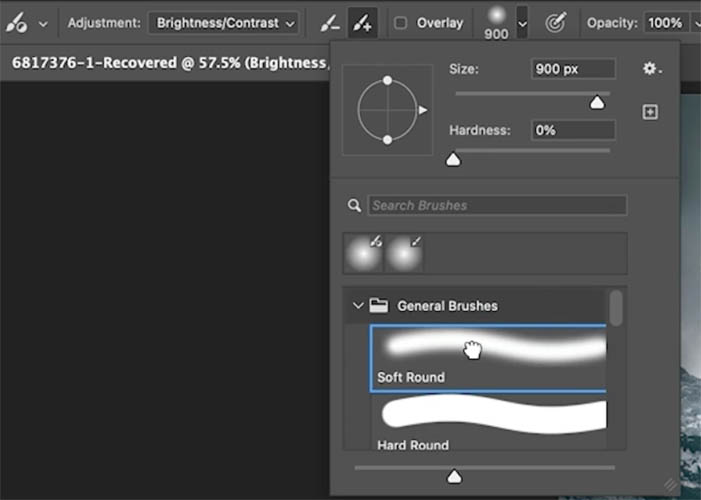
If you want to build up the effects and blend them better, use a lower setting on the flow.

If you choose the brush icon, you can change the brush and use any brush you like,
If you are using a pressure sensitive pen tablet such as a Wacom, Xense labs or Microsoft Surface, you can change the pen pressure settings.
Choose Window>Brush Settings
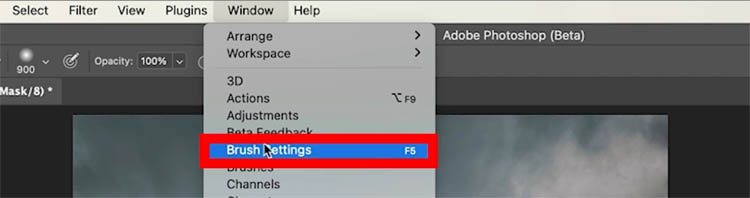
Here you can change things like opacity and size to be affected by how hard you press with your pen.

Just set the Control to Pen Pressure. Obviously, if you are using a mouse, the Pen Pressure option isn’t available.

I hope you found this tutorial useful. Let me know if you would like to see me create a more in depth tutorial on dodging and burning with the Adjustment Brush. Drop a comment and let me know. If I get enough interest, I’ll create said tutorial.
As always, if you got any value out of this, please share with your friends and tell them about the cafe, either in Real Life or on social media by clicking the share buttons at the top of this page.
Great to see you here at the CAFE
Colin
PS: Get over $200 worth of valuable Photoshop Add ons, brushes, presets, cheat sheets and ebooks abolulutely free, right here.
The post New Adjustment Brush in Photoshop appeared first on PhotoshopCAFE.