
What’s new in Camera Raw?
Adobe updated Camera Raw to Version 16.3 and added some nice new features. These features work exactly the same way in Lightroom Classic. The video goes quite in-depth, but I’ll keep these written steps brief because I have already covered them in my Lightroom write up which you can see here. As well as in-depth tutorials on individual tools.
Generative Remove
Generative remove uses firefly ai (same tool as Generative Fill in Photoshop) to remove and replace objects in a photo.
Bear in mind that maximum resolution generated in 1024×1024 pixels, so be careful when using on areas that will be OUTPUT larger than that. I emphasize this point because I’m seeing a bit of an overreaction to this. Unless you are printing your images, it isn’t as much of an issue for people, as some make out, because remember 1024px is close to the full resolution height when you output an image at full HD (1920 x1080) which is enough for online and social media sharing. But do check the final output to make sure there isn’t a softening or resolution mismatch. If you are concerned about this, or want print quality, then use the legacy tools or the remove tool in Photoshop which doesn’t’ have resolution limitations. Smaller patches are totally ok. Ok, having said that, let’s see how this works shall we?
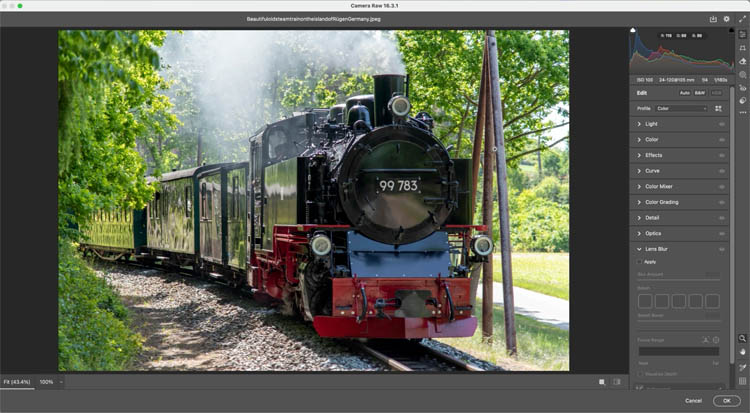
Choose Filter>Camera RAW from Photoshop, or open as ACR from Bridge.
Click the eraser icon in the toolbar

You will see the remove panel.
If Generative ai is off, then the tool will work in legacy mode (How it used to work) If it is checked, it will use Generative ai, which requires and internet connection.
Object aware, will try to detect the edges and cover the object

Scribble select, or make a rough selection with Object aware on

It will do its best to select the object. It will make a selection slightly larger than the object, which you always want to do.
You will also notice it goes directly to the refine panel. (Hold Ctrl/Cmd to skip the panel)
Use the bush to refine the selection area (Some tips are in the video at the top).

Choose subtract to remove brush strokes
When you are ready, click apply

To bject will now be removed. Click through 3 variations to find the best one.

Lens Blur
I’ve covered Lens Blur in depth on other tutorials.
Click apply in Lens Blur

The ai will detect you object and blur the background.
Under the hood (or bonnet) it will build a depth map to tell ACR where to blur. More on depth maps in a sec.

You can adjust the blu amount.
If you choose the target tool, you can click anywhere in the photo and that will become the sharpest part of the photo. Yes, this is like focusing the photo after you have taken it. (Remember, a blurry photo will still be blurry though, so nail that focus in camera!).

See the focal range.
If you move it to the left, it will focus closer to the viewer.

Move to the right and the focus will be further away from the viewer, with the close objects blurred.

If you make the slider more narrow, the focus area will be less, aka shallow depth of filed.

Widen the slider to expand the depth of field and have more of the photo sharp at once.

Lets look at that Depth map thing shall we?
Turn on Visualize Depth.
Now you see the depth map. The lighter areas are closer to you and the darker areas are further away.
The trees to the left are blurry but should be sharp.
Under refinement, choose focus

As you paint on the image, ypou can paint the areas that you want more in focus, or more out of focus.

See how the trees on the left are nice and sharp like they should be now.

If you look at the presets, you’ll see that there are new Adaptive presets for the blur. Adaptive means the ai adapts for each photo. Basically selecting the unique subject in each photo and then applying the preset blurs and settings.

Content Credentials
You can embed Content Credentials into the photo if you like. This is a way to protect you are the creator, as well as apply a layer of safety to viewers who need to know if ai was used on an image. It helps protect from deep fakes and reveals synthetic media.
Click the export button

You’ll see in the export panel, Content Credentials. Currently this is only working on jpg.
Producer, lets you attach your name. Connected Accounts, lets you link some of your social media accounts.
Edits and activity, embed any known edits or ai information.

You can store just locally and embed the data into the image, or into the cloud where the data will be attached to the image and recognized, even if its stripped locally. I haven’t tested the latter. Or you can use both options.

Save the image.
You can check any image on the Content Credentials Cloud. https://Contentcredentials.org/verify

You can test your image by dragging it into the website.

It will provide info on the image and also reveal if any editing has happened. Here i says ACR was used and ai was used.
More software and Hardware companies are building in Content Credentials as part of the CAI. Content Authenticity Initiative. Some of the partners include Adobe, Canon, Nikon, Leica, Getty, Microsoft, Nvidia, Qualcomm, arm, Reuters, universal pictures, Wall Street Journal, New York Times, and many, many more.
Eventually all image will be part of this and contain a pin that people can use to check if the image is real or not. Solving one of the big fears about ai generated content.

I hope this was a useful tutorial for you.
Great to see you here at the CAFE
Colin
PS Don’t forget to follow us on Social Media for more tips..
(I’ve been posting some fun Instagram and Facebook Stories lately)
You can get my free Layer Blending modes ebook along with dozens of exclusive Photoshop Goodies here 
The post New Features in Adobe Camera RAW 2024 ACR 16.3 appeared first on PhotoshopCAFE.