
Today is the first day of Adobe MAX and with that comes the release of new versions of Adobe software! Notably, Lightroom Classic (LrC) version 12, Camera Raw (ACR) version 15, Lightroom (Lr) for Mac/Win version 6, and Lightroom for mobile version 8. Let’s get to the good stuff!
Masking Interface Changes
You’ll see more details about why in a moment, but to accommodate the new features added the panel that houses the masking tools has evolved. Here’s how it looks in Lightroom Classic.
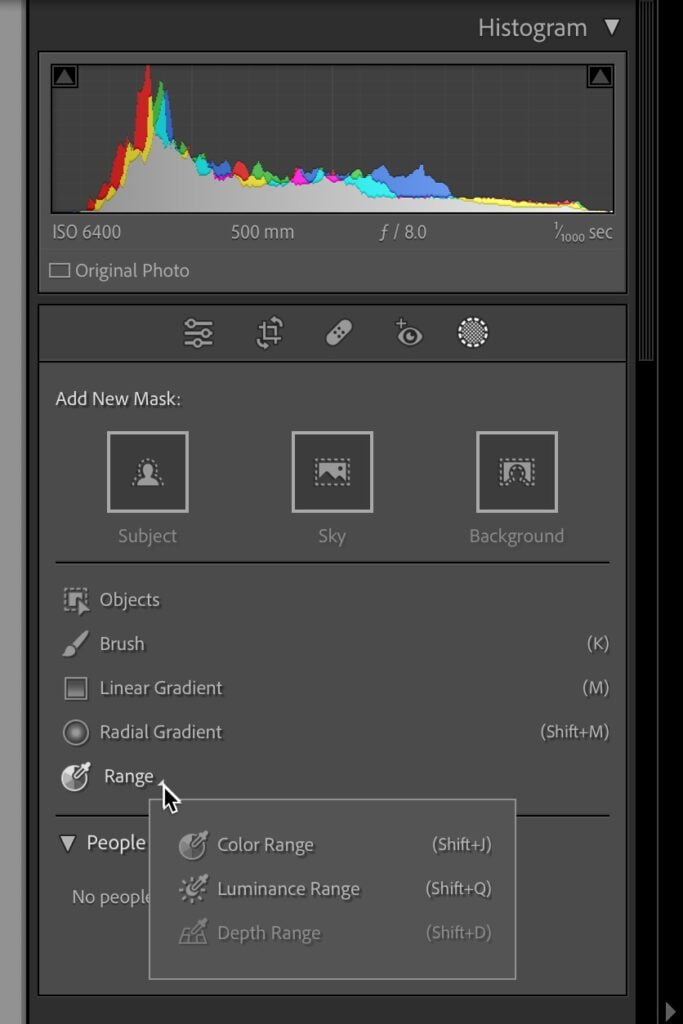
Aside from the new features, I want to make you aware that Color Range, Luminance Range, and Depth Range are now found under the Range popup. Also, note that there is a new Edit icon (to the left of the Crop icon) under the Histogram to make it easier to jump back to the regular editing panels from other modes. The exciting new stuff–Select Background, Select Subject, and Select People–is available in LrC, ACR, and Lr for Mac/Win currently.
Select Background
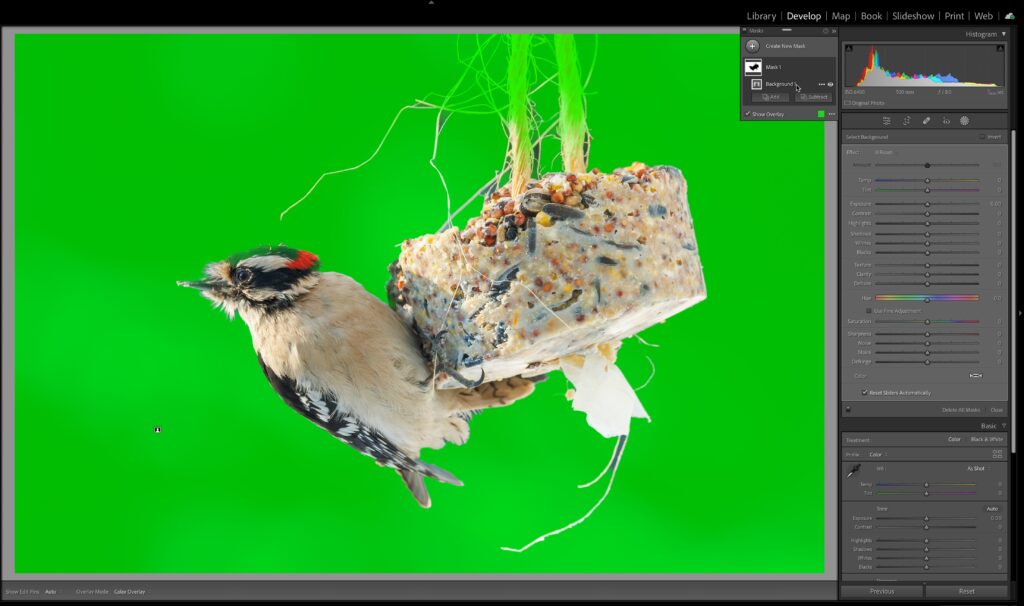
Prior to this release we could select a background by first using Select Subject, then inverting that selection to get the background. Adobe has simplified that process by giving us the ability to click the Select Background button and get it done in one step.
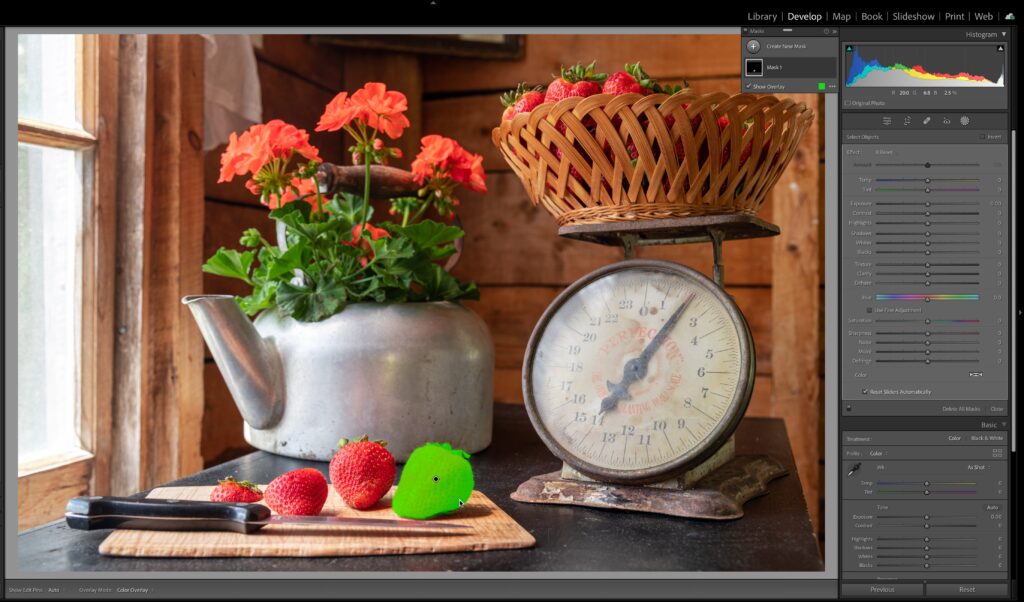
Select Objects
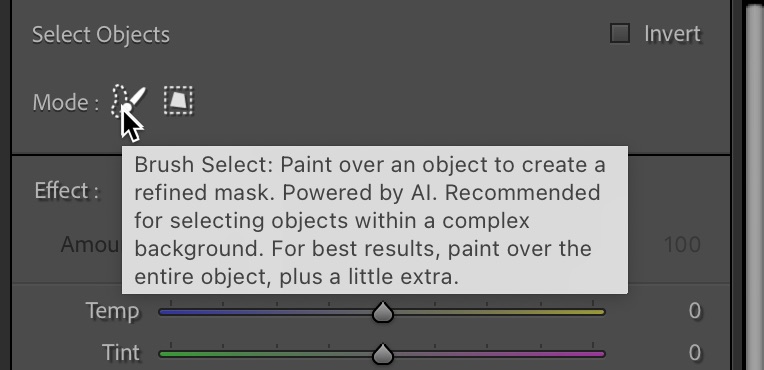
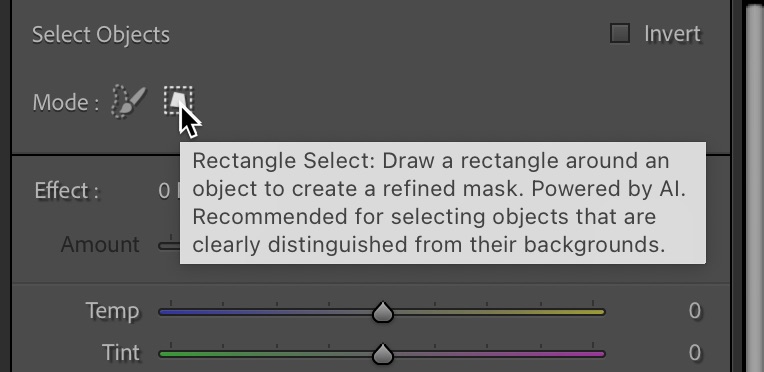
Moving down the panel, the next new feature comes in two flavors, though both can get you to the same destination. Let’s say you wanted to select just a single strawberry in this photo. Click the Objects icon in the panel to open the Select Objects controls. There is a Brush Select mode and a Rectangle Select mode, and as you guessed, when using Brush Select you paint over the object you want to select and then the software creates a mask for just that object. With Rectangle Select you draw out a rectangular selection over the object to create a mask. Choose the option that works best for a given photo.
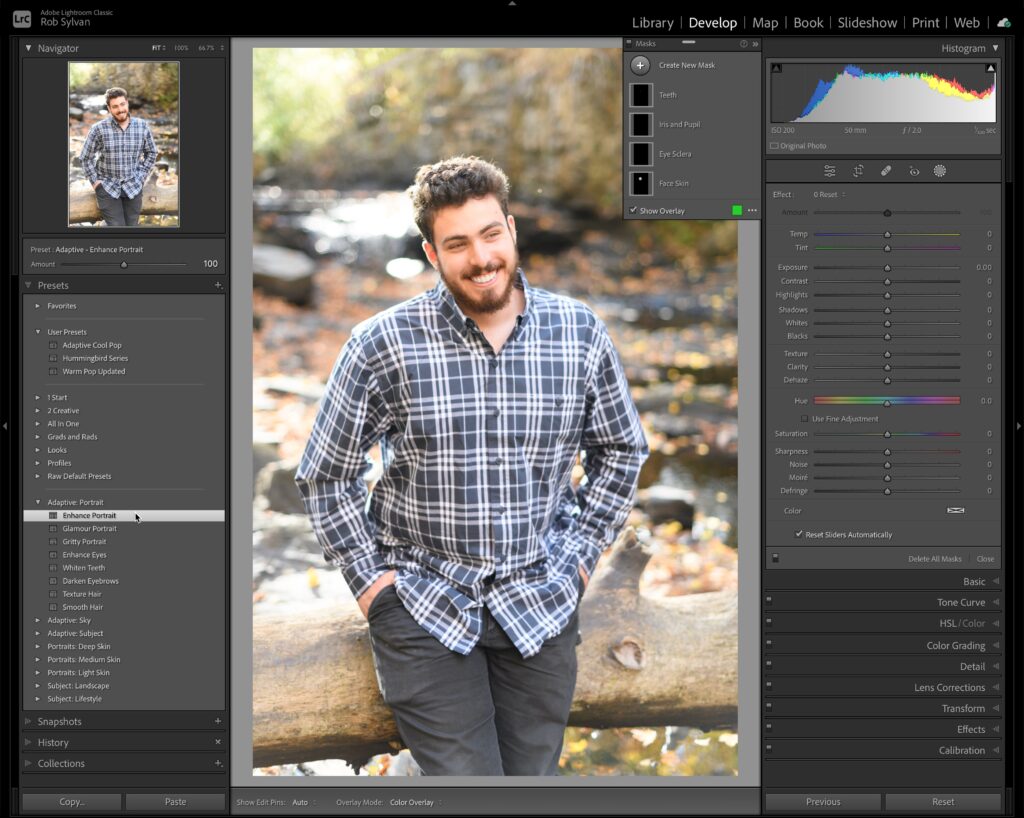
Select People
If you thought Masking changed the game when it was released last year, you’re going to be over the moon about the new ability to select individual people and even isolate key facial features. Not only does the AI recognize a person as a subject, but it differentiates people from other subjects and provides us with the ability to make masks of their face skin, body skin, eyebrows, eye sclera, iris and pupil, lips, teeth, and hair! It can even tell if someone isn’t smiling and not show the option for teeth. You’ve really got to try this to see how powerfully this is going to change workflows for portrait editing!
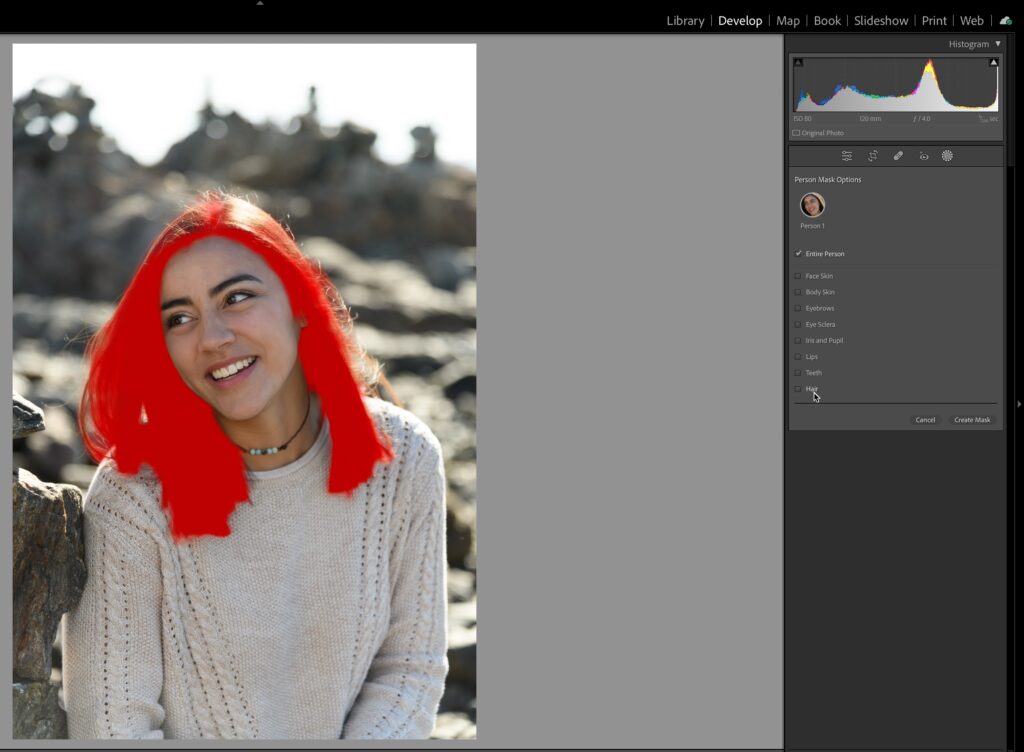
Be sure to try it on photos of multiple people!
Content-Aware Remove
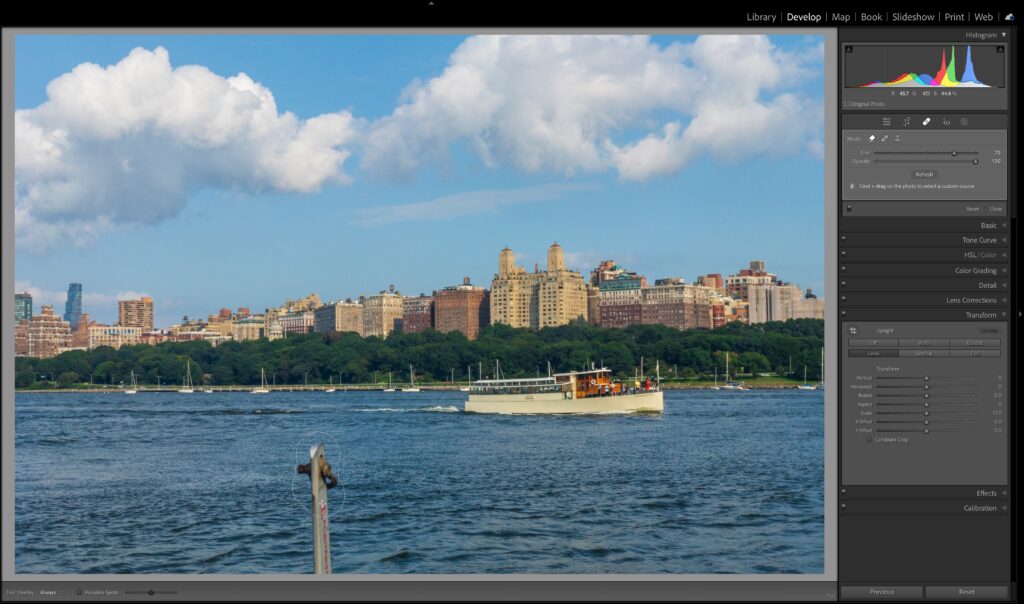
The Spot Removal tool (now just called Healing) in Lightroom Classic has always had a bad reputation when used for more than getting rid of sensor spots. Well, those days are gone! Clicking the Healing icon (band aid) gives you access to the three modes of the Healing too. The first is the newest, which is Content-Aware Remove. The other modes are the ones we’ve had all along.

Select Content-Aware Remove then paint over an object in your photo and let Content-Aware do its thing. Like Content-Aware in Photoshop, it is not perfect, but does a much better job than the old tool.
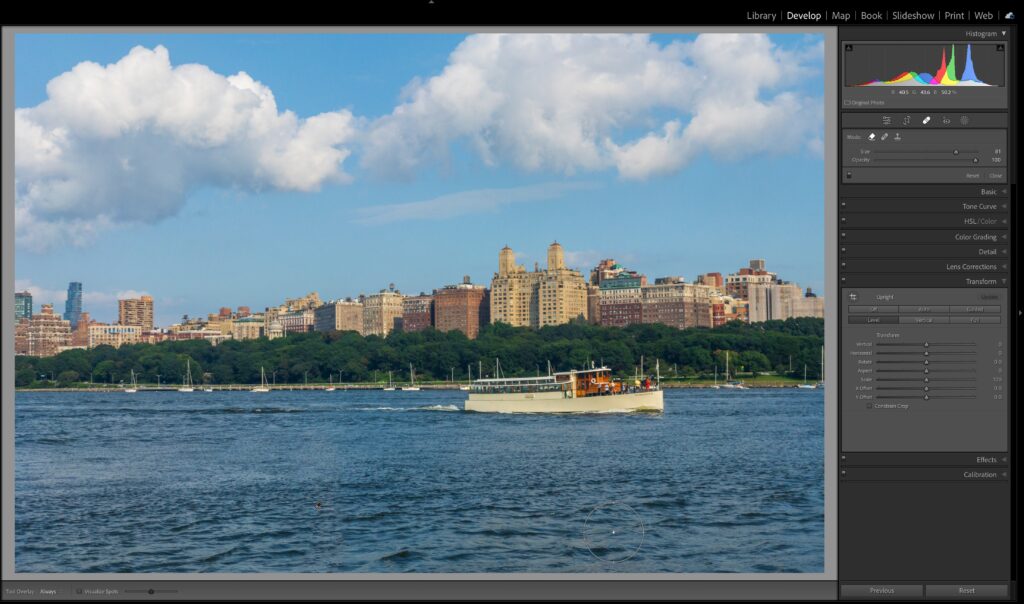
You can click the Refresh button in the panel to update the Content-Aware fill or press CMD (PC: Ctrl) and drag on the photo after brushing to manually select a source.
Adaptive Presets for People Masks
Adding to the two other sets of adaptive presets, meaning presets that utilize AI-based masking to make selections and then apply adjustments, we have gained a new set of presets called Adaptive: Portrait. Give them a spin and then make your own adaptive presets!
Swap Left and Right Panel Groups (LrC)
As a predominantly left-handed person, I like the intention behind this new preference setting. First, to find this new feature head to Lightroom Classic > Preferences > Interface (PC: Edit > Preferences > Interface), and locate the Swap Left and Right Panel groups checkbox.
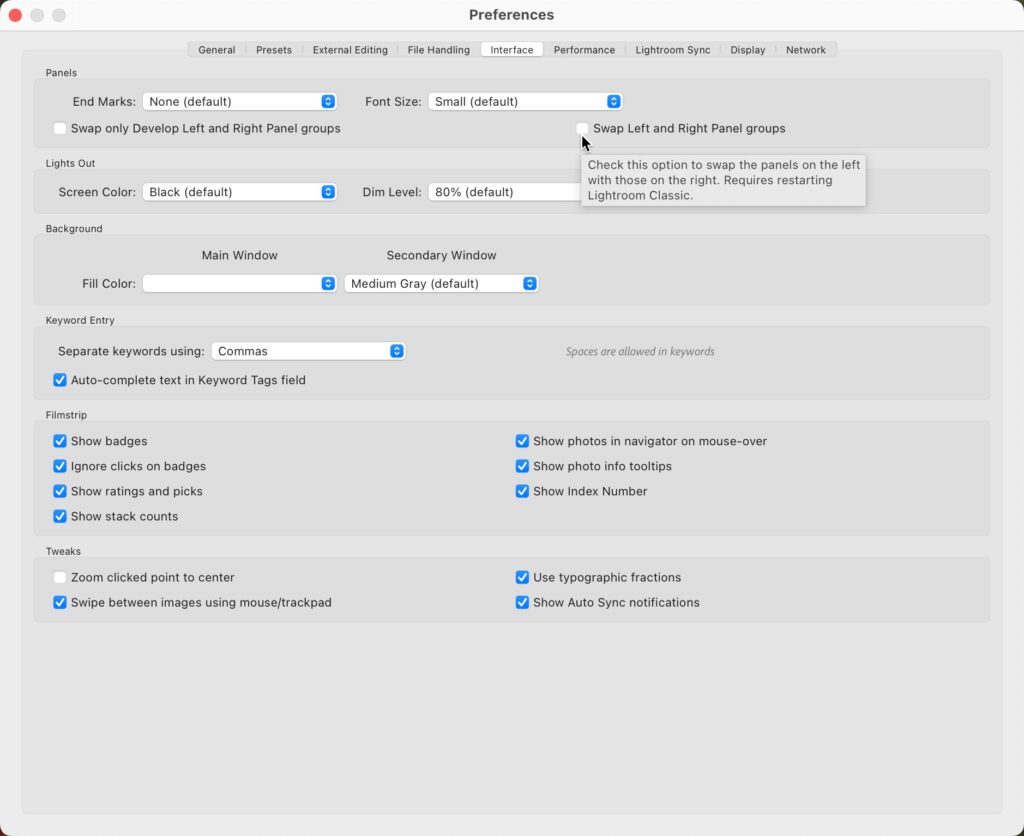
Checking that box will swap the contents of the Left and Right Panel groups for every module upon restart of the program.
[Editor’s note: I made a mistake in my original post because I completely missed the accompanying checkbox for Swap only Develop Left and Right panel groups. My apologies for my previous rant (now deleted), and my gratitude to Rikk for pointing that out. ] So, that out of the way …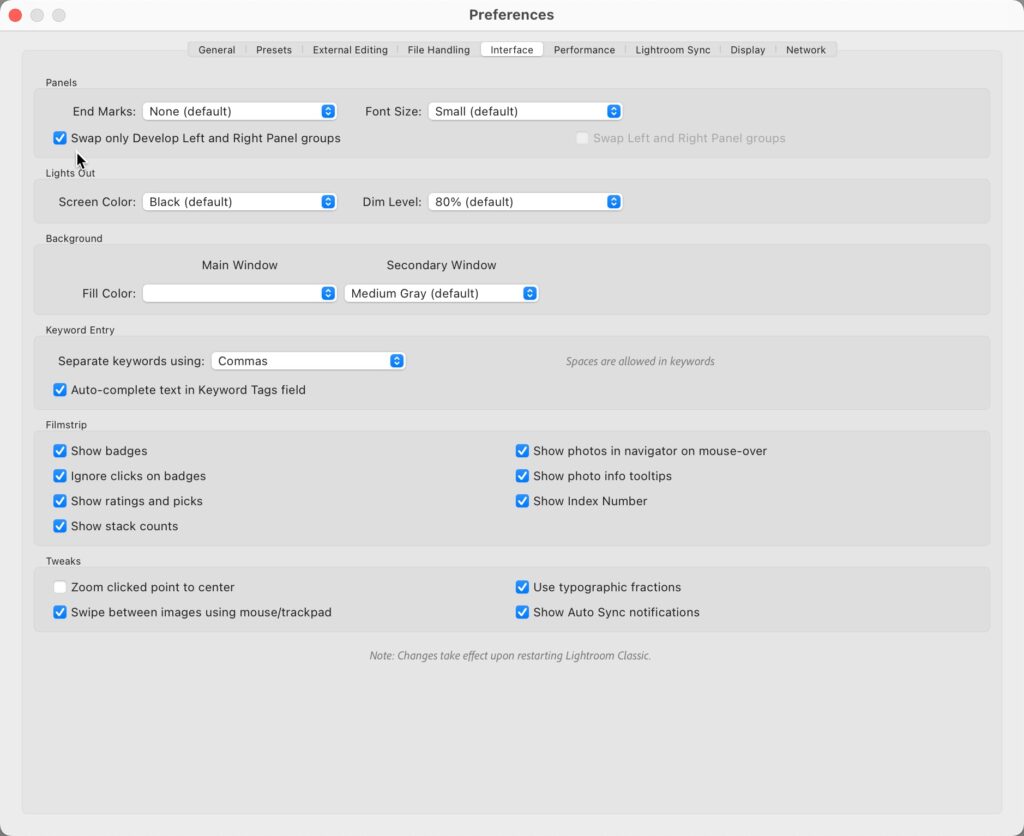
As a lefty, the only place it really matters to me (and I realize this is subjective) is in Develop, and only when using a tablet device that allows me to edit on screen with a stylus or via touch. Why so specific? Because with the panels on the right side, when using a stylus on screen (like with a Wacom Mobile Studio Pro or Microsoft Surface) your big dumb left arm covers the photo! Having all the editing panels on the left side for this specific situation is very welcome, so thank you, Adobe.
I use this same feature on my iPad, as it has a setting called Left-handed editing, and when enabled it places just the editing panels on the left side.
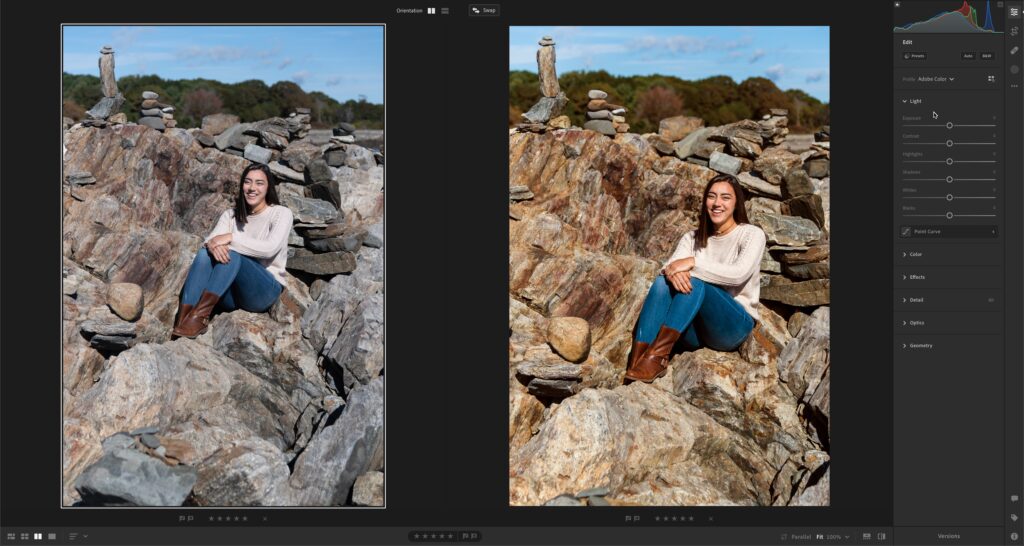
Compare View with Edit (Lr Mac/Win)
Compare view arrived in Lr for Mac/Win a while ago, but now we can use it when editing too.
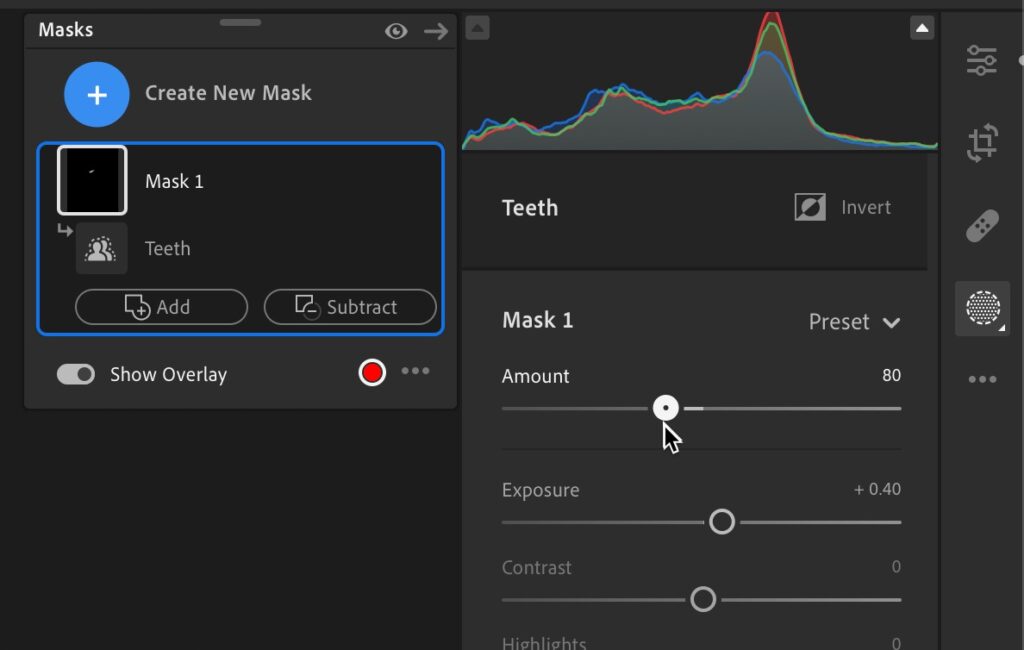
Mask Amount Slider (Lr Mac/Win)
A small, but welcome addition is the Amount slider at the top of the Masking panel when you apply edits and want to tone them down or amp them up.
Other Improvements
As with all updates and new versions we gained support for new cameras, new lenses, and many bug fixes. There have also been performance enhancements made to Lightroom Classic, specifically on export and switching between photos. Be sure to check out Adobe’s own rundown of new features to learn more. Enjoy MAX!
The post October 2022 Release for Lightroom Classic, Lightroom, and Camera Raw appeared first on Lightroom Killer Tips.