
It’s the fourth installment of our retouching column: last time, we looked at retouching teeth, and also wound up brightening the whites of the eyes. This time around, we’re going to look at a very common retouch: reducing wrinkles and dark circles under the eyes.
Our goal when we retouch wrinkles is not to remove them but to reduce their intensity. With wrinkles, the darker the shadows appear, the deeper the wrinkles look, and the older our subject looks. So we’re going to look at making the wrinkles look less deep and less intense without removing them altogether, which would make our subject look obviously retouched and probably kind of weird-looking.
Note: You can download this same image for free from Adobe Stock and practice right along using it. Here’s the link. You’ll need to log in with your Adobe ID to get the free Adobe Stock download.

STEP ONE: After importing the image into Lightroom Classic, press D to jump to the Develop module (or, if you’re using Lightroom for the cloud, click the Edit button at the top-right side of the window). Now let’s zoom in tight on our subject’s face so we can clearly see the area we’re working on while we’re retouching. You can do that by pressing Command-+ (PC: Ctrl-+) a few times until you’re zoomed in nice and close, as seen here. Click and drag to move the image around if necessary.
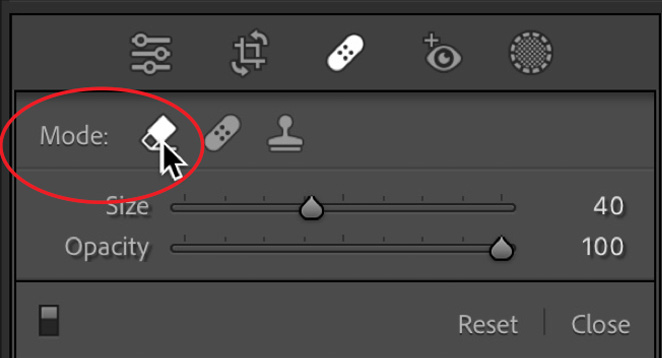
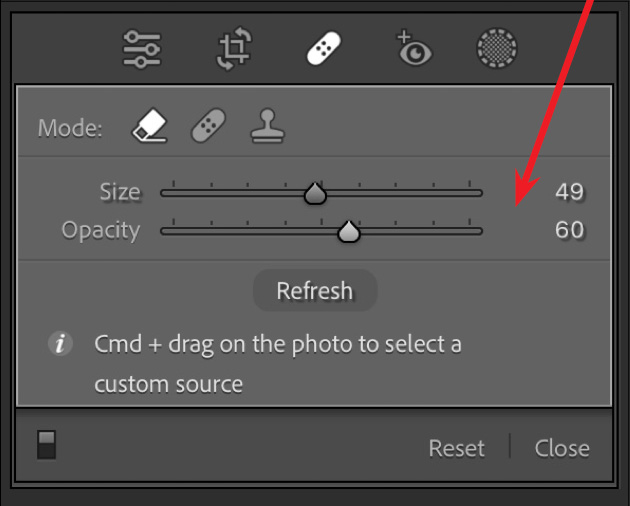
STEP TWO: In the toolbar below the Histogram, click on the Healing icon (it looks like a bandage). When it reveals a panel with three healing tools, click on the one on the far left; its icon looks like an eraser (as shown above). Set the Opacity to 100% for now.
STEP THREE: We’re going to start with the wrinkles on his forehead, so make your brush size just a little larger than the wrinkles you’re going to remove. You can resize the brush using the Size slider in that panel you just saw in Step Two, the Left and Right Bracket keys on your keyboard ( [ ] ); or, if you have a two-button mouse, you can use the scroll wheel.
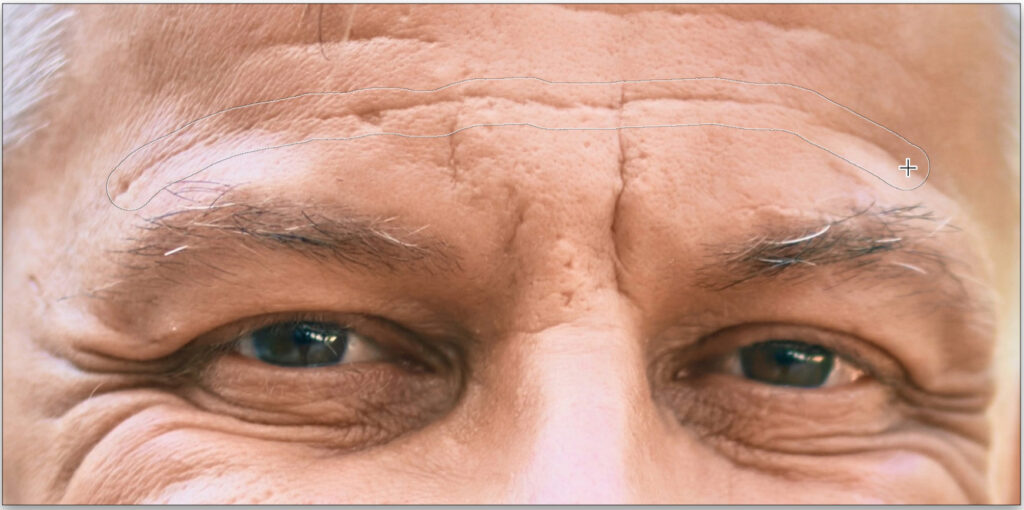
STEP FOUR: Now you’re going to trace along that wrinkle, starting on the left side and painting all the way over to the right side of it. It’s kind of hard to see in this particular image but, as you paint, you’ll see a thin white outline appear in the size of your brushstroke. It’s there in this image, but, as I said, it’s kind of hard to see, though you can see my cursor above his left eye on the right side of the wrinkle.
STEP FIVE: When you release the mouse button, the wrinkle is gone (I did a side-by-side before/after here by pressing the letter Y so you could see the difference). So, the wrinkle is gone, but completely removing it isn’t our goal; it’s just to reduce its intensity, so we’ll fix that in the next step.
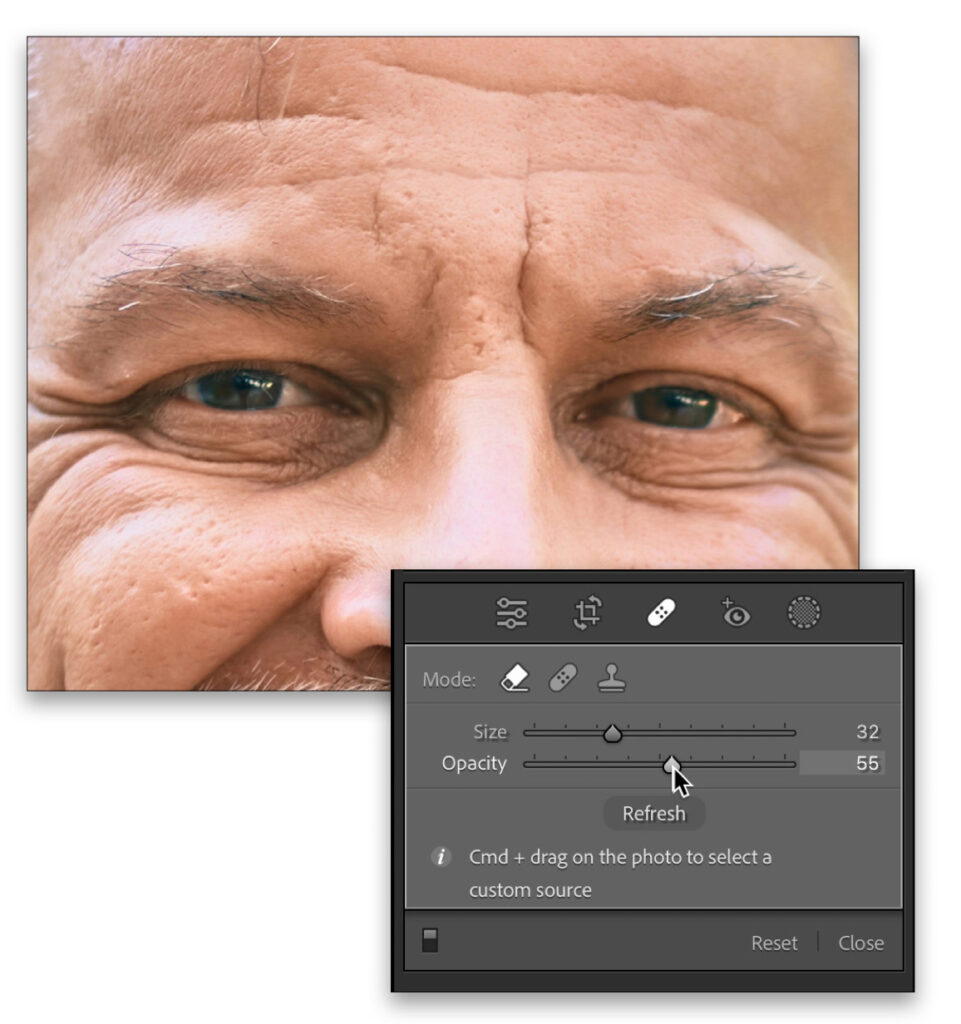
STEP SIX: What we’re going to do is bring back part of the wrinkle, and when we do that, the wrinkle won’t be nearly as dark so that it won’t appear nearly as deep, and our subject won’t appear nearly as old. Well, our goal is ten years younger, not 40 years younger. To do that, go to the Healing options panel and drag the Opacity slider to the left (as shown here), and as you do, it brings back the wrinkle. The farther you drag to the left, the more the wrinkle returns. Here I lowered the Opacity to 55%, and now you can see the wrinkle is there, but it’s not nearly as intense or noticeable as it was before.
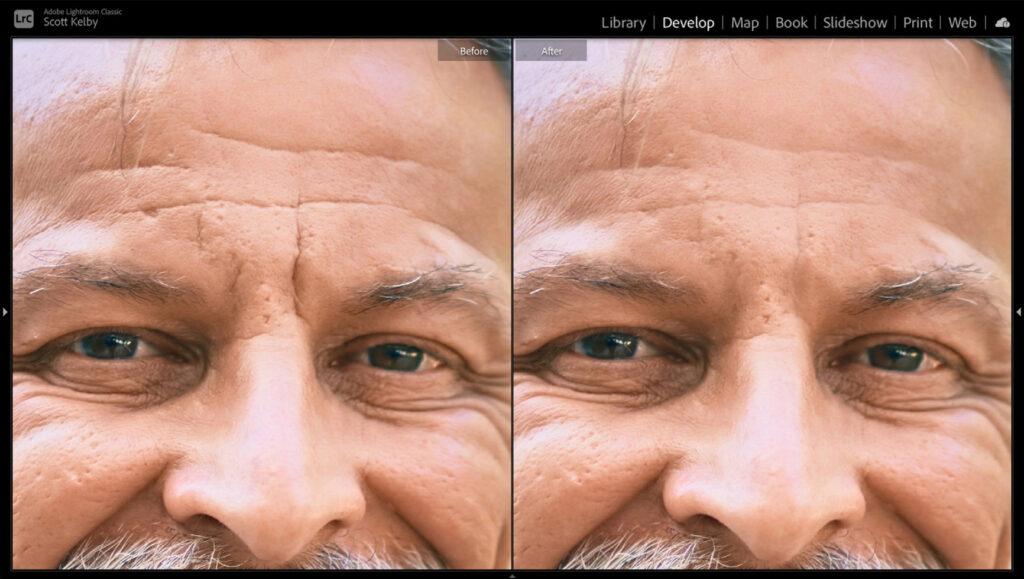
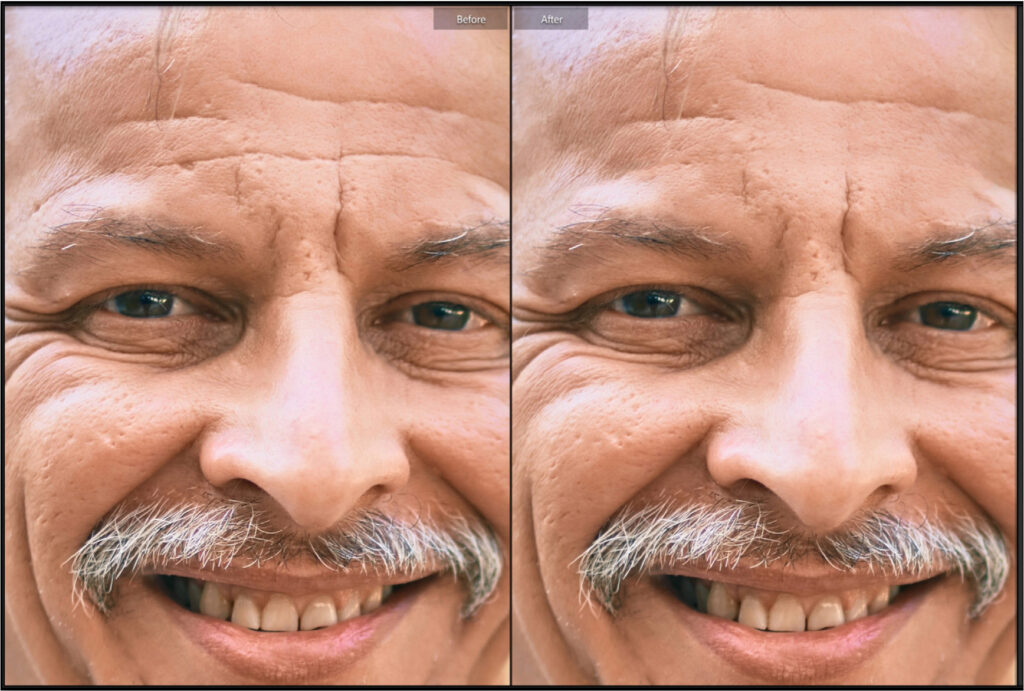
STEP SEVEN: Now you can continue on with this process of painting over wrinkles, and the tool will remember that 55% Opacity amount, so when you paint over the next row of wrinkles, they’re already at 55% Opacity. Here’s a side-by-side before and after of just painting over the forehead wrinkles and those few between the eyes.

STEP EIGHT: Next, let’s do the same thing with the wrinkles under his eyes. Just paint over those areas to reduce their intensity. Have you noticed how much better a job this is doing removing these wrinkles than Lightroom used to do in the past? That’s because this erase Mode of the Healing tool is based on Photoshop’s Content-Aware technology and, in most situations, it’s vastly better than the old Spot Removal tool, which was well-named because that’s pretty much what it was good for: removing spots.
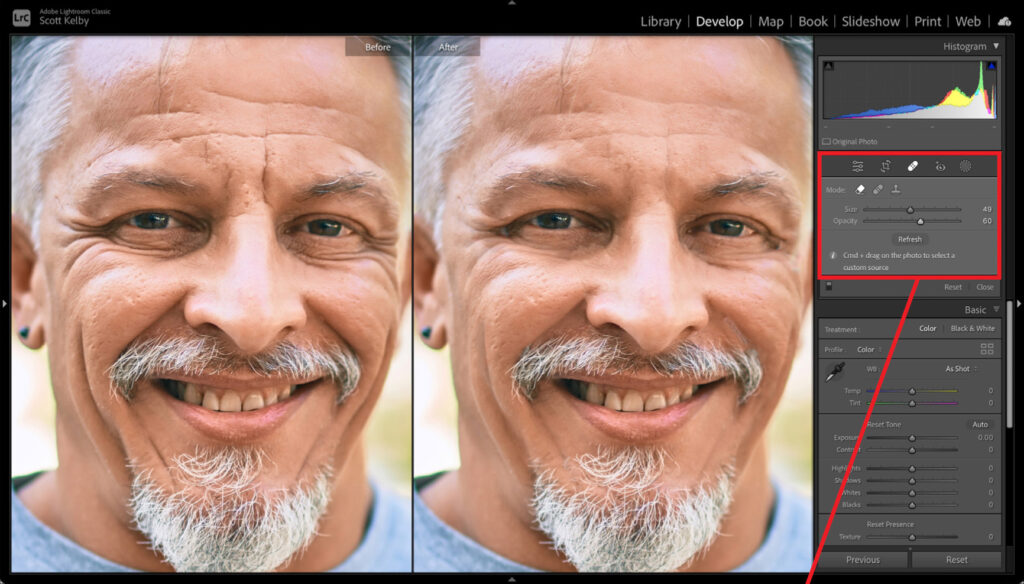
STEP NINE: Continue with the process of painting over the wrinkles for the rest of his face. After you’ve painted over all of them, zoom back out a step or so (Command-– [PC: Ctrl-–) and take a look at the image to see if that Opacity slider needs to be moved up for any of the wrinkles. To see the pins for each of your brushstrokes, choose Auto in the Tool Overlay drop-down menu below the left side of the image. Now, when you move your cursor into the image, you’ll see all the pins. Click on the one you want to change, and then adjust the Opacity for that wrinkle.
Above: Here, I changed all of them to 60%, so the wrinkles are lessened even more. You could also lower the Opacity if you want to bring back more of a wrinkle. Zooming out will help make that decision easier because you can see more of the overall face. Again, the side-by-side is a helpful view here too.
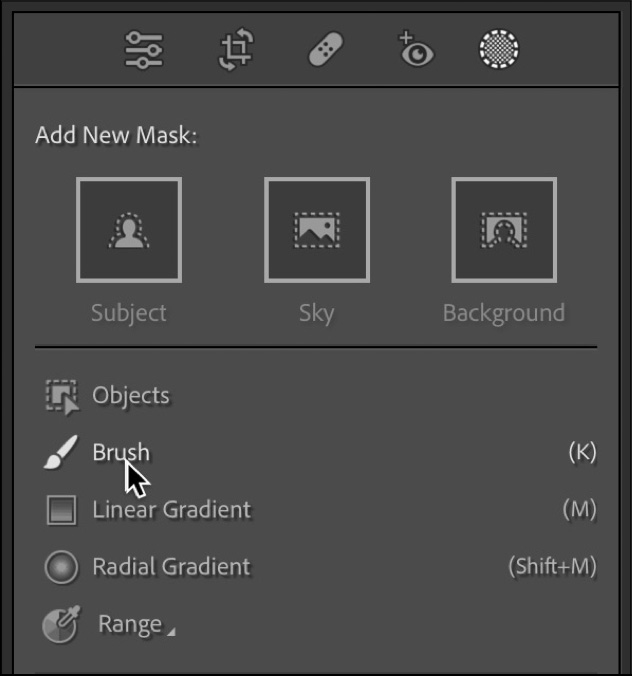
STEP 10: His eyes are a little deep set, and that makes his eye area look darker (and older), so let’s brighten that area up a little to finish things off. Up in the toolbar, click on the Masking icon (it’s the gray circle with the dotted white line around it) to bring up the list of masking tools. Click on the Brush tool (as shown above). In the brush controls, set both the Flow and Density to 100.
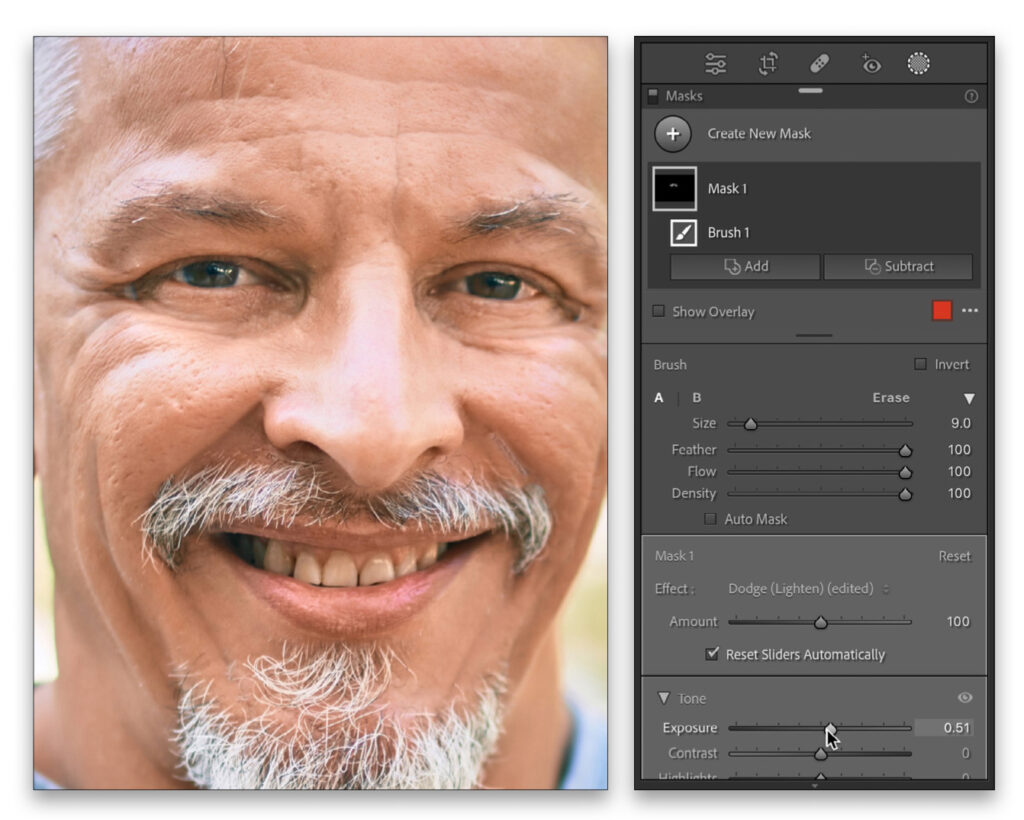
STEP 11: Make the Brush about the size of one of his eye sockets and paint over both eyes. Next, we’re going to increase the Exposure amount and dial in the right amount of brightness. You’re looking to match the brightness of those eye sockets with the rest of his face. In this case, that had me raising the Exposure slider to around +0.50, or around 1/2 a stop brighter, and that did the trick. You could probably brighten the whites (the sclera) of his eyes a bit too, which we covered last week.
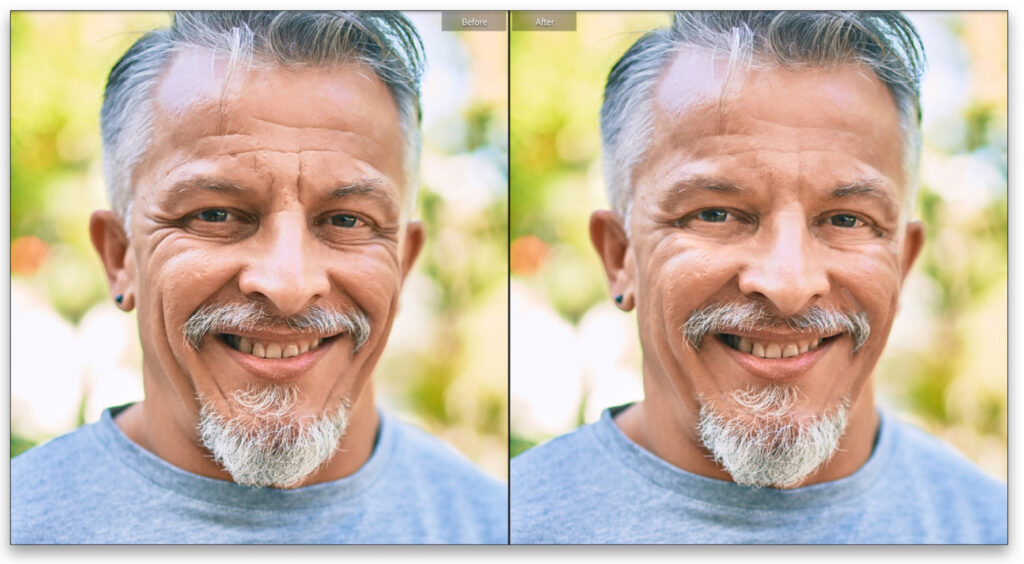
Above: Here’s a final before and after reducing the wrinkles and brightening the eye sockets. By the way, now that I look at the final image, I think I’d probably back off that Opacity for the wrinkles by another 5% or so, bringing back a little more of the shadows, to around 55%, instead of leaving it at 60%. That’s the great thing about this technique: it’s as easy as dragging a slider at this point to dial in the exact amount for each wrinkle.
Next time, we’ll dig a little deeper into the world of retouching portraits in Lightroom. See ya then.
The post Portrait Retouching in Lightroom, Part 4 (Realistically Retouch Wrinkles) appeared first on Lightroom Killer Tips.