
Following on from last week’s post where we gathered photos for printing, and potentially cropped them as needed, we’re ready to start printing.
The Print Module
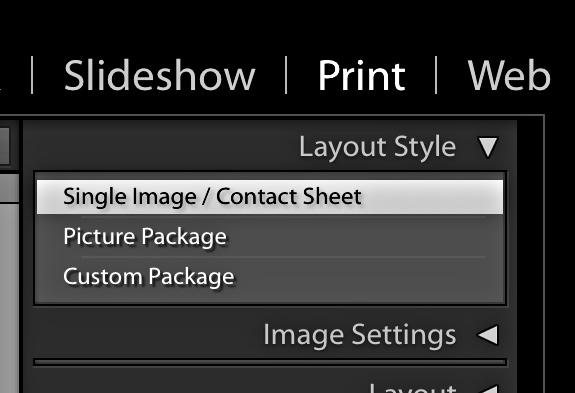
Lightroom Classic’s Print module is built with a variety of different print jobs in mind. If you expand the Layout Style panel, you can see there are three different styles. Each style is intended for a different type of printing job. Single Image / Contact sheet is great when printing a single photo at a specific size (or a batch of photos at that size) or for printing a variety of different photos at all the same size on a page (think a grid of photo cells with the same dimensions, like a contact sheet). Picture Package is for printing the same photo at a variety of sizes (think a package of school photos containing a single pose at different sizes). Custom Package allows you to print any number of different photos at different sizes with a lot of customization in the layout (this can be useful for maximizing the space on a single sheet of paper, or for creating poster-like layout).
When it comes to simply churning out the prints, my go-to
style is Single Image / Contact sheet. This way I can configure the size of the
paper I’m using, then create a layout of one or more photo cells, and send it
off to my locally connected printer. My best advice for printing large amounts
of photos at the same size is to use pre-cut paper at that size, so you don’t
have to spend time cutting them out. If you do need to cut your prints,
investing in a rolling trimmer will give you precision results. In my case I
buy big packs of 4 x 6 paper to have on hand for these kinds of jobs.
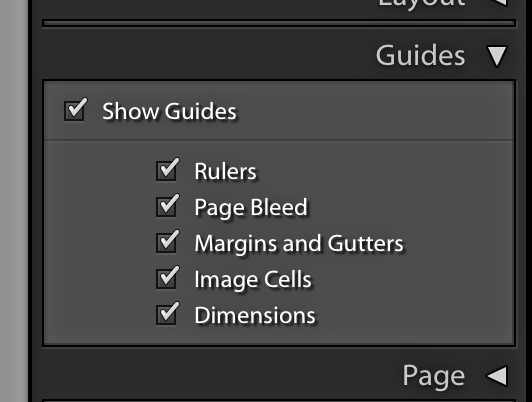
Lightroom Classic comes pre-loaded with a variety of print templates in the Template Browser. These templates can contain settings for everything from layout style to printer profile, and creating custom templates can be real timesavers. My advice is to skip the pre-loaded templates for now, and see how easy it is to start from scratch (clicking some of the pre-loaded templates can change your paper size, so be mindful of that). I also suggest starting by expanding the Guides panel and checking all of the boxes to enable all the visual indicators designed to help you with your layout. The Ruler is especially helpful to confirm the paper size matches your intention.
Note, there is an option under the View menu to display an Info Overlay over the canvas area showing the paper size and printer, which I find useful to ensure nothing changes.
Creating a Print Job
Here’s how to set up to print a batch of 4 x 6’s (but the same steps would work for any print size):
Step One: Choose the Single Image / Contact Sheet layout style.
Step Two: Click the Page Setup button to access the printer driver. In the Page Setup dialog (PC: Print Setup), choose your printer, the paper size and the orientation of your print. This is where we encounter some operating system differences.
On Mac, I can choose a 4 x 6 paper size that includes a
borderless option. Click Ok to return to Lightroom.
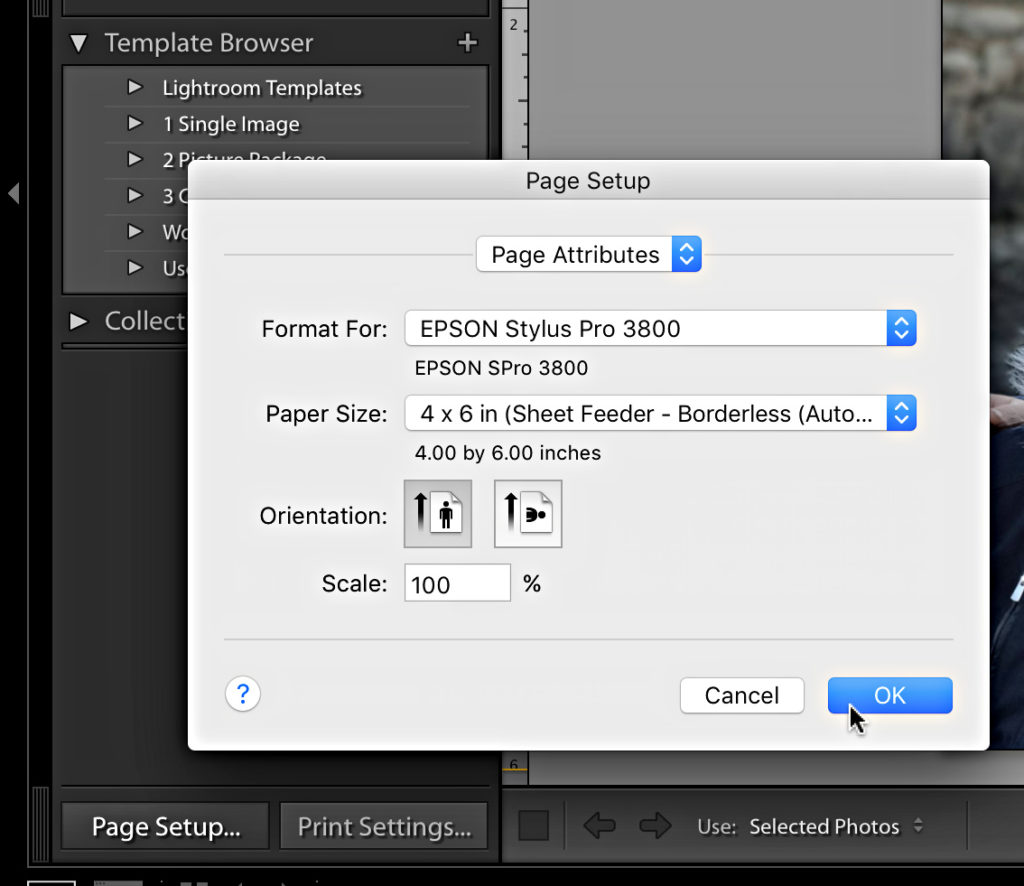
One PC, first choose the 4 x 6 paper size, then click the Source drop-down menu and choose the Borderless option (you can also find a Borderless checkbox under Properties, which seems to do the same). Click Ok to return to Lightroom Classic.

If you don’t choose a borderless option you will not be able to zero out the margins back in Lightroom Classic. Lightroom Classic takes its orders from the settings you dial into the printer driver.
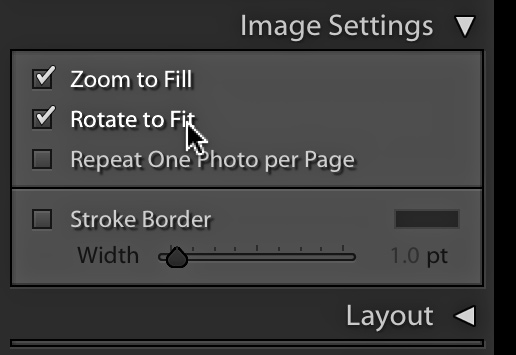
Step Three: Expand the Image Settings panel and check the boxes for Zoom to Fill and Rotate to Fit. Even though we’ve cropped previously, I keep Zoom to Fill checked to ensure the photo fills the cell I create. Rotate to Fit allows me to include portrait and landscape oriented photos in the same batch, and ensure they are rotated to fit the cell correctly.
Step Four: Expand the Layout panel, and zero out the margins. Set the Rows and Columns to 1, and set the cell size to 4in x 6in.
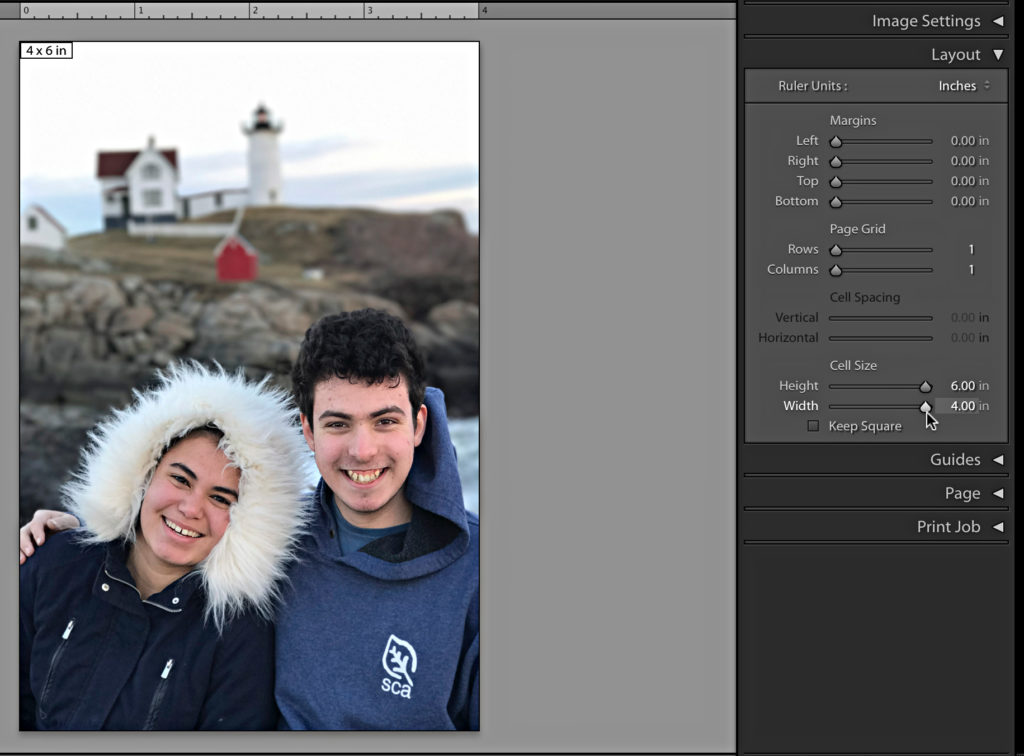
At this point you should see the first photo in your
collection filling the page in the main area of the Print module. If you are
unable to zero out the margins, make sure you’ve selected the borderless option
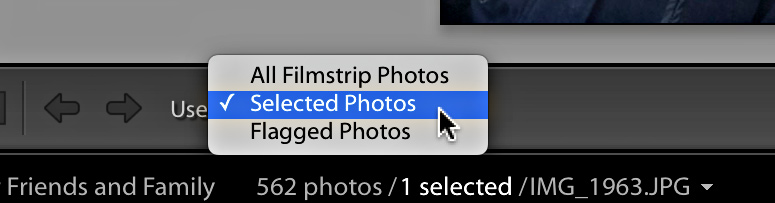
back in Step Two. Note, it is worth setting the Use menu in the Toolbar to
Selected Photos to ensure you only print the photos you manually select (as
opposed to the entire Filmstrip).
Step Five: Expand the Print Job panel, and set the Print Resolution (fine to leave it at the default, or enter a value of your choice). Print Sharpening is optional, but I default to Standard for most prints.
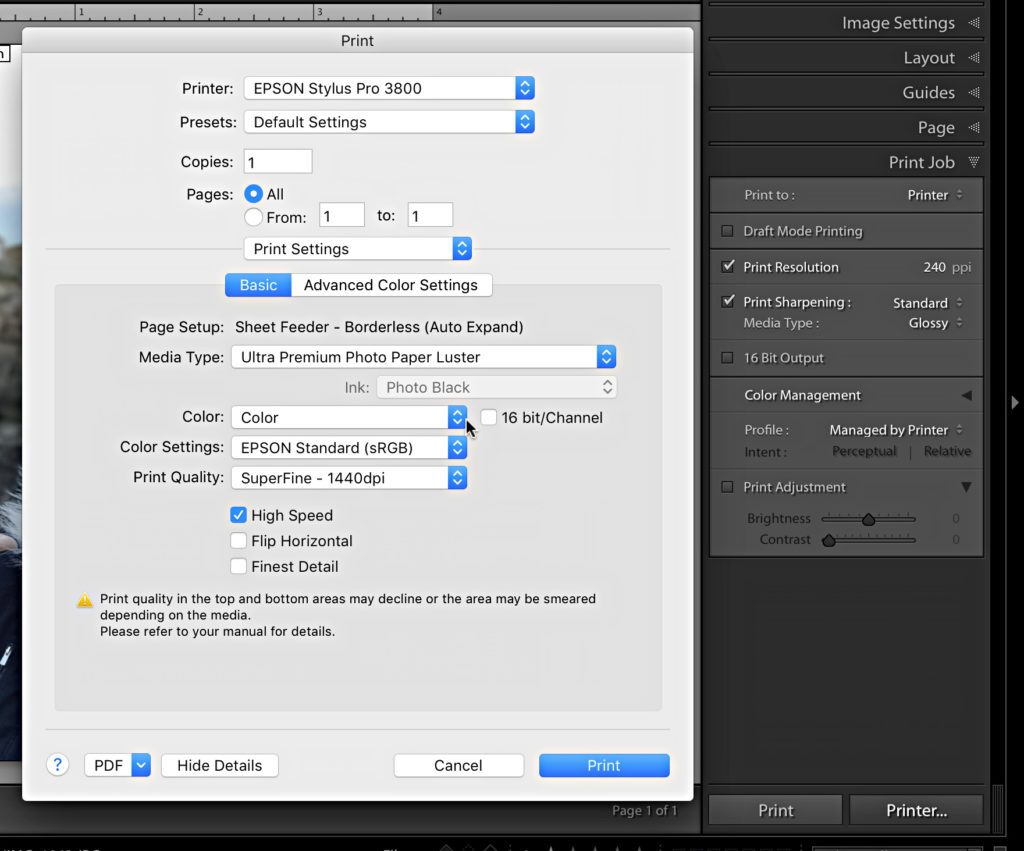
Step Six: Choose your Color Management path. In a perfect world, choosing Managed by Printer or selecting a specific printer profile (to put Lightroom in charge of color management) should produce equally good results. However, your mileage may vary. My suggestion would be to give your printer a chance by leaving it set to Managed by Printer, and see how it does. If you like the result, then you are good to go.
If you choose Managed by Printer in Lightroom Classic, then you have to ensure that color adjustment is ON in the printer driver. On my Epson printer, when Managed by Printer is on, my Color setting in the Print Settings (PC: Properties) dialog is active.
The alternative is to choose the specific profile for your printer/paper combo via the Profile drop-down menu in the Print Job panel in Lightroom Classic. This puts Lightroom in charge of color management, and when this is the case the color adjustment setting in the printer driver needs to be disabled or set to off.
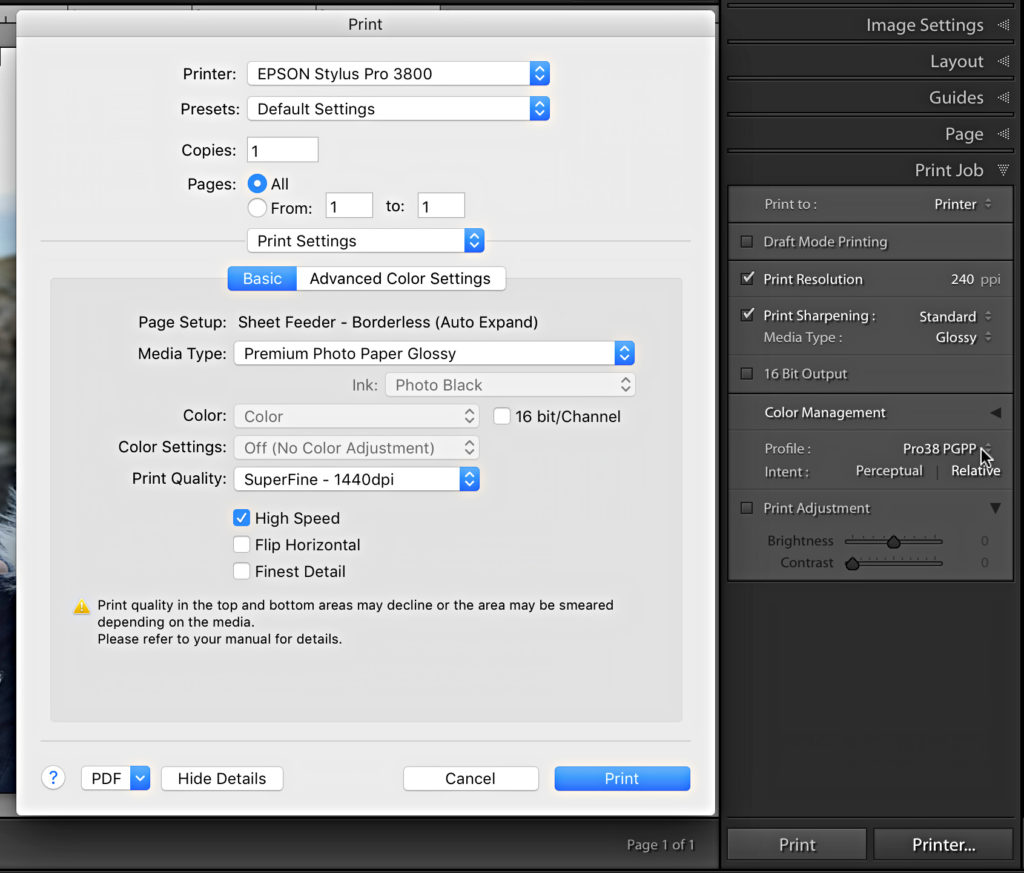
If you decide to choose a specific printer profile in Lightroom Classic, you want to find the one that specifically matches the printer model and brand of paper you are using. Most printers will install profiles for that company’s popular papers when you install the printer driver, but you may need to visit the paper company’s website to download profiles for any papers not installed. This is especially true for third-party papers.
Do a test run with each option, and in each case, ensure that only the printer driver or only Lightroom Classic is managing color (not both at the same time), and compare results. Choose the option that you like best for your future prints. Don’t look back.
Step Seven: Click the Printer … button to access the printer driver. On Mac, in the Print dialog go to Print Settings and choose your Media Type (this is the type of paper you are using). Confirm your color management setting is correct based on what you chose in Lightroom Classic.
On PC, in the Print dialog, click Properties, then choose
your Media Type, and confirm your color management setting is correct.
If all looks good, load your paper in the printer and click
Print (PC: OK).
Print Adjustments
Note, if your prints come out darker than expected, check Print Adjustment at the bottom of the Print Job panel and do a test with increased Brightness amounts until you get a result to your liking. Leave that setting enabled for future prints. You won’t see a preview of those sliders in Lightroom Classic. You only see the effect in the actual print.
Printing with Lightroom Classic can seem like a lot of work at first, but once you’ve had a successful print run you can save your settings as a template to make it a snap in the future. Before leaving the Print module, with all your good settings dialed in, click the + sign on the Template Browser, and give your template a meaningful name (consider including paper size and media type). The next time you want to print off a batch of photos with those settings you can start by clicking the template, selecting your photos, and then head right to the Printer … button to confirm settings and send it to the printer.
The post Print More Photos Continued appeared first on Lightroom Killer Tips.