
Yesterday during the online stream of my “Ultimate Photography Crash Course” full-day seminar one of the questions I got was how to save a Lightroom Print layout as a JPEG (handy for sharing your layouts online, or for sending your image to a photo lab). In case you have a similar question, here ya go:
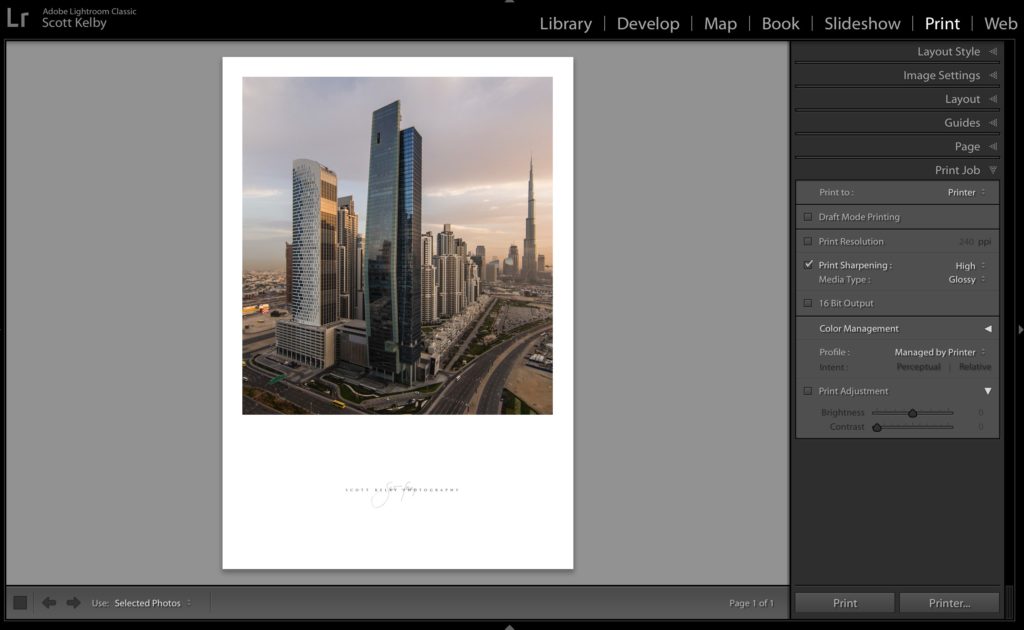
STEP ONE: Start by creating the layout you want in Lightroom’s Print Module (here I did kind of a fine-art mat layout, with some text and my signature in the open area below the image).
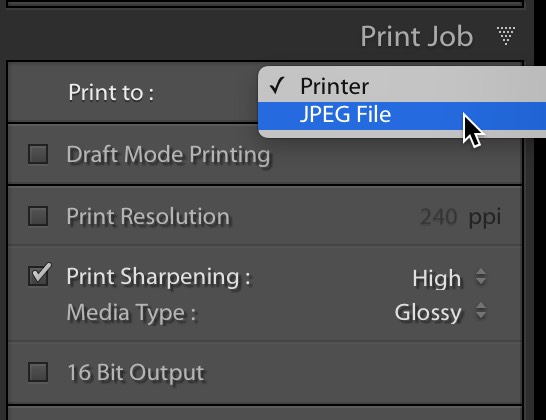
STEP TWO: at the bottom of the right side panels, in the Print Job panel where it says “Print to:” at the top left of the panel, on the right, by default it will say “Printer.” Click and hold on Printer and from the pop-up menu that appears, choose ‘JPEG File” (as shown above).
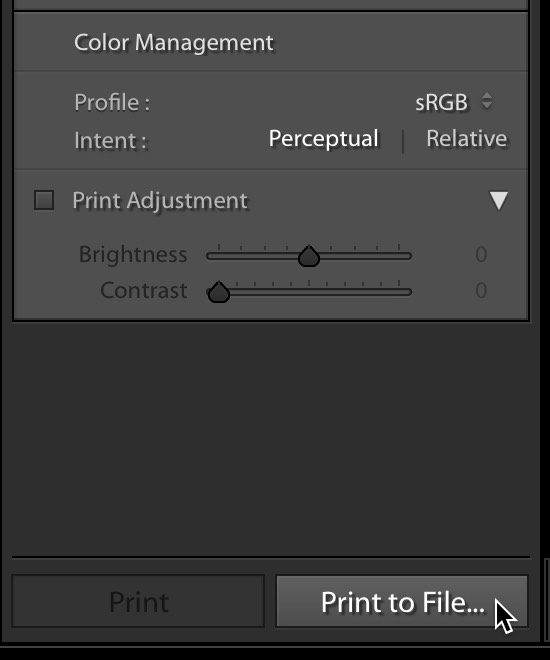
STEP THREE: Now, to actually save the file, go to the bottom of the right side panels and at the bottom right you’ll see that the button that’s normally says “Printer” now says “Print to File.” Click that button (as shown above) to save your file where you want it on your computer, and you’re done.
Tuesday, our two-day, two track Lightroom Conference kicks off
Don’t miss out — hundreds of photographers from all over have already signed up and you don’t want to miss you. Get the details, and tickets, over at lightroomconference.com – you are so going to want to be a part of this live-streamed Lightroom training event of the year!
Stay healthy, stay creative, and stay inside!
-Scott
The post Saving Your Print Layouts as JPEGs appeared first on Lightroom Killer Tips.