This is one of those little things that I had to really dig around to find, and then discovered it was a little different on each platform, so here’s the round up of ways to set a photo to be the cover photo on the album icon in Lightroom for desktop, iOS, and Android.
Update Alert
Before diving into this tutorial, I want to call your attention to a small update that snuck out this week. Updates for Lightroom Classic, Adobe Camera Raw, and all the Lightroom Cloud apps were released. Lightroom Classic is now at version 9.4, Adobe Camera Raw is now 12.4, Lightroom for desktop is 3.4, and Lightroom for iOS and Android is now 5.4. Basically, this update was all about new camera support and new lens support. If you’ve recently purchased a new camera or lens, check those links to see what was added. Ok, on to the main event …
This all started because I’ve been going through old trip albums longingly looking at places I have been and thinking about places I want to go once traveling is a simpler activity again. Let’s begin in Lightroom for desktop.
Setting Album Cover in Lightroom for desktop
This one is also the easiest and most obvious. Launch Lightroom on your Mac or Windows machine, then navigate to the album you want to view. If you are in Grid view, you can press P to pop out the My Photos panel where all albums (and the folders they live in) are found.
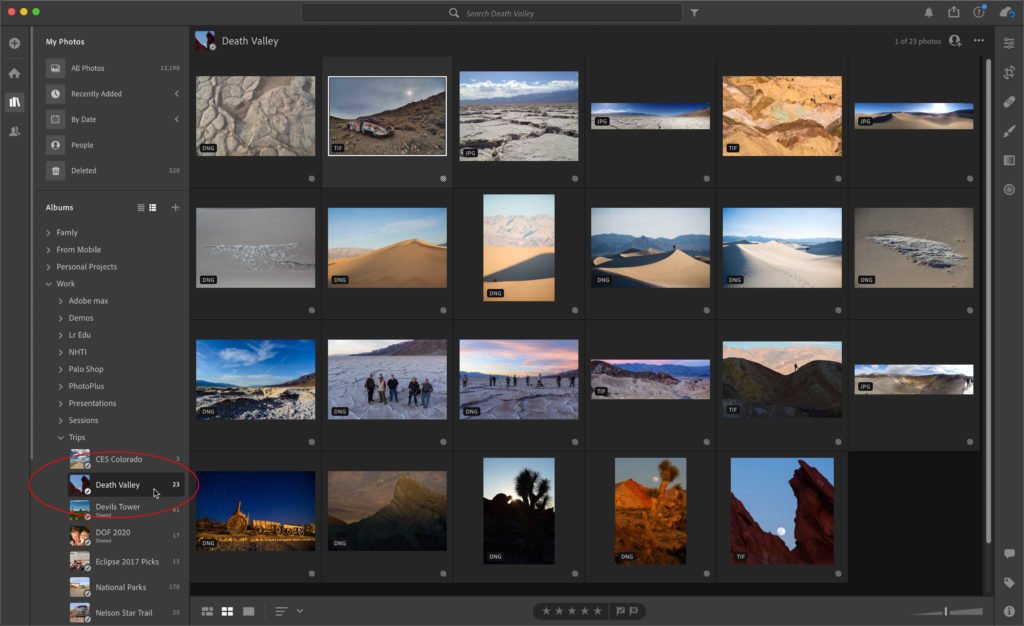
Then click on the desired album to see its contents.
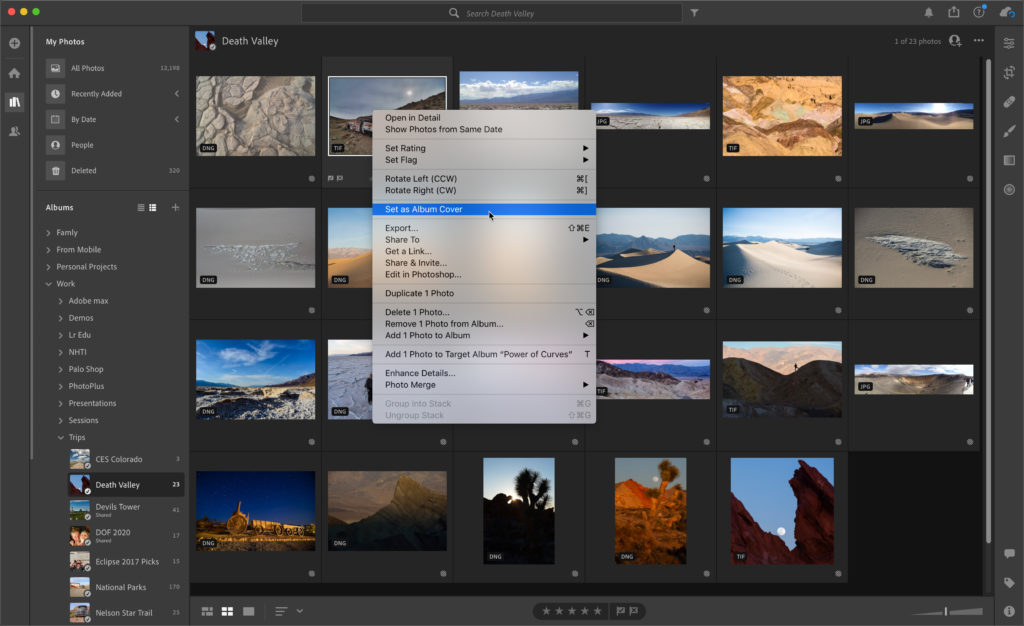
Choose the photo you want to be the album cover and right-click (or control-click if lacking a mouse on Mac), and choose Set as Album Cover. I was thinking about Death Valley as it reportedly hit 130 degrees Fahrenheit (54 Celsius) there recently! Moving on to iOS where it isn’t as obvious.
Setting Album Cover in Lightroom for iOS
On iOS, you will need to navigate into the album you want to view, then scroll through the thumbnails to find the photo you want to set as the album cover.
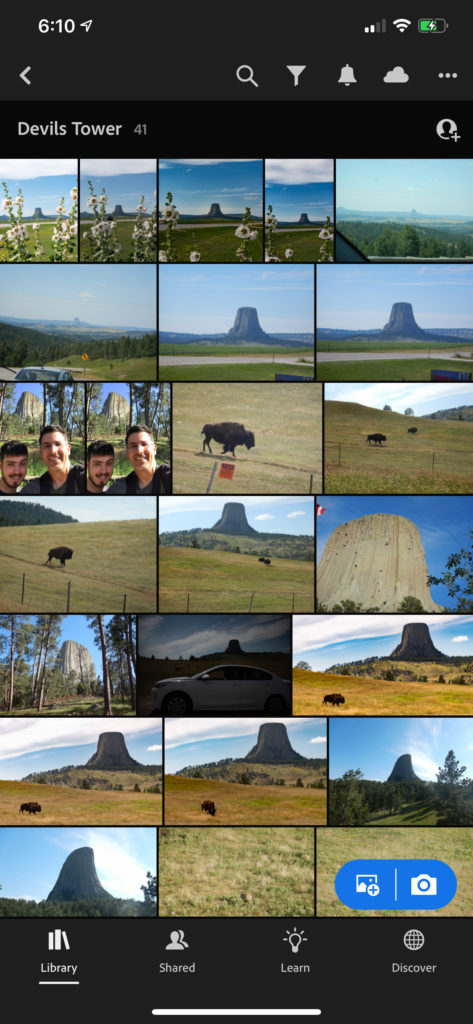
Then, tap the desired photo so that it fills the frame.
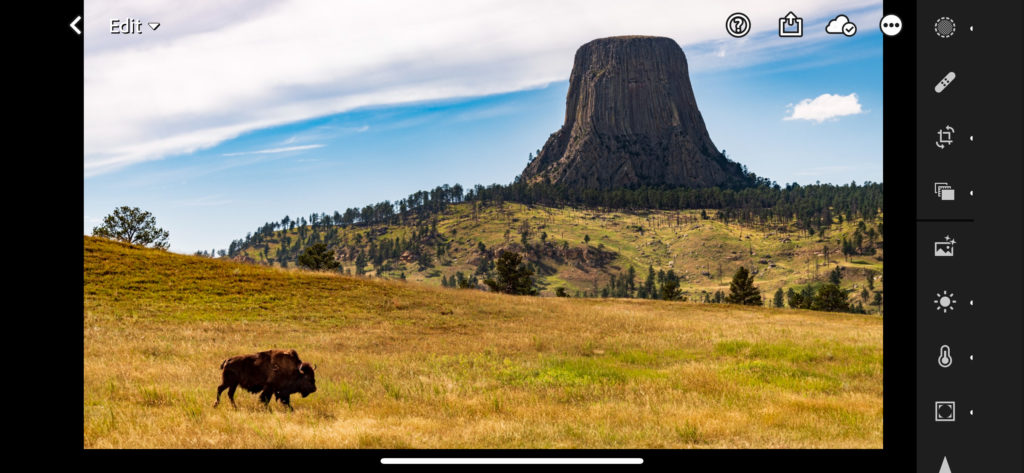
Here’s where it gets a bit hard to find. Tap the 3-dot menu in the upper-right corner to see a contextual menu of options.
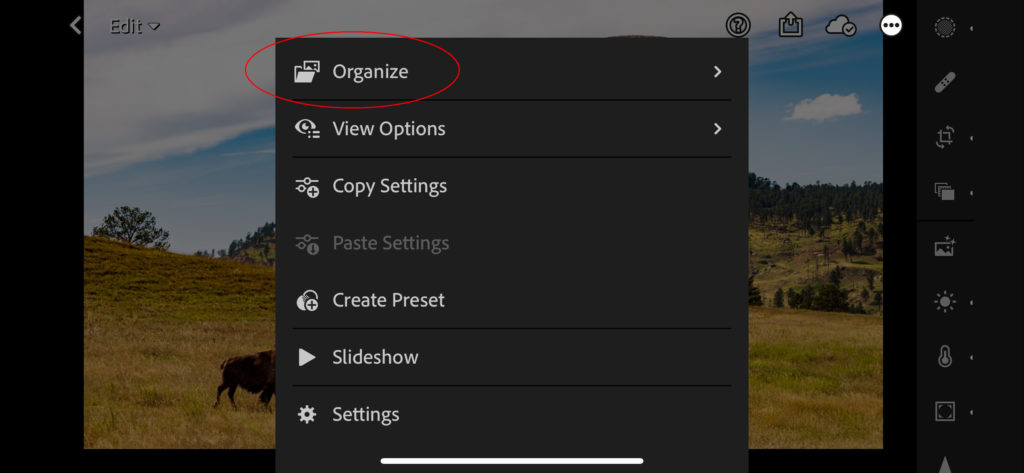
Then, tap Organize to see its options.
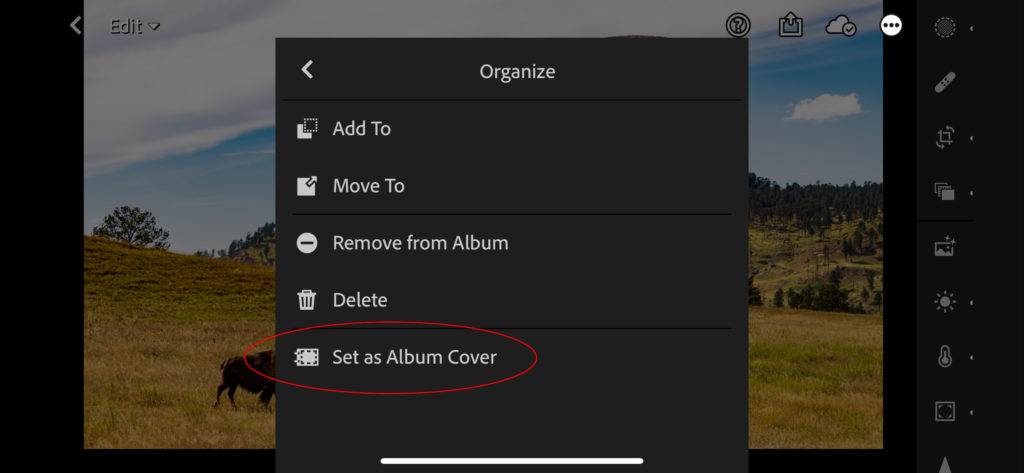
And there you will find Set as Album cover.
Setting Album Cover in Lightroom for Android
On Android, the process is similar to iOS, but not quite. First, navigate to the desired album.
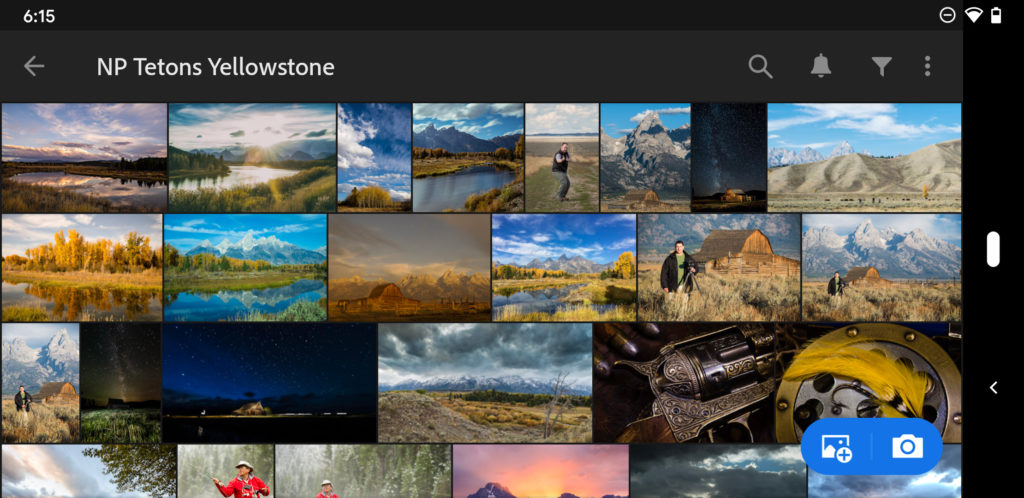
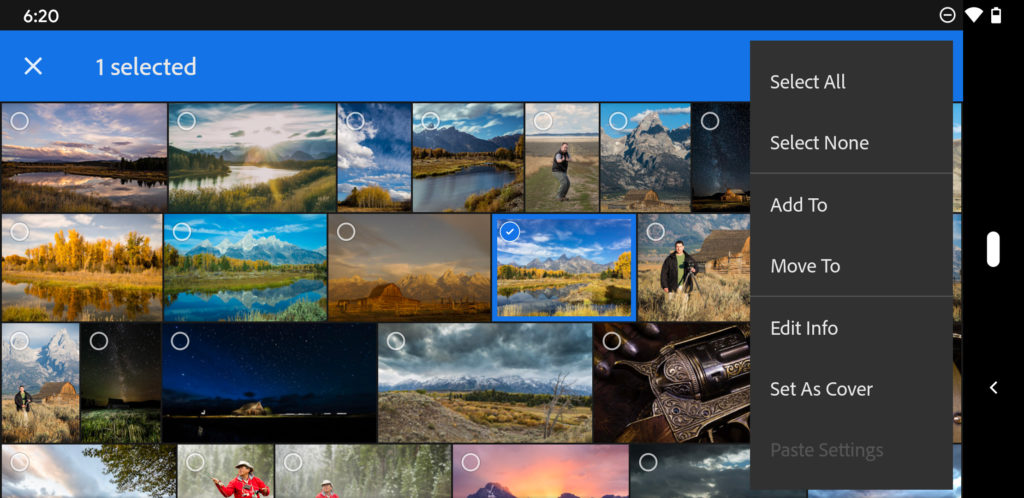
Then, scroll to find the photo you want to be the new album cover. Once found, long press the desired photo to select it. A blue bar will appear along the top of the screen and that photo will be highlighted.
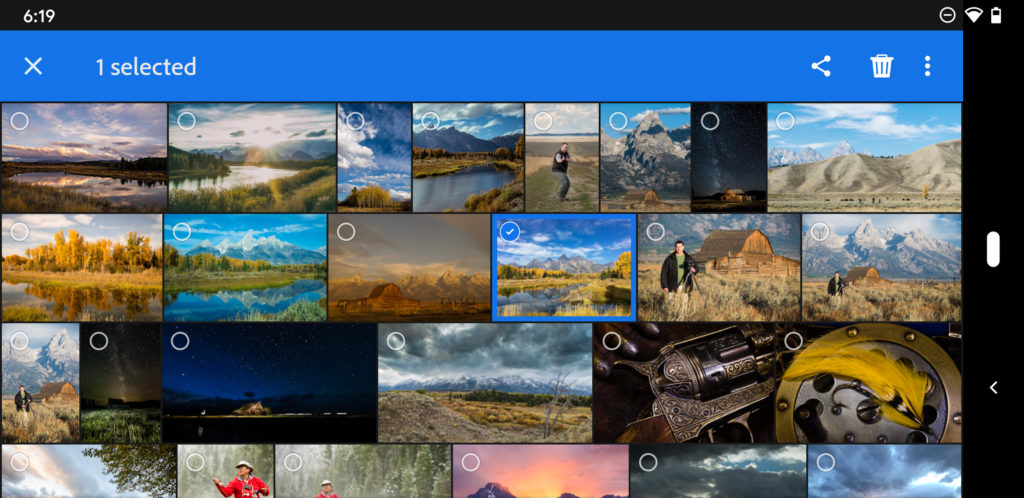
Tap the 3-dot menu in the upper-right corner, and in the resulting contextual menu, choose Set as Cover.
And there you go. Now, get all those albums looking just the way you want, and change it over time as needed.
The post Setting Album Covers in Lightroom Cloud Apps appeared first on Lightroom Killer Tips.
