

Now that we have awesome new masking tools, here are some of the masking shortcuts I use the most (many of these were in Lightroom even before the new masking tools were added):
- ‘ | The apostrophe key inverts your current mask
2. The [ and ] bracket keys (to the right of the letter P) let you change brush sizes. Hitting the left bracket key makes the brush smaller – the right one makes it larger.
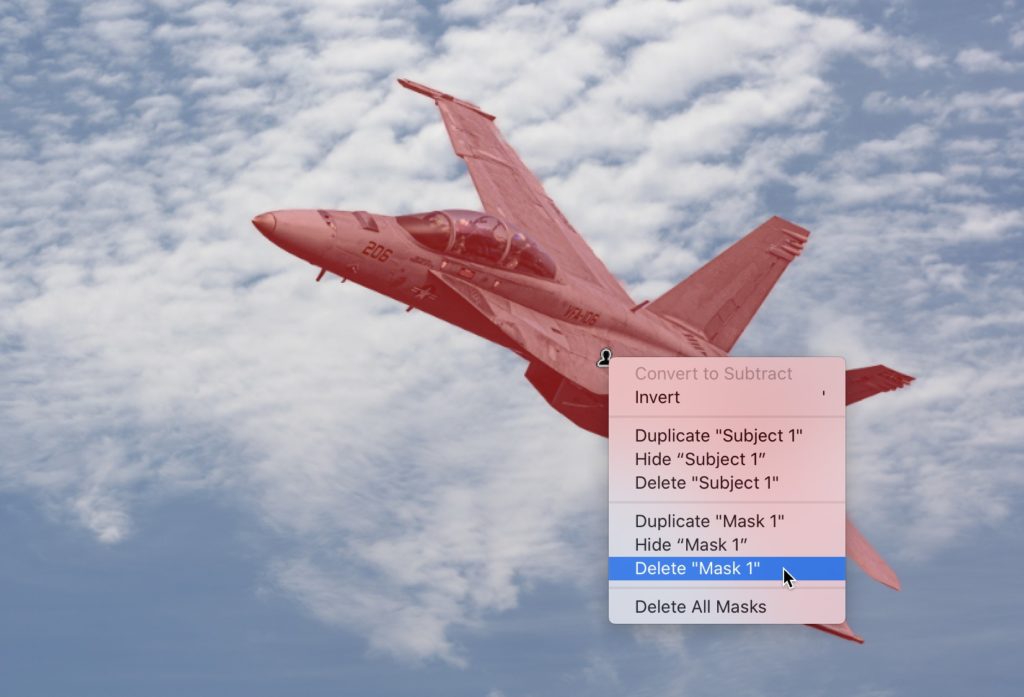
3. Right-clicking directly on a mask pin will bring up a pop-up menu of things you can do to that currently selected mask (as seen above). Everything from deleting to hiding to inverting masks.

4. Press the letter O on your keyboard to hide the red overlay tint on your masked area (as seen above right).
5. N | Creates a New Mask using whichever masking tool you used last
6. Double-clicking a mask’s name brings up the renaming dialog where you can type in a new name.
7. You can change masks (scrolling up/down in the Masks panel) by holding the Option key (Alt-key on PC), and using the Up/Down arrows on your keyboard. If you want to select a mask, and then select one of the additions or subtractions you’ve applied to that mask, then hold the same key but use the left and right arrows to toggle through them.
If you want more masking shortcuts, there’s a list right in the masks panel itself – click on the little ? button in the top right corner of the Masks panel and it brings up a floating window with a bunch of ’em. 
Hope you found those helpful. Here’s wishing you a super kick-butt Monday!
-Scott
The post Seven Really Useful Lightroom Masking Shortcuts appeared first on Lightroom Killer Tips.