
How to replace a sky in Photoshop
Sky replacement is explained, so you know what every adjustment does, as well as how to refine and change anything. Even after you have applied the Sky Replacement filter. I have included a sky pack containing 5 of my own sky images that you can download and use for free, (Non-commercial use). Watch the video to see everything in action and then look at these written notes and study the helpful chart.
How to use Sky Replacement in Photoshop
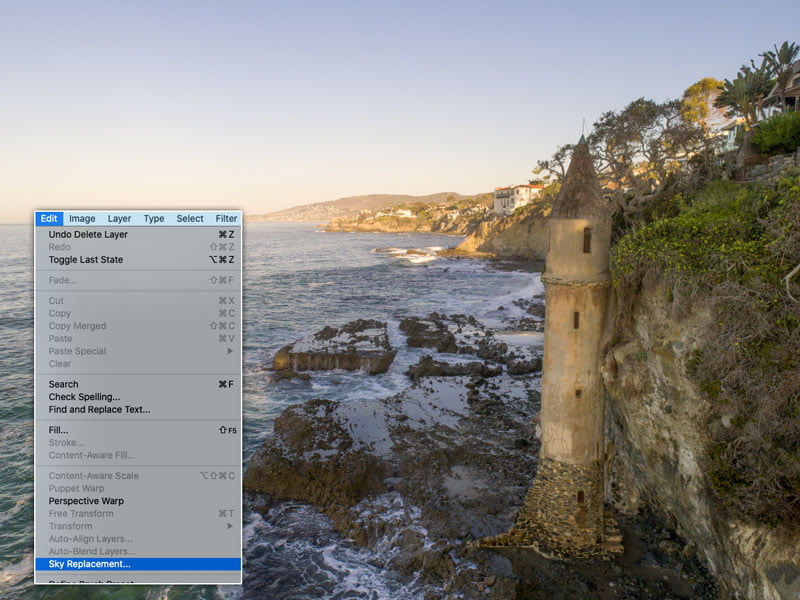
Start with the photograph. Here is one I shot, I love the photo, but the sky is boring, a perfect candidate.
1. Choose Edit>Sky Replacement.
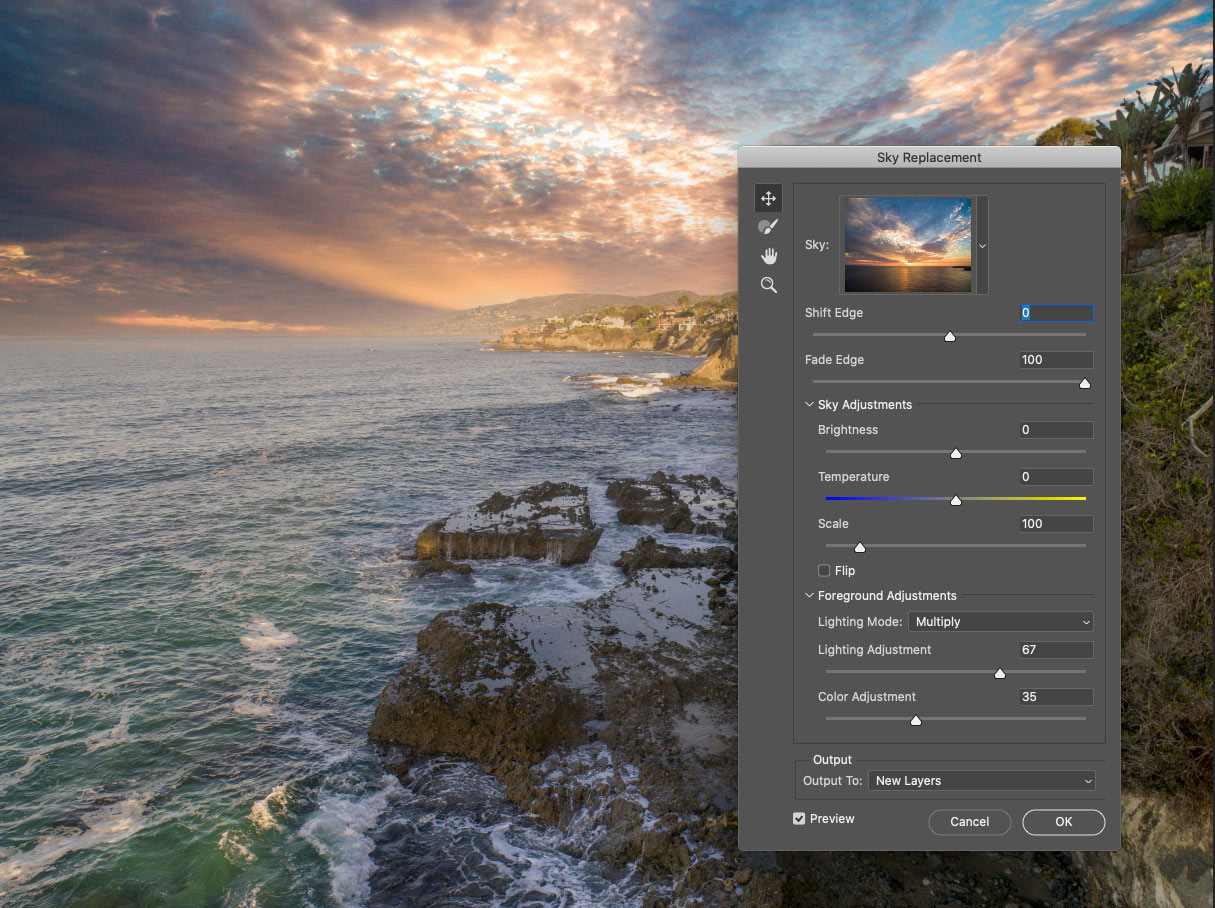
You will see see the Sky Replacement dialog box, and the shy will be replaced with the currently selected sky. If you don’t see any skies, watch the video to see how to get the default set in Photoshop. (You should watch the video anyway, as there is a lot of additional info).
How to Get custom skies into Photoshop
You can use the default skies that are preinstalled in Photoshop, or use your own.
1. Click the arrow in the pane to open the menu.
2. Click the + to load in skies.
3. Navigate to the images you want to use. So far I have tested raw, jpg, tif and png file formats.
If you would like to have my custom sky pack for free, grab them here.: photoshopcafe.com/vault
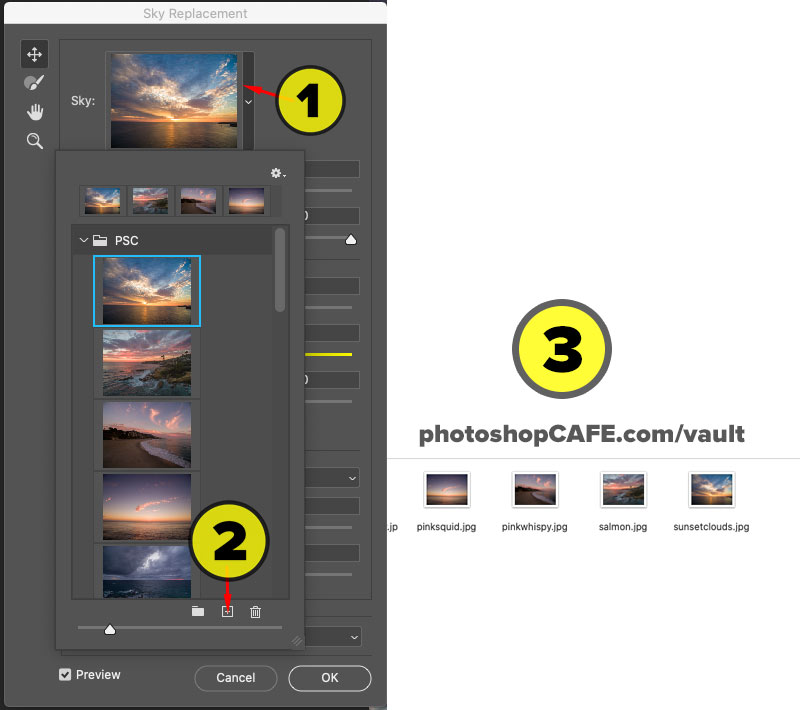
Once you have added the sky images, they can be arranged into sets, I show you in the video.
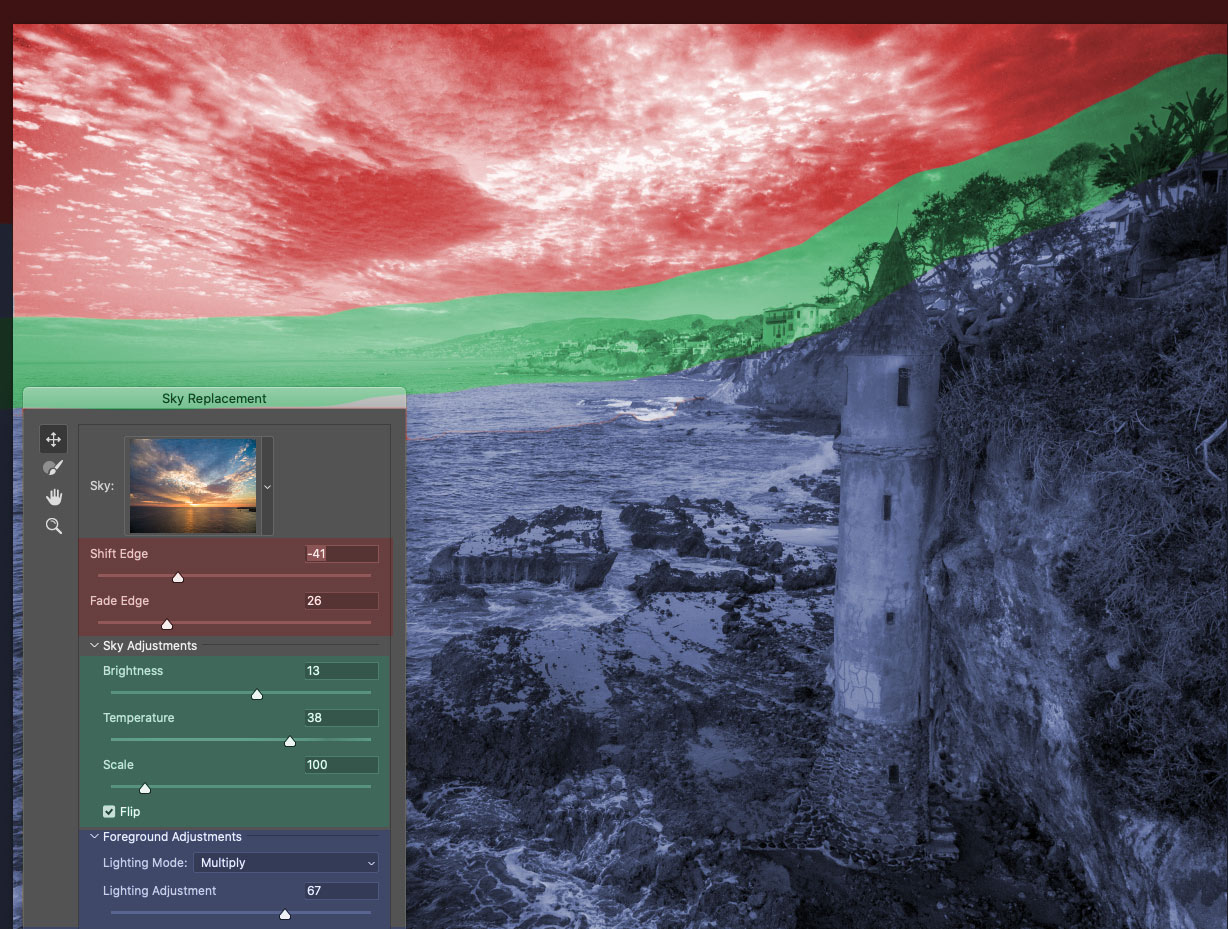
All the settings in Photoshop’s Sky Replacement
Now, it’s just a matter of getting the settings just right for the most convincing result. I’ll show you them all here.
The settings are broken into 3 areas.
The sky, the Foreground and the transition.
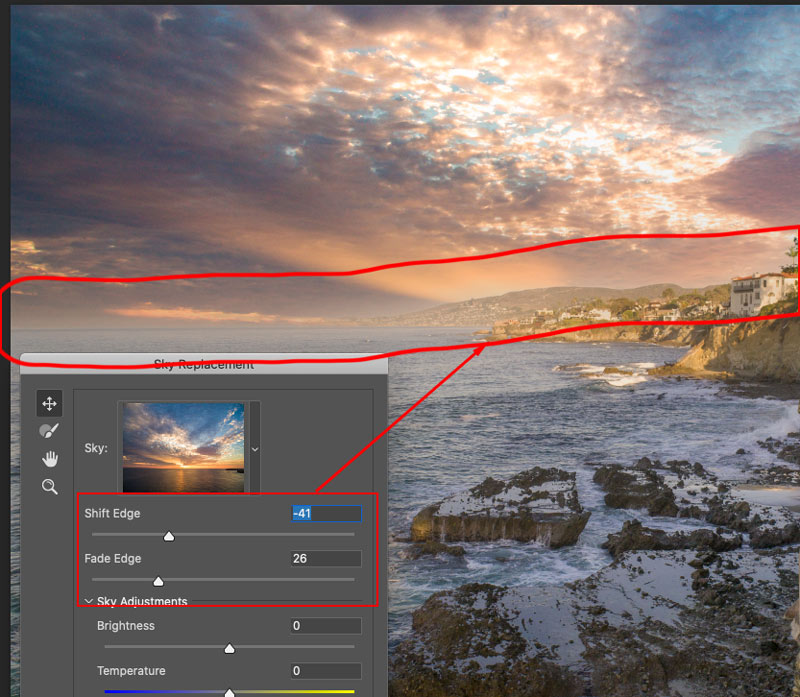
Transition:
- Shift Edge: move the edge up or down, so your horizon blends where it should.
- Fade Edge: adjust the haze on the horizon.
Sky Adjustments:
- Brightness and temperature to make the color and lightness match the original image.
- Use scale and Flip to match the lighting direction and scale.
Foreground Adjustments:
- Color Adjustment: match the color with the color of the sky
- Lightness Adjustment: change brightness of foreground
- Lighting Mode: Either lightens or darkens the transition
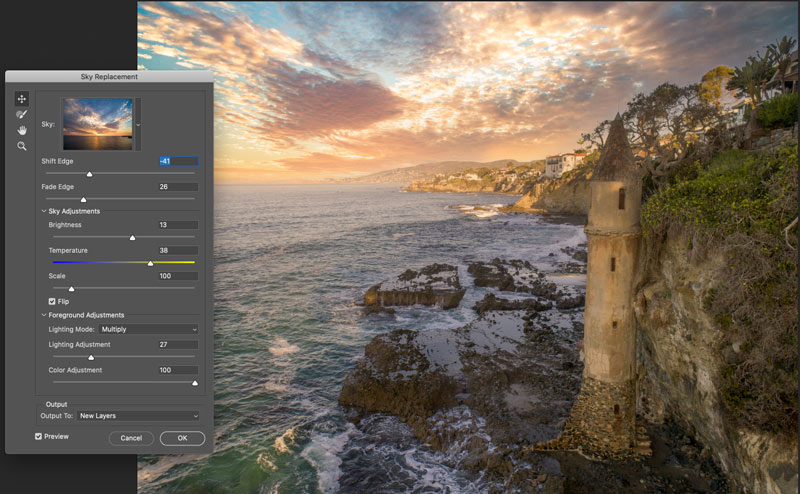
Here you can see the image after I have made the adjustments.
As far as applying the effect, thats it in a nutshell. However you have complete control over everything after, I’ll show you in the next step.
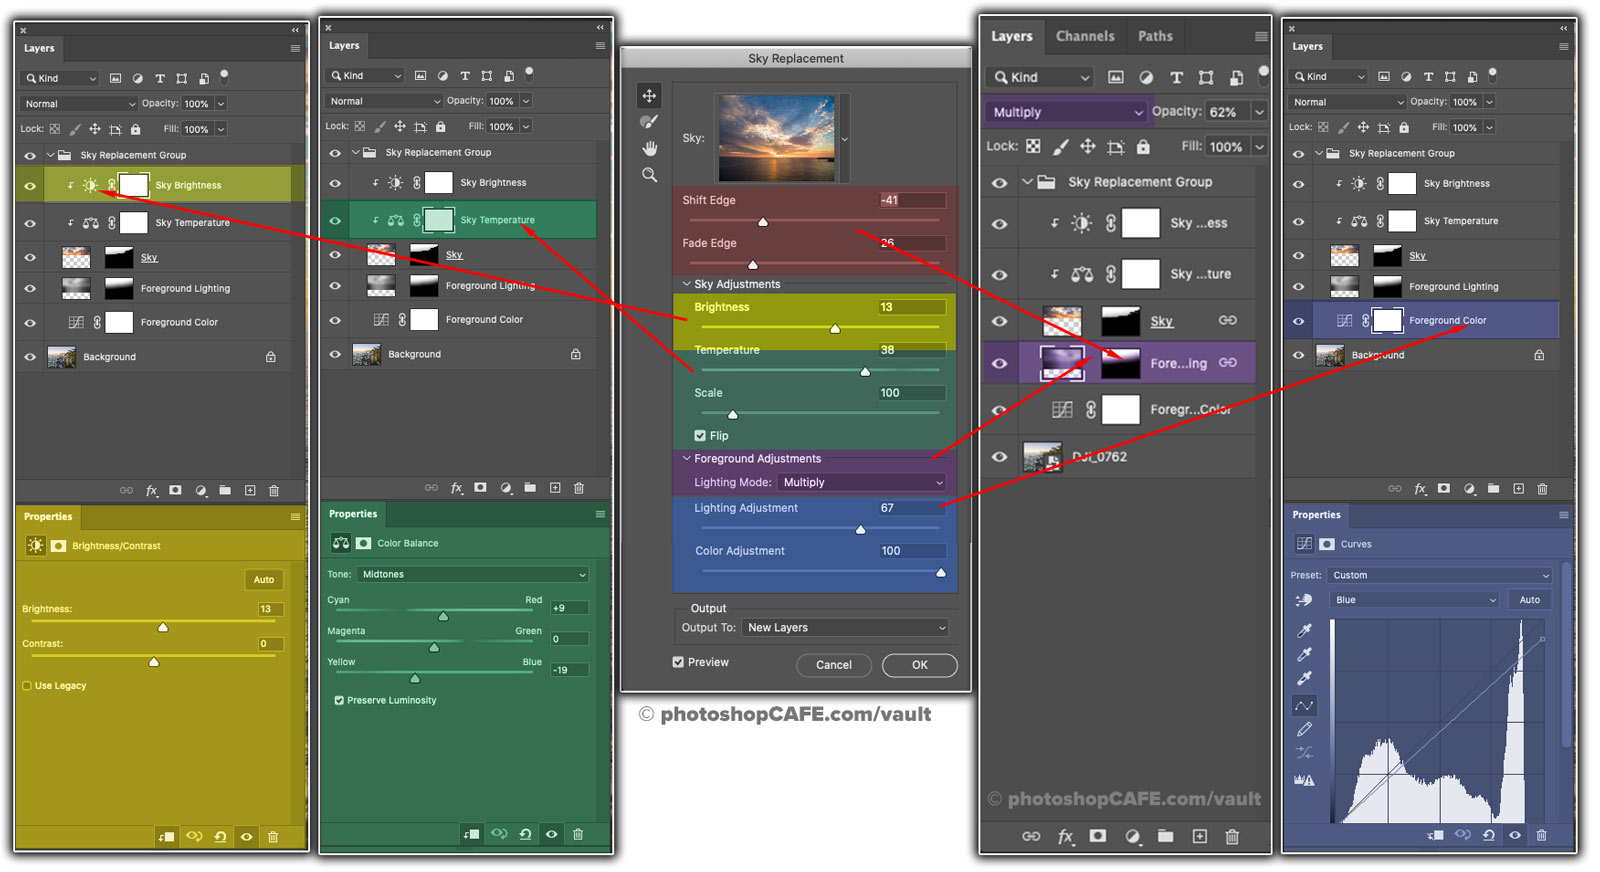
What every setting in Photoshop Sky Adjustment Does
I have made a chart to show you exactly what every setting does in Sky replacement, watch the video to see this in action.
As you can see, Sky replacement creates a Layer group and uses Adjustment Layers and Masks to accomplish its result. This is so nice because, everything can be edited afterwards.
Here in this chart, I have mapped the settings in Sky Replacement to the results in the Layers panel, so you can see what each adjustment does. You won’t be able to see the layers and the Sky replacement at the same time while working in Photoshop, I broke it all out so you can see under the hood and understand exactly how it works. I hope this is useful for you, as it took me a bit of time to make this.
I hope you enjoyed my tutorial on Sky replacement. I have some other tutorials on this topic if you want to explore further.
Advanced Sky Replacement to make a reflection
Another old school Sky replacement tutorial
Thanks
Colin
The post Sky Replacement in Photoshop, ultimate tutorial – free sky images included. appeared first on PhotoshopCAFE.