
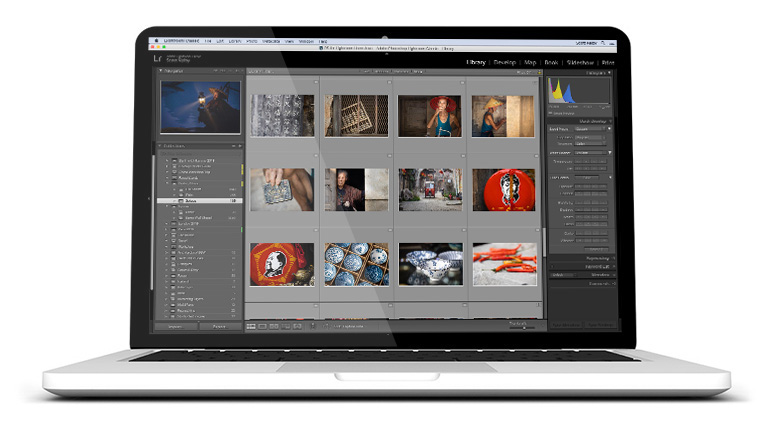
If you travel with your laptop (like I do), you want to be able to sort and edit on your laptop, but then when you get back home, you want to have all those edits and sorting move over to Lightroom on your home computer.
This process is way easier than you might think, and I’ll take you step-by-step through the process (again, much easier than you’d think). Here goes:
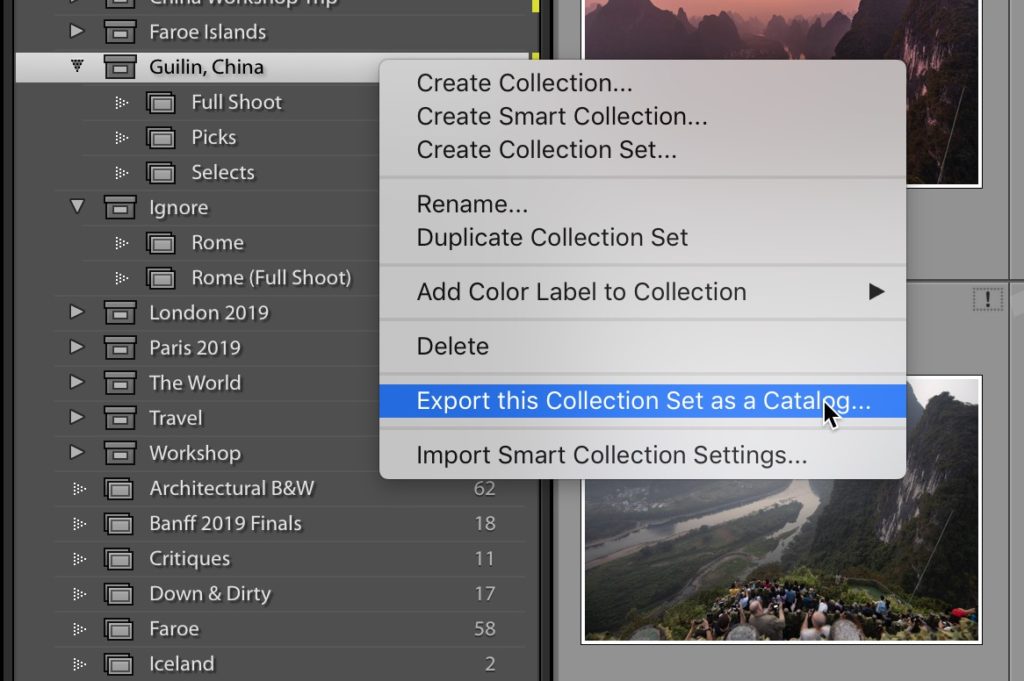
STEP ONE: Once you’re back from your trip, and you’re done with sorting and editing your images on your laptop, right-click (Mac: Ctrl-click) on the Collection (or, in my case, the Collection Set) you made during your trip and from the pop-up menu that appears, choose “Export this Collection Set as a Catalog” as shown above. Of course, if you created a Collection rather than a Collection Set, it would read “Export this Collection as a Catalog” instead. If you work in Folders rather than Collections, it would say, “Export this Folder…” and so on.
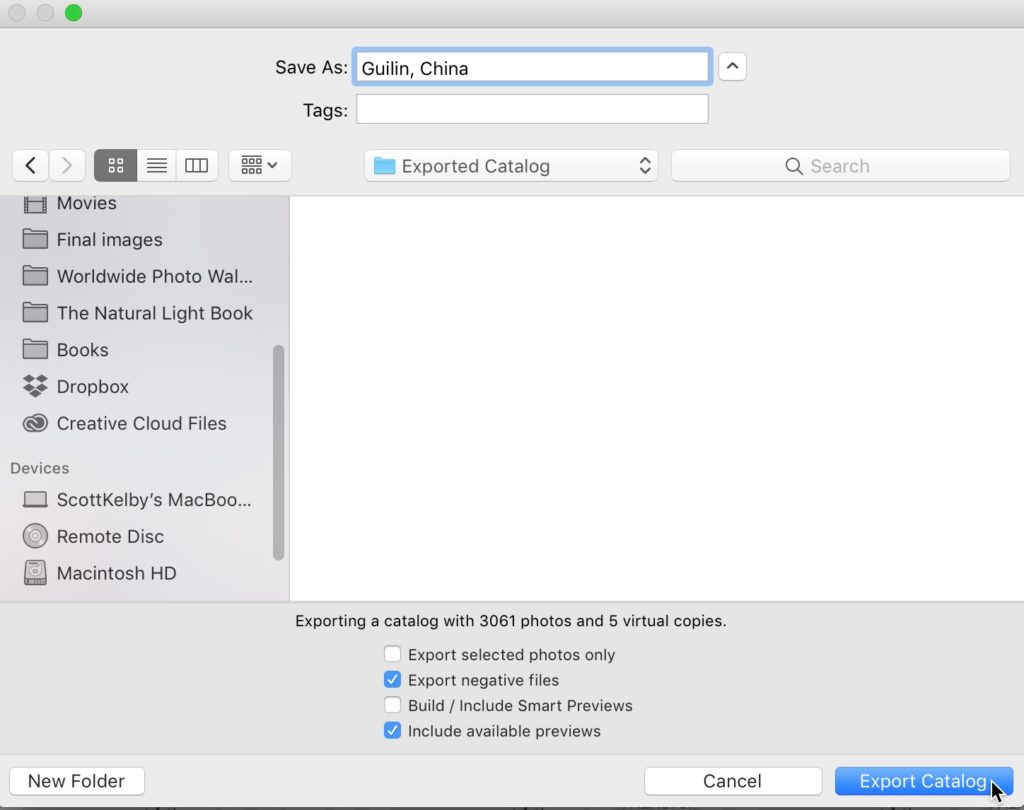
STEP TWO: This brings up a dialog box asking where you want to save this newly exported catalog. At this point, I would plug in an external hard drive and save it to that hard drive. If you don’t have an external hard drive, you could save it to Dropbox, iCloud, or a cloud-based storage service instead.
At the bottom of the window are checkboxes for some options, the most important being “Export negative files.” Turn that on! Turning on that checkbox includes a copy of your actual images, which is important — otherwise, all you’d be moving to your home computer would be the thumbnail previews. You want the RAW (and/or JPEG) files to be copied over to your home computer as well. Now click the Export Catalog button (as shown here).
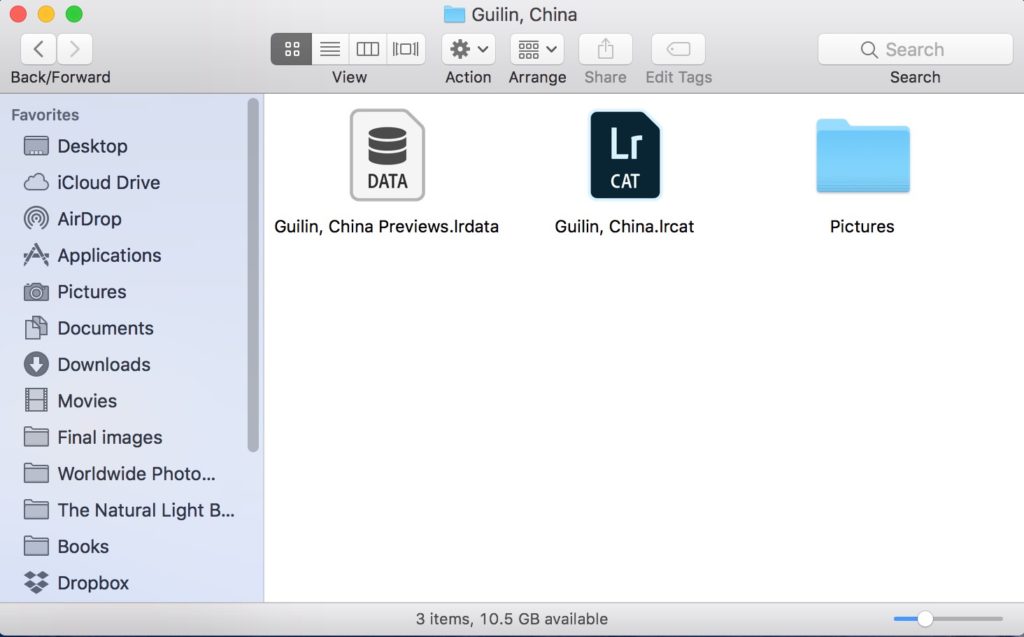
STEP THREE: Here’s a look inside the folder created when you exported that Collection Set as a Catalog. It’s the Preview file, the Catalog file itself, and a folder named “Pictures” with all the Images that were in that Collection Set you edited on your laptop. These are all saved to your external hard drive (or cloud service if you choose to go that route instead).
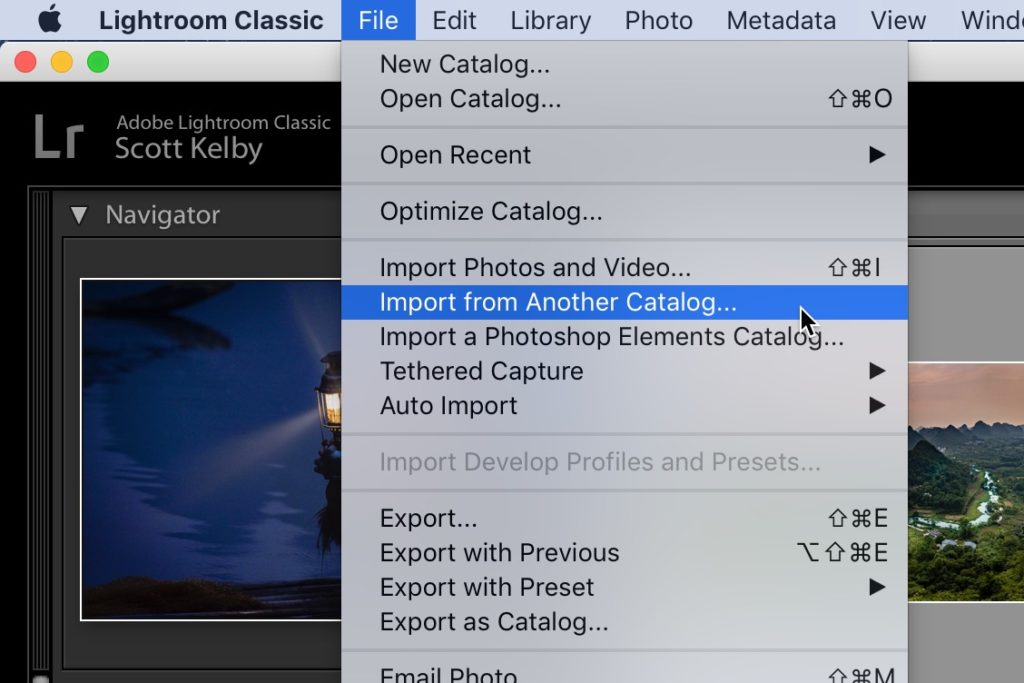
STEP FOUR: Now eject that external hard drive from your laptop and plug it into your home computer (in my case, it’s an iMac). Then go under Lightroom’s File Menu and choose Import from Another Catalog (as shown here).
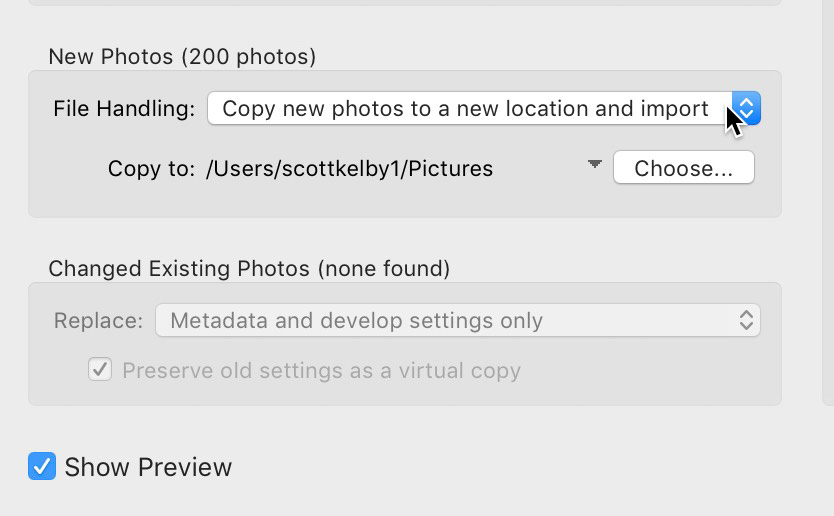
STEP FIVE: This brings up a standard “open” dialog, so navigate your way to have that folder on your external hard drive with your exported catalog. Now choose that Catalog file (not the previews, not the Pictures folder; the one that ends with the file extension .lrcat), and open that catalog. That brings up the Import window, and the important thing to do here is go to the File Handling pop-up menu (seen above). Choose ‘Copy new photos to a new location and import’, then click the Choose button right below that and choose where you want these images from your laptop to be stored (in my case, they are photos from China, so they’d go inside my Travel Folder on my Synology NAS storage unit at my house).
Now click the Import button, and you’re done. Your images will copy to wherever you choose, and this Collection Set (or Collection or Folder, depending on what you chose) will now appear in your Collections panel (or Folder panel), just as if you had created it there from the start. All the sorting and editing you did on your laptop will still be intact.
NOTE: If you used Dropbox or iCloud instead of a hard drive, the process is the same; just choose to import the catalog from Dropbox or iCloud, etc., instead of from your External Hard Drive.
There you have it. Basically, you export a collection from your laptop and then reimport it on your home computer, and it adds it there as if you created it there in the first place.
I hope you found that helpful, and here’s wishing you a super relaxing weekend.
-Scott
The post Travel Photographers: Moving Your Lightroom Classic Edits From Your Laptop To Your Computer At Home appeared first on Lightroom Killer Tips.