How to change a photo to a dramatic sunset.
I’m going to show you how to take a photograph and turn it into a sunset scene, what you’re going to learn from this is how to change the time of day in any photograph and also how to do an advanced sky replacement. We will recreate the reflections in the water, the movement in the water and in the sky.
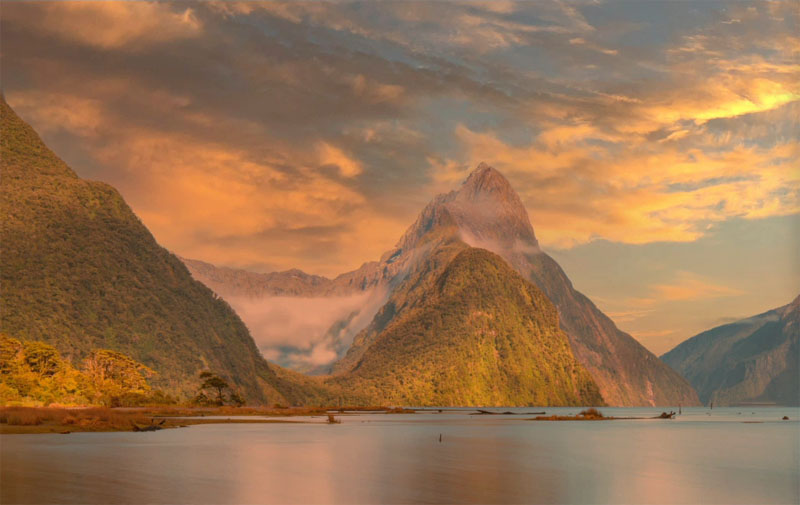
We are taking this beautiful photograph from Milford Sound, New Zealand. Its an Adobe Stock photo and we’re going to change it into a beautiful, dynamic sunset.
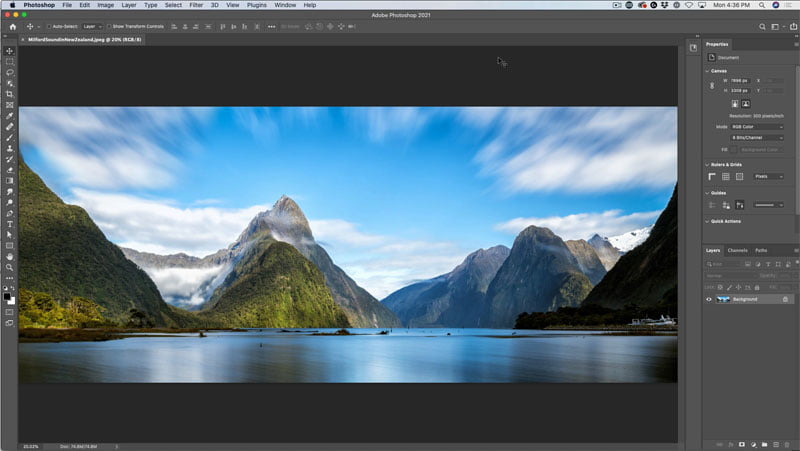
First thing, we want to replace the sky. And this is very easy inside of Photoshop 2021.
1. Choose edit>sky replacement.
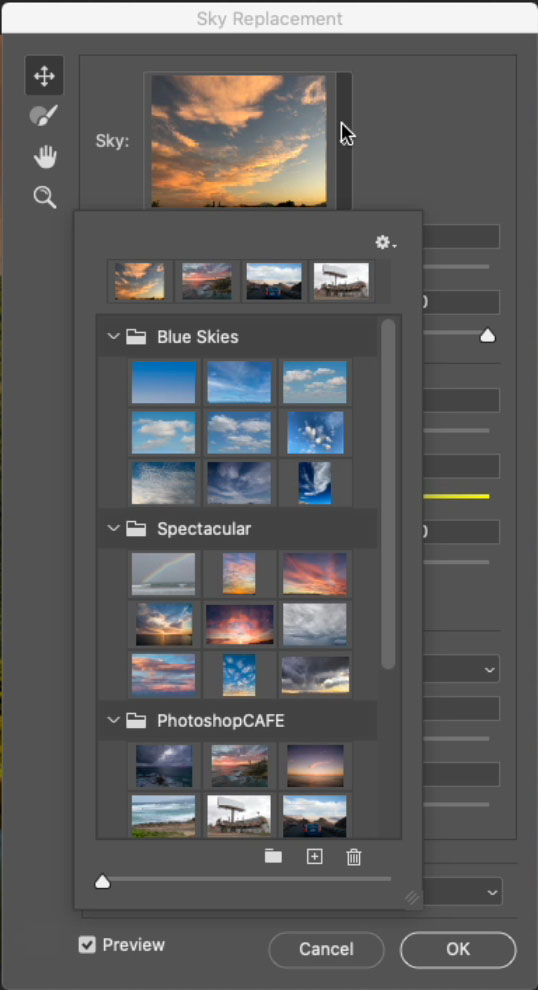
If you don’t see any skies, just click the little arrow and you’ll see a gear, choose the gear and just choose append default skies. You’re going to see different groups.
(I’m working on some custom skies for photoshopCAFE.com. We’ll have those ready at some point), but just go down to the sunset’s.
2. Choose the sunset I’m using, Click, OK, to apply .
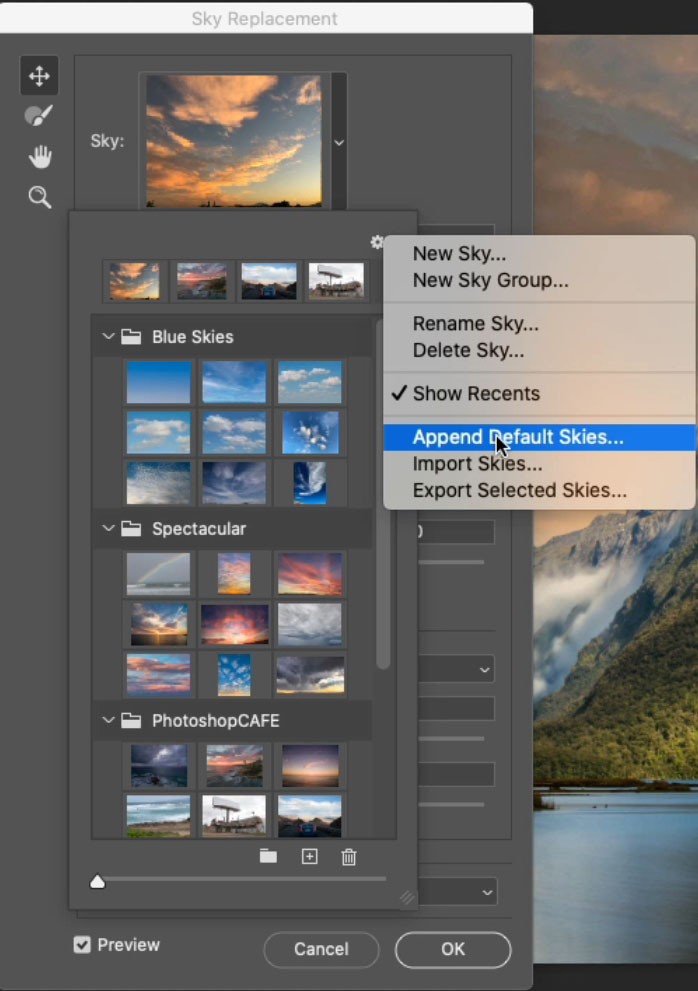
This is definitely getting these, but we want to bathe this in gold and light. And also we want to get the reflection into the water.
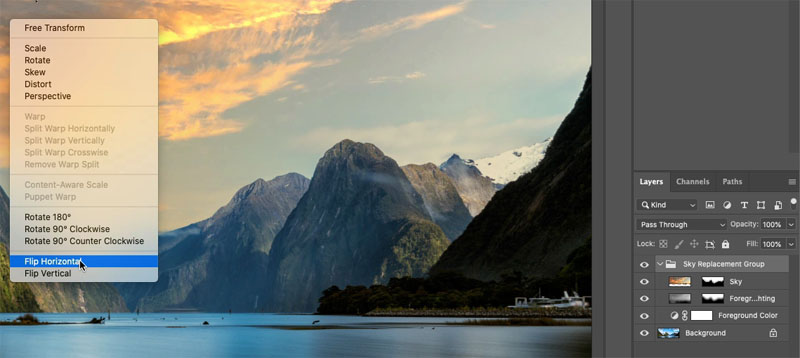
Optional Step: Make sure that the light on the sky is coming from the right direction.
It’s very easy to overlook that. Look at the hills, you can see the shadow on the left hand side of the hills and the light is coming from the right. Make sure when we look in the sky that the light is coming in the same direction. And to me, it looks like it is here. If it wasn’t, go up under your Sky Replacement Group, hit Control/Cmd+ T for free tansform. Right-Click and choose flip horizontal.
Sky replacement gives you the option to apply some color to the foreground. We want to make it more dramatic with Match Color. Match Color doesn’t work as an adjustment layer and it won’t work as a smart object.
3. Choose the background and Press Cmd/Ctrl+T to duplicate the layer, so we can go back to the original background if we need to.
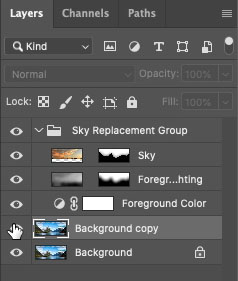
4. Image>Adjustments>Match Color.
The amazing thing about this tool is this has the ability to take the color from any Layer in any open document in Photoshop.
Under source; choose the document name of your current document.
Under Layers choose Sky.
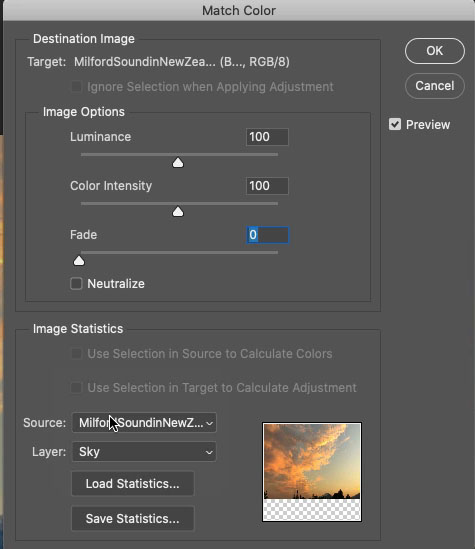
Immediately you will see the color.
5. Choose fade and reduce the color until it looks good, around about 57 in this case. .
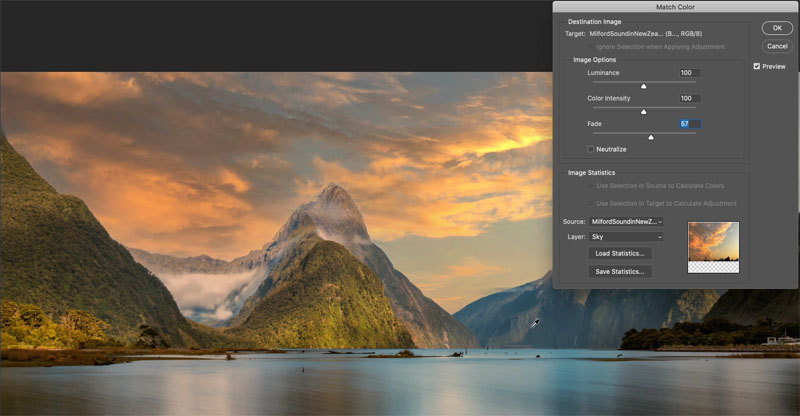
That’s great. Now, we want to reflect the clouds into the water because the reflections are not matching.
6. Choose the Sky layer, hold down alt/Option and drag a copy of that sky layer down in the layers panel and drop it right above the background.
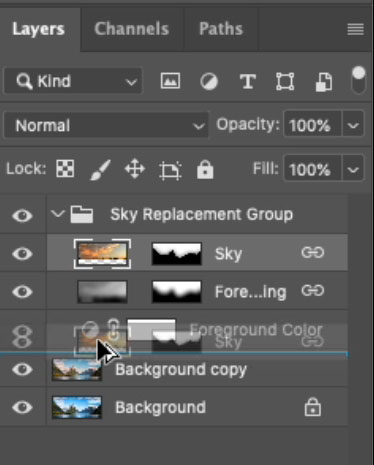
7. We need to get rid of the layer mask. Right click on the mask and choose delete layer mask.
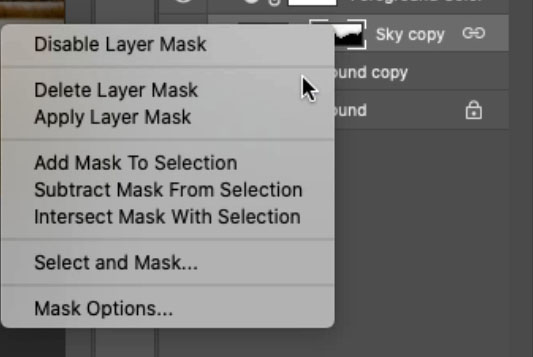
If you look on the right, you’ll see this little chain link. It means there are linked layers. If we try to move the layer, it moves all of those linked layers together.
8. Right-click, choose Unlink Layers.
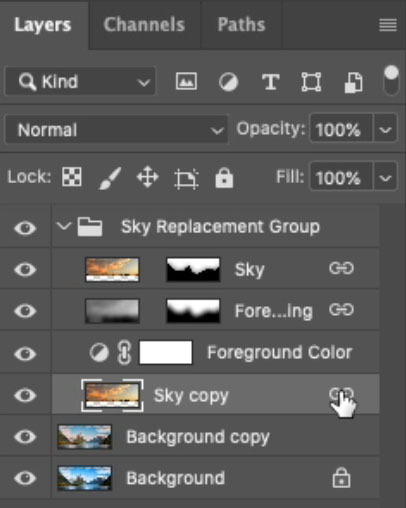
9. Cmd/Ctrl+T for free transform mode.
Right-Click > choose flip vertical.
Drag the reflected sky down on the page until its positioned over the bottom of the image.
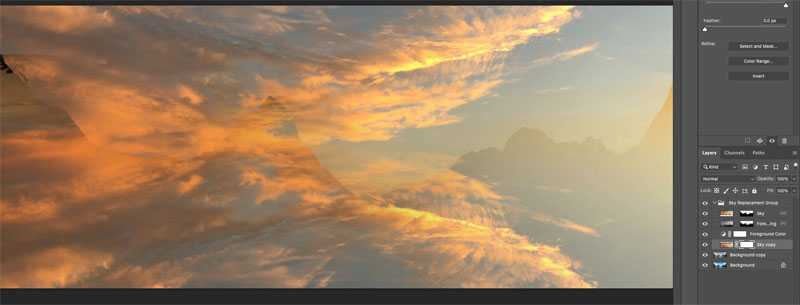
Obviously we want to blend this layer into the photograph.
10. Click Add Layer Mask in the Layers Panel, this adds a new mask to the reflected clouds.
Choose the Gradient tool.
On the tool bar at the top, we will start from the right and work our way across. Transparency is on; opacity 100; mode normal; linear gradient.
Click on the little arrow to open up our gradients.
Choose the first option; black to white (It may be in the Basics group).
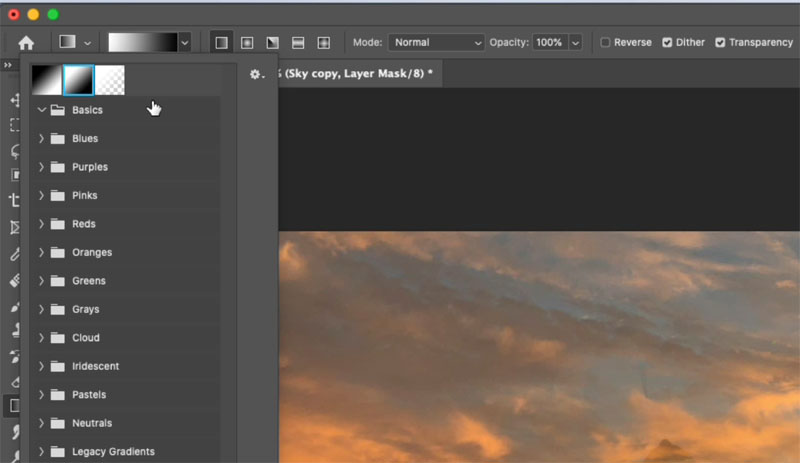
11. Make sure that the layer mask is selected.
Drag the gradient in the area you want to blend the reflection. From the top of the water, into the water a little bit. The nice thing about the gradient on a mask, is if its not how you want it, you don’t have to undo, just drag again until you like the result.
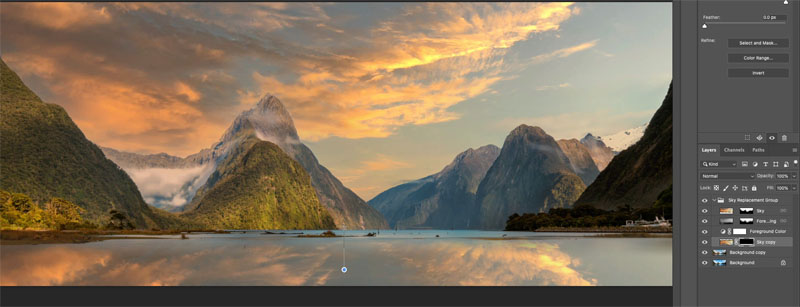
Now, we have a good amount of reflection, for many images, you will be done here.
But it’s still not looking realistic on this photo because of the soft movement on the water. This is a slow exposure. So we want to add a little bit of a blur to the reflection. So it matches the blur in the water.
12. Make sure you now select the layer and not the mask anymore.
Choose filter>blur>Motion blur.
Set the angle to 90. Change the distance until it looks more glassy to match the water.
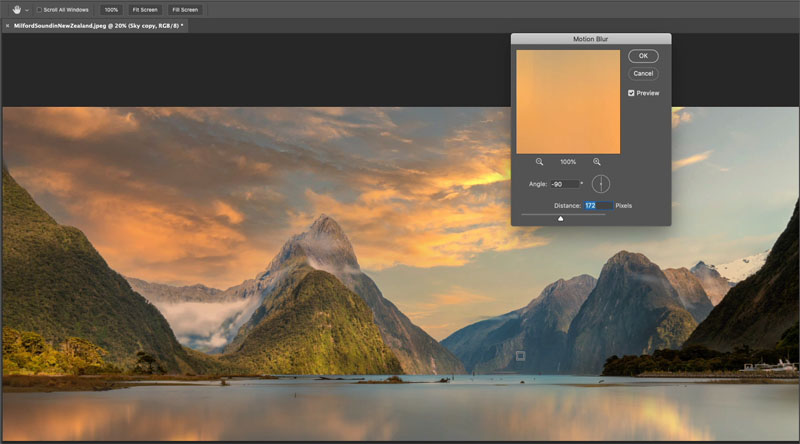
If it looks too strong, you can reduce the opacity or also try changing the Blending Modes to screen or soft light.
Here is an optional step, adding the movement to the clouds, so it looks like a true slow exposure.
13. Choose the Sky Layer (The clouds at the top)
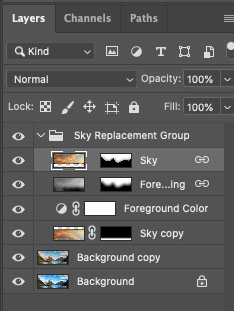
14. Filter>Blur>Radial Blur
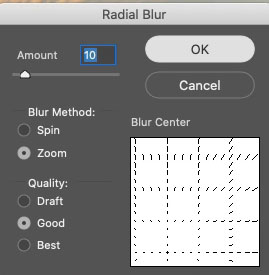
15. Change the method from spin to zoom. Drag in the box to move the origin point to the bottom left. That means that everything is going to radiate from this area. And let’s keep the amount quite low.
Click, OK
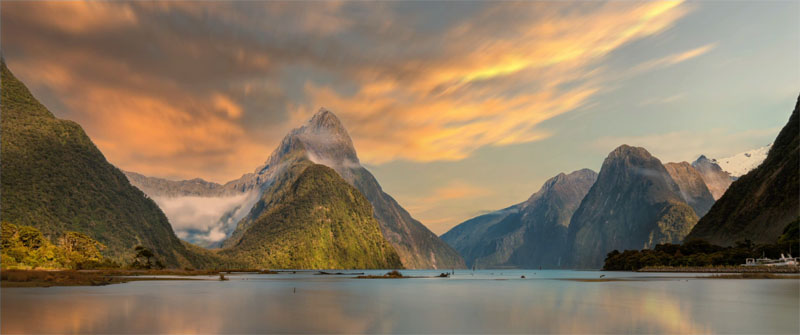
Whether or not you want to add that blur, that movement would really depend on the photograph. This particular photograph already had the movement, so it made sense. But of course, you could add that to any photograph to get the same kind of effect.
So anyway, thanks for joining us and thanks for checking out this tutorial.
And until next time, I’ll see you at the cafe.
Colin
Browse our hundreds of other free tutorials here, or search for what you are looking for in the search at the top of the page.
You can also browse by topics in the free tutorials menu.
If you are ready to get serious about Photoshop, see our full length courses here
For notifications when I post new tutorials and livestreams, join our mailing list
Keep the conversation going; follow us on Social Media:
The post Turn a landscape photo into Stunning Sunset in Photoshop appeared first on PhotoshopCAFE.
