
Along with the new features I covered for Lightroom Classic (LrC), Lightroom (Lr), and Camera Raw (ACR) last week there is one additional feature that came to Camera Raw that is not yet in Lightroom Classic or Lightroom. We can now adjust contrast, tone, and color using Curves in a mask within Camera Raw. Adobe says this feature is coming to Lightroom Classic and Lightroom, but for now you’ve got to use Camera Raw if you want to try it out. So, let’s look at a few ways a Lightroom Classic user can edit a photo using the Camera Raw plugin for Photoshop.
Open Directly in Camera Raw
The most obvious way to do this is simply open a raw photo from Bridge into Camera Raw or use the File > Open menu in Photoshop to do the same. However, as a Lightroom Classic user you may not be used to navigating through Bridge or your operating system’s file browser to find where a given photo is stored to open it into ACR. Additionally, you may have made some edits in LrC that you want to keep and bring into ACR, and once the edits are done you probably want all of the edits back in LrC. So here’s a bit of a non-typical workflow that will keep your LrC edits with the source raw photo, allow you to play with Curves in Masking in ACR, and then have all new edits show up in LrC when you are done.
Starting and Ending in LrC
OK, let’s say we have a raw photo in a collection in LrC (which can make it harder to know where it is stored on drive), and we’ve done some basic edits, flag state and other metadata in LrC that we want to retain.
Step One: Select the photo in the Library module and go to Metadata > Save Metadata to File. You can also press CMD+S (PC: Ctrl+S) to do the same. You may see a warning prompt designed to inform you about what will happen and allow you to cancel if you did it by accident. Click Continue to well, continue.
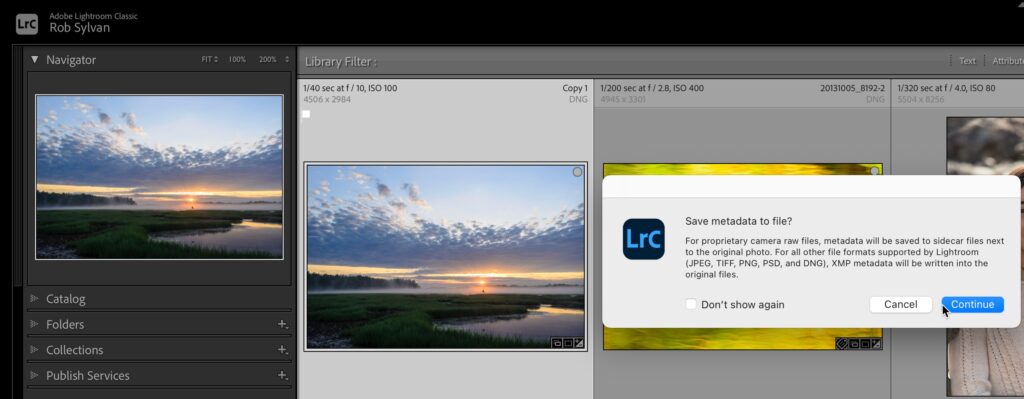
All that is happening is LrC is writing all the data it stored in the catalog about that photo to the XMP metadata of the selected photo. Now, not everything stored in a catalog can be written to XMP, such as virtual copies, so you need to have the source photo selected (not a virtual copy) to make this work. The purpose of this step is to be able to see any LrC edits previously applied when we open in ACR.
Step Two: Press CMD+R (PC: Ctrl+R) to open your operating system’s file browser (Finder or Explorer) with that photo already selected. This is just a fast way to find that photo so it can be opened directly into ACR.
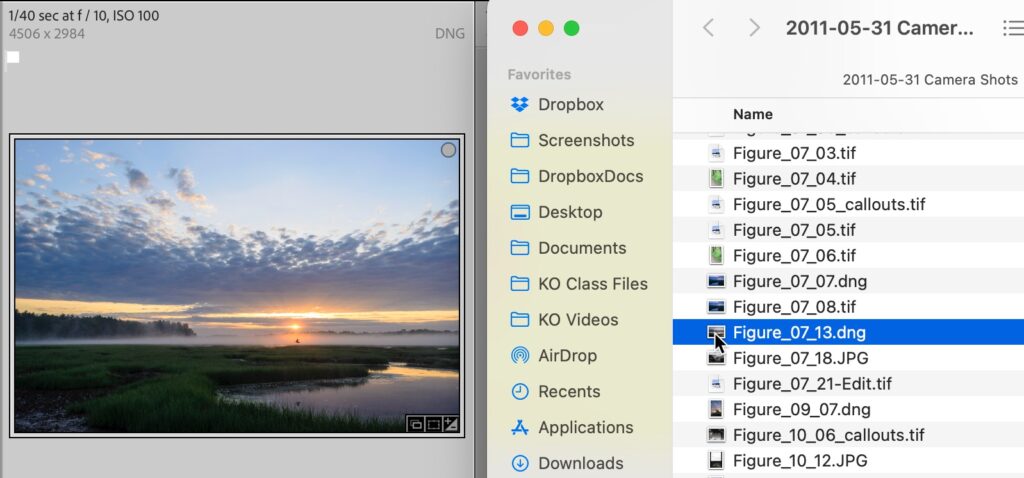
Step Three: Double-click the photo (assuming Photoshop is the default program for raw photos) to open it into Photoshop via ACR. Alternatively, right-click the photo and use the Open in contextual menu to open it in Photoshop. When you open a raw photo into Photoshop it goes right into ACR.
Because we wrote from LrC to the photos metadata, any edits you made in LrC should be visible and editable in ACR.
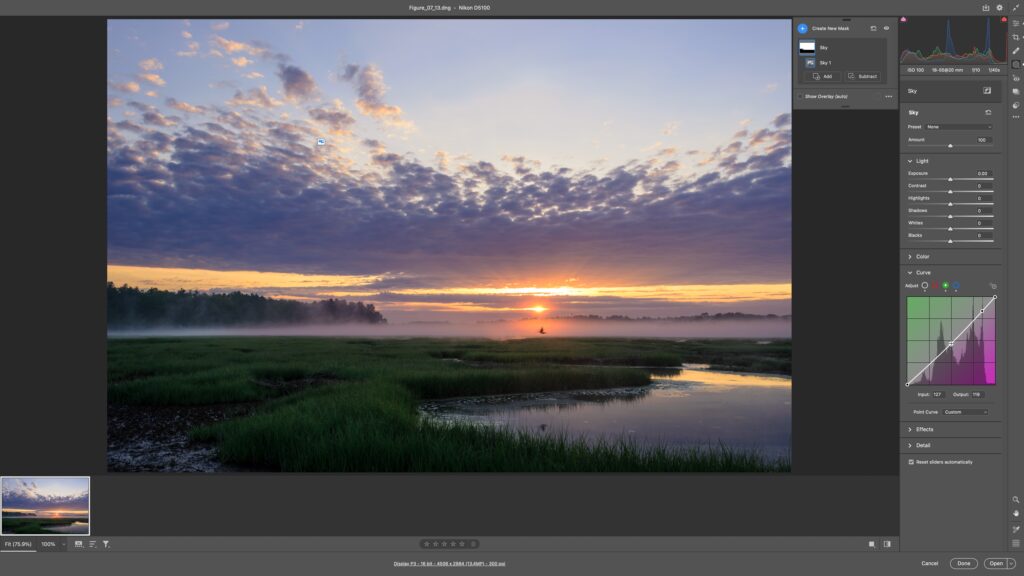
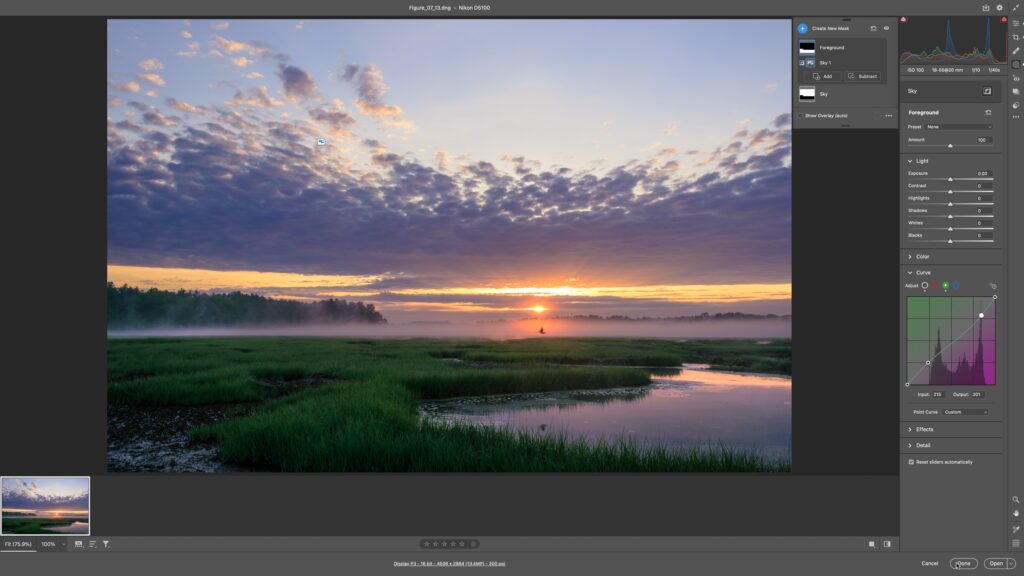
Step Four: Click the Masking icon to open into masking and use whatever tools you desire to make your mask so that you can make adjustments to that mask using Curves. In this example, I’ll start with Select Sky to make my first mask and expand the Curves panel.
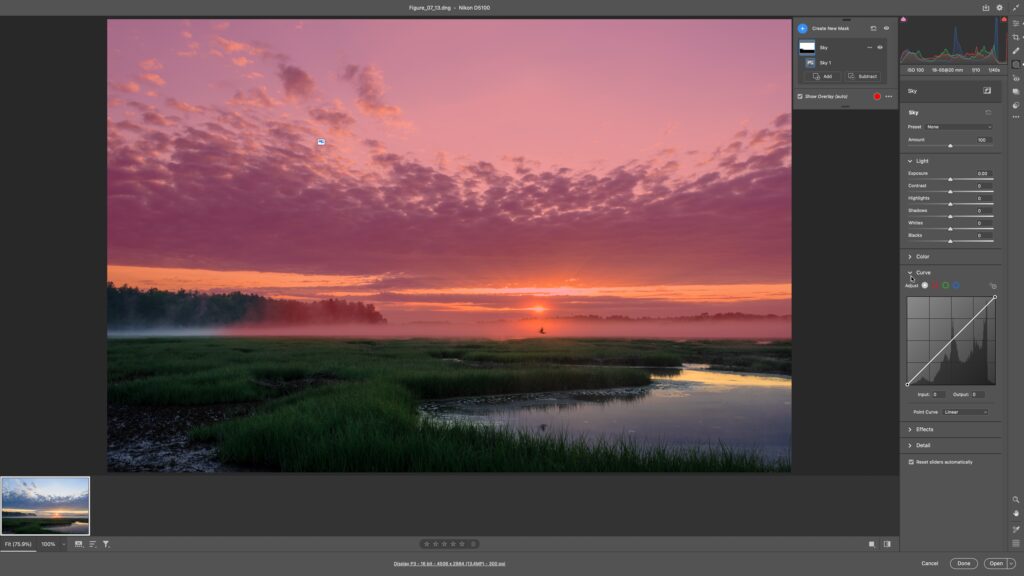
One of the obvious uses of Curves is to adjust contrast and tonality, so let’s darken the sky down a little while increasing contrast.

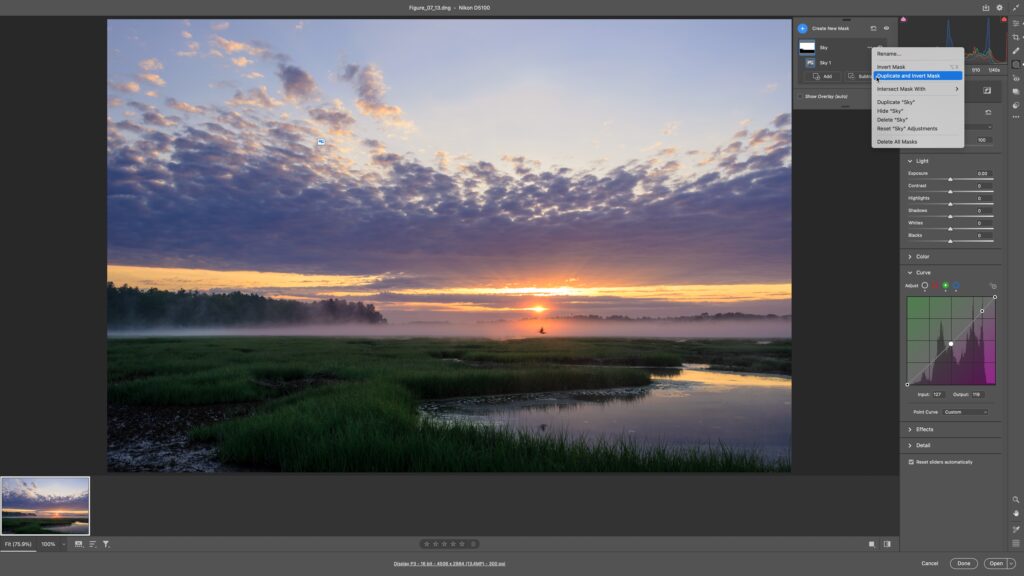
But we can also use the RGB curves to adjust individual color channels. Let’s pump up the sunrise colors a little bit more by using the Blue curve to add more yellow to the highlights.
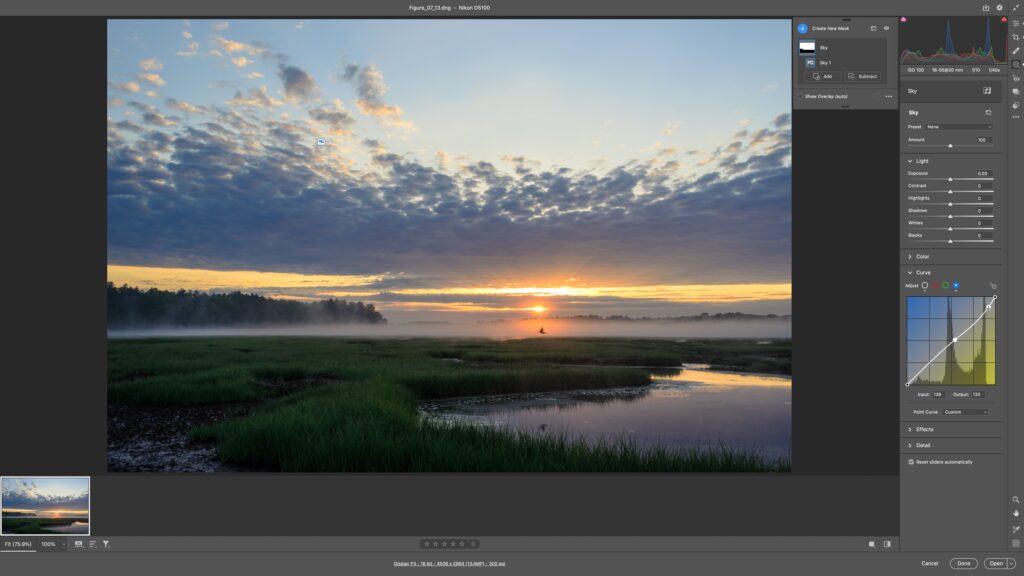
Then use the Green curve to add a little magenta into the sky as well.
Using the existing Sky Mask, I’ll click the three-dot menu next to it in the Masks panel and choose Duplicate and Invert Mask so I can work on the foreground separately from the sky.
First, I’ll use the parametric curve to brighten up the overall foreground.
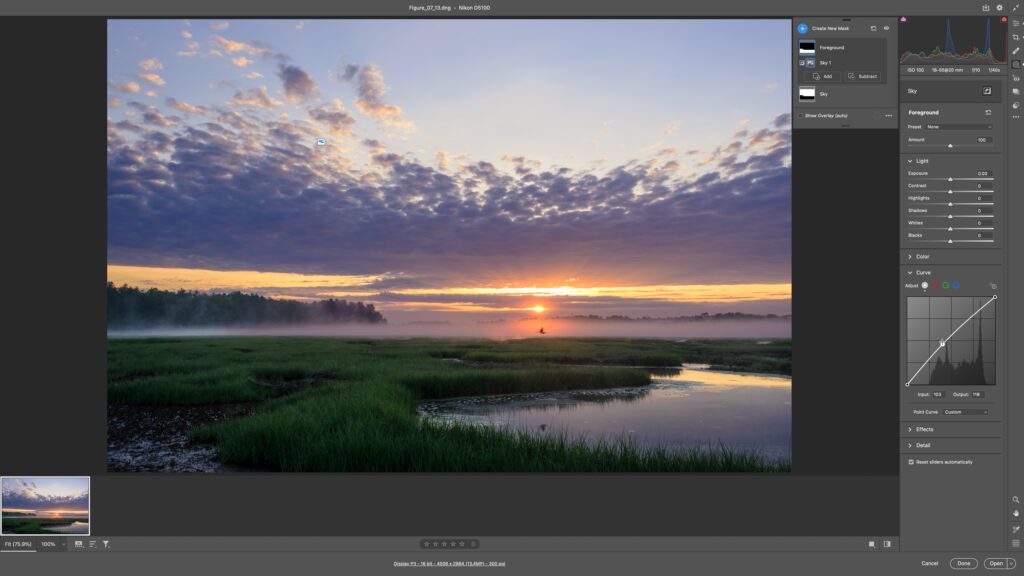
Then I’ll use the Green curve to add magenta into the highlights while boosting the darker green tones of the grasses.
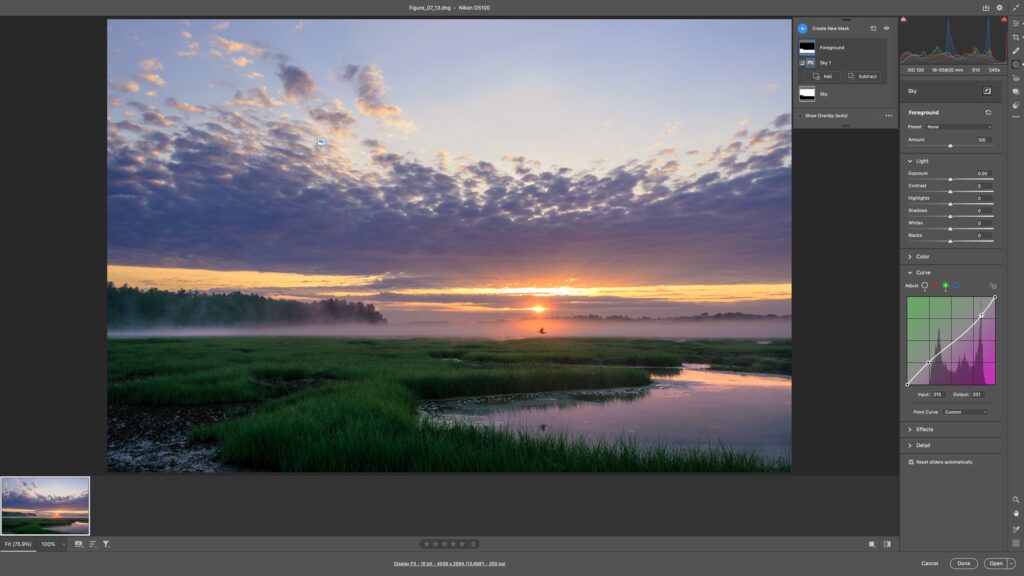
OK, those are some quick edits just to explore what curves can do for a photo. Now, let’s bring it back to LrC.
Step Five: To finish in ACR without opening in Photoshop, click the Done button. This will write all edits to the photos XMP metadata and close ACR.
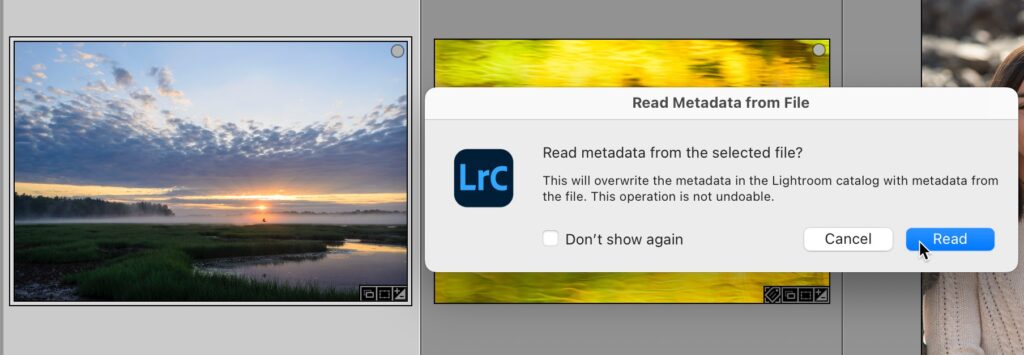
Step Six: Switch back over to LrC, and make sure the original photo is still selected (if not, select it). Go to Metadata > Read Metadata from File. You will see another prompt informing you of what you are doing. Click Read to continue. This tells LrC to update the info in its catalog with the info from the photo’s XMP metadata, and since we started this by writing from LrC to the metadata we won’t lose anything in the process. In fact, we gain all the edits we made in ACR. Once the process is done you should see the preview update in LrC (if not, switch to Develop and it should update there).
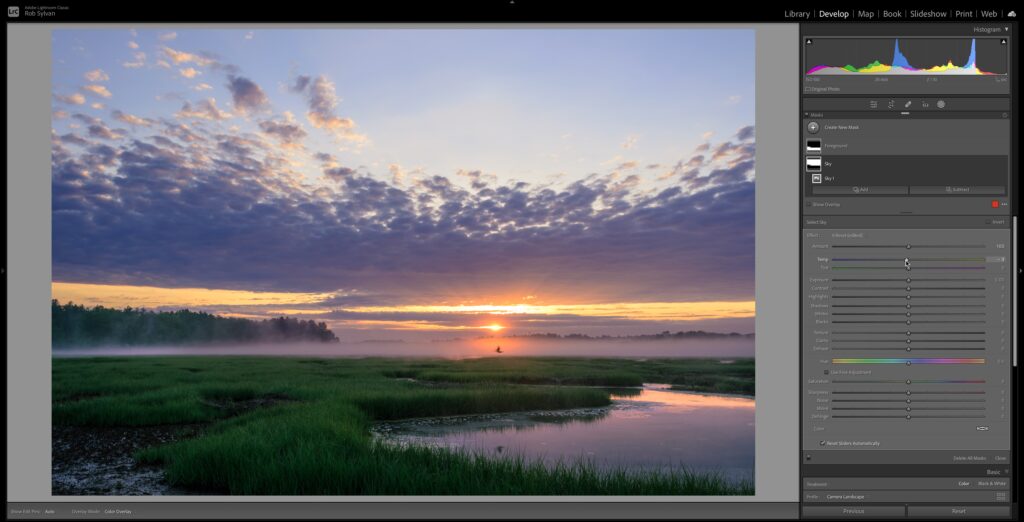
Even though we cannot edit the Curves adjustments in the masks made in ACR we can see them in LrC, and we can adjust other settings in the masks if we wish.
So, go and play around with this new feature and when it comes to LrC you’ll be able to edit those Curves adjustments without jumping through all these hoops. Enjoy!
The post Using Curves in Camera Raw Masking from LrC appeared first on Lightroom Killer Tips.