
Here’s a pretty cool little tip (from the vault): in Lightroom Classic’s Library module you can use the Paint Can (in the toolbar along the bottom of the thumbnail grid) to “spray” on the preset of your choice (among other things). That’s right, any thumbnail in the Grid view you drag across gets the preset applied or you can drag across a bunch of thumbnails and have the preset applied as you drag, which is the big advantage of the Paint Can. Here’s how it’s done:
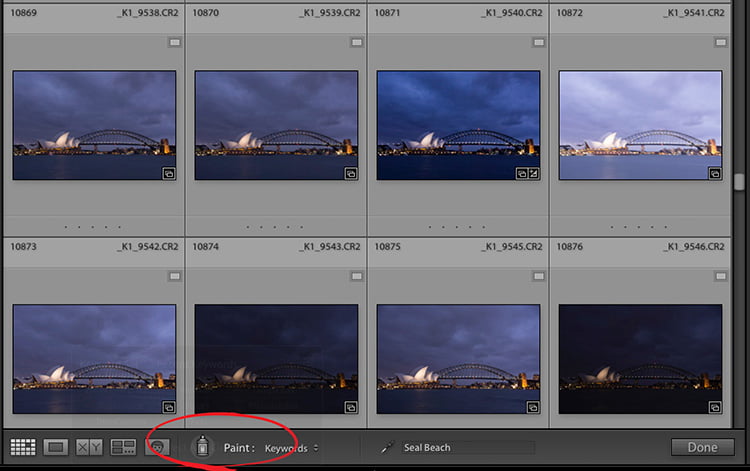
STEP ONE: Click on the Paint Can at the bottom of the toolbar (I circled it in red here for ya). By default, it wants to paint keywords, but we’re going to change its function to something else.
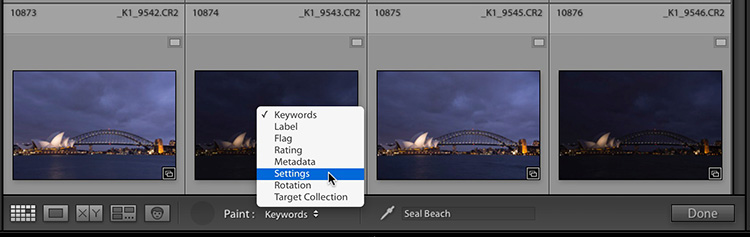
STEP TWO: Click and hold on the Paint pop-up menu and choose Settings (as shown above).
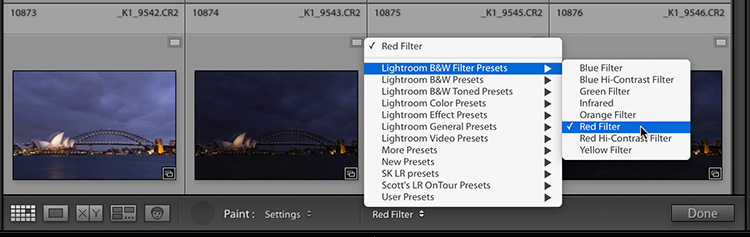
STEP THREE: When you choose Settings, you’ll see the word “Auto Tone” appear to right of it, but if you click and hold on Auto Tone, you’ll get a pop-up menu with access to all your Develop Module presets (as shown here where I chose ‘Red Filter,’ one of Lightroom’s built-in Black and White presets. Now, the Paint Can will ‘paint’ the Red Filter B&W preset.

STEP FOUR: To apply the preset, just drag it over the images (as I have here) and each one get that Red Filter preset applied to it Simple as that. 
NOTE: as you can see in the capture in step two above, you can “spray on” lots of things (not just presets) from Keywords to copyright info; from rotating your images to labeling, flagging, or adding star ratings. Plus, it’s just fun to use.
Hope you found that helpful, and tip-of-the-hat to Adobe’s Julieanne Kost, from whom I learned this tip in the first place.
Here’s wishing you an awesome, safe, healthy, happy week!
-Scott
The post Using Lightroom’s ‘Spray Paint’ feature to “Spray” Presets Across Multiple Images appeared first on Lightroom Killer Tips.