
Scott has an article from last week sharing 5 great reasons to start using Lightroom mobile, and I wanted to build on that with a focus on using Lightroom on an iPad. I’m still using a first generation iPad Pro, so I can’t speak to the benefits of the power boost that comes with the latest generation of iPads. I’m just focused on the cool benefits of using Lightroom on this device in general, no matter which iPad you own. That said, many of these same benefits apply to using an Android based tablet, but I don’t own one to test with to confirm.
(1) A much large display
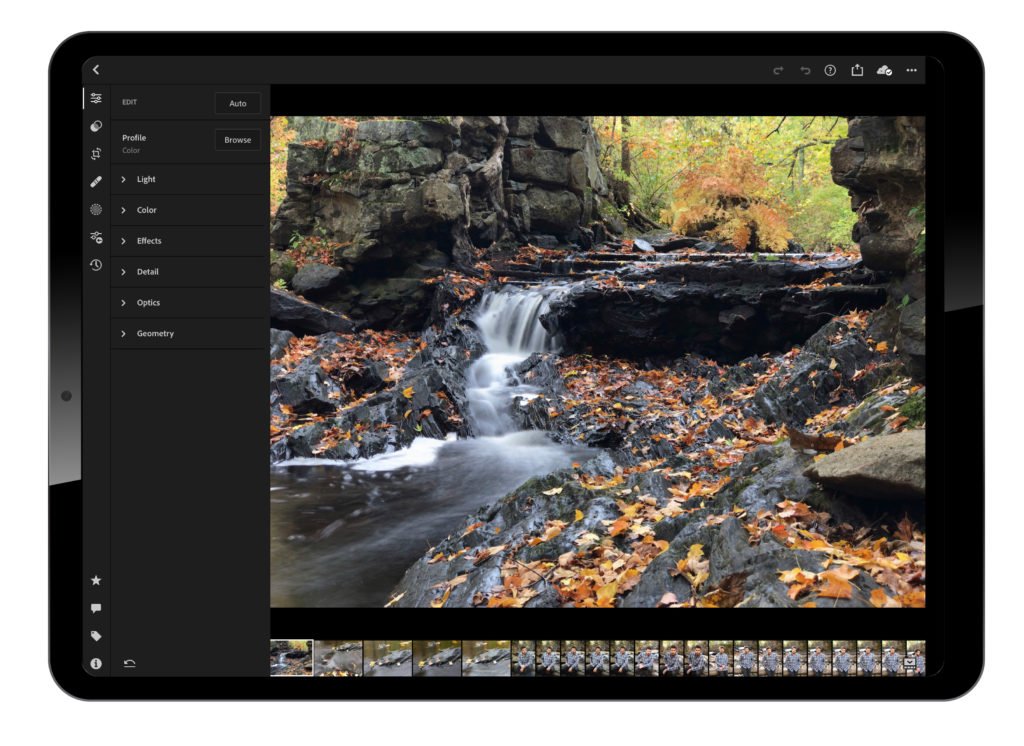
You could almost say this goes without saying, but it really is the whole point. Having a portable, powerful device with a much more usefully large display gives you more screen real estate for seeing what you are doing, for displaying larger editing controls, for having an (optional) filmstrip along the bottom, and such a better editing experience all around. With the larger display comes the larger device, sure, but also a much more powerful tool for editing. It’s not just a larger phone. Adobe really did design the interface with the iPad in mind.
(2) Pair it with a keyboard and you’ve got shortcuts
Certainly the main draw of using a tablet is the ability to work right on the screen itself, but for those of us used to working primarily on a computer you’ll be glad to know that you can apply those same skills when using the Lightroom app paired with a keyboard. Whether you are using the arrow keys to navigate through an album, the P key to apply Pick flags (X for reject and U for unflag), the 1-5 number keys for star ratings, or CMD/Ctrl+C to copy settings and CMd/Ctrl+V to past them, there are a number of useful shortcuts to take advantage of in your workflow.
(3) You can put the editing controls on the left side
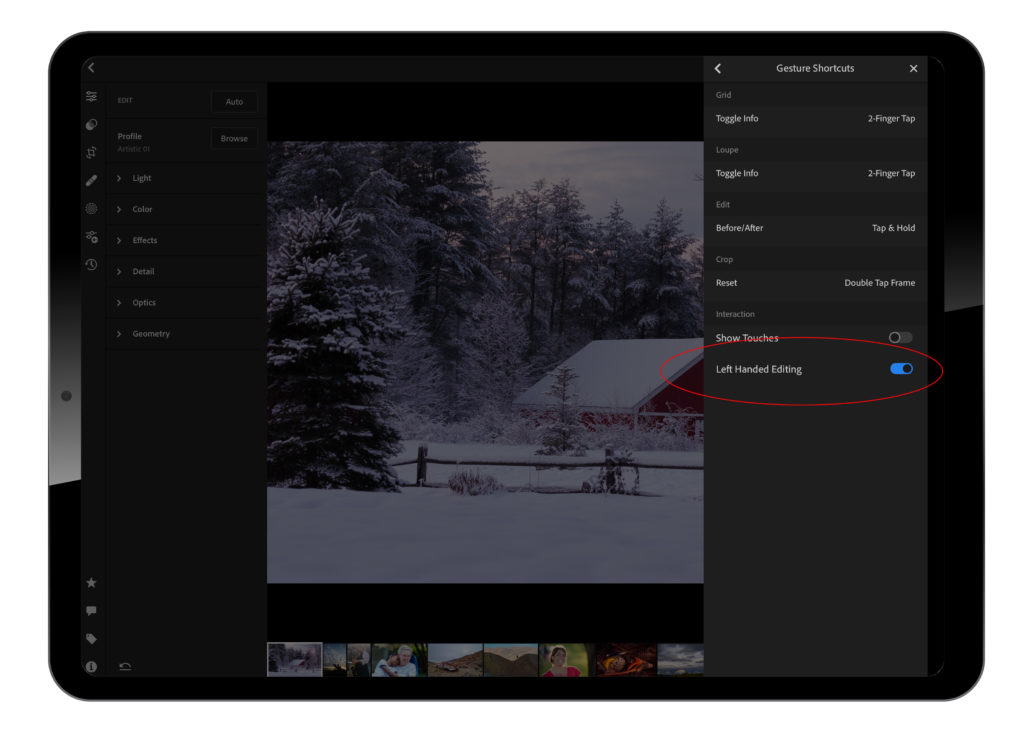
Ok, showing my lefty bias here, but this is the only place in all of Lightroom-land that you can move the editing controls to the left side of the screen, and its worth a shout out! Go to Settings > Gesture Shortcuts, and then enable Left Handed Editing. No more reaching across the photo you are editing to move a slider! Thank you, Adobe, now please do the same in Lightroom Classic. Thanks!
(4) Edit in Photoshop
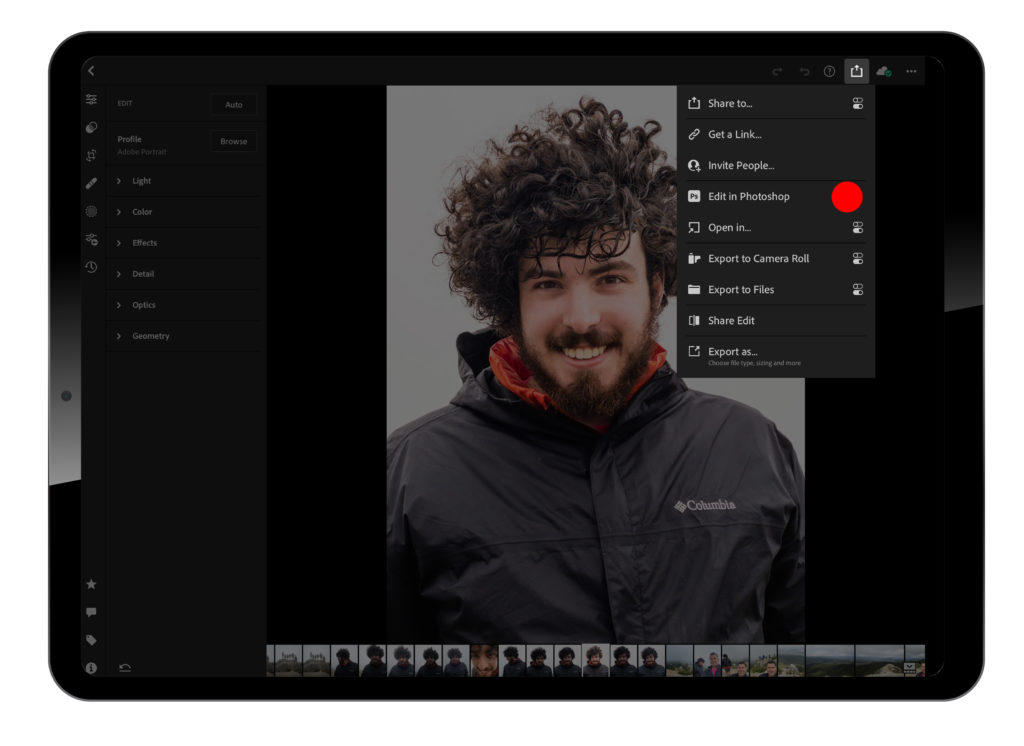
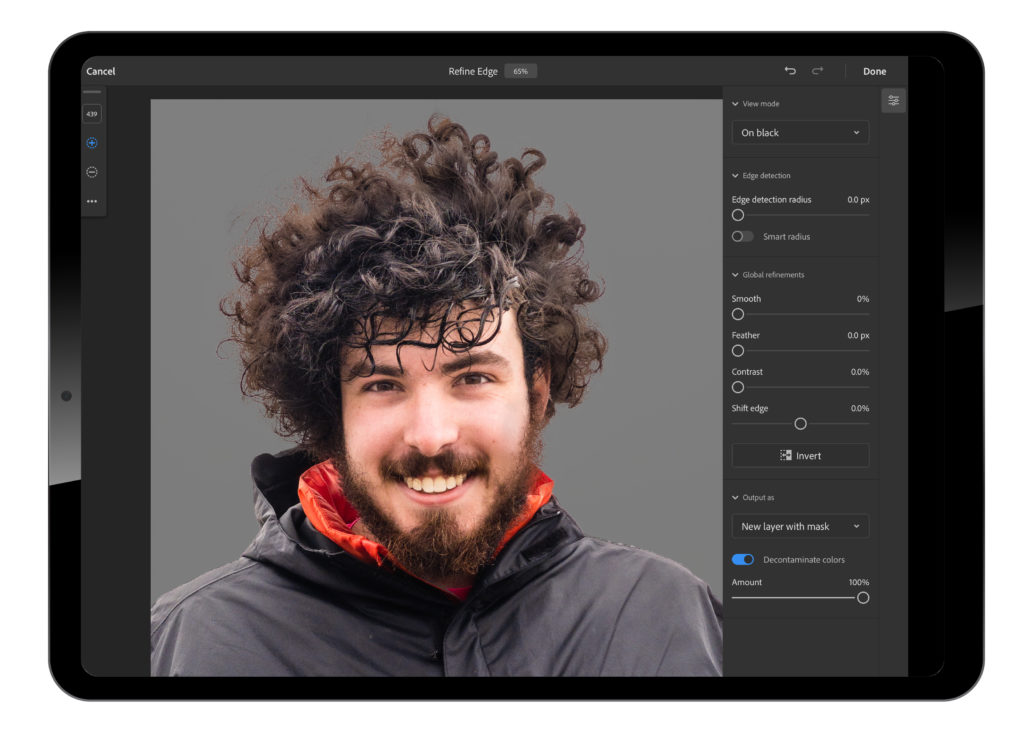
Photoshop for iPad is currently included in all the subscription plans that include the full version of Photoshop, so if you have one of those plans, just sign in with the same Adobe ID/password after installing it from the App store (FAQ for Photoshop for iPad to learn more). Once installed on your device, edit your photo in Lightroom to the point you want to send to Photoshop for iPad, then tap the Share icon and choose Edit in Photoshop (this only works with full resolution photos, not smart previews). If not already downloaded, you’ll see the original photo download from the cloud, then appear in Photoshop, where you can work with selections and layers, do additional retouching, and more. When done editing, tap the Send to Lightroom button to save your edited copy back to where you started.
(5) The Apple Pencil
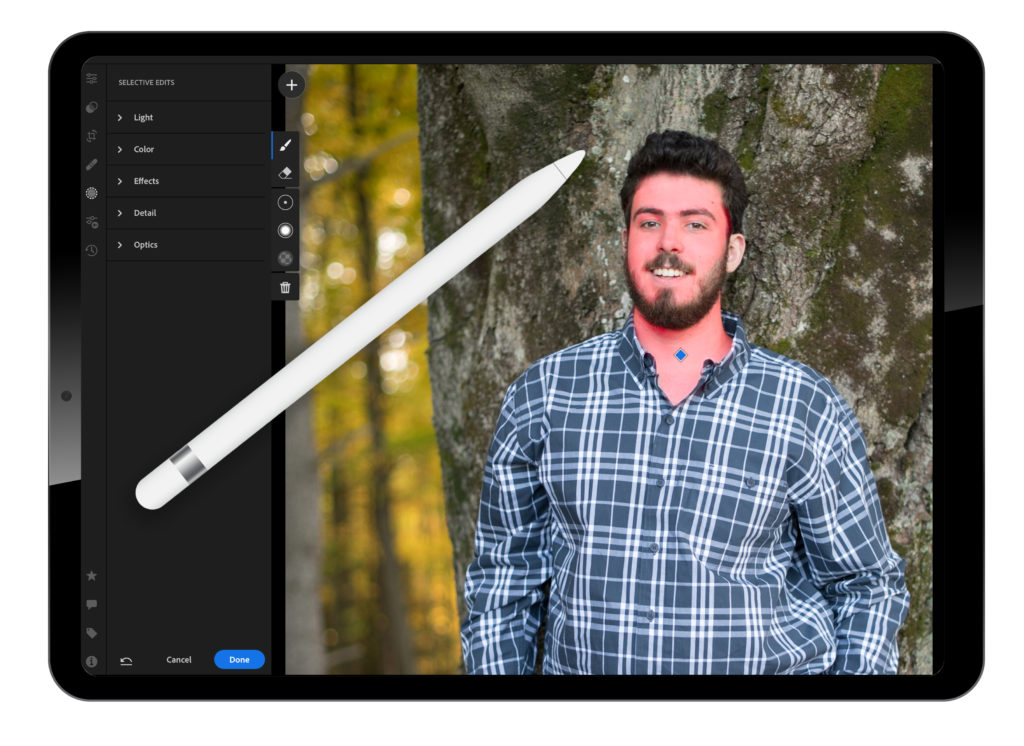
If you’re using an iPad that supports the Apple Pencil you’ll seriously want to consider adding this tool to your workflow, as it is so much easier when using the adjustment brush in Lightroom or when working in Photoshop for iPad. Once you’ve started using it you’ll wonder how you ever used these tools without it before. You can be much more precise in your brushing, it feels so much more natural, and you don’t get fingerprints all over your screen.
As the iPad (and other tablets) get more power, better displays, and more accessories, they will only become even more useful to a mobile editing workflow. Combine that with cloud storage that provides access to full resolution photos you won’t have to be as concerned about local storage on your device either.
The post 5 Great Reasons to Use Lightroom On Your Ipad appeared first on Lightroom Killer Tips.