
How to use Color Curves in Photoshop to add colored highlights
How to control color with Curves in Photoshop, easier and more powerful than you imagine
When you change curves into color mode, they don’t change the tones, but rather the color. There are 6 primary colors in Photoshop and this is the best way to access them. One of the most powerful ways to control color in photoshop is with curves, you will learn how to unlock these powerful color controls in Photoshop.
Lets start with a little bit of theory, trust me this is WELL worth the read, as this will open up a new world of color to you in Photoshop, The color theory is only 2 steps then we will jump into using this to create some stunning colored highlights that can be used for reflections, rim lights, cast lights and more.
Using Photoshop Curves in Color Mode
Press Ctl/Cmd+M for curves (we will use adjustment layers in a second)
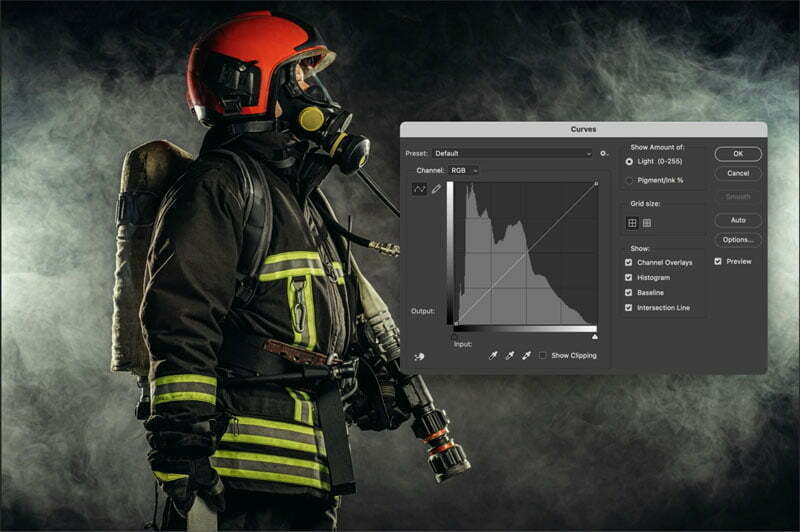
You are probably used to using curves to adjust brightness. Pull down to darken, up to brighten. (How to use Photoshop curves here)
We are going to do something totally different. We are going to use curves to adjust color.
When you are in color mode, the curves change the color NOT the brightness. (You can see a little tonal shift if you are aggressive with color curves, especially on multiple channels).
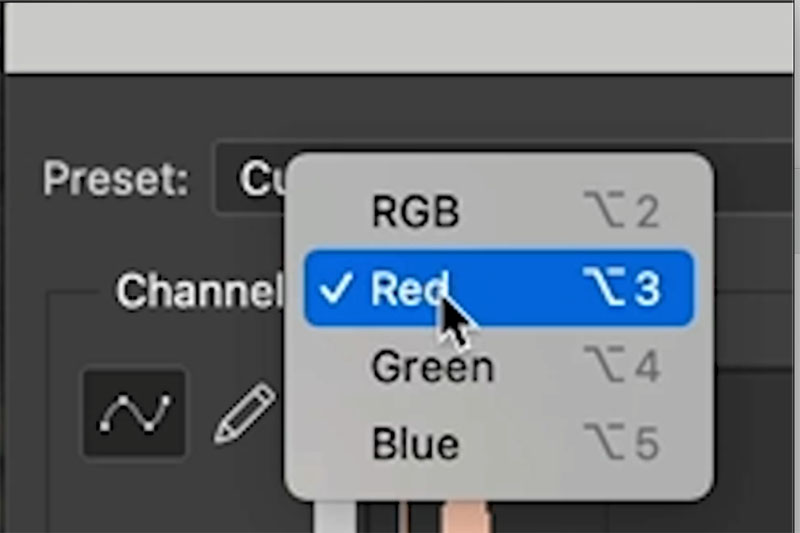
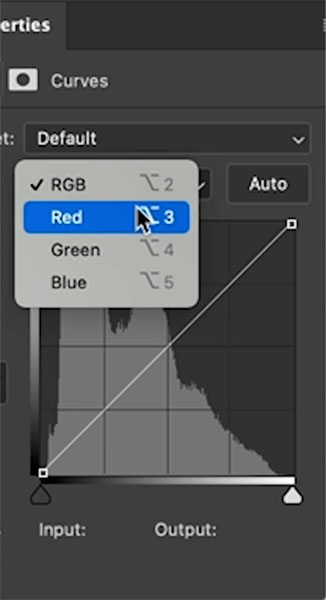
Where it says RGB, choose a color channel. Now you are in color mode
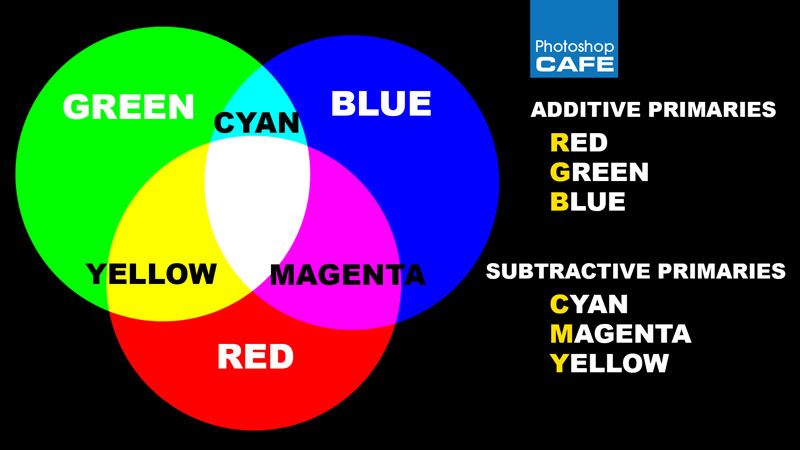
There are 3 primary colors in Photoshop in RGB mode. Red Green and Blue. (Additive primaries)
The opposite of the RGB primary colors are the subtractive primaries (CMYK) Cyan, Magenta and Yellow. (B is black, but its not a color, but a tone). Subtractive are used for print, to an offset printing press, CMYK mode. (I have written extensively about this in my books and in my premium corses, we won’t go deeper here).
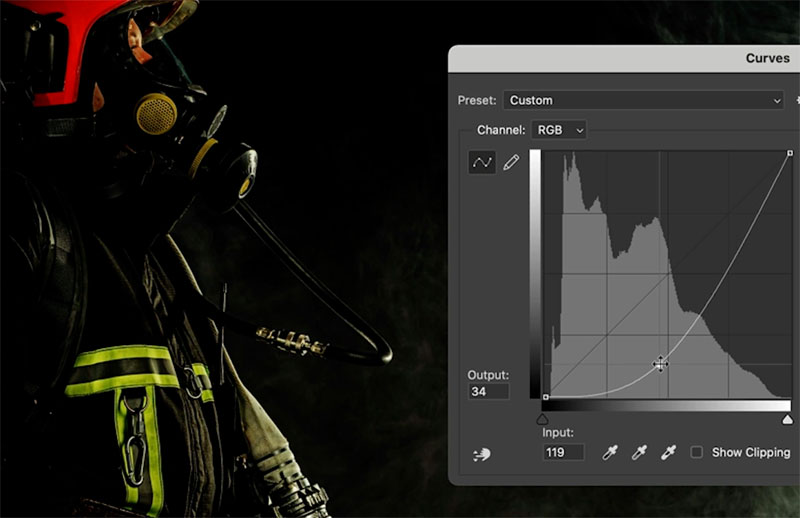
What you need to know if if you push the red curve up above the baseline, you are adding red. If you pull it below the baseline, it doesn’t darken the image, it adds the opposite of red> Cyan. (See my full courses on Curves and also on layers to understand more of this.) So the colors are as follows:
Red Channel: +Red – Cyan
Green Channel: +Green -Magenta
Blue Channel: +Blue -Yellow
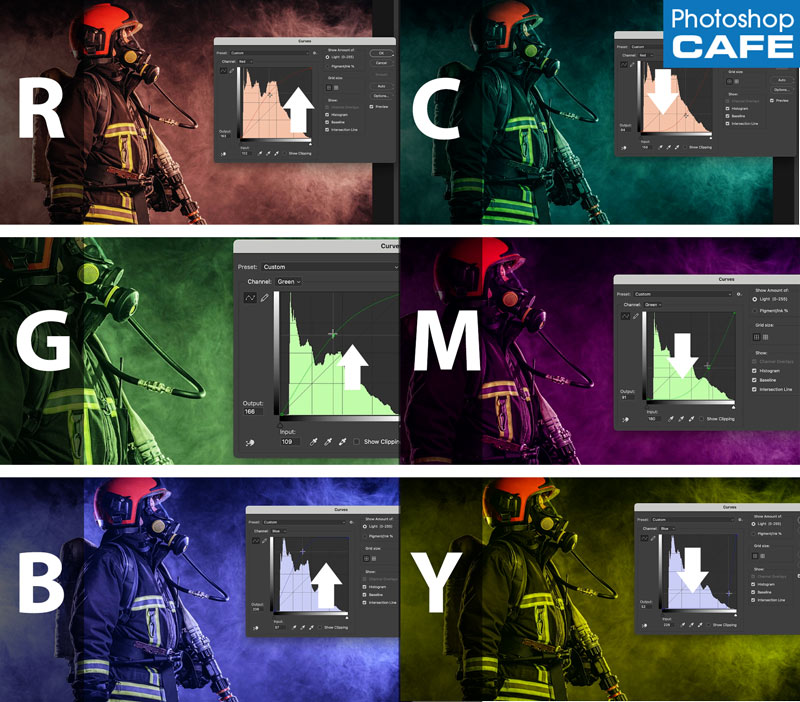
Here you can see how the colors interact with each other, The colored circles are in screen mode.
Additive RGB are light. All colored added equal white.
Subtractive CMYK are pigments. All colors subtracted equals white. (Let me know in comments if you want me to go more in depth in another tutorial, please ONLY if you REALLY want me to to, as in you will read it lol). Ok, on to the practical steps..
Using Color Curves to add colored highlights to a picture
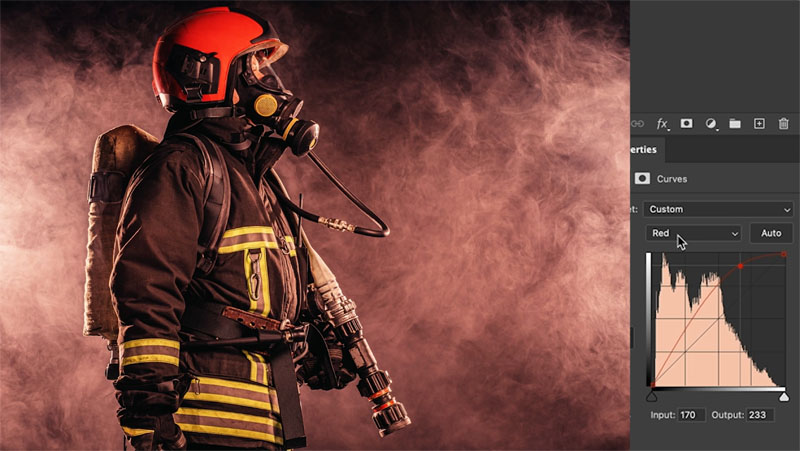
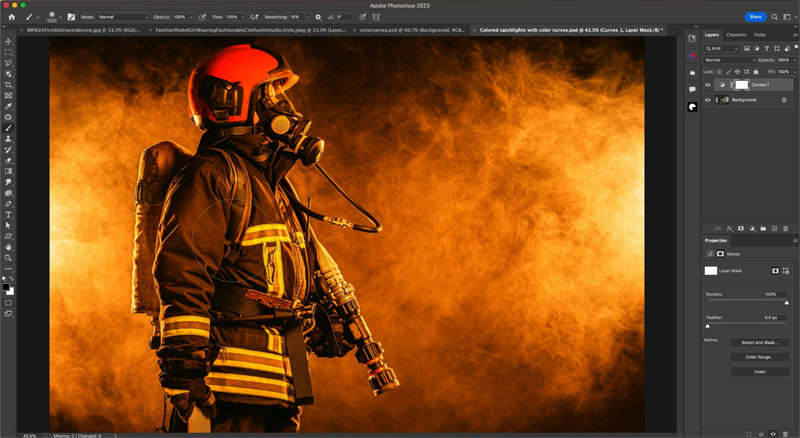
Let add some drama to this image, but in a realistic way. We want to set the background on fire by changing it to a bright orange, and only hit the highlight areas of the fire fighter with the color.
Add a curves adjustment layer in the Layers panel.
Choose new adjustment layer and choose curves.
Change to the Red color channel in curves.
Drag the pointer up the right side of the red curves (Highlight region)
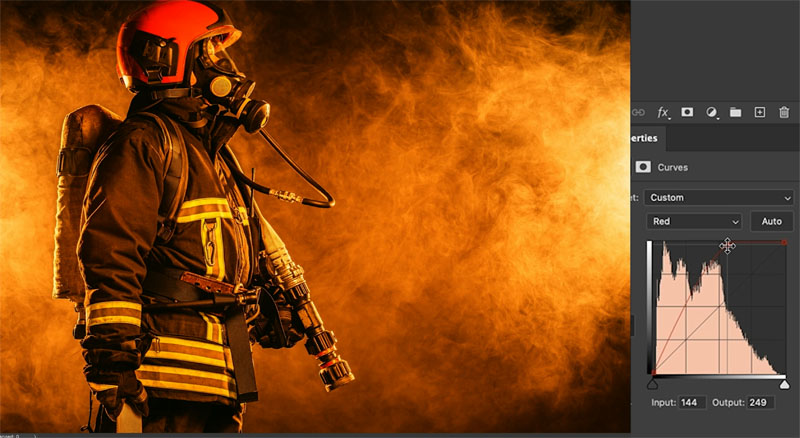
We have red, but we want orange. Red and yellow make orange. How do we add yellow?
We just learned that the opposite of Blue is yellow. So choose the Blue channel
Drag down to add yellow. This yellow added to the Red makes orange.

To change the hue of the orange, go back to the red channel.
Make adjustments and you can really set the orange ablaze.
To color is good, but in the real world, the backlight color wouldn’t be on the centerline of the object, let’s remove it.
Click on the layer mask in the curves adjustment layer,
Choose a black brush
As you paint with the black brush, notice the color is removed from that part of the image.

Targeting the highlights only.
Let’s remove the color from the shadows and only hit mid-tones and highlights.
Choose the adjustment layer again, rather than the mask. (you can see all this on the video above)
Click on FX and choose Blending Options.
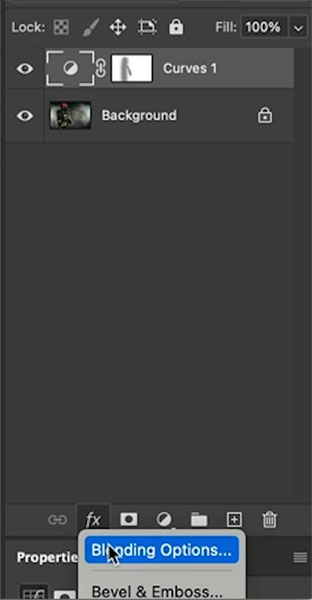
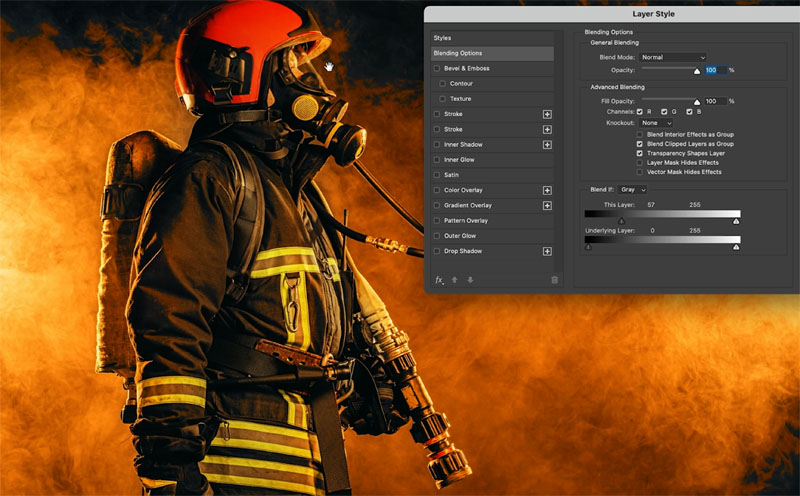
See the Blend if?
Drag the black slider on “this layer” to the right.
Notice the color is gone from the shadows, but the edges are rough.
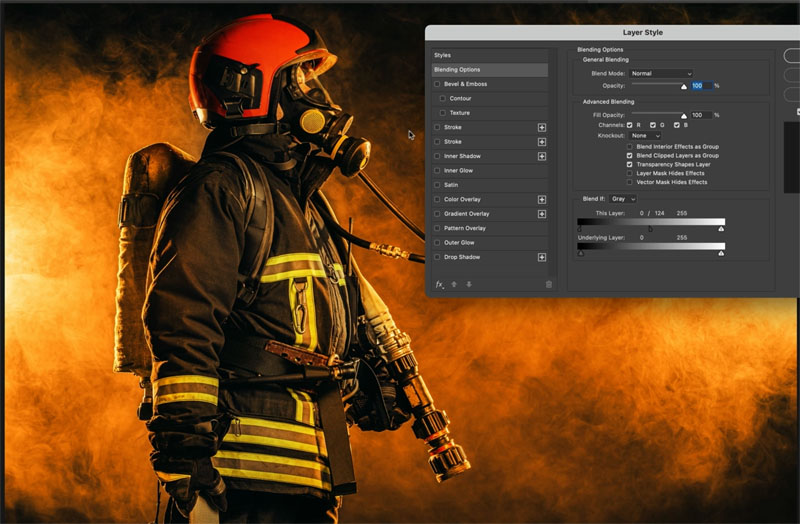
Hold alt/Option and drag on the left side of the arrow. This splits the triangle and makes for a smoother transition.

Adjust the black slider to suit your taste.
And here you have it, just one of the many things you can do with curves.

If you are ready to really step up your Photoshop game, you need to understand how to use curves, they are one of the most powerful tools in Photoshop.
I have created a course on curves, which makes it really easy to learn and grow, Check it out here
For a limited time, you can get 20% off this course, because I know it will really help you. Use the code: PSCCurves20 at checkout.
I hope you enjoyed this weeks tutorial.
See you next week
Colin
The post Add colored highlights in Photoshop with color curves appeared first on PhotoshopCAFE.