
Add RIM light with mask in ACR and Lightroom
In this Lightroom / Camera RAW tutorial, we will learn an easy way to add edge lights and background lights to separate an image from the background.
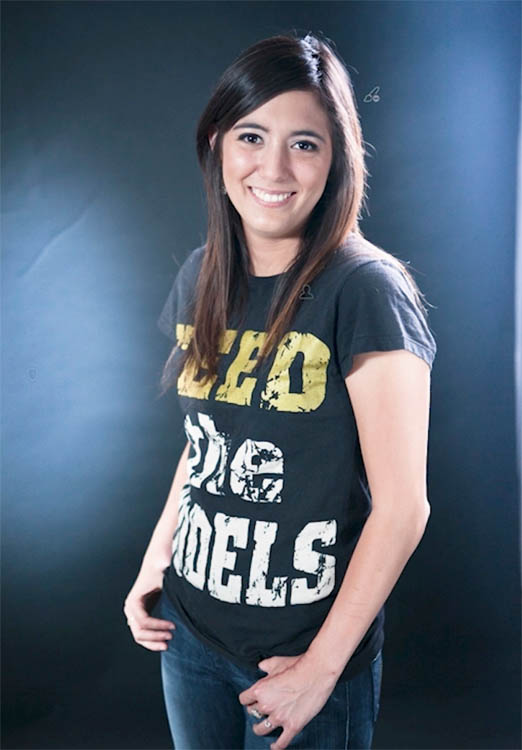
This is an effective way to add some pop to a photo. In this case, we are using a person. The technique will work for any object and also works well in product photography and even photography for ebay.
In the Lightroom Classic develop module, or in Camera RAW (they are both the same and this tutorial applies to both Adobe apps.)
Click on create mask
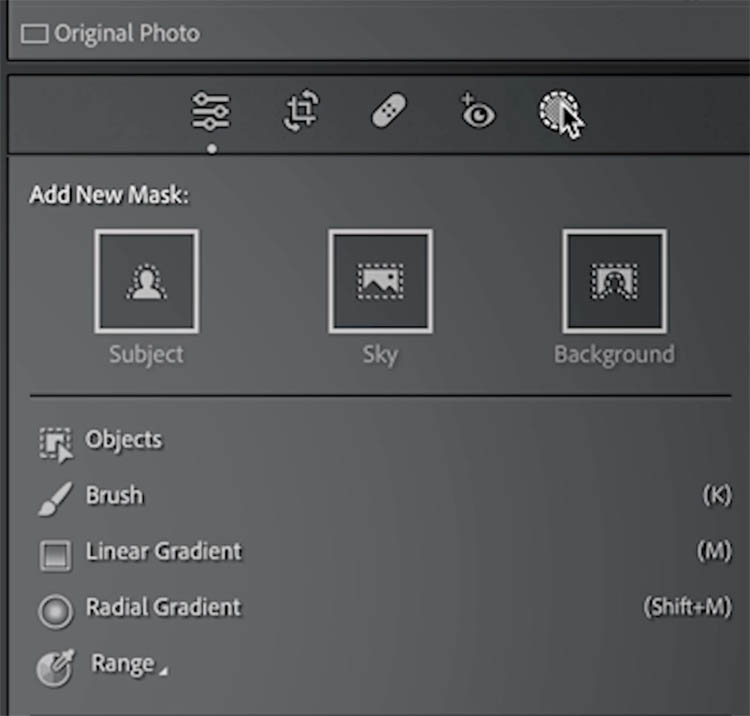
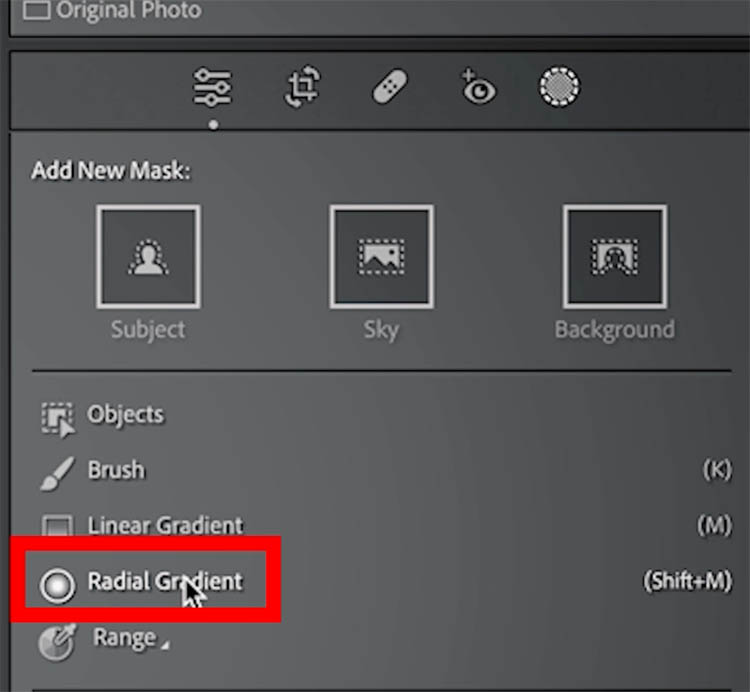
Choose Radial Gradient
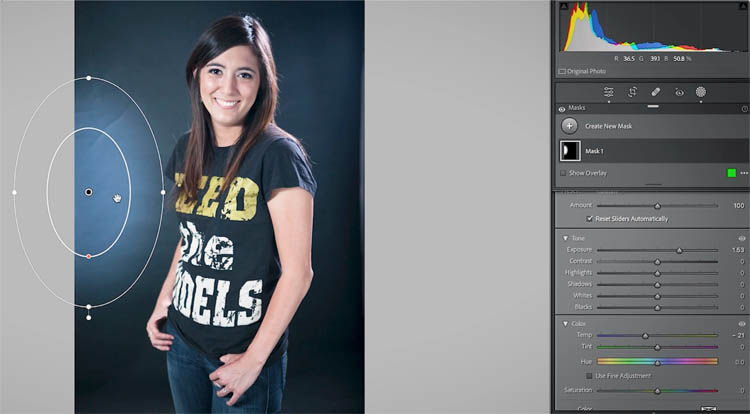
Drag out the gradient to add a spotlight effect on the background.
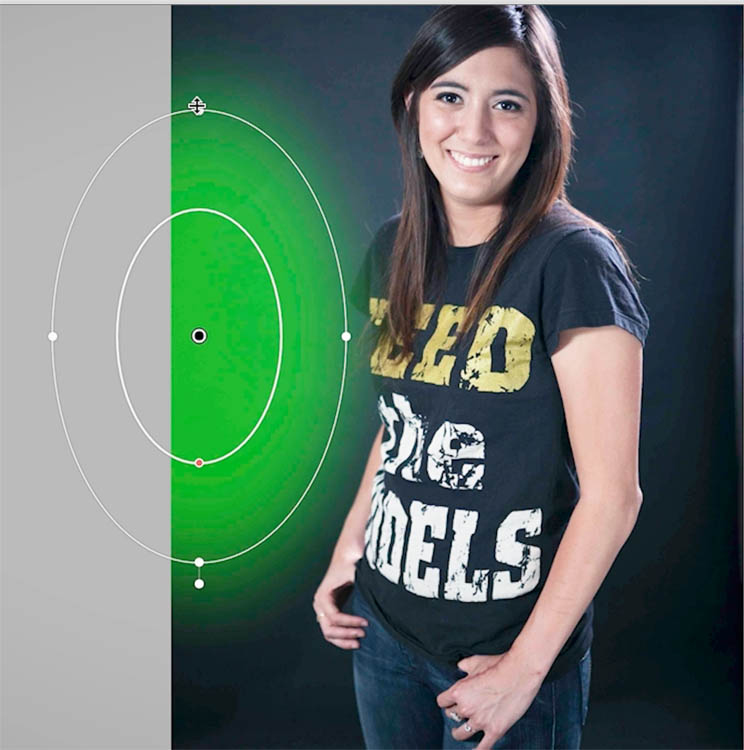
Adjust the Exposure to brighten the light.
Change the temp to add color to the light. In this case we are making it more blue (cool light).
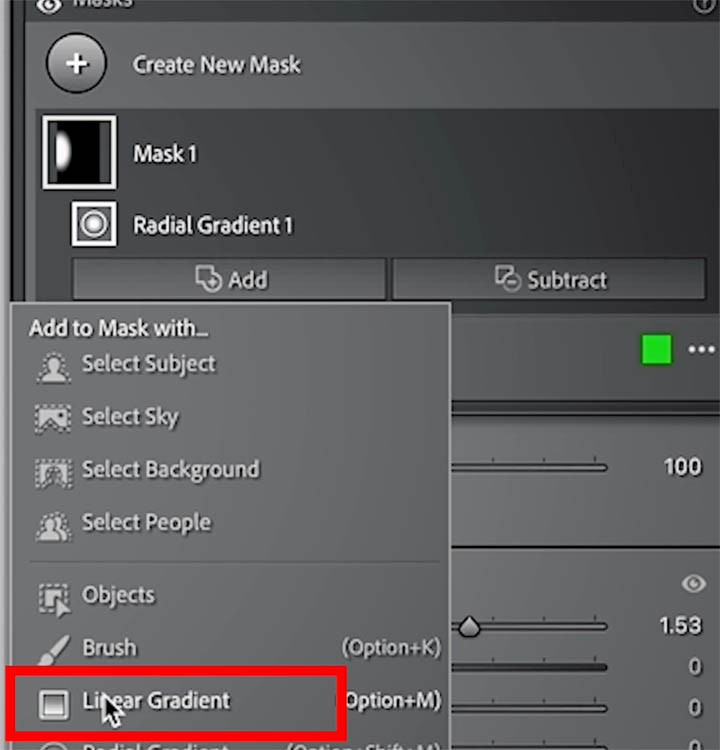
Let’s add a second light on the other side. (This wills show you how to use both gradient types).
Choose Add, and Linear Gradient
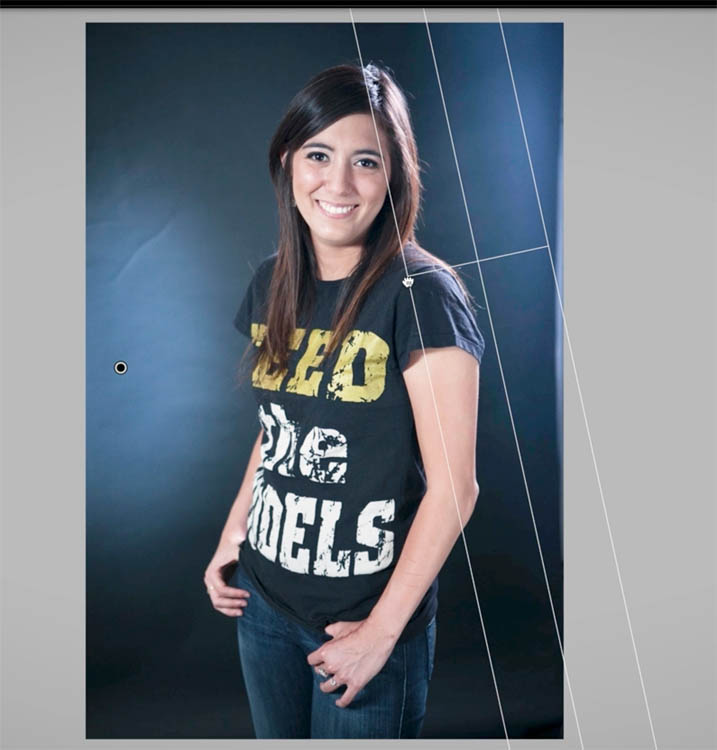
Drag out the gradient to add some light that would be originating just above the model and off to the side.
Because we are adding to the mask, notice it takes on the settings of the previous gradient. If you want different settings, create a new mask, rather than adding.
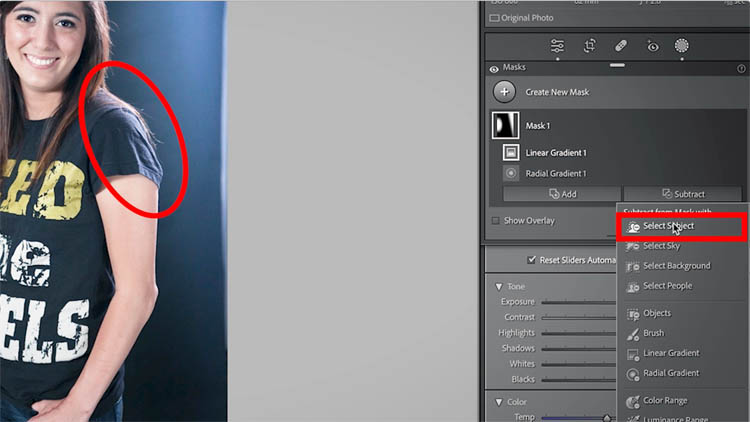
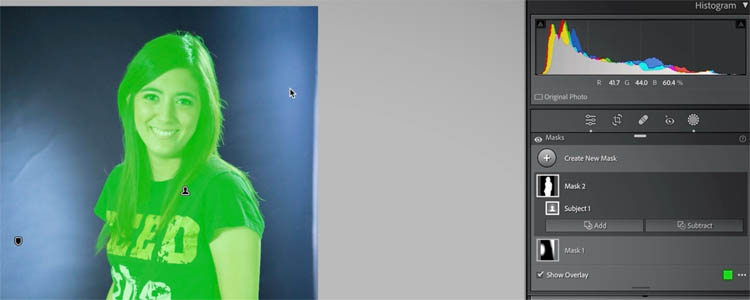
Let make sure the lighting only affects the background. We will customize the lighting on the model. The exclude our person (Julia, is the model’s name), choose Subtract and select subject.
The model will be unaffected by the lights now.
Lets add edge light to the model
Click Create New Mask
Choose Subject
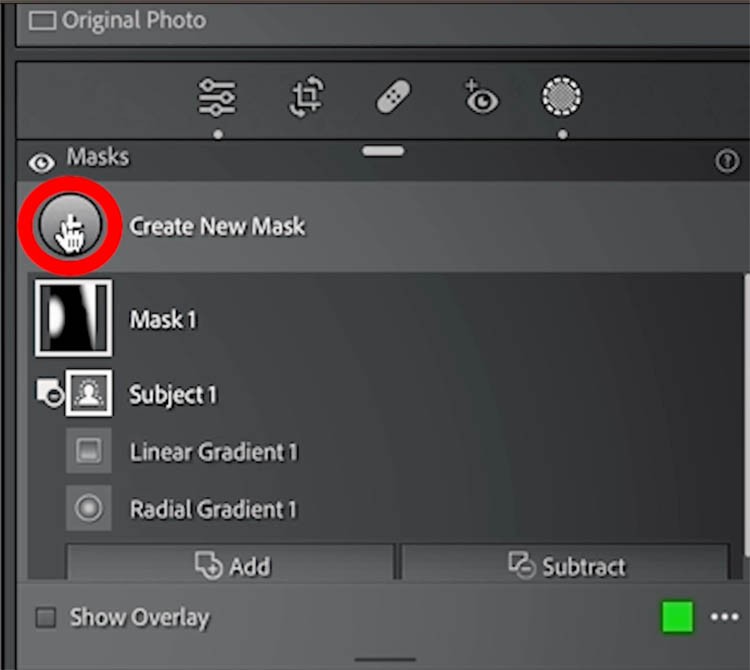
You will see our model is masked.
Now we want to use the mask as a stencil, so we can add the rim light, but have the edges protected.
Hold down Alt/Option in Lightroom (Shift in ACR) and you will notice add/subject now says Intersect
Choose interest with Brush
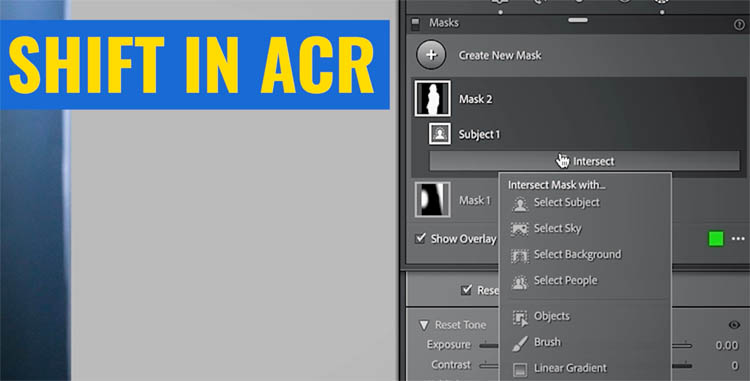
Intersect will only add a mask where the 2 masks overlap. This is magical when adding an edge/rim light, because we don’t have to worry about painting outside the model’s mask.
Paint around the edge
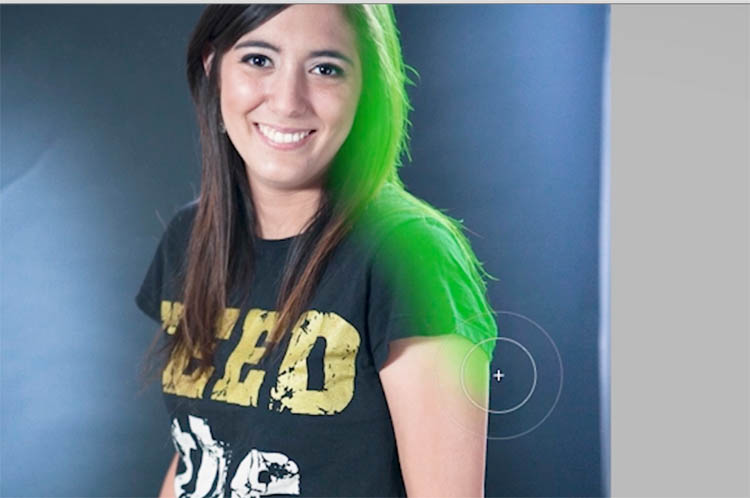
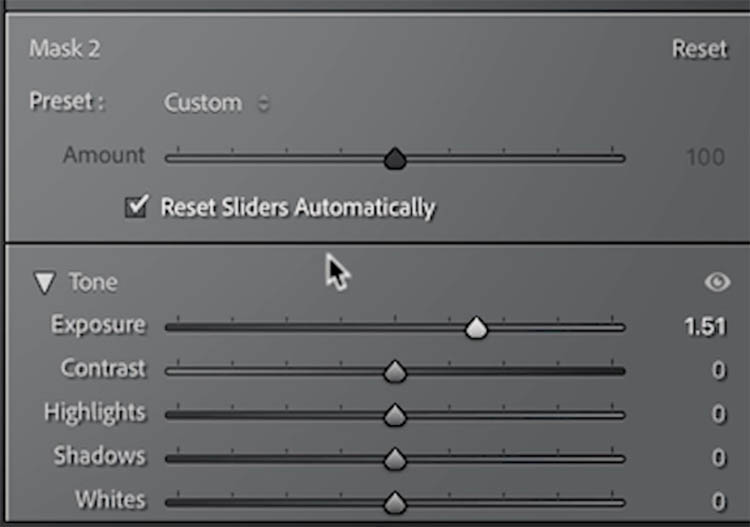
Brighten the exposure
Notice it now looks like a back/side light is on the model, to match the spill on the background. This light wouldn’t be placed in front of the model, as it’s acting like a hair light, (but larger and lower), kicker, or separation light, whatever you decide to call it. (I say this because I always get comments on the lighting and I have lit enough people in the studio to know how lights look).
Add more light on the other side to match the radial gradient we created in step 1).
I hope you found this simple tutorial useful and that you can adapt it to your own projects and go even deeper with it. Let me know in the comments.
I just want to mention, this is a small taste f the kinds of things I teach in my brand new Masking in Lightroom and Camera RAW course. (And no, it isn’t just for portrait photography, a lot of it is landscape as well and all lessons work on any type of photography).
Thanks for checking it out
Colin
Masks in Lightroom and Camera RAW (in Photoshop)
This new 3+ hour set of 26 tutorials will help you master the use of the new Masks in Lightroom or /and Camera RAW. The launch discount of 20% ends on a couple of Days, this Tuesday!
20% off, Use code MASKSLAUNCH Get it here
The post Add Edge Lights in Camera RAW and Lightroom, with ai Masks appeared first on PhotoshopCAFE.