
This post is following up from last week’s look at the cloud-based Lightroom desktop app. Today I want to explore the editing workflow to see how similar, yet different it is from Lightroom Classic.
I’m also super excited to announce that the update to my Lightroom Classic for Dummies book is finally out! To celebrate I’ve got two copies of the book to give away, and all you need to do is leave a comment on this post to be entered to win (make sure you use a working email address so I can follow up with you for shipping).
Editing Workflow
While the
engine under the hood (so to speak) is the same in the cloud-based Lightroom as
in Lightroom Classic (or Camera Raw), the interface and overall experience is
slightly different. Adobe has made great gains in getting closer to feature parity
with Lightroom Classic’s Develop module, though it still lacks some tools (like
Range Mask in local adjustments), and I suspect it is just a matter of time
before it is a full equal. Let’s walk through an edit of a landscape photo to
see how similar, yet different the experience can be.
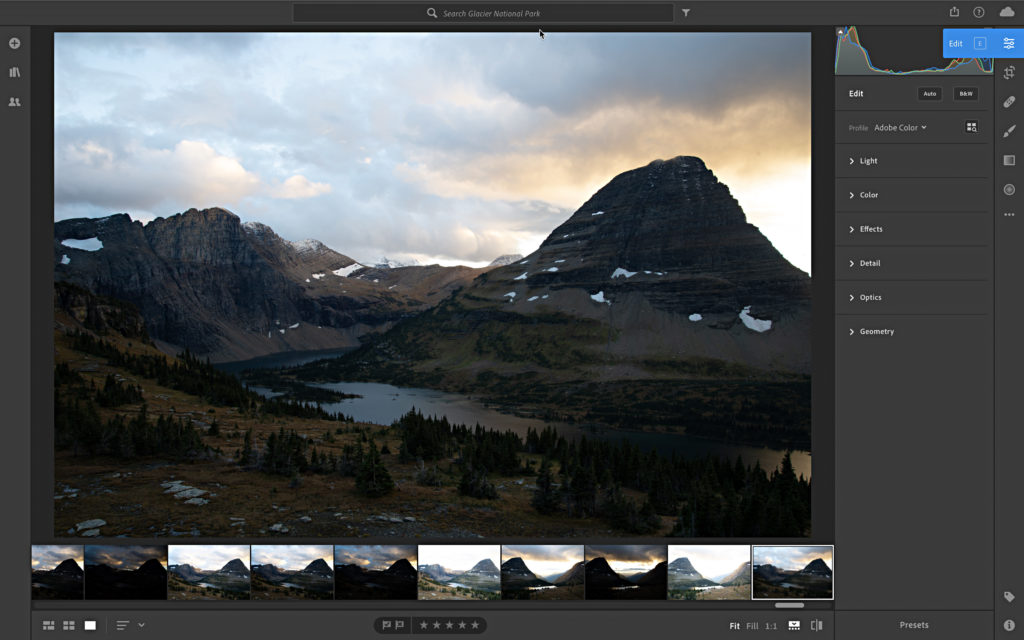
STEP ONE: Starting in Grid view (G) or Detail
view (D), press the E key or click the Edit icon in the top-right panel to gain
access to the editing tools. Note, a Filmstrip will appear along the bottom,
which is helpful for moving between photos, but can be closed by clicking the
Filmstrip icon (bottom of interface) or pressing the forward slash key (/).
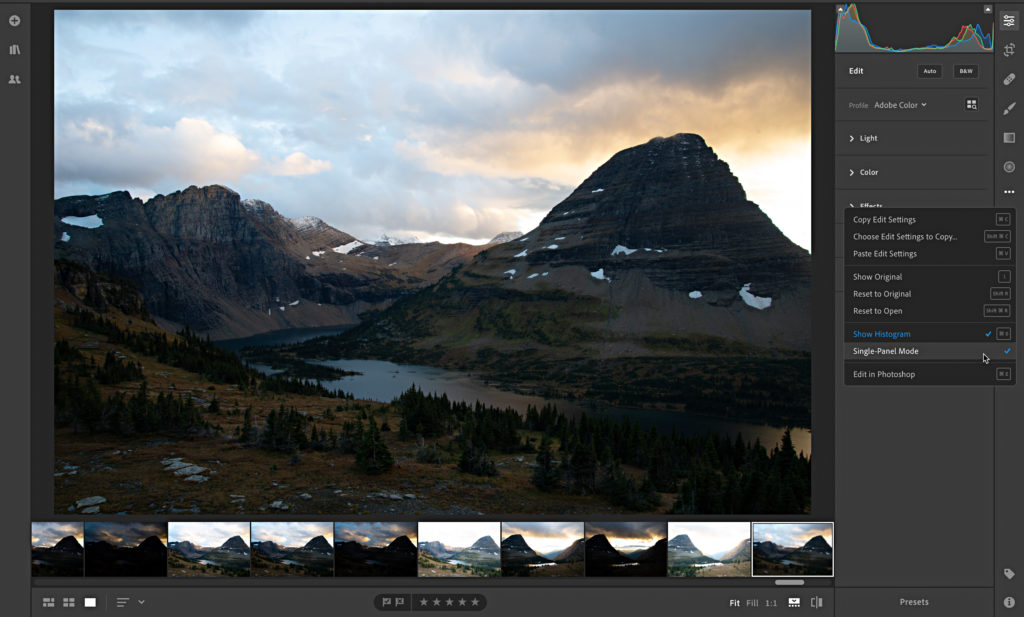
STEP TWO: Click the three-dot menu (under the
Edit icon on the right-edge) to see the options it contains. I recommend making
the Histogram visible and turning on Single-Panel Mode (like Solo Mode) so that
only one panel is expanded at a time. Note that you’ll also find the commands
for copy and pasting settings, showing the original image, resetting edits, editing
in Photoshop, and all of the associated keyboard shortcuts.
STEP THREE: (Optional) Click Auto to start your edit
from the recently tweaked Auto settings and choose your desired profile. I
clicked Auto and chose Adobe Landscape for my photo.
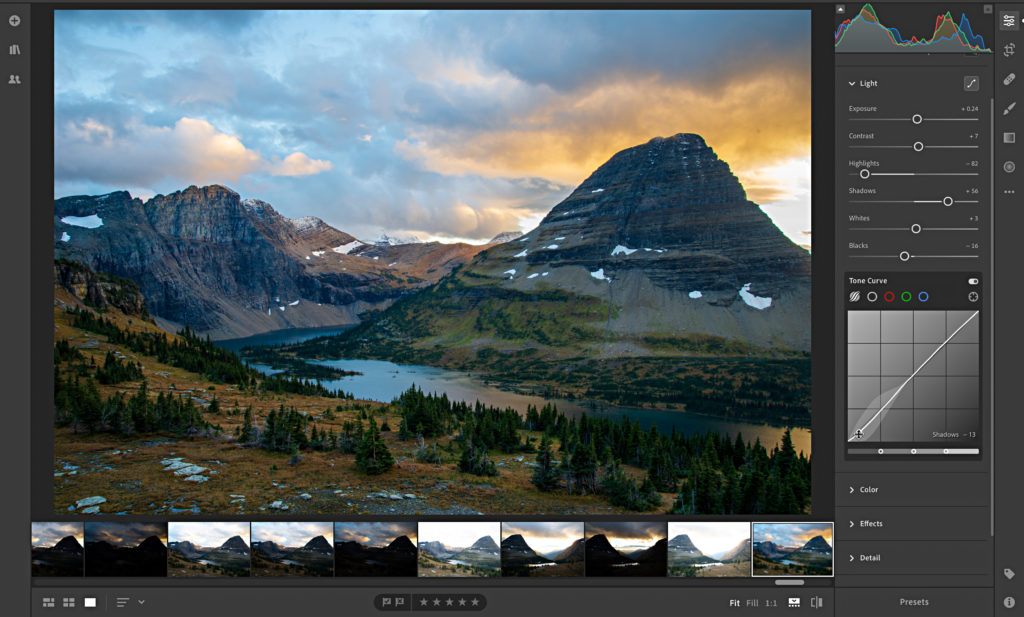
STEP FOUR: Expand the Light panel to access the
tonal value controls (no Basic panel here) and adjust as needed. Click the Tone
Curve icon in the upper-right of the Light panel to open the Tone Curve panel
for additional control over brightness and contrast.
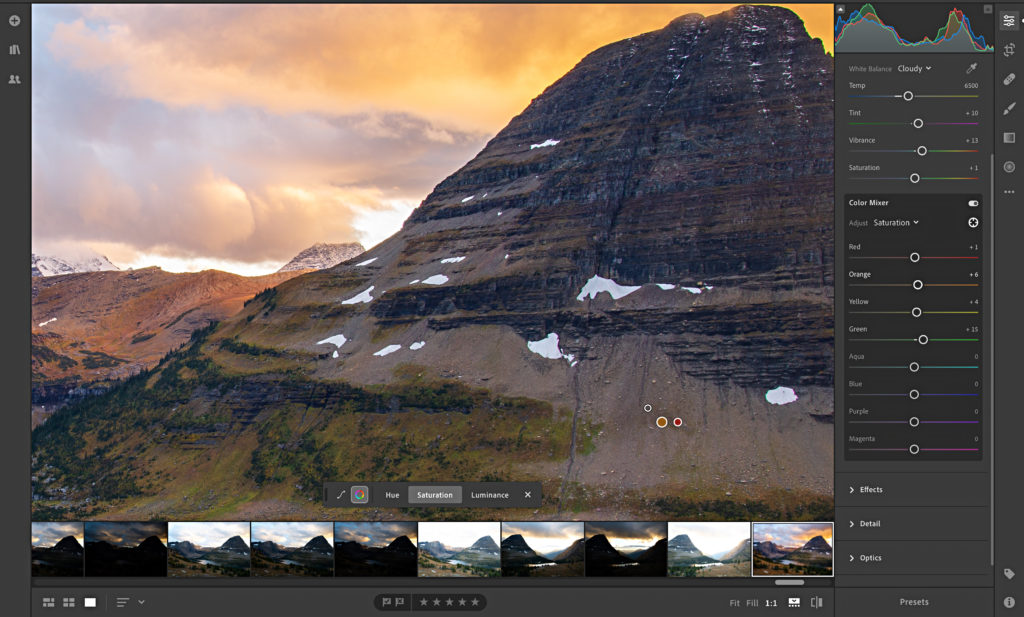
STEP FIVE: Expand the Color panel and adjust White
Balance, Vibrance, and Saturation as needed. Click the Color Mixer icon in the
upper-right of the Color panel to open the Color Mixer panel (think HSL panel
in Lightroom Classic) to fine tune color adjustments. Note the Target Adjustment
tool (cross hair icon) allows you to adjust Hue, Saturation, and Luminance by
clicking and dragging within in the photo.
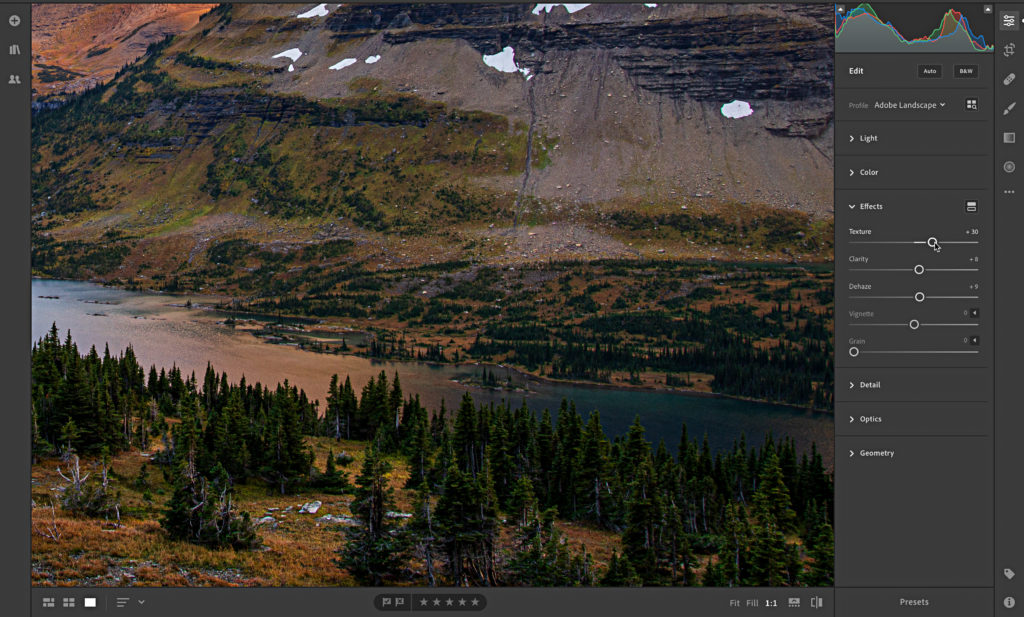
STEP SIX: Expand the Effects panel to adjust Texture,
Clarity, Dehaze, Vignette, and Grain. Click on the photo to zoom into to 1:1
view or click the 1:1 icon (bottom of interface) when adjusting Texture or
Clarity. Note that the Split Toning icon also lives in the top-right of this
panel.
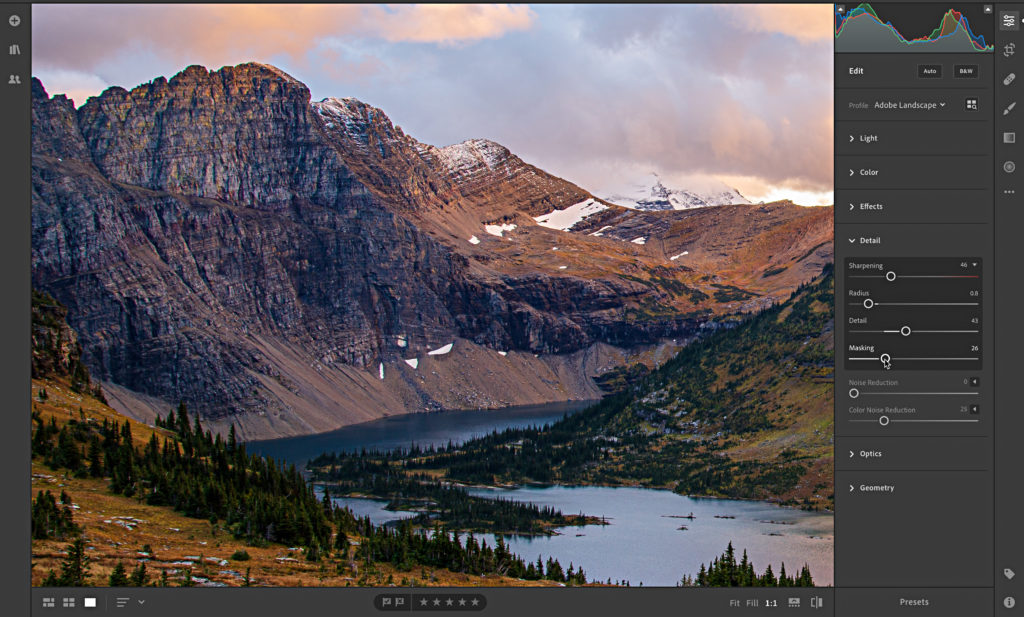
STEP SEVEN: Expand the Detail panel to access
controls for Sharpening and Noise Reduction. You’ll want to remain zoomed into
1:1 for this, and then click the disclosure triangle next to Sharpening to find
the familiar controls for Radius, Detail, and Masking. Just like in Lightroom
Classic, you can hold the Option key (PC: Alt) while moving any of the
sharpening sliders to see an alternative (and helpful) view of how that
adjustment affects the photo.
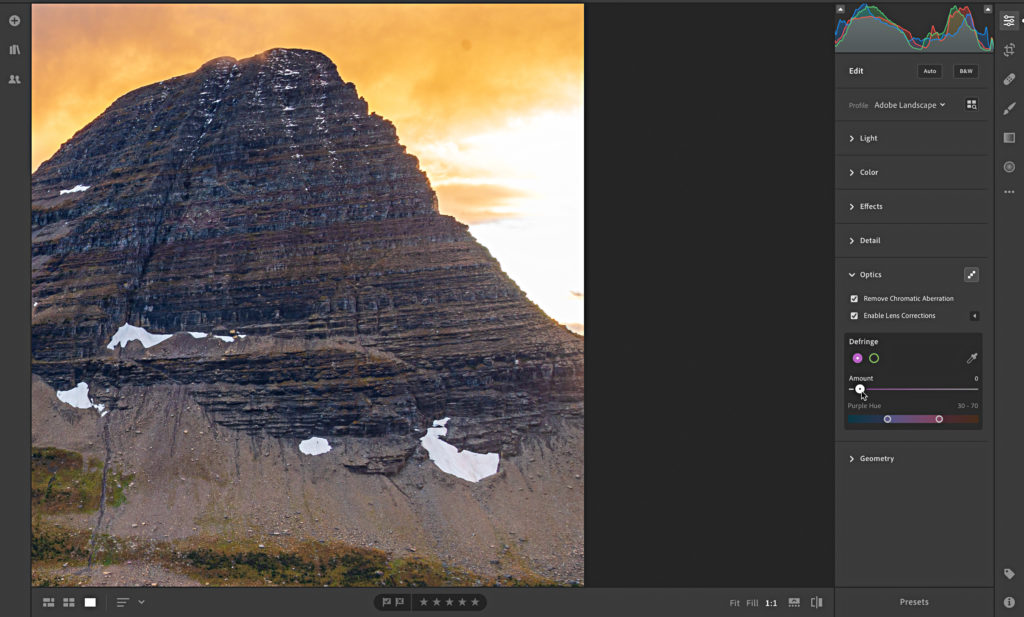
STEP EIGHT: Expand the Optics panel to
automatically remove Chromatic Aberration and Enable Lens Correction. If the
checkbox alone did not remove the green or purple fringe, you can click the
Defringe icon (upper-right) to access additional controls for removing color fringing.
STEP TEN: Expand the Geometry panel to access the
perspective distortion correction tools in the form of the Upright options or
Manual Transforms adjustments.
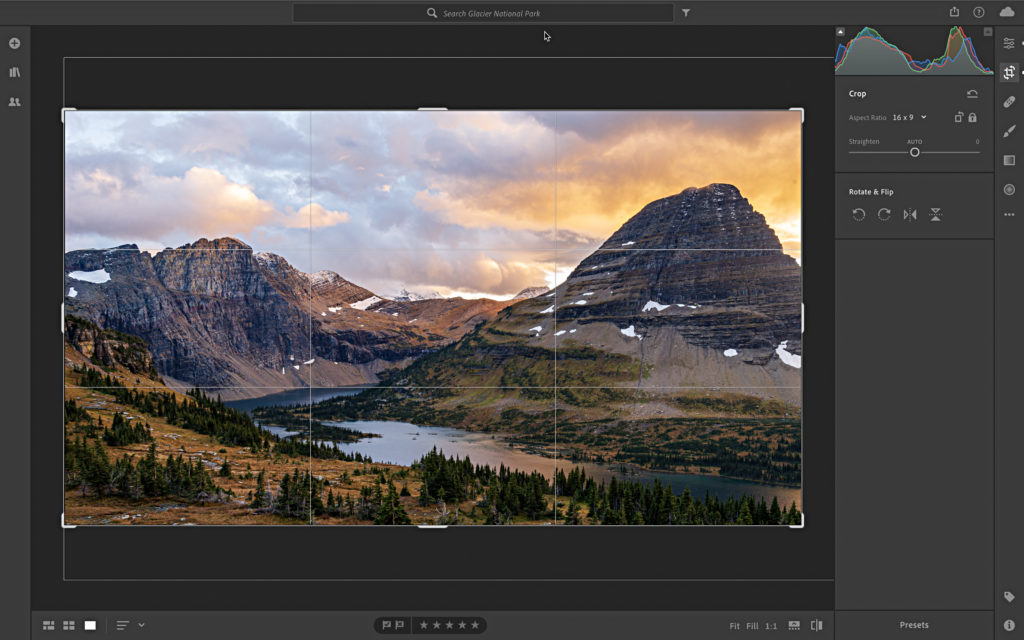
STEP
ELEVEN: Locate the
Crop Tool, Healing Brush, Brush (Adjustment Brush), Linear Gradient (Graduated
Filter), and Radial Gradient (Radial Filter) controls under the Edit icon along
the right-edge. These function the same as their counter-parts in Lightroom
Classic with a few minor exceptions to be aware of at this time. I noted the
current lack of Range Mask in the Brush, Linear Gradient, and Radial Gradient,
but you should also know that the Crop Tool currently lacks an option to enter
a custom aspect ratio (though you can click the Constrain Aspect Ratio icon and
manually adjust the crop rectangle as desired).
I think you’ll
find that overall the editing experience is powerful and familiar to Lightroom
Classic, but give yourself time to get acquainted with the subtle differences in
names, panel groupings, and shortcuts to avoid the frustration of things not
working the way we assume.
As the cloud-based Lightroom ecosystem continues to evolve and improve, I am sure we will see our favorite features and functions appear to complete our personal workflows. That said, I am impressed with how much I can do from either of my computers without having to worry about which computer the source photos are stored on, and then pick up where I left off in my iPhone or iPad.
Lightroom Classic for Dummies Giveaway!
The first book I had ever written was Lightroom 2 for Dummies, which came out in 2008. It is safe to say a lot has changed since then, and I finally got the chance to update it to the current version (as of early 2019). I wrote that book and this current update with the goal of helping Lightroom Classic users get started on the right foot and avoid the pitfalls and problems that I so often encountered in the Help Desk questions that I saw every day.
This book was a huge effort, and I tried to pack in everything I thought a person using Lightroom Classic would need to know to work smarter, faster, and more confidently than they would have without it. As evidenced by the start of this blog post we also have this new cloud-based version of Lightroom too, so I dedicated 3 chapters exclusively to helping a Lightroom Classic user get started with using the cloud-based Lightroom on the mobile platform (which is an excellent addition to the Lightroom Classic workflow). I also did my best to help clear up the confusion around these different versions of Lightroom (no small thing). I’m very grateful to have had the opportunity to update the book, and I hope readers find it useful. If you’d like to be entered to win a copy for yourself, just leave a comment here. Thanks!
The post Editing with Lightroom Desktop (and a Book Giveaway!) appeared first on Lightroom Killer Tips.