
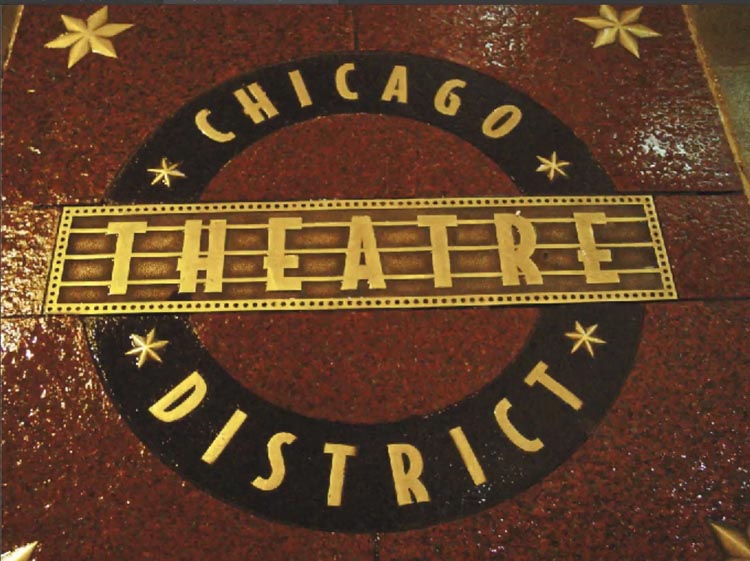
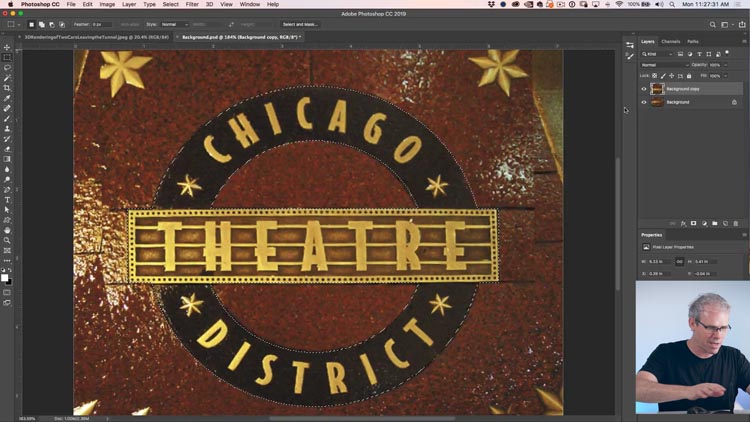
We will start with this shape. Instead of using the magic wand etc, lets use the marquee tools already in Photoshop. These tools give nice clean edges, and they are quick when you understand how to use them.
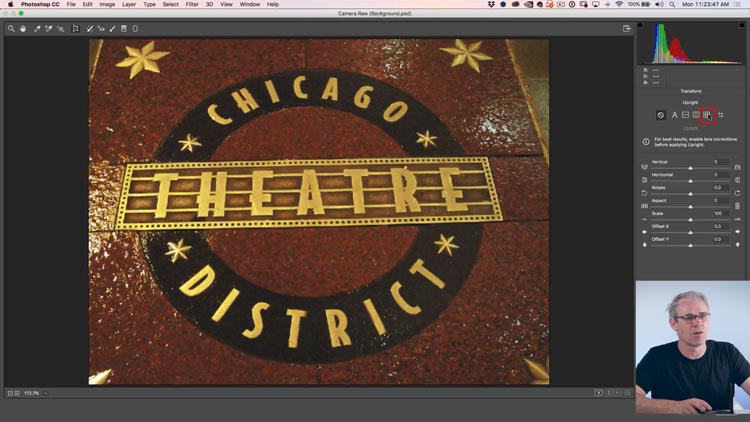
Before we start, why don’t we get rid of the distortion on this photo. Don’t worry, we will keep a distorted version, so you can learn how to select that too.
Step 1.
Duplicate the photo layer by choosing it in the Layers panel and pressing Cmd/Ctrl+J
Choose Filter>Camera Raw
Click on the perspective button at the top left of the screen. Its the icon that looks like a grid.
Step 2.
Click the Full upright option
The distortion will now be gone.

We will now have a corrected version of the photo above the original. Lets get started,

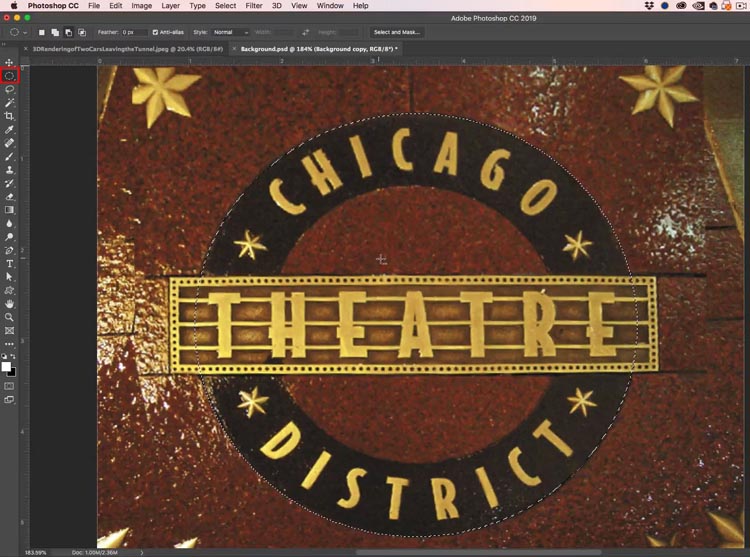
Step 3.
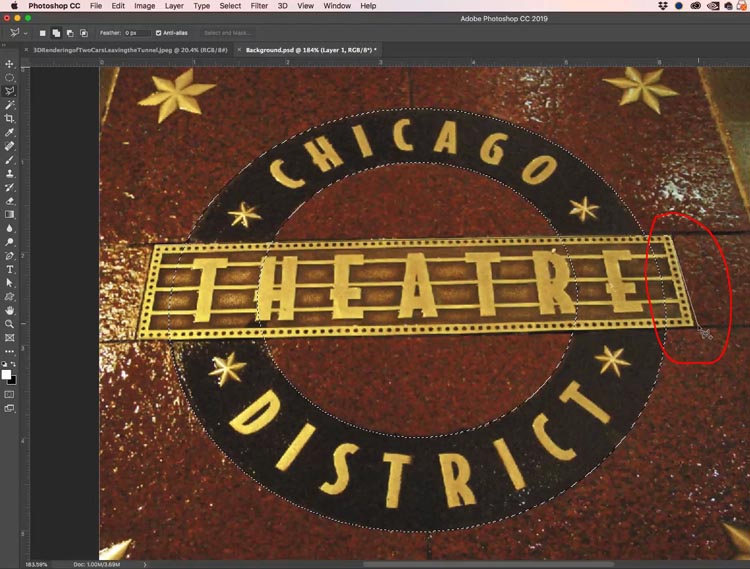
Selecting the logo
Choose the elliptical marquee tool.
Drag to make a selection around the outer ring.
Here are some tips to help.
- Holding down Spacebar allows you you move the entire selection
- Hold Alt/Option to drag from the Center
- Shift Constrains/unconstrains the shape depending on the version of Photoshop you are using
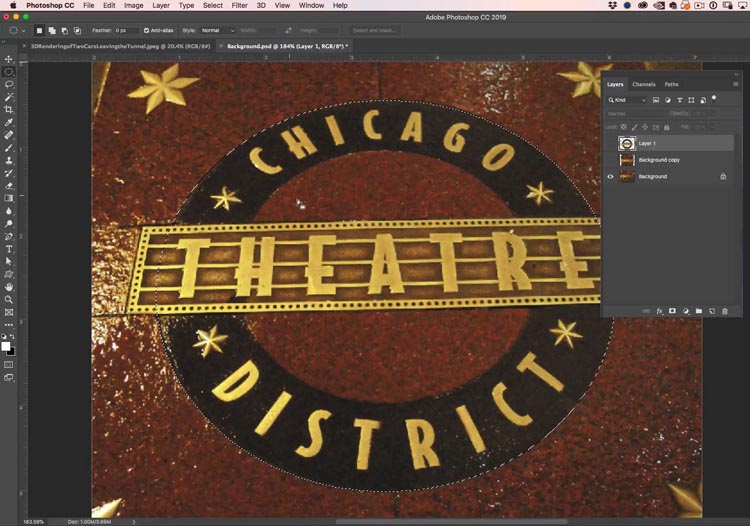
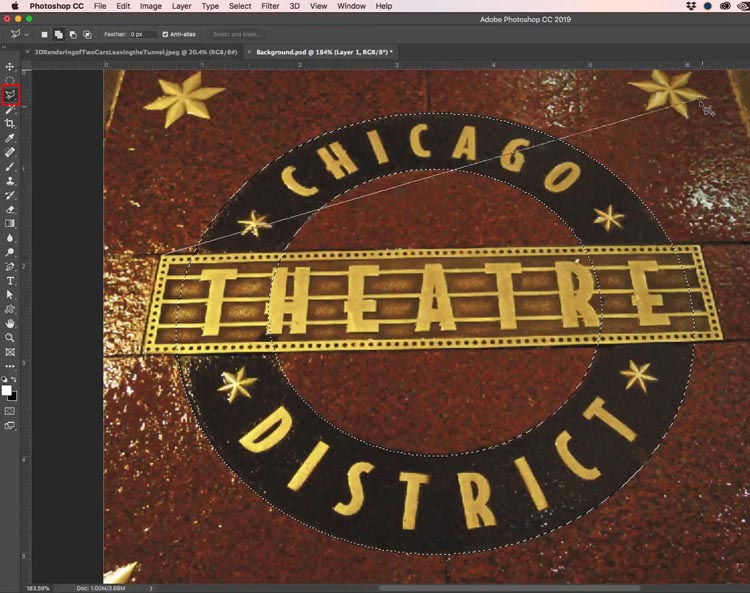
Step 4.
Lets make an inner selection
Hold Down Alt/Option to remove from the selection (you will see a minus sign by the selection)
Make an inner ring selection
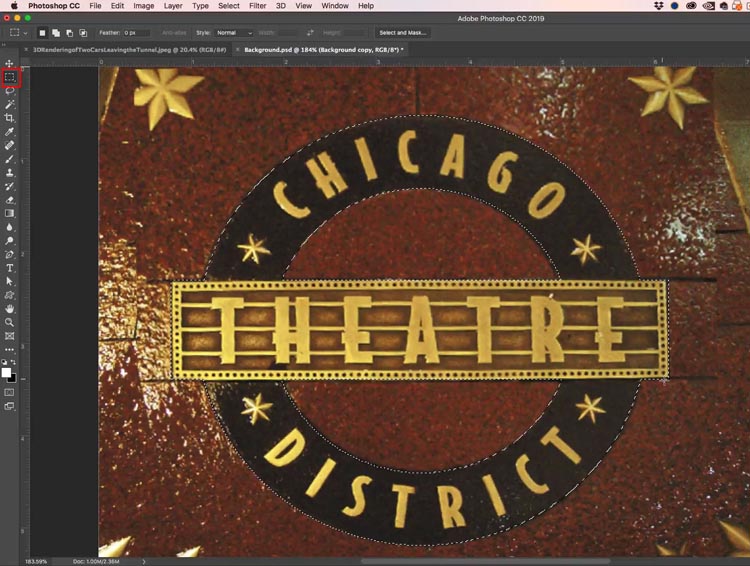
Step 5.
Choose the rectangular selection tool. To add to the selection, hold down the Shift Key
Make the selection over the “theater” words.
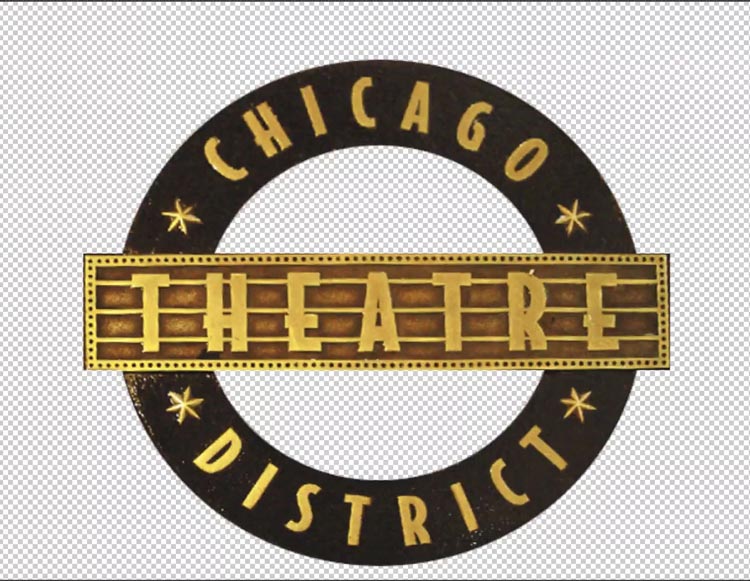
Step 6.
Press Cmd/Ctrl+J to copy the selection to a new layer. You can see the shape was easily selected, using only 2 tools. Wait, there’s more.
Step 7.
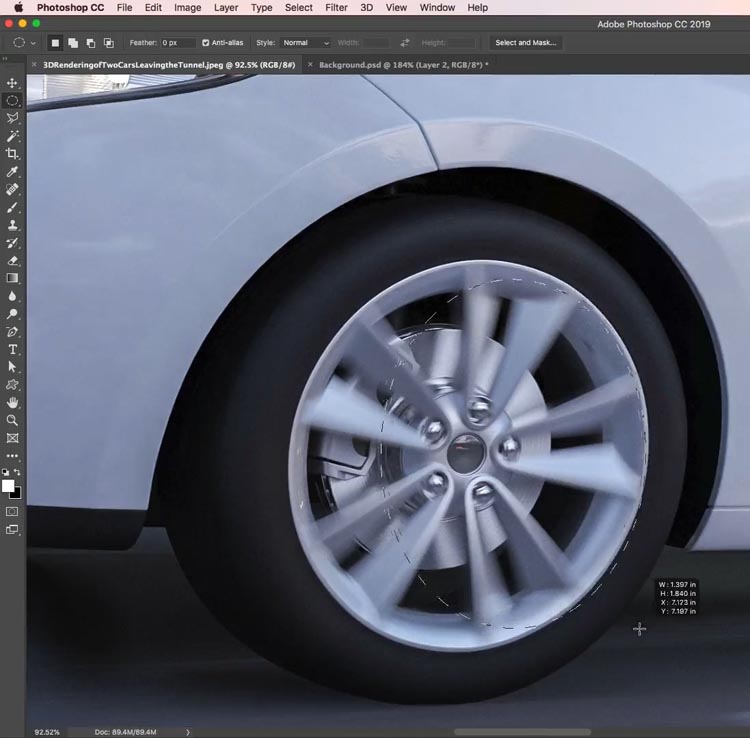
Let’s tackle something a little harder. Lets do the skewed image.
Make the outer ring selection with the elliptical marquee tool, as before.
Step 8.
Hold down Alt/Option and make the inner ring selection. Don’t forget to also use the spacebar to move the selection. Its a finger-dance, but you’ll get used to it.

Step 9.
Ok, the rectangular tool isn’t going to work this time, what do we do?
Choose the Magnetic lasso tool.
Hold down Shift, to add to the selection. Click in the top left corner of the skewed rectangular shape.
As you move the cursor, notice the line follows your mouse, like gum stuck to a shoe.
Step 10.
Click the top right corner to anchor the 2nd point
Now move to the bottom right corner. If the line is only constraining to 45 degree angles, its because you are shill holding down Shift. It’s ok, you can let go of the shift key, Photoshop already knows you are adding to the selection.
Click the bottom right corner.
Step 11
Click on the left corner, bottom left.
Move the tool over the first corner where you started the selection. You will see a tiny “0′ which indicates the start point Click to complete your selection
YOu have now selected a more complex shape. But, the best id yet to come, read on…

Step 12.
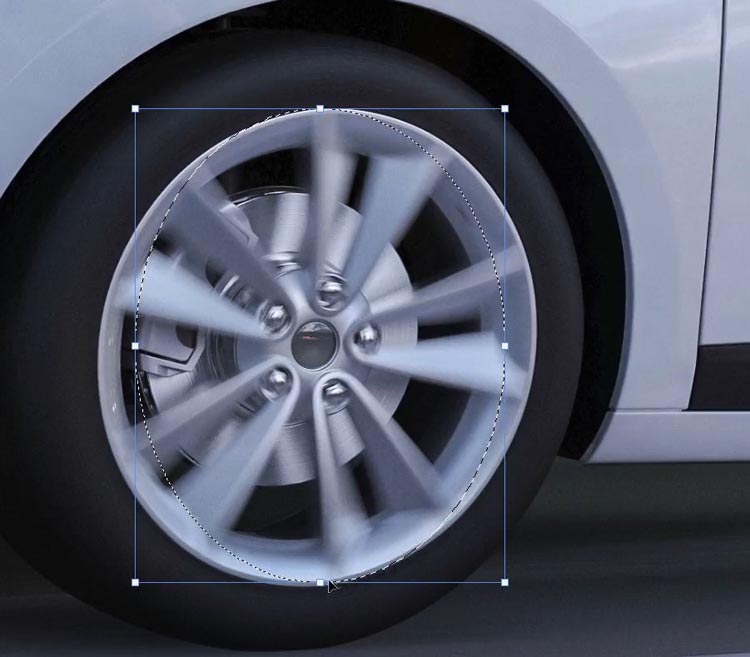
Lets do a more complex shape.
“What? The wheel is complex? Its just an oval.” I hear you say.
Th challenge is that its an oval at an angle. You can’t do that with the elliptical marquee tool. Or can you? Read on.
Make the basic elliptical selection.
Step 13.
Ok, time for the big reveal.
Choose Select>Transform Selection.
Now you can dra any of the 9 points to rotate and scale the selection. Isn’t that handy? And it works on any selection.
Step 14
Pro Tip: Holding down Cmd/Ctrl enables you to move the points independently, getting you the control you need for an oh, so perfect selection.
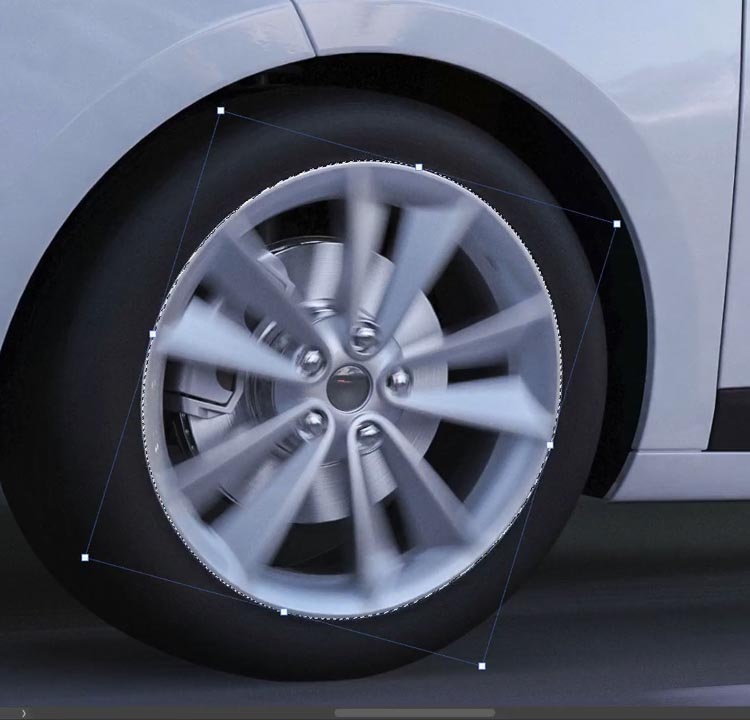
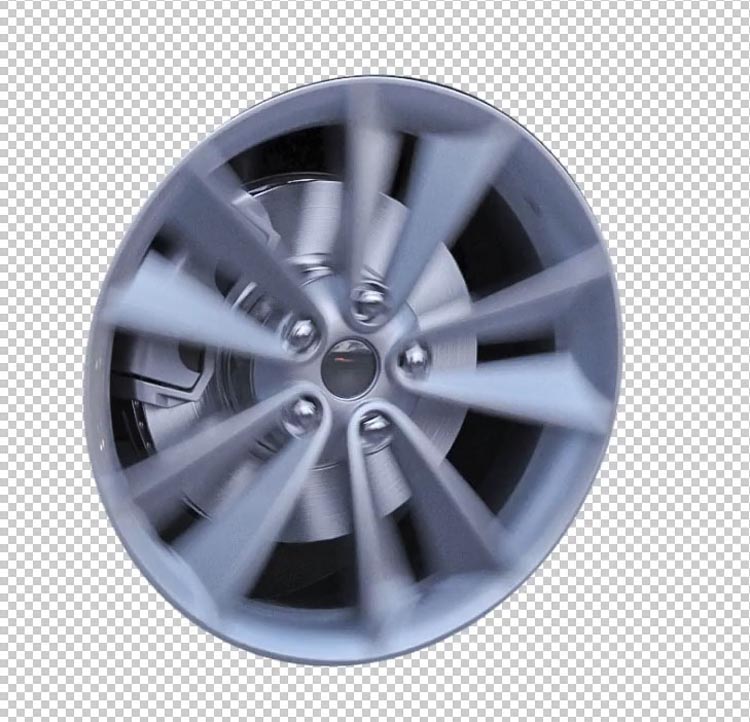
Cutting out the wheel so you can see it.
Step 15,
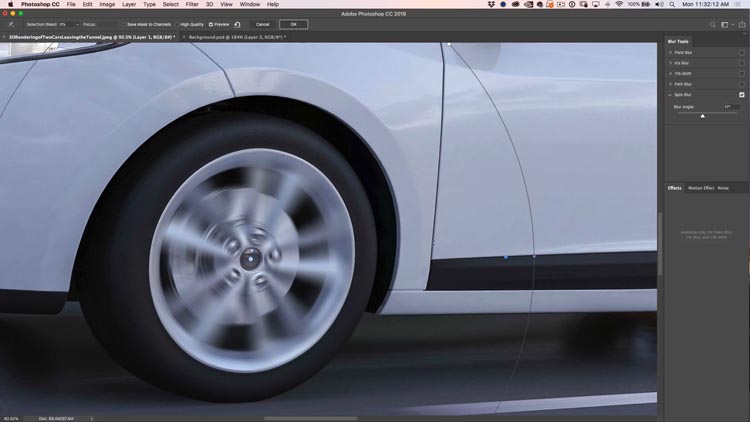
You can use the Filter>Blur Gallery>Spin to spin the wheel and put it in motion.
Pro Tip: Why did I select the rim and not the whole tire? (I know someone will ask). OK, stop and look at the result. Does it look like I needed to spin the tire? No, I didn’t, it looks fine as is. Selecting the rim was a lot easier than selecting the tire too and this yields a more realistic result because there is no sloppy selection on the tire. One thing I have learned doing this for a living for 20 years or so, is that it’s result that matters, and getting there as fast as possible. If you are doing this for a job, its about getting the job done right, as quickly as possible.
Thanks for checking out this week’s tutorial. Let me know if you like it in the comments.
Let your friends know about this tutorial and PhotoshopCAFE. Remember, Create.Don’t Steal.
Thanks
Colin
PS Don’t forget to join our mailing list and follow me on Social Media>
(Ive been posting some fun Instagram and Facebook Stories lately)
You can get my free Layer Blending modes ebook here
The post Best Selection tool Tips in Photoshop. Selections made easy. appeared first on PhotoshopCAFE.