
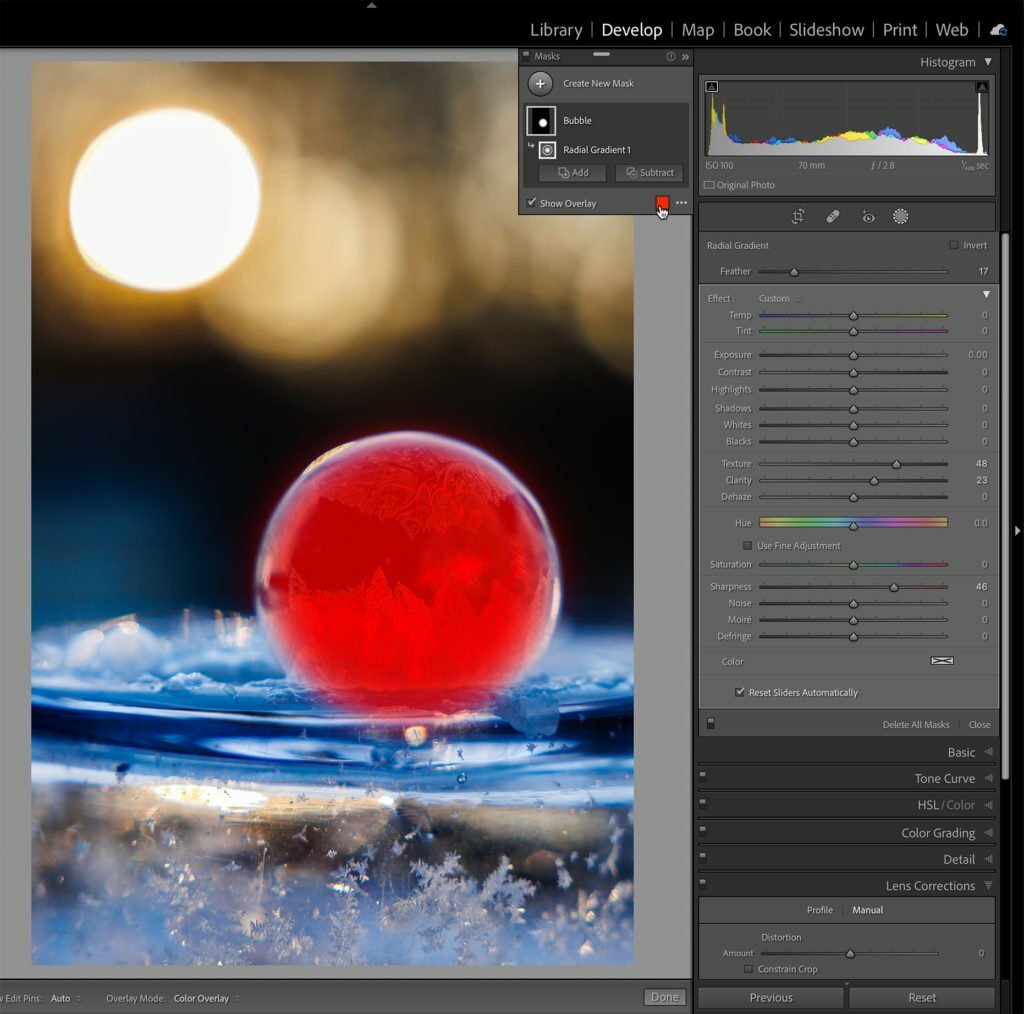
One of the aspects inside of the recent Masking update worth exploring a little deeper is all the new functionality added to the overlay that appears when a mask is first created. In its previous form we had the same red/ruby appearance we have now, but the options for changing the color were limited to cycling from red to green to white to black and back to red. We can still do exactly that by pressing O to show the overlay (if not already showing), then pressing Shift+O to cycle through each color.
But now we can do so much more.
Overlay Popup
Click the color swatch in the Masking panel to open the overlay popup dialog containing the color picker to choose any color you wish for the overlay by clicking with the eyedropper tool.
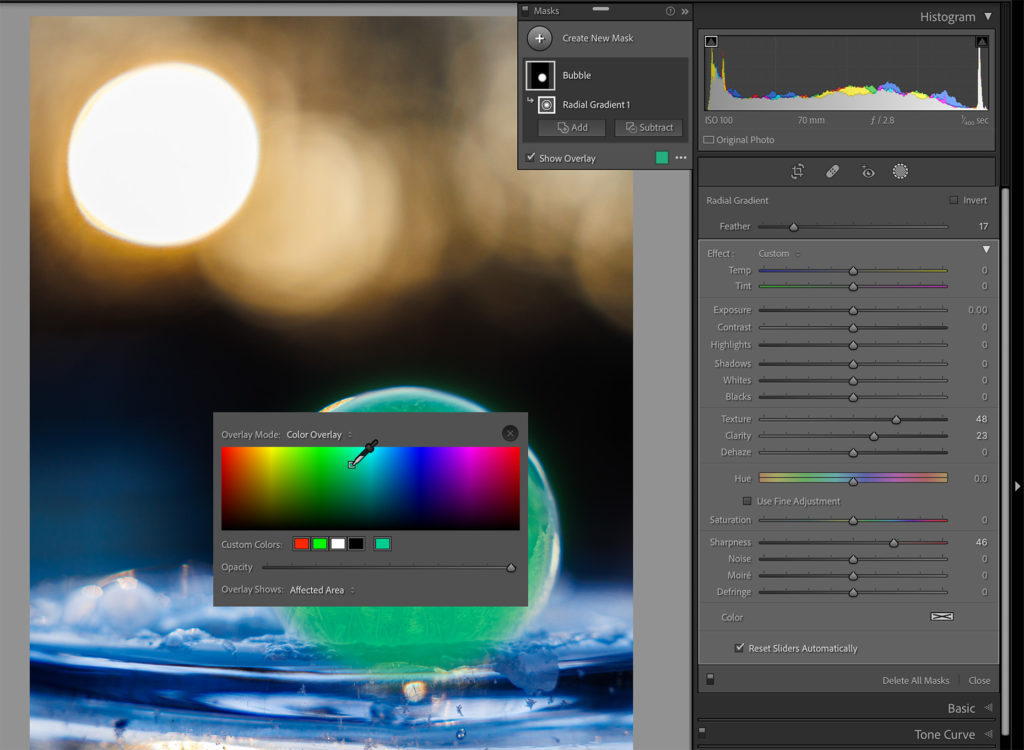
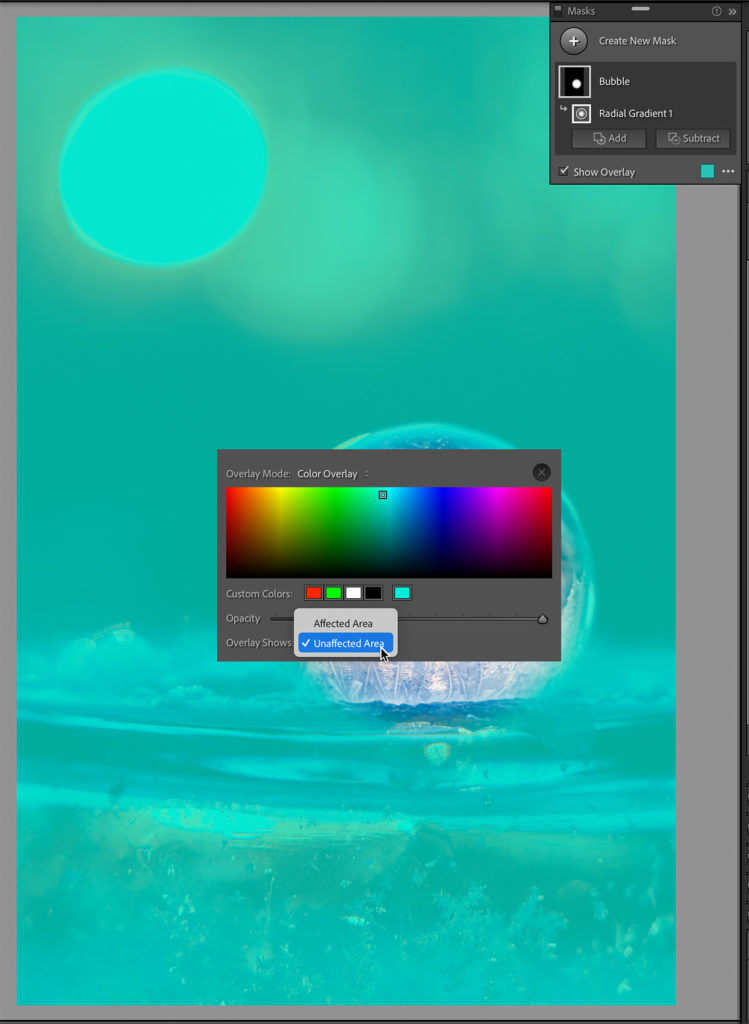
But that’s not all! You can grab the Opacity slider at the bottom and dial in your desired level of overlay visibility too. Beyond color and opacity choices you can also switch between having the overlay cover the affected area (default) to covering the unaffected area in case that helps you better visualize the mask and the edits you are trying to make.
Taking another step deeper, click the Overlay Mode drop-down menu at the top to switch from Color Overlay to one of the following choices:
- Color Overlay on B&W
- Image on B&W – the affected area appears in color and unaffected area appears in B&W
- Image on Black – the affected area appears in color and the unaffected area appears all black
- Image on White – the affected area appears in color and the unaffected area appears all white
- White on Black – the affected area appears in white and the unaffected area appears all black
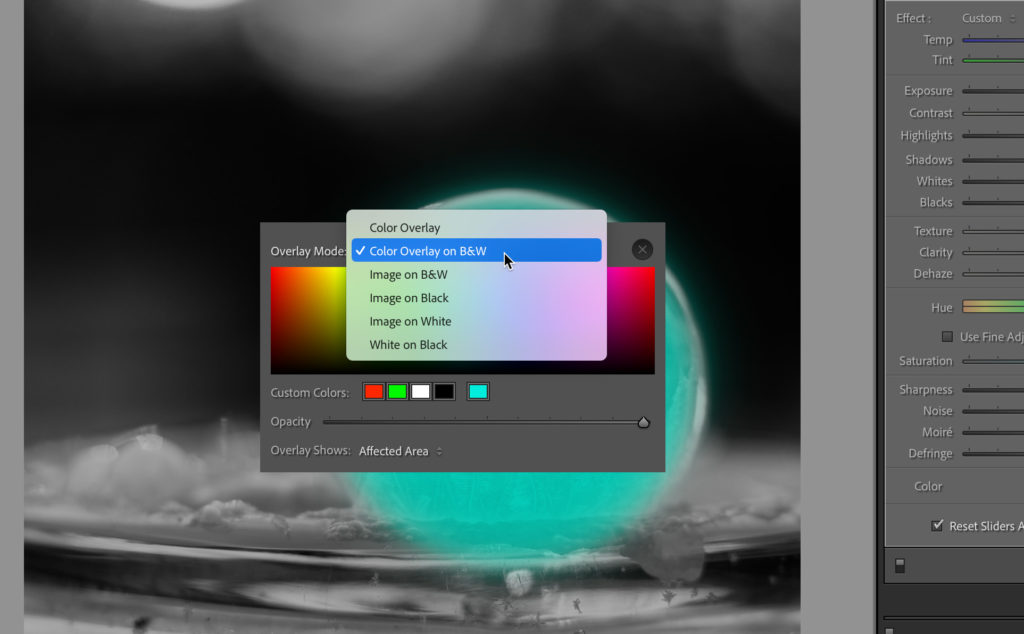
How you’ve configured the Overlay Shows option (between Affected or Unaffected Area) will affect how the first two overlay modes (Color Overlay and Color Overlay on B&W) appear on your photo. Experiment with the different variations to see which one helps you the most. You can also switch between the various Overlay Modes via the three-dot menu next to the color swatch in the Masks panel or in the Toolbar below the working area.
The post Exploring Masking Overlay Options appeared first on Lightroom Killer Tips.