
Editing Landscape photos in Photoshop, full workflow
In this tutorial, I show you my entire workflow for editing landscape pictures. Please watch the video to see a lot of steps that would be missed in the written steps. This is my general workflow, sometimes I might use additional tool and other times, I might skip some of these steps. I hope you enjoy it and find it useful.
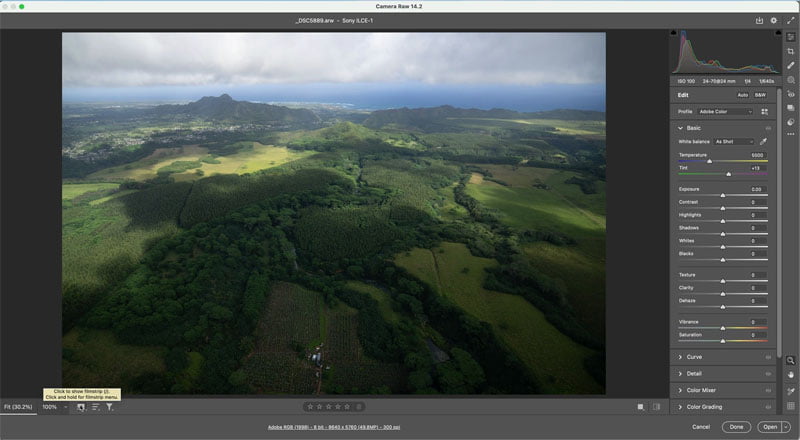
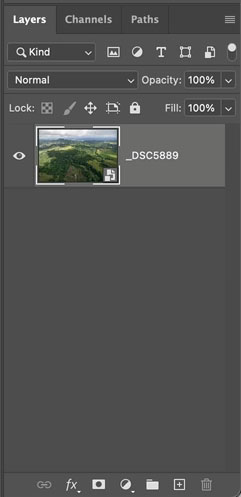
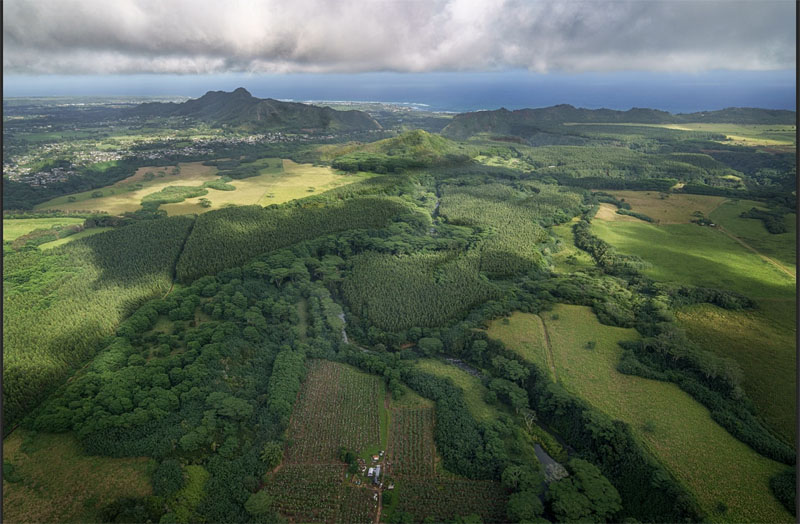
We are using a photograph that I shot out of a helicopter in Kauai recently.
I was using a Sony A1 with 24-70 G master lens (at 24mm). I shot at ISO 100 (to keep noise low) F4 to open up the iris and allow for a faster shutter speed. 1/640 shutter speed. I made an effort to use a faster shutter speed because the helicopter was moving. I shot the image in RAW, as I always do. Even if you don’t have a RAW file, the process is exactly the same. I am using Photoshop 2022, but these main steps will work on any version of Photoshop
Start in Camera RAW
Choose File>Open. Because its RAW it will open into ACR, Photoshop’s RAW editor. You can right-click and choose open in Camera Raw on other formats, such as jpg, tif from Bridge.
First step is to apply a color profile.
Choose the square button by profile
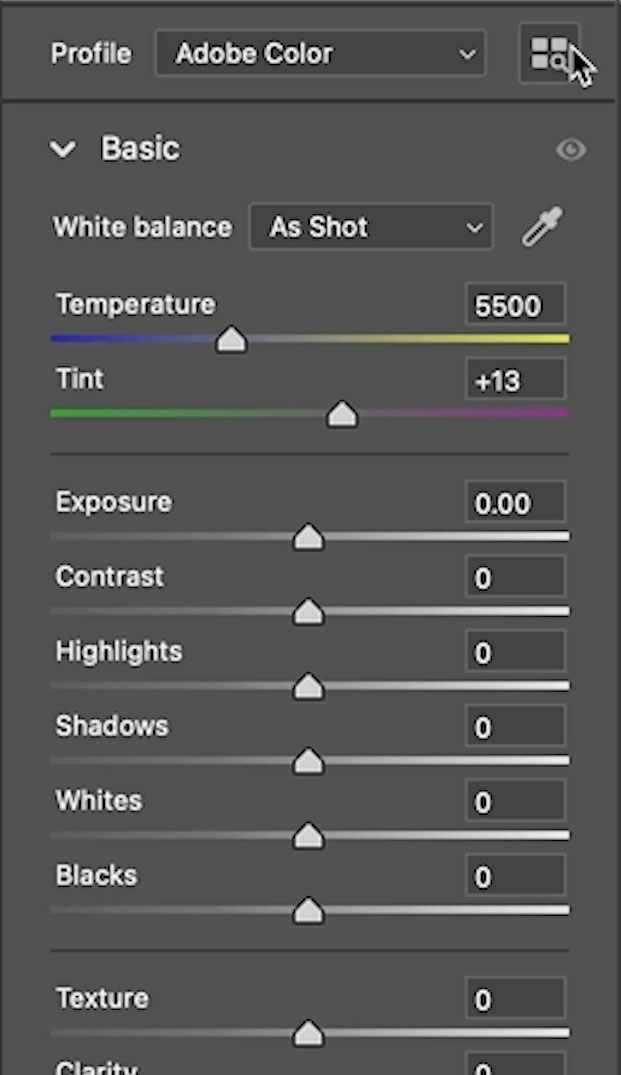
Slick on the different profiles and see which one gives you the best starting point. These profiles can vary the way the photo looks substantially. I go much more in depth in my Camera RAW course if you are interested in learning more.
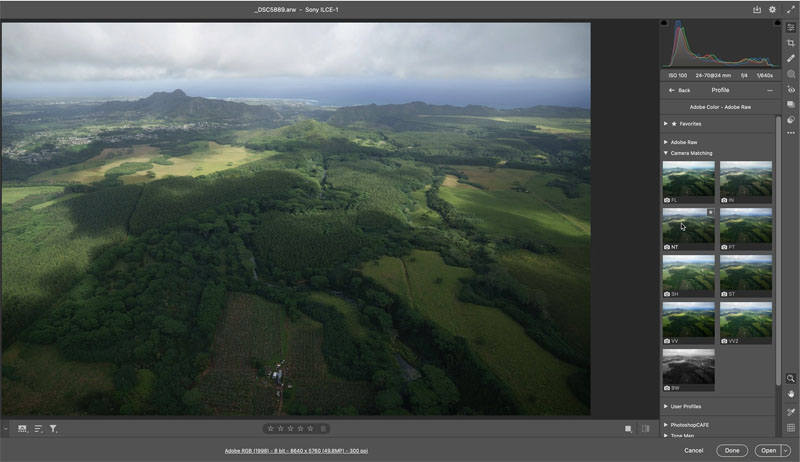
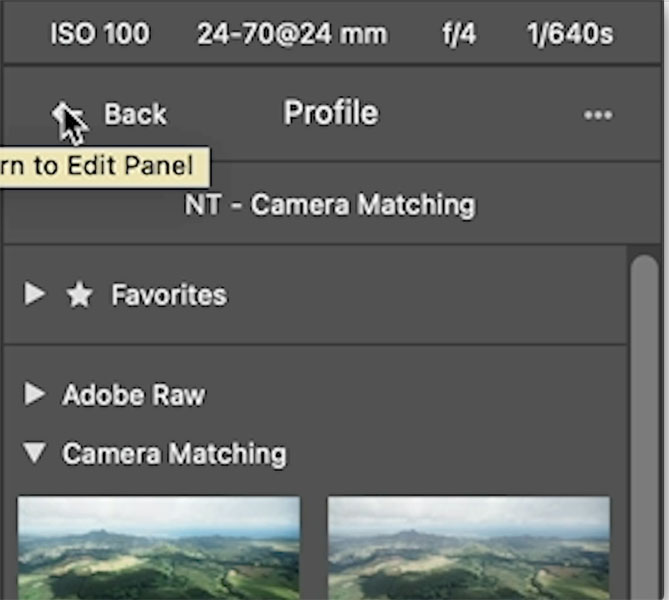
When you have chosen the Profile, click the back button to go back to the basic adjustments.
Now it’s time to make the basic adjustments. Don’t be fooled by the name of the basic panel. This panel is very powerful.
First thing, I recover shadow and highlight detail. Don’t be alarmed if these movements look extreme. I was taught to do this by Thomas Knoll (The man who created Photoshop and Camera Raw). Thomas, pushes them to their absolute limit. I don’t alsways move them that much, depends on the image.
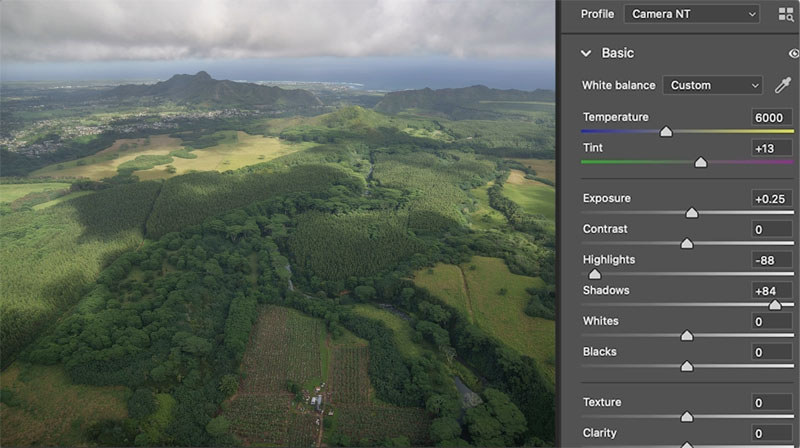
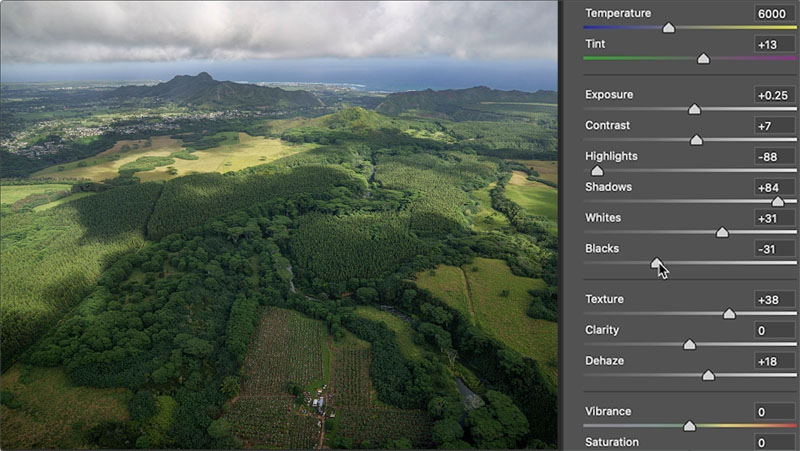
Let’s add some punch to the shadows and highlights by moving the blacks and whites. This adds contrast.
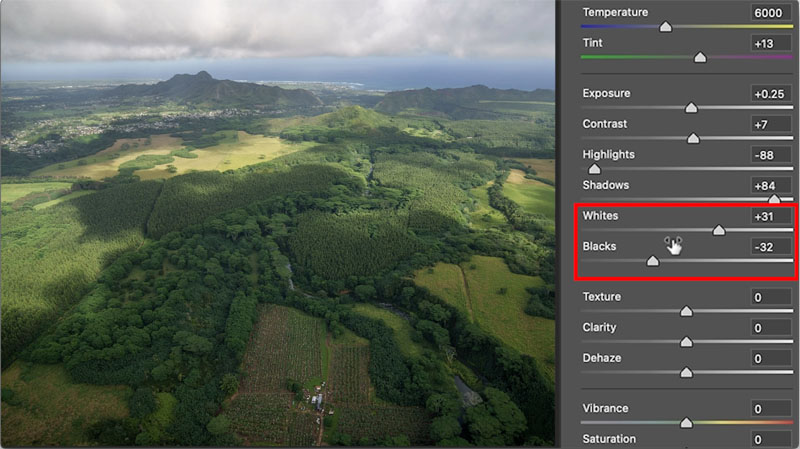
Add some punch and detail in the details section with the Texture and tiny bit of dehaze. I rarely use Clarity, because it makes the photo look to fake to me.
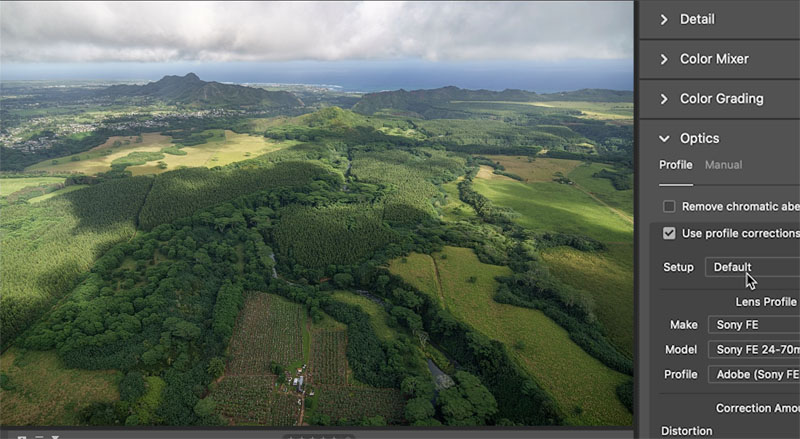
Go to the Optics section.
Enable Profile corrections to reduce lens distortion and vignette. Here is sees I was using a Sony A1 with 24-70 G master lens.
Hold down the Shift key to change Open to Open Object and click.

This opens the image as a smart object. Always use a smart object when you can because it preserves the image and allows you to go back into Camera Raw by double clicking the thumbnail.
Dodge and Burn in Photoshop
At this point, I wan to make 2 Dodge and Burn passes.
The first pass is for composition and the second pass is to add dimension and shape. (See my dodging and burning course here if you want to really learn this powerful technique)
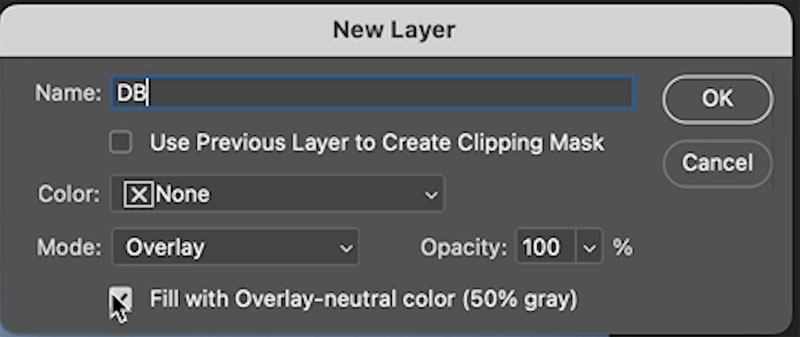
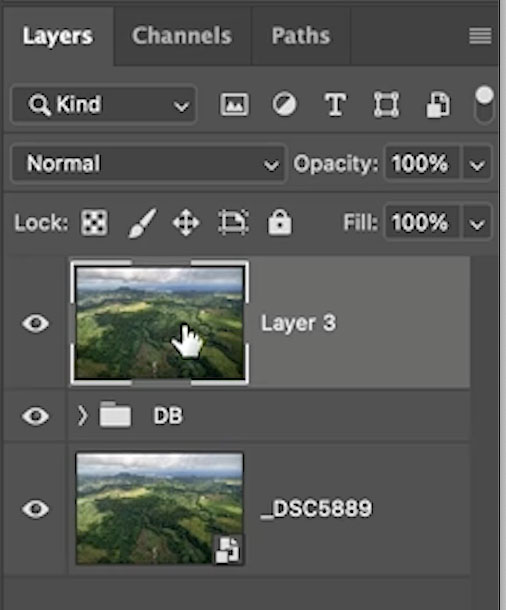
Hold down the Alt/Option key and click on the create new layer icon. This opens the new layer options.
Change to Overlay blending mode and turn on Fill with gray. (Filling with gray is optional, but I find I get less banding than using a transparent layer).
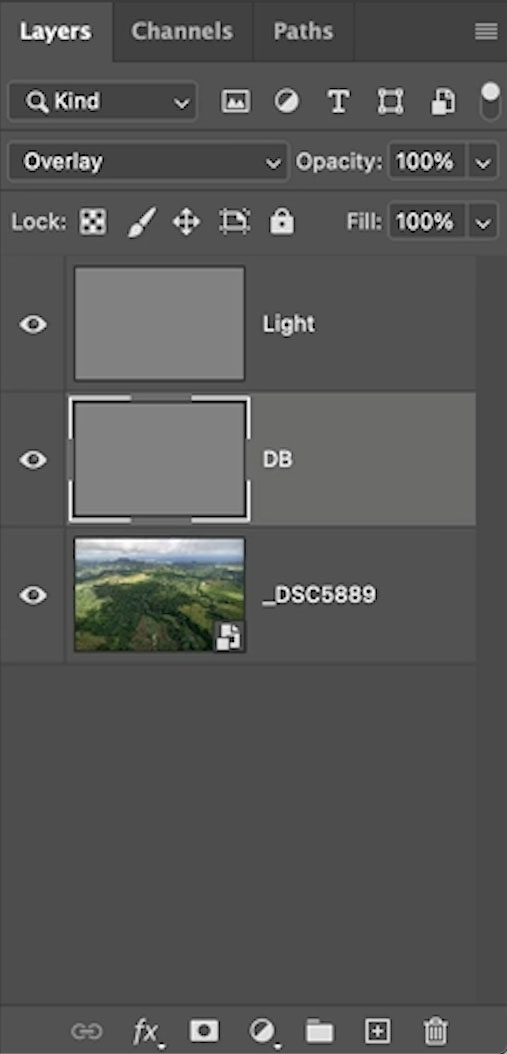
Press Ctrl/Cmd+J to duplicate the gray layer. Because it’s in overlay mode, the gray will be hidden.
Use one of these layers to darken and the other to lighten. I always darken first. I don’t really have a reason, its just the way i do it.
Press the D key to reset foreground and background color. Make sure black is the foreground color.
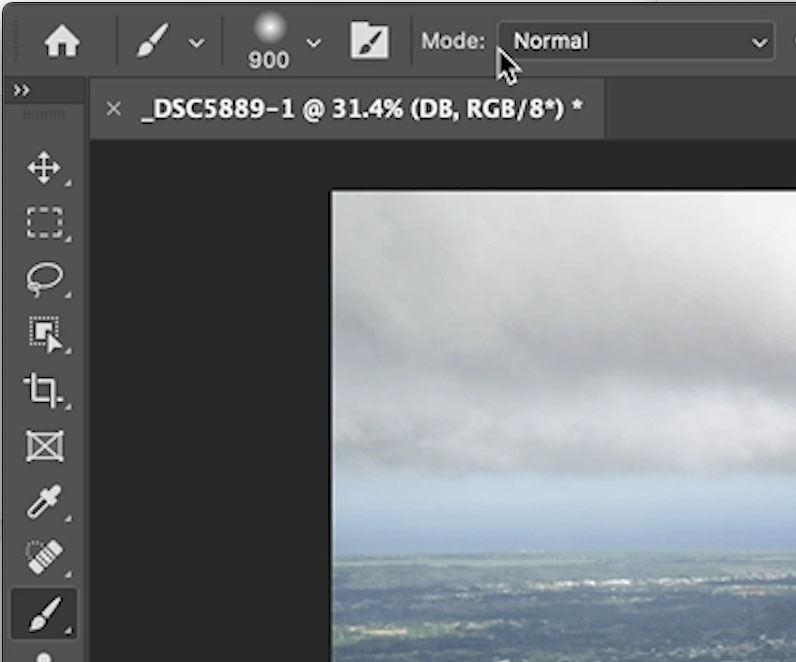
Choose a brush and use the soft round option.
If you are using a pressure sensitive tablet such as a Wacom, click the folder with the brush,
Turn on Transfer and set Opacity to pen pressure.
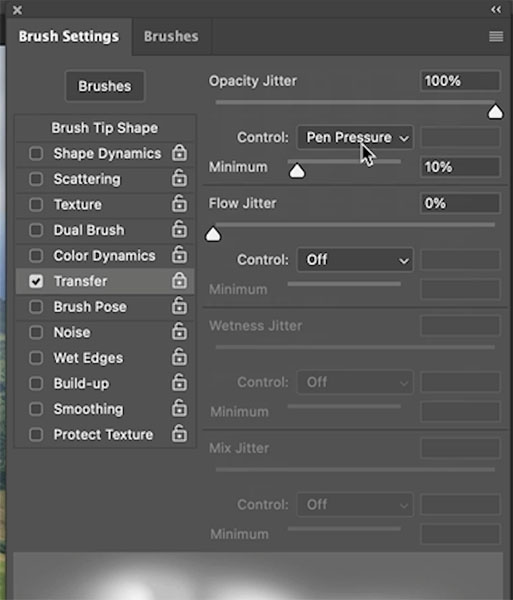
If you don’t have a tablet, you can use your mouse, just set main opacity to 20-30%. Otherwise keep it at 100% Drop flow down to 10%. I have a tutorial on the difference between flow and opacity here.

With the gray dodge burn layer selected, begin to paint (The video at top shows the brush strokes)
Here i have painted on the clouds to darken them. Also around the edges, to draw the eye into the photo.

Choose the other gray layer and use a white color for the brush. I painted a lighter path into the middle of the photo, to simulate sunlight.
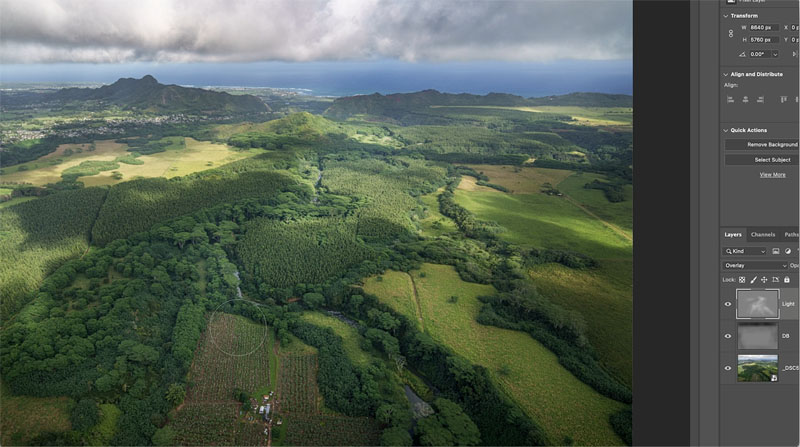
Dodging and Burn to add depth
Use a smaller black brush and start to paint into the shadows to deepen them. Make sure you are using the shadow layer again (Burn).
Grab the white brush and paint in the highlight details, you really need to see the video if you haven’t, to see this in action, it makes a huge difference.
Let’s create a flattened layer on top of all the other layers.
Cmd+Option+Shift+E on Mac. On Windows use Ctrl+Alt+Shift+E
Filter>Camera Raw
At this point, Take it back to camera Raw and give it a few tweaks. I added a little contrast and tiny bit of vibrance.
Click OK

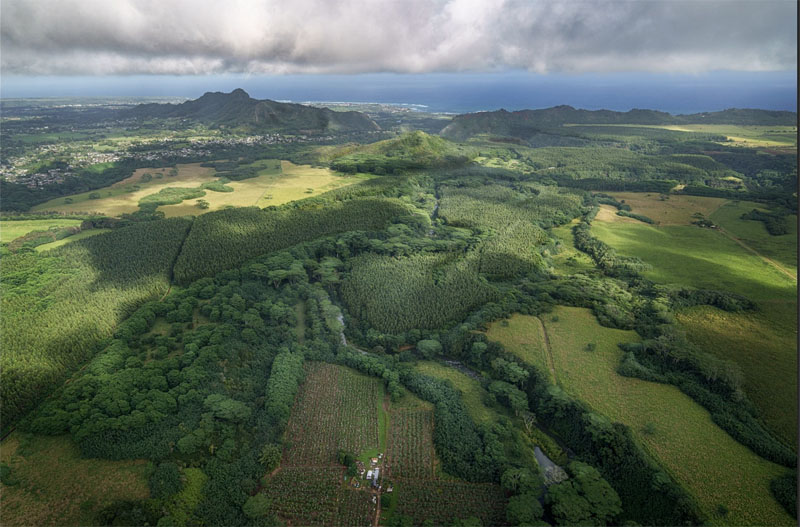
Sharpen your photo in Photoshop
Let’s sharpen. But rather than use Unsharp Mask which works well, we will use a more advanced High-Pass Sharpening.
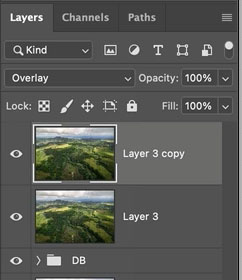
Press Ctrl/Cmd+J to duplicate the top layer
Change to Overlay Mode. It will look dark right now, but its just a transitional move.
Choose Filter>OtherHigh Pass. The colors will go back to normal.
Adjust the Radius to change the amount of sharpening. Try to keep it subtle. No sizzle please (When the light tones turn to white because of over sharpening). I call it sizzle, and not in a good way.
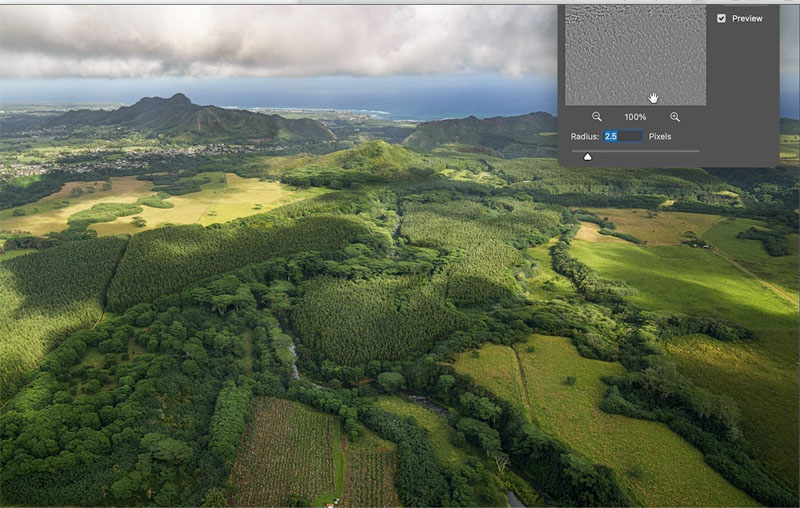
Click ok and we are done.

I hope you enjoyed this look int my editing workflow.
There are literally hundreds of things we could have done on the photo. I created my flagship series of training to cover all of those and more. If you are serious about Photoshop, please check out these 3 courses (Look at the reviews, people love them and I don’t think there is anything quite like them in the depth and ease of following along.
Photoshop 2022 For Digital Photographers
Lightroom For Digital Photographers
The Camera Raw Hand book (Video series).
Thanks everyone!
Great to see you at the CAFE
Colin
The post How to make Landscape photos look better, in depth Photoshop photo editing tutorial appeared first on PhotoshopCAFE.