
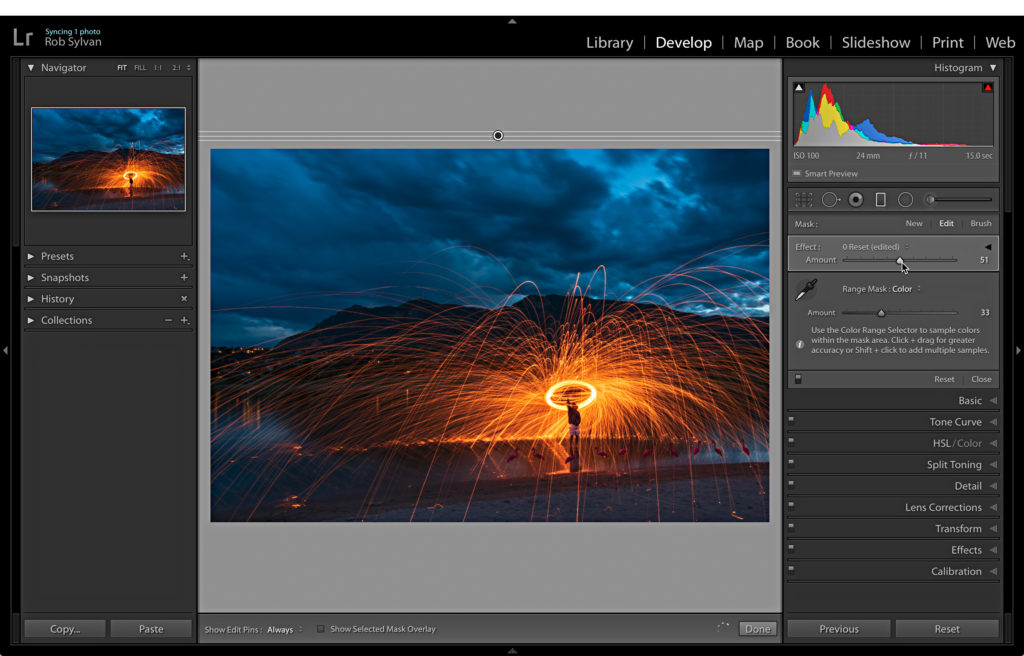
Following up from last week’s post on the Luminance Range Mask, this week we’ll dive into the Color option. For this next photo I used a Graduated Filter with Range Mask set to Color to adjust only the orange sparks from the burning steel wool.
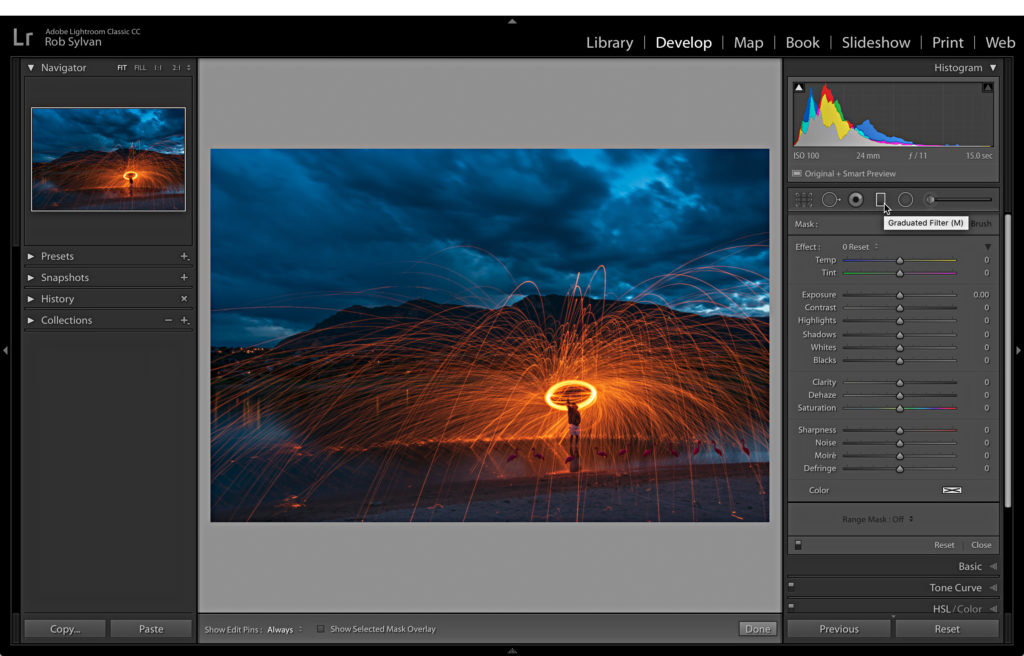
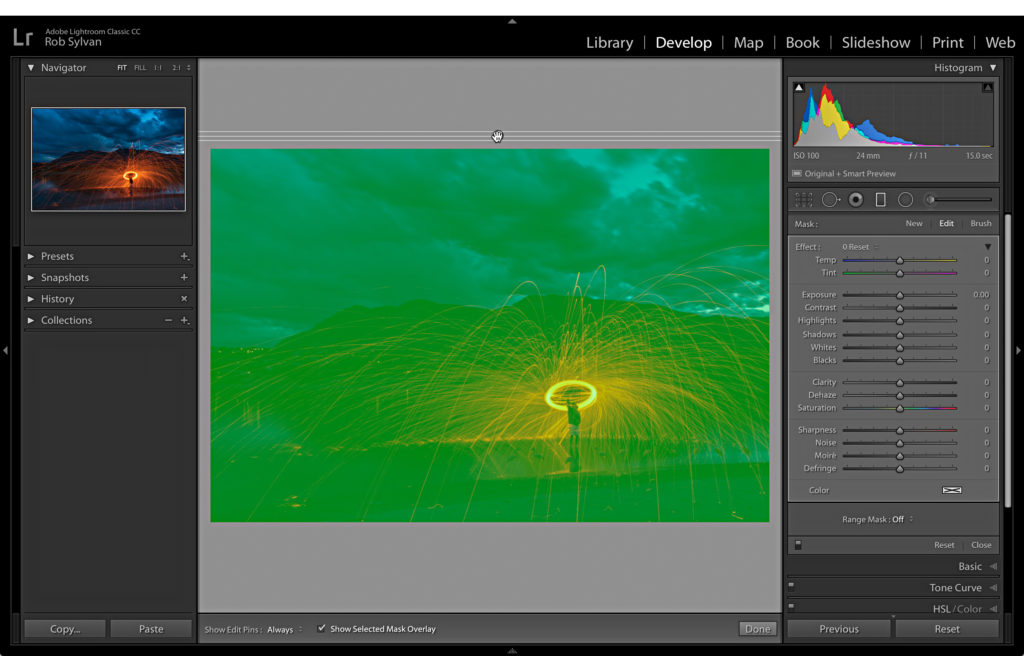
To start, I dragged out the Graduated Filter at the top of the photo. I don’t need to concern myself with the actual graduated part of the filter (the area between the two outer lines) or even that the filter is placed off the photo, as I’ll use the Range Mask to affect the only the sparks. I also switched to the green Mask Overlay to see it better (press Shift+O to cycle the mask colors).
With the Graduated Filter in place, set the Range Mask drop-down menu to Color to access its controls. The Color Range Selector (eyedropper) is used to click on the color you want to limit the mask to affect. Like with the White Balance Selector, you first click on the eyedropper to activate the tool, then you click on the desired color within the area you’ve defined with the local adjustment.
To increase accuracy (especially in color gradients like the sky), you can click-drag over an area of color to increase the range of hues included in the mask. Alternatively, you can hold the Shift key and click up to 5 different points to increase accuracy of the mask. I Shift+clicked 5 times to ensure I included all of the sparks. I turned off the mask overlay while clicking to better see the sparks.
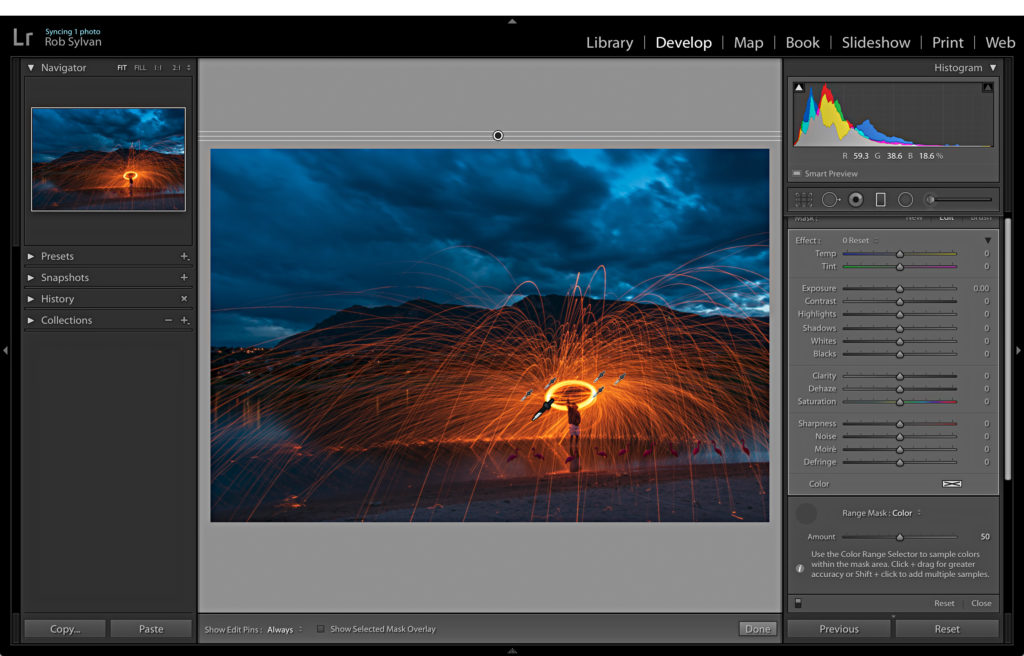
Note, the H key hides local adjustment pins, so if you are not seeing anything as you click, press the H key again to show the pins (or set the Show Edit Pins drop-down in the Toolbar to Always). You can further refine your mask using the Amount slider. Decreasing the amount contracts the mask, and increasing the amount extends the mask. I decreased the Amount slider a small amount for this photo.
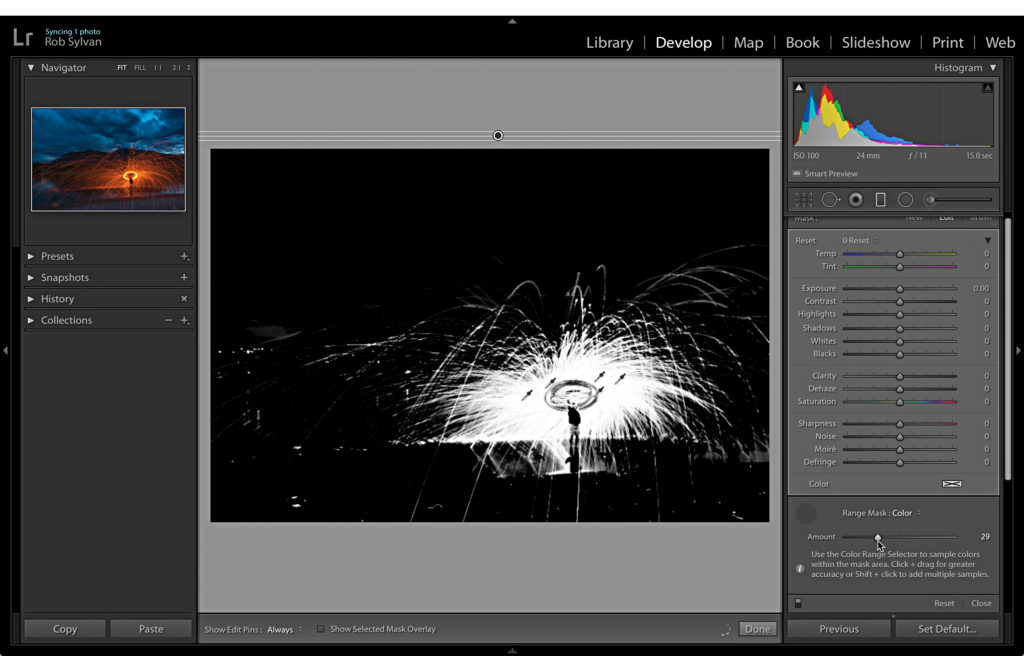
If you hold the Option key (PC: Alt), while you drag the Amount slider you will see a grayscale mask appear on the photo (this also works with the Range slider when using a luminance mask). Areas in black are being excluded from the adjustment, and areas in white get the full adjustment. Sometimes this is an easier way to see what is happening.
My goal was to increase the contrast and intensity of the sparks against the background, so I used a combination of positive Temp, Highlights, and Clarity. When I use a combination of adjustments on a local adjustment tool, I usually click the (hard-to-see) disclosure triangle next to the Effect drop-down, which collapses all of my adjustments into a single Amount slider. Then I dial that amount up and down to get the effect I am looking for.
I personally prefer to apply a local adjustment with no settings applied first, adjust the mask, then dial in settings, but you can certainly start with settings (or a preset) dialed into your local adjustment tool of choice. The final result is all that matters.
Next week we’ll wrap up this series with a look at the Depth option in the Range Mask.
The post Exploring Range Mask Options: Color appeared first on Lightroom Killer Tips.