
Turning a photograph into a Facebook 3D photo
When you are in Facebook and scrolling, suddenly a photo seems to come to life. As you move your mobile device or mouse around, you will see a cool parallax effect. Maybe you wondered how they do it. Or if it’s possible for you to do it. Perhaps you thought it required special gear or special skills. The good news is that its really easy and you can get this effect with any photo. Here is a tutorial thats shows you exactly how to turn any of your photos into an exciting Facebook 3D photo in Photoshop. Enjoy.
Here is a live example (like the photo, comment + follow me on FB and join the PhotoshopCAFE group).
Your photo can be with a phone that doesn’t have depth, or any camera. If you have a phone with depth such as google pixel or iPhone X, shoot in portrait made and upload, done. If you don’t have that kind of phone, o you want to work the magic on a non-Depth photo, then read on.
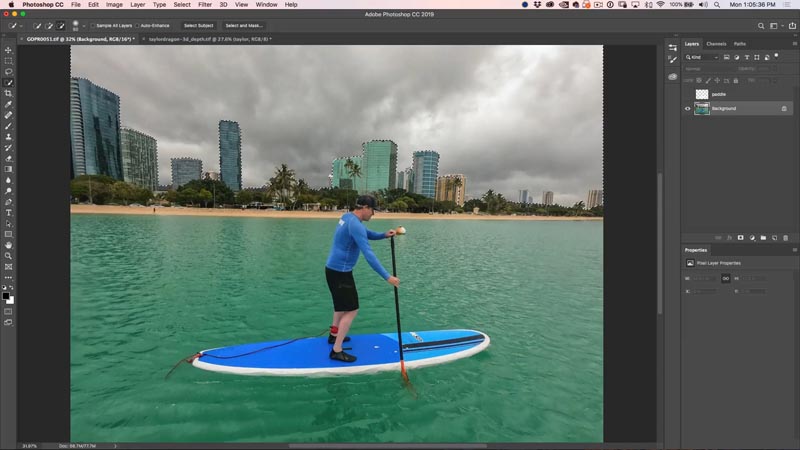
This photo was shot on a gopro by my paddle boarding instructor from SurfHNL. This is me in Hawaii, trying Stand Up Paddle Boarding (SUP) for the very first time. For the record, I loved it.

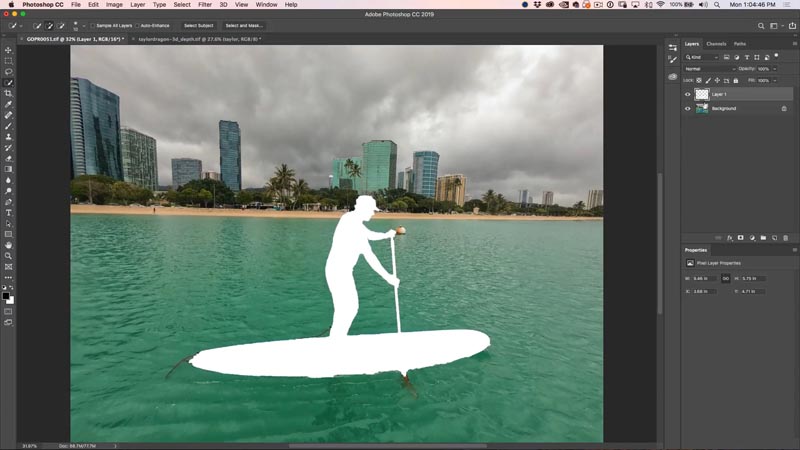
Step 2. Make a selection around the subject.
Use the quick selection tool to make a selection. (Making Selections in Photoshop)

Step 3.
Make a new Layer

Step 4.
Fill the new layer with white (or any color at the moment).
Ctrl+Delete (win) / Cmd+Backspace (mac) will fill with background color.
Alt+Delete (win) / option+Backspace (mac) will fill with foreground color.
Cmd/Ctrl+D to deselect
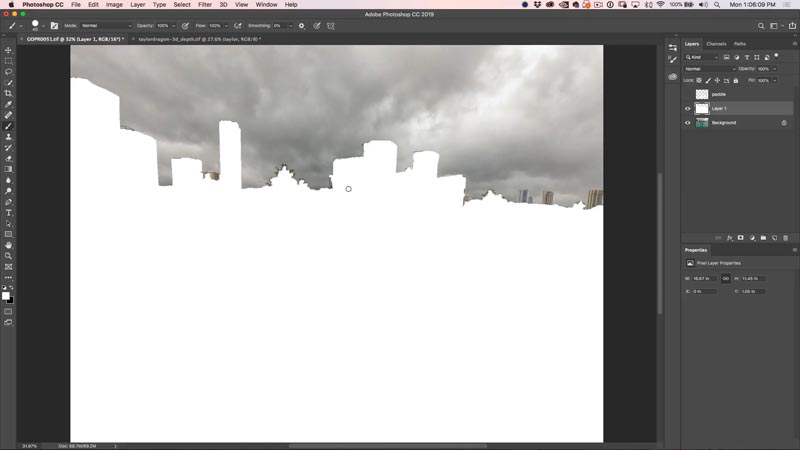
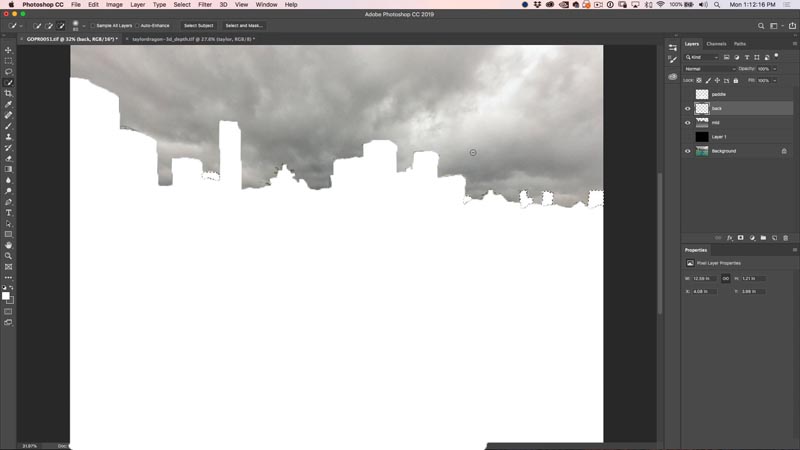
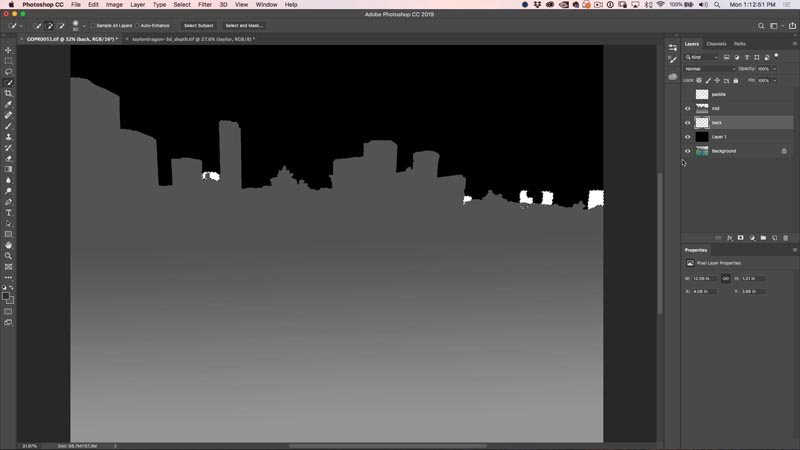
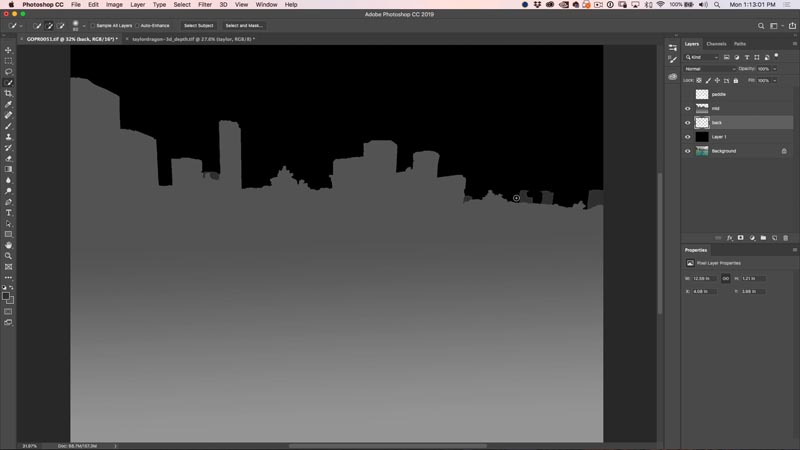
Step 5. Select the mid-ground
Select the water and the buildings
Step 6.
Create a new Layer
Fill the mid ground with white.
Step 7. adding some extra depth.
Make a selection around the distant buildings, this will make a far mid-ground.
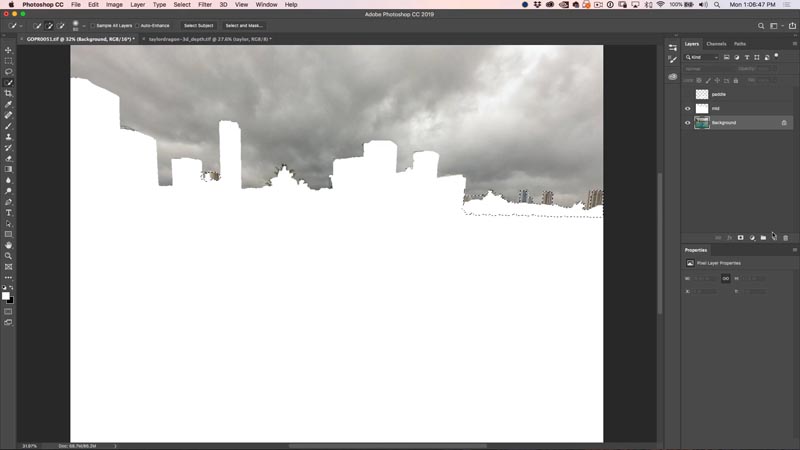
Step 8.
New Laye, then Fill with White.
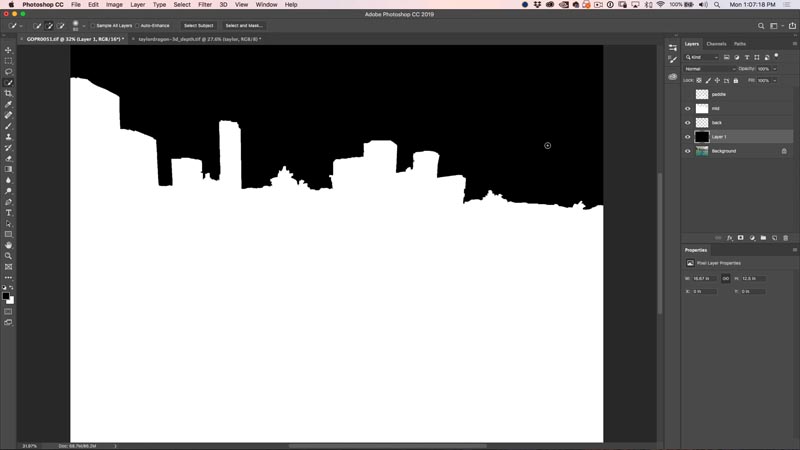
Step 9.
Create a new layer and fill with black.
Move the black layer to the bottom of the depth-map layers as shown.
This is our background.
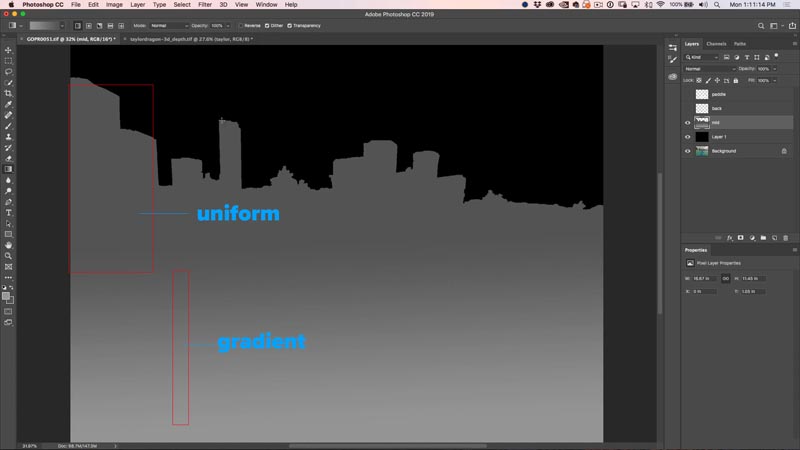
Step 10. Creating Depth Maps.
Remember, we define distance by using different gray tones. The darker the shade, the further back and the lighter the shade, the further forward.
Choose the mid ground layer and Ctrl/Cmd+click on the layer thumbnail to load the selection.
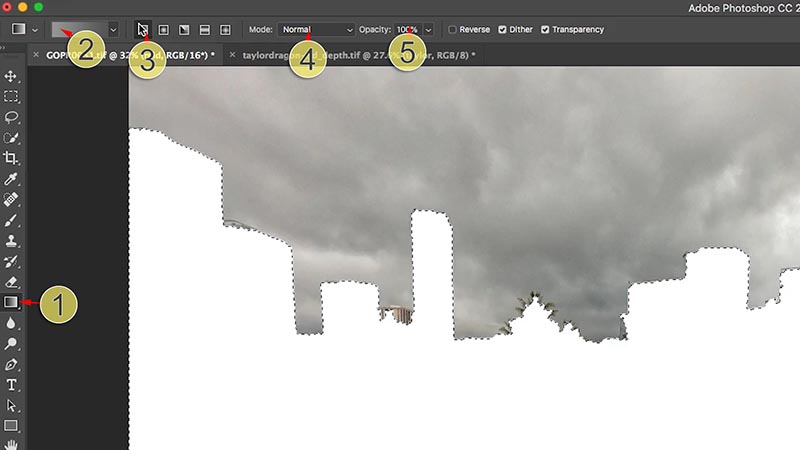
(1) Choose the gradient tool
(2) Choose foreground to background
(3) Linear
(4) Normal blending mode
(5) 100% opacity
Step 11.
Create a gradient by dragging the gradient tool on the image.
Remember to make the lighter side of the gradient at the bottom, which is closer to the viewer.
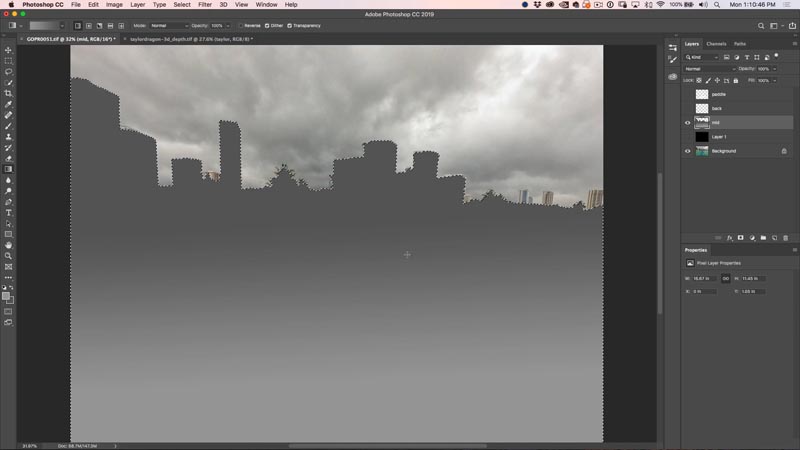
When you make the gradient, make sure the gradient part is the area where there is distance. Area like the buildings will be fairly even, so they should be a flat shade. This is accomplished by ending the gradient before the buildings. Use a shorter drag. If you are new to Photoshop gradients, try a few times and you will pick it up quickly enough.
Step 12.
Select the layer and load the selection from the background buildings.
Step 13.
Fill them with a darker gray, but not as dark as the background.
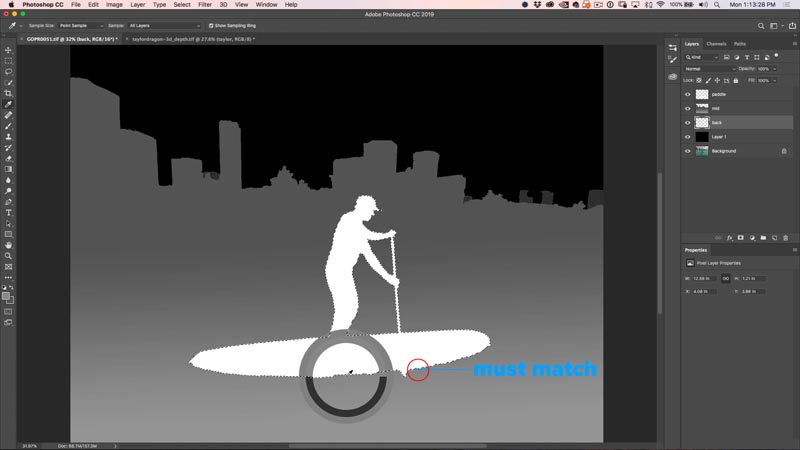
Step 14.
Turn on the layer of the paddle boarder and load the selection.
Using the eye dropper tool (Hold alt/option while in the gradient to sample). Sample the shade right next to the bottom of the Paddle Boarder.
Tip: When you want to anchor a subject, its shade must match the underlaying layer, or it will just float in space when turned into 3D.
Step 15.
Apply a gradient with the top of the subject a little lighter than the bottom. Make sure the bottom blends in. If the background has enough of a gradient, you could fill the subject with a solid shade nd get a better result.
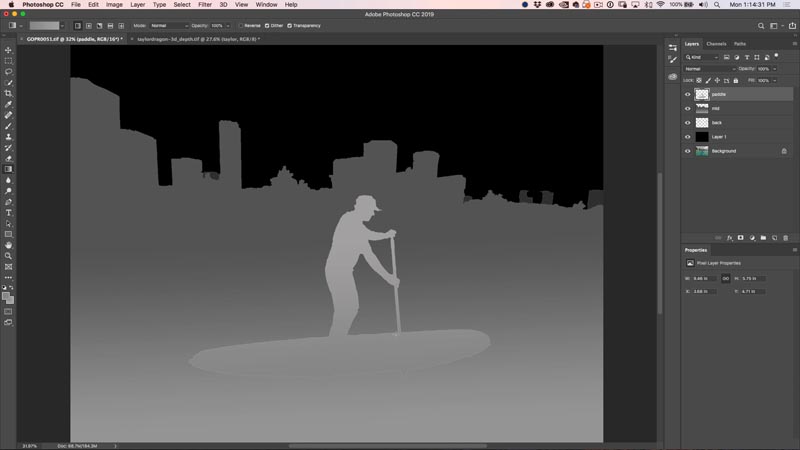
Ok, our depth map is now ready. let’s post it as a 3D picture to Facebook.
How Facebook reads depth maps and makes 3D photos
Making the image work in Facebook is really easy actually. We need to upload both the photo and the depth map. They can be either jpg or png, either will work. Making the photo jpg will make it 1/10th the size of a png and you won’t see much difference.
Note: Because solid shades work better as PNG than jpg (artifacts) you can make your depth map PNG, yes you can mix and match formats. This will make it look better for people using 3D goggles such as Occulus. Of course, if you use a jpg for both, people viewing on a mobile device won’t see much difference.
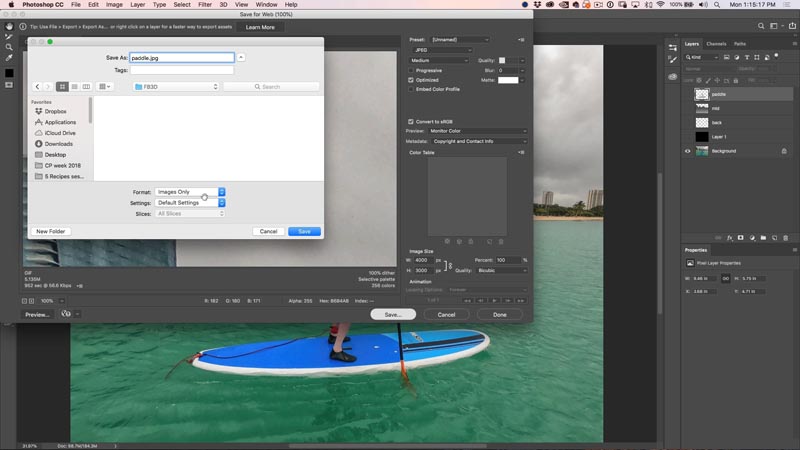
Step 16. Uploading a photo to Facebook as a 3D photo.
Hide the depth map layers for now and show the original image.
Choose file save as.. or File>Export>Save for web (make sure the image stays under 4000 px).
Name and save your image.
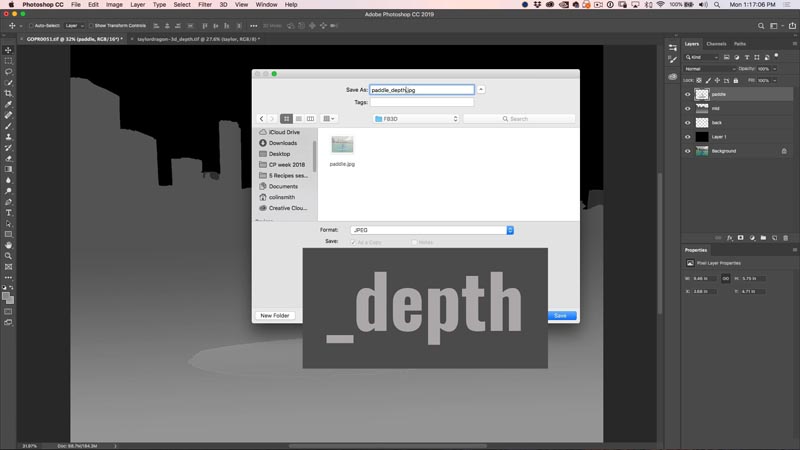
Step 17.
Turn on layer visibility for all the depth maps layers.
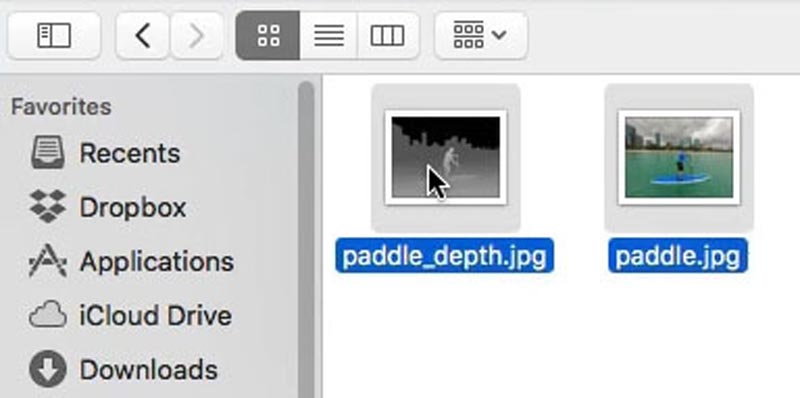
Choose File>Save as.. or File>Export>SaveFor web and save out your depth map with the same name as the photo but with _depth at the end of the name.
The key is in naming. The depth maps is the same name as the image but with underscore depth. eg. name.jpg / name_depth.jpg
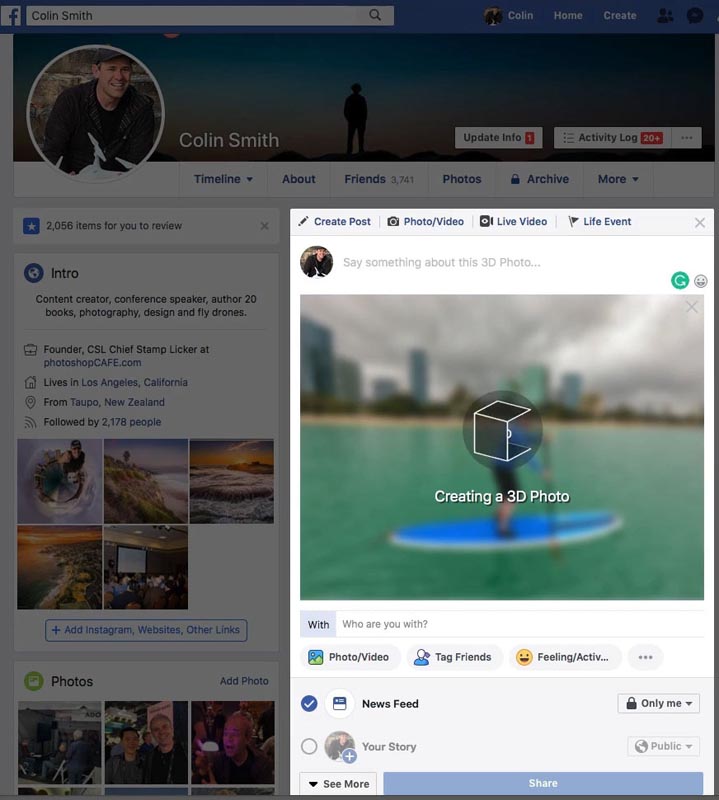
Step 18. Uploading to Facebook
Go to your facebook profile
Set privacy to Only me so you can test it.
Click on Photo/Video
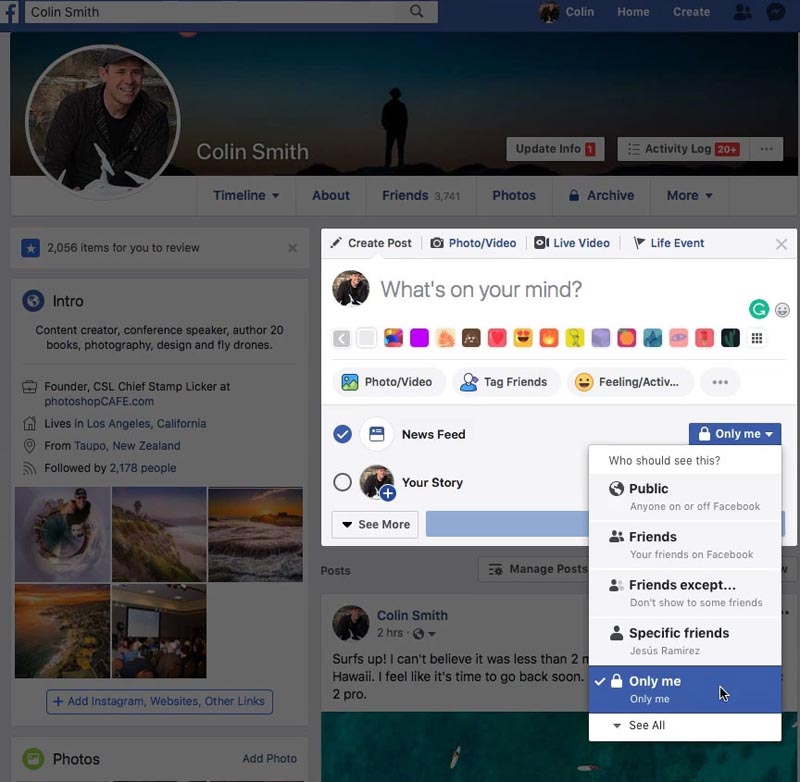
Select both your photo and your depth map
Facebook will combine the photos and process a 3D image, it will take a little bit of time, so don’t close your browser yet.
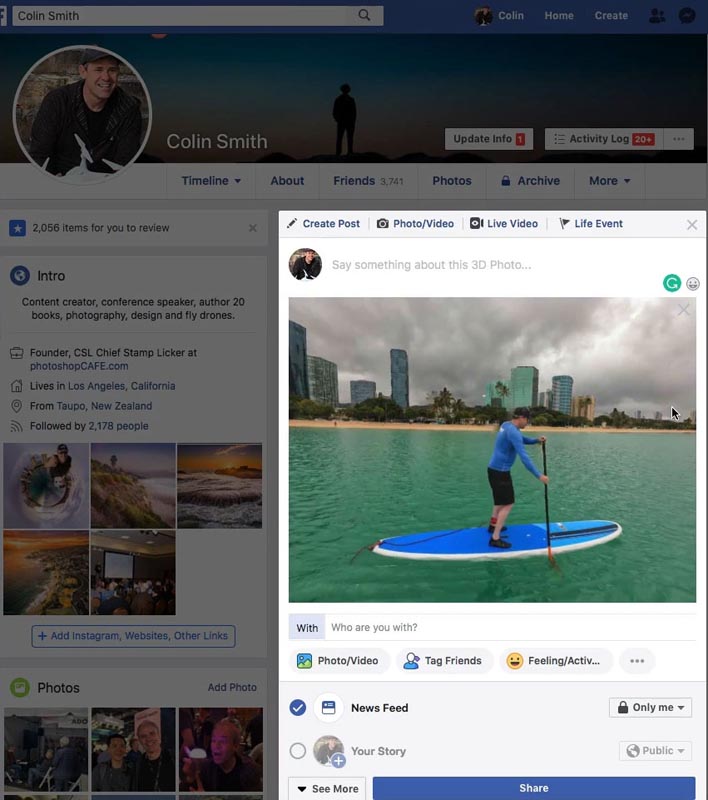
And finally, you will have a cool Facebook 3D image.
Change privacy to public or friends, so other people can see it and add a description, hey, maybe even add a link to this tutorial ?
Here is a live example (like the photo, comment + follow me on FB and join the PhotoshopCAFE group).
I hope you enjoyed this tutorial and found it easy to follow.
I am working on a more advanced one for tutoring Photoshop Composites to Facebook 3D and will post it soon, keep any eye on this site: PhotoshopCAFE.com for it.
Thanks,
Colin
PS Don’t forget to join our mailing list and follow me on Social Media>
(Ive been posting some fun Instagram and Facebook Stories lately)
You can get my free Layer Blending modes ebook here
The post How to turn any photo into a Facebook 3D photo in Photoshop appeared first on PhotoshopCAFE.