
Here are five tips to help you become more proficient with Lightroom Classic (LrC):
[These tips first appeared in the October issue of Photoshop User Magazine – Rob]Set a custom Mask overlay color
With most of the attention being focused on the improved tools for masking, and rightly so, the tools for displaying the overlay of where the mask is located were also completely overhauled and upgraded. You may remember that previously you could press the O key to show/hide the overlay, and press Shift+O to cycle the overlay through the default red, green, white, and black colors, which is all still true. However, now we can click the overlay color swatch to open the Mask Overlay panel that includes a color picker we can use to select any color we desire.
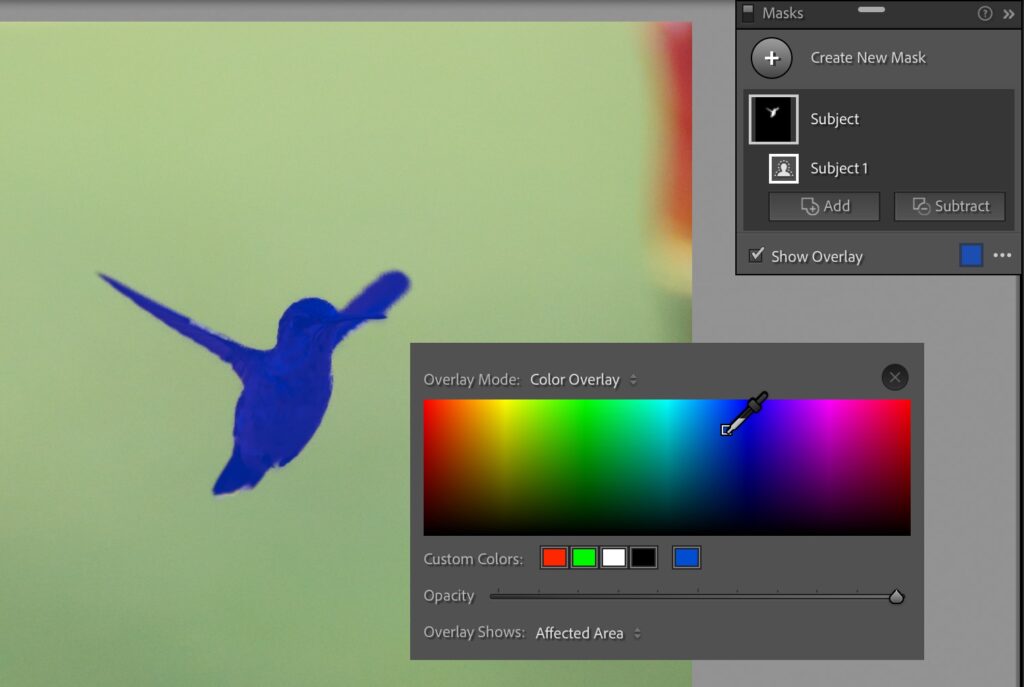
Change the Mask Overlay Mode
Speaking of the Mask Overlay panel, beyond changing the overlay color we can also choose from several different overlay modes. Click the Overlay Mode drop-down menu at the top to switch from Color Overlay to Color Overlay on B&W (affected area with color overlay and unaffected area in B&W), Image on B&W (affected area appears in color and unaffected area appears in B&W), Image on Black (affected area appears in color and the unaffected area appears all black), Image on White (affected area appears in color and the unaffected area appears all white), or White on Black (affected area appears in white and the unaffected area appears all black). You can also access these overlay modes from the Toolbar below the image or the three-dot menu at the bottom or the Masks panel.
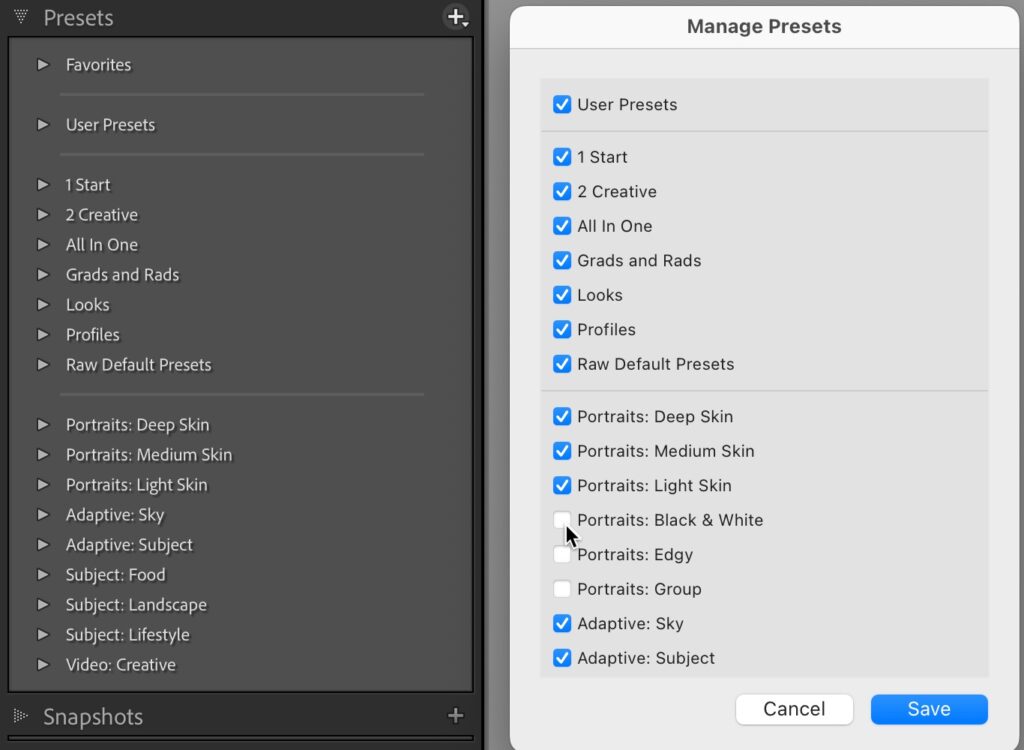
Manage your Develop presets
Develop presets can be incredibly helpful as a learning tool, a way to save some combination of settings for reuse, a productivity booster, and a means to maintain a consistent look across your edits. However, that panel can quickly become unwieldy and overwhelming due to the sheer volume of presets we can collect and create. One quick tip for reducing the clutter in that panel is to invoke the Manage Presets dialog box and hide all of the preset groups you do not use. Click the + icon at the top of the Presets panel and choose Manage Presets to open the panel. Then uncheck the box next to any preset group you no longer want to see in the panel (you can always check the box later to bring them back).
Mark a Develop Preset as Favorite
Another way to help gain some control over preset clutter is to mark your go-to presets as a Favorite. Once you mark a single preset as a favorite a special Favorites group will appear at the top of the panel to save you from scrolling up and down looking for the preset group it belongs to when you need it. To mark a preset as a favorite, simply right-click the preset and choose Add to Favorites. This works for both custom presets you create or import as well as the presets provided by Adobe. Bonus, if you mark a preset as a favorite you can hide its parent preset group using the Manage Presets panel I mentioned previously, and the preset remains in the Favorites group.

Find Exactly where a Photo is Stored
One of the most important things anyone using Lightroom Classic should know is where exactly a given photo is stored on their system. This is often the source of self-inflicted injury or general confusion because the Folders panel has a way of simplifying the folder structure displayed, so just looking at the folders shown may not be enough. In addition, we also often work from within collections, and a collection can contain photos stored across any number of different folders. So, if at any point in your workflow you find yourself wondering, where exactly is this photo stored on my system, just right-click its thumbnail (either in Grid view or the Filmstrip) and choose Show in Finder (PC: Show in Explorer) from the contextual menu to open the file browser on your system with that photo selected.
The post Five Tips for Lightroom Classic appeared first on Lightroom Killer Tips.