
Hello from Photoshop World! I want to share some of my favorite things about the camera module within the Lightroom app for mobile (iOS and Android). When you sync your Lightroom Classic catalog with Lightroom for mobile all the photos you take in the mobile app are automatically uploaded to the cloud, and then eventually downloaded to the computer running Lightroom Classic. To me, this is an unbeatable combination just for that alone, but there’s a lot more in the Lightroom camera to love.
Some of the features found in the camera module will depend on the mobile device you are using at the time. Be sure to check out the minimum requirements and FAQ to ensure your mobile device is compatible (note, my screen captures were made on an iPhone 7+ with dual lenses, so this may differ from what you see on your device).
One: Shoot in Raw Mode (DNG)
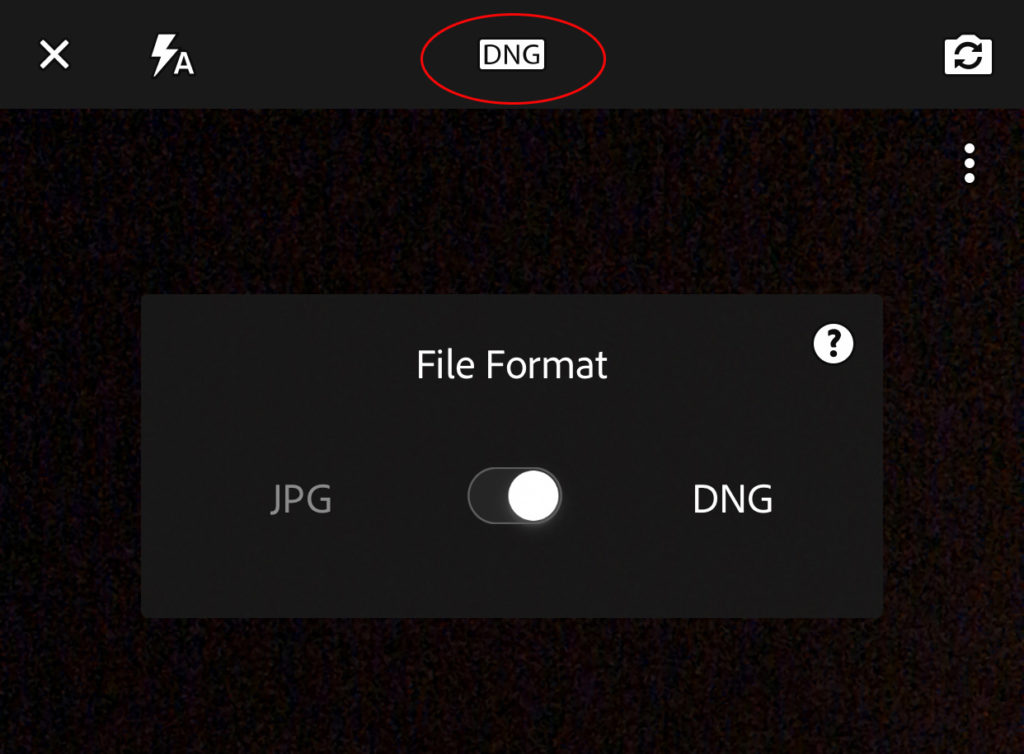
Sure, you can shoot in the standard JPG file format, but why not shoot in raw mode and take full advantage of the editing power inside the app? Keep in mind that photos captured in the app are not saved to the local camera roll (well, they are stored in a temporary cache until they can be uploaded to the cloud and then removed from the device), so these won’t clog up your device’s local storage (for long).
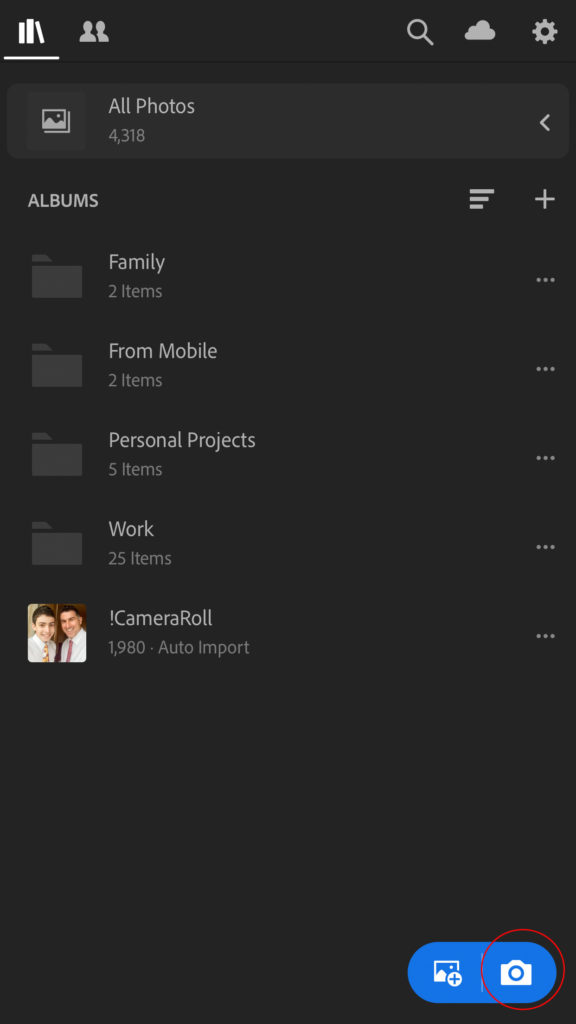
Tap the blue camera icon to open the camera.
You can change file format between JPG and DNG (raw) by tapping the file format icon in the top-center of the interface. This opens file format selector, where another tap will switch you DNG (if not there already).
Two: Shoot in Professional Mode
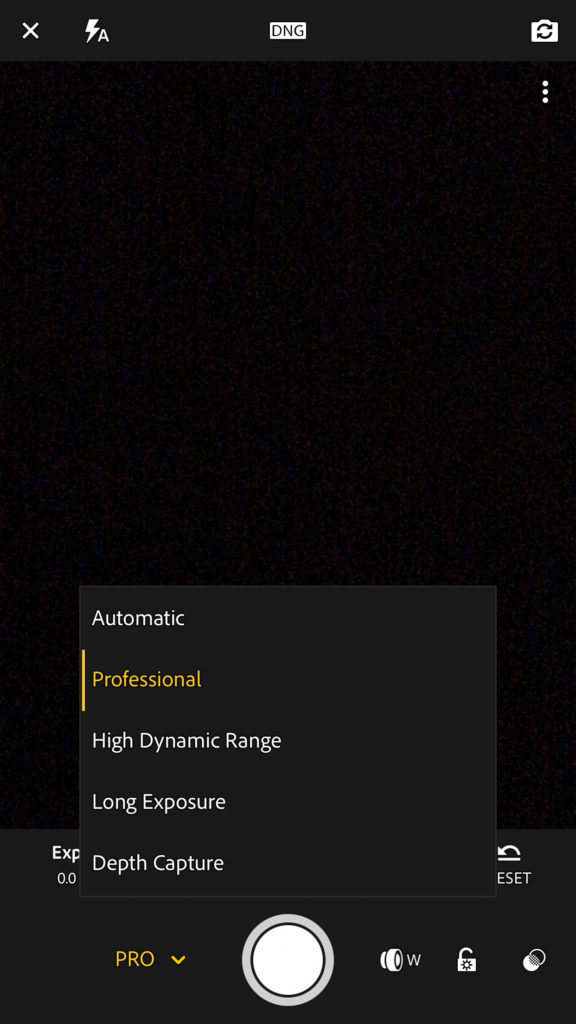
When you first open the camera, it will probably be set to Auto mode, which lets the camera control shutter speed, ISO, focus, and white balance automatically. That’s fine for snapshots or when you are in a hurry but try taking back a little more control by switching over to Professional mode. Tap Auto to expand the mode menu and tap Professional.
In PRO mode you have the option of controlling the following settings (or leave them in auto mode):
- Exp: This is the control for exposure compensation, which allows you to override the camera’s meter and increase or decrease the exposure value to better match the scene.
- Sec: Control shutter speed if you are trying to stop motion or play with creative blur.
- ISO: Manually control ISO setting to avoid noise or work in low light.
- WB: Choose the right white balance setting for the scene you are in.
- [+]: This is the control for switching from auto focus to manual focus. Note the green highlight appearing along in-focus edges is called focus peaking. The area highlighted in green is in focus.
- Reset: One tap sets all of the above back to automatic modes.
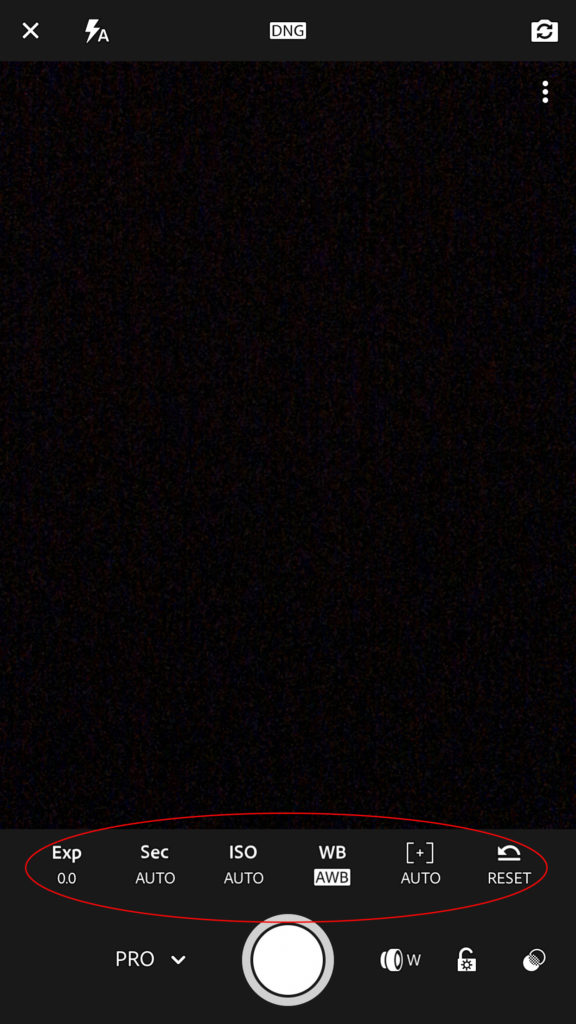
Tap the icon representing the aspect you want to change to access its options (usually represented by a simple slider, except in the case of white balance).
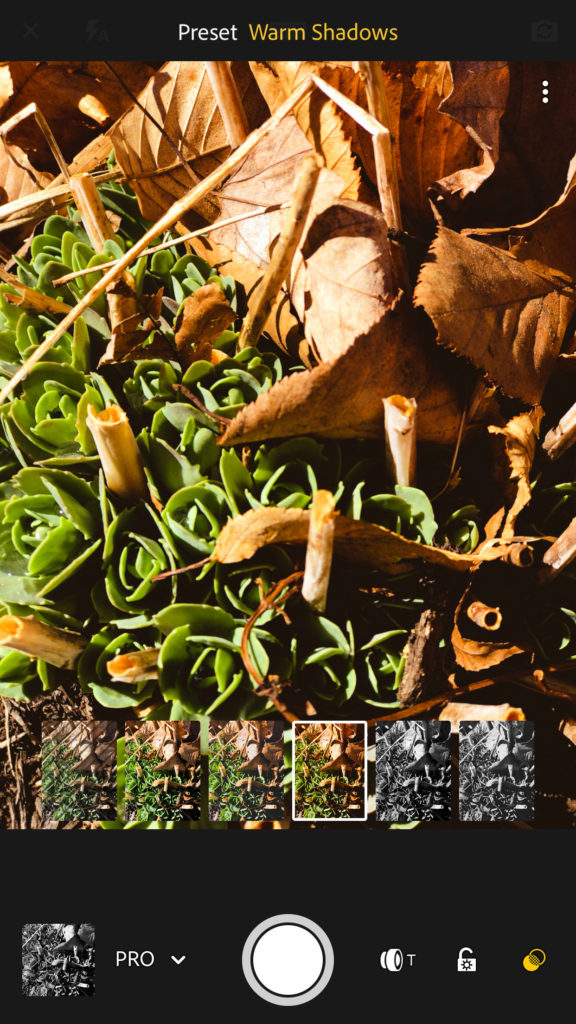
Three: Shoot-through Presets
If you like to visualize creative effects while shooting, then tap the shoot-through presets icon in the lower-right. There are five built-in presets (in addition to none) to choose from; High Contrast, Flat, Warm Shadows, High Contrast B&W, and Flat B&W. For example, to help you visualize the scene in B&W choose either of the B&W presets and the live scene changes to match. These presets are completely non-destructive, so you can change them or completely reset them later when editing.
Four: Helpful Overlays
There are a number of overlays that you can invoke to help compose the photo and avoid over exposing the highlights. Tap the three-dot menu in the upper-right to expand the options. From left to right, they are:
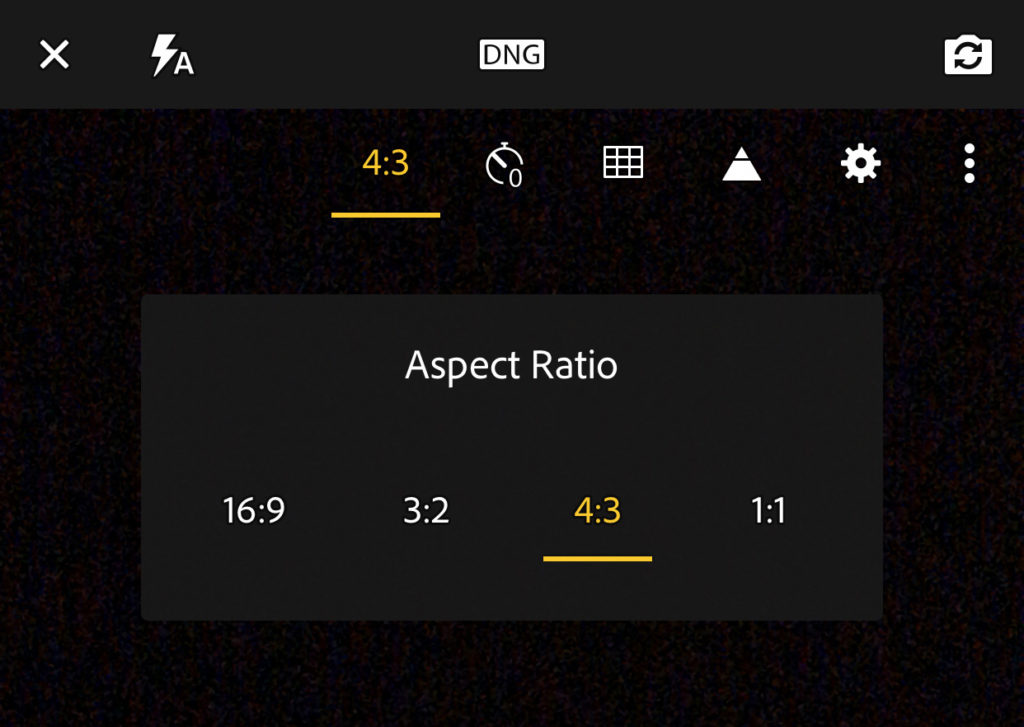
- Aspect ratio: This will show the default aspect ratio for your device at first, but you can switch between 16:9, 3:2, 4:3, and 1:1. You’ll get a live preview of the aspect ratio you choose for taking the photo, but you can always revert back to the full image in the crop tool by choosing Original.
- Timer: Set a 2, 5, or 10 second timer before the shutter trips. We’ll cover this more in the next section.
- Grid & Level: You can switch between three different grid overlays to help with composition and even enable an electronic level indicator to help you avoid crooked horizons.
- Highlight clipping: Enable this option to easily see any area of the photo that the highlights are being over exposed. Any highlights in danger of being clipped will show a series of diagonal lines called zebra stripes. Use that exposure compensation mentioned in the previous section to recover those highlights before taking the photo.
- Settings: The gear icon contains controls for maximizing screen brightness to help you see in bright daylight conditions, to enable/disable geotagging photos, and if your camera supports HDR mode (covered later in this chapter) you can have the app save the normal unprocessed photo in addition to the HDR version.
Five: Remote Trigger, Burst Mode, and Silent Shutter
Aside from the big shutter button within the app interface you can also trigger the shutter by pressing the volume control on the side of your device. Note, on Android, you’ll need to first click that settings gear I mentioned previously and enable capture from the Volume Keys Function menu. This is very handy when you hold the device in landscape orientation.
You can also leverage that volume control trigger by turning your headphones (with volume control) into a remote camera shutter. This can be useful for slow shutter scenes when your device is on a stable platform (like a tripod). There are even Bluetooth enabled volume control buttons that you can buy for a true hands-free remote shutter trigger. On the iPhone (and hopefully coming to Android), you can fire the shutter in burst mode by pressing and holding the volume control button, which is very useful for capturing fast action scenes. One final tip, switch your phone to silent mode to disable all sounds including the fake camera shutter sound. Enjoy!
Side note, I had the opportunity to do a guest post over on Scott’s blog last week. I pulled together a bunch of my favorite Lightroom Classic tips, so be sure to check it out.
The post Five Useful Things in the Cloud-based Lightroom Mobile Camera App appeared first on Lightroom Killer Tips.