
2 Scenarios: The first is when you are the photographer.
In this case, I always get the shot and then have the model leave the scene and shoot a clean background plate. In this case, I used a photo from Adobe Stock, and I searched for more photos from the same shoot. I was able to get a different shot, but one that revealed a different part of the background. You will see how we use it right now.
Then we will look at the 2nd scenario, you are the retoucher/designer and you only have the single image to work with. This way, everyone should be covered ?
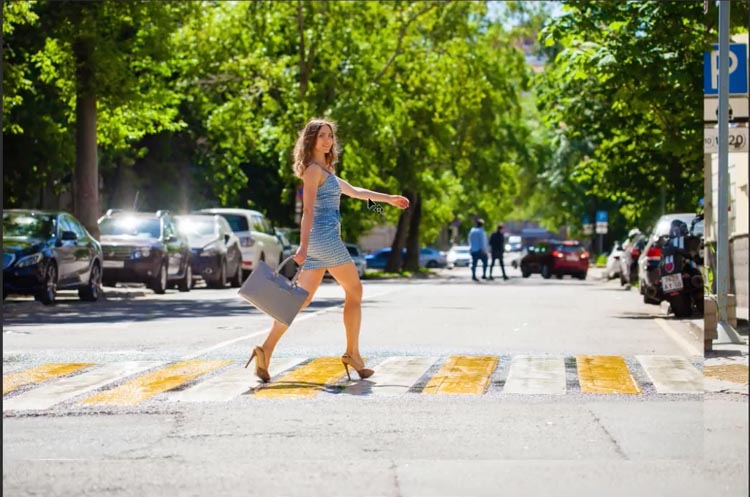
Technique #1 Remove people from a photo when you have more than one image to work with
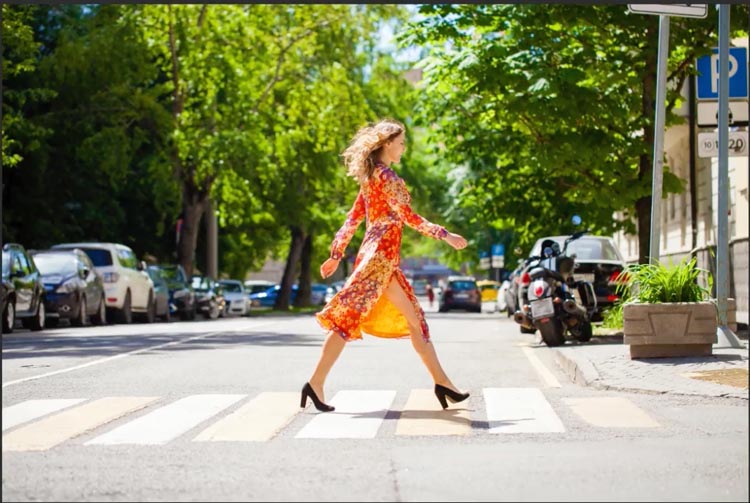
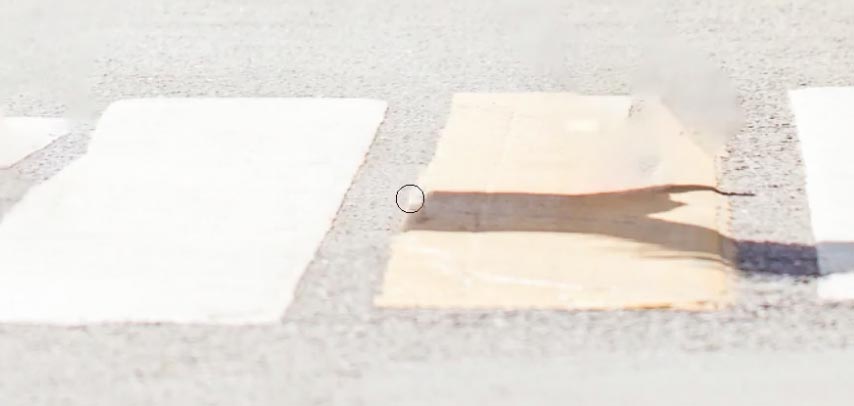
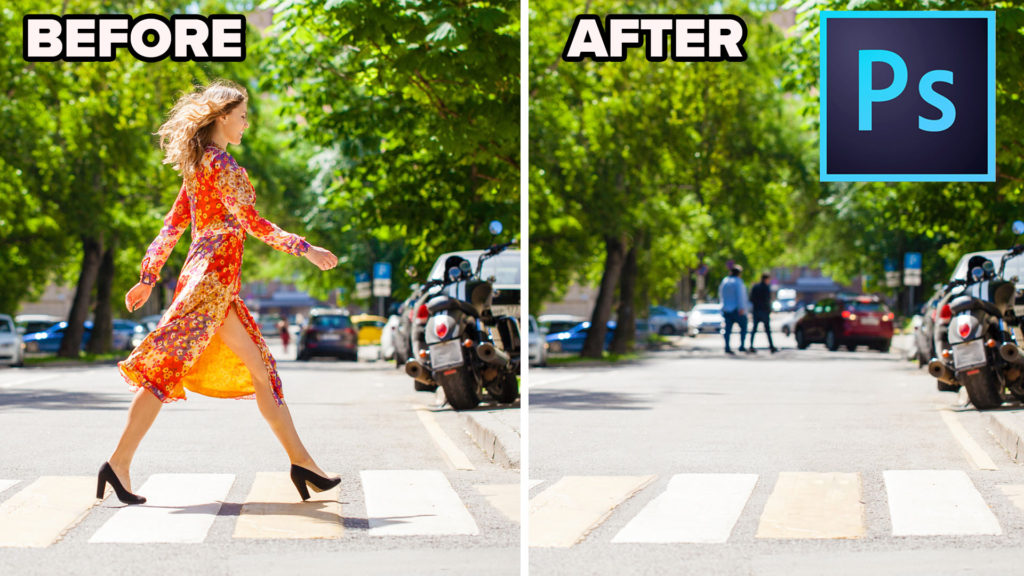
Here is the starting photo. We will remove the person. Let’s go…
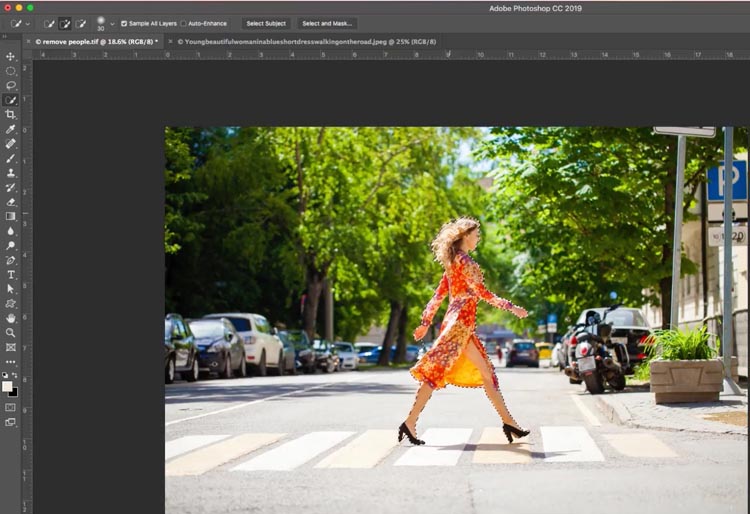
Step 1
Choose the Quick Selection brush
Click on Select Subject (If you are on CS6, you will need to brush over the subject to select it).

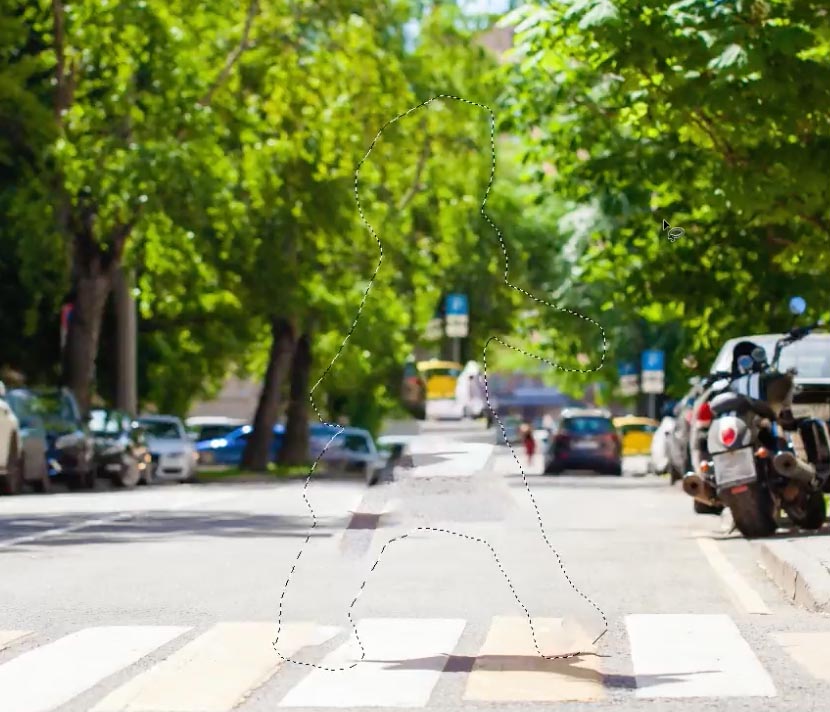
Your person will be selected. But we want a nice loose selection for a better background blend.
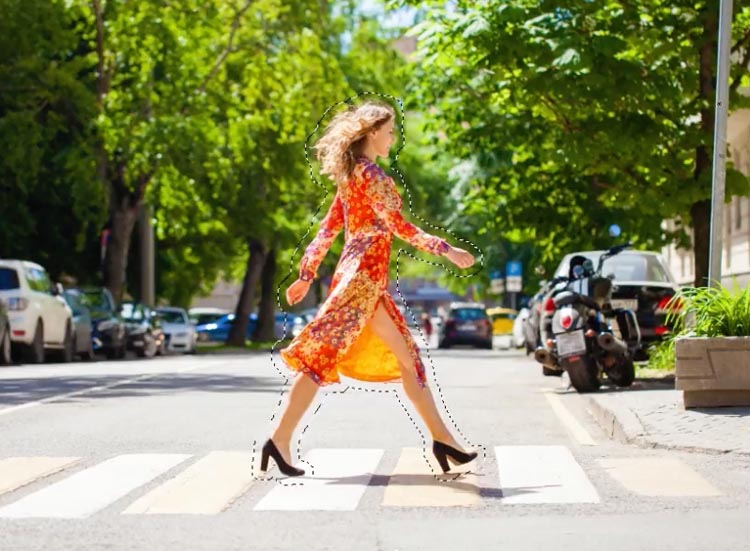
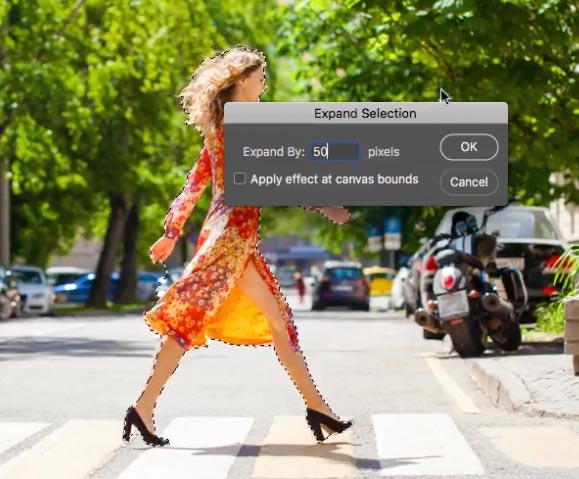
Step 2.
Choose Select>Expand>50 pixels
Step 3.
Press Shift+Delete (Shift+Backspace on Windows) this opens up fill.
Choose Content Aware and click ok
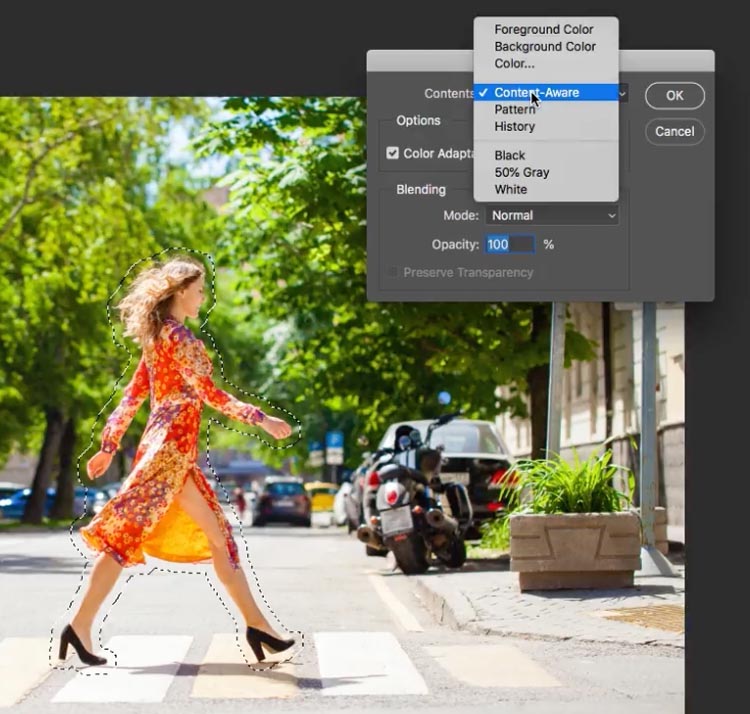
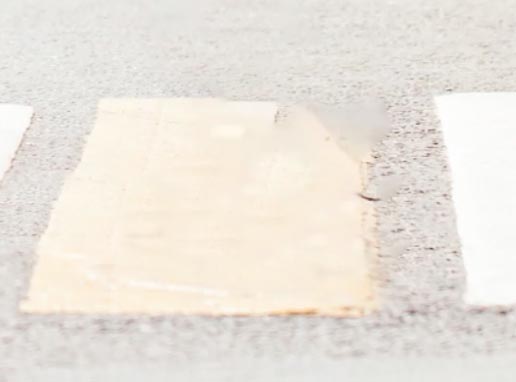
It does a pretty decent job to start with

We can go 2 ways from here. Either fix the rest of this photo (which we will do in a few steps) or use an additional photo to patch it. Lets look at the patch option right now.
Step 4. Using Multiple photos to remove a person.
If you have shot other photos at the same location, use an addition photo that is unobstructed in the area we are fixing.
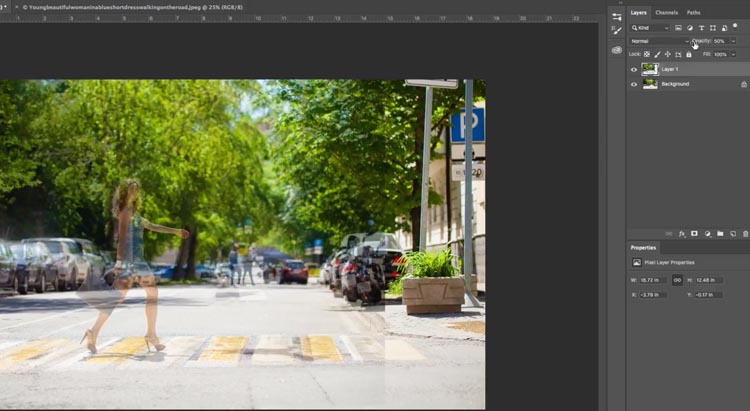
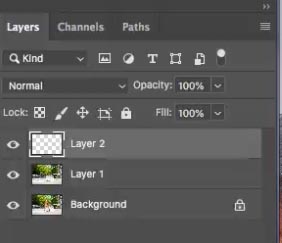
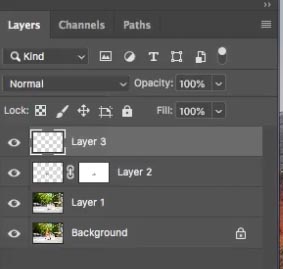
Drag the new photo into the same document as our main photo. So we will have the 2 images on separate layers.
To combine, drag the photo into the tab at the top of the screen, of the other photo. Wait for the document to open and then move to the center of the image and then release. How to combine 2 photos.
Lower the opacity of the top layer to 50% so you can see both.
Using the move tool (V) reposition the top layer so that it lines up with the one underneath.
(Note you may have to rotate, scale and dirtier the layer to fit, if so, press Cmd/Ctrl+T for free transferm and right click for additional options).
Step 5.
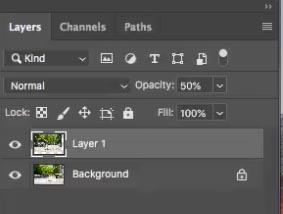
Once you have lined up the layer, hide it with a mask: While holding down Alt/Option click on the new layer mask icon.
It will make a mask that is black and hides the top layer.

Step 6.
Choose a soft edged black brush.
Choose the black layer mask and paint over the area to patch.
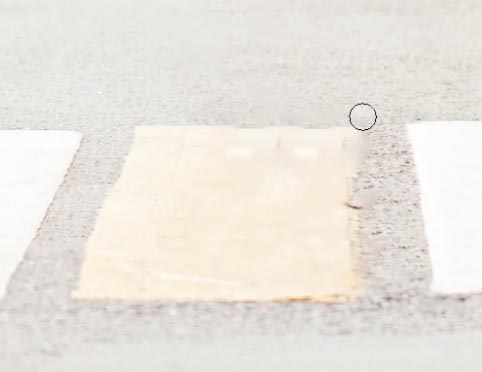
Paint in the top layer over the area you want to hide (The video above shows all this).
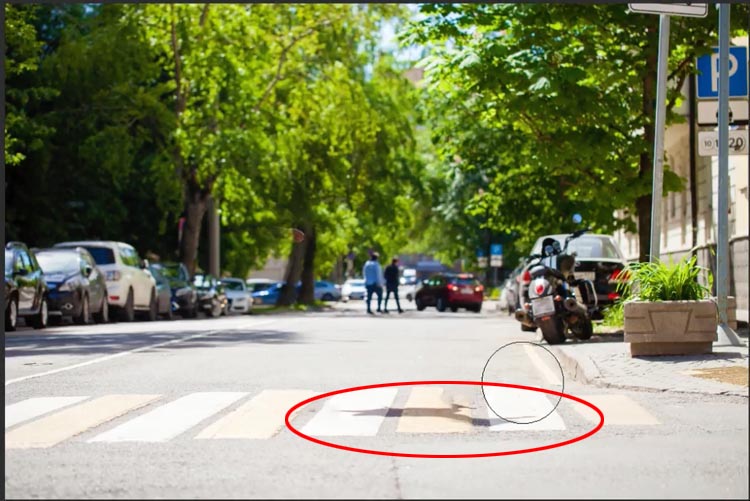
Here I have painted it the top layer over the top half of the photo. Notice it looks perfect. The only thing is the shadow on the cross walk. We will address that in the next technique.
Technique #2. Removing a person from a photo with a single image.
Here we will remove a person from a photo without using a second photo to patch the image. This is the technique you will use if you only have a single image to work with.
Step 1
Press Cmd/Ctrl+J to duplicate the layer (This leaves us with a clean background layer in case we need it later.
Choose the Quick Selection brush
Click on Select Subject (If you are on CS6, you will need to brush over the subject to select it).
Your person will be selected. But we want a nice loose selection for a better background blend.
Step 2.
Choose Select>Expand>50 pixels
Step 3.
Press Shift+Delete (Shift+Backspace on Windows) this opens up fill.
Choose Content Aware and click ok
This is the result. Not a bad start
Press Cmd+D to deselect.
Step 4.
The top part needs some work, lets apply Content Aware to that.
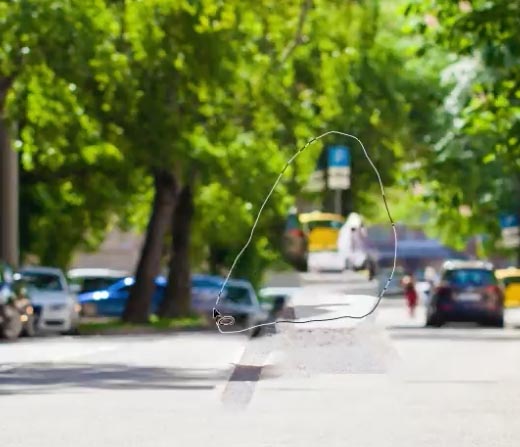
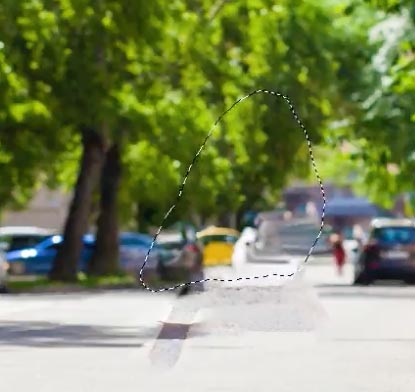
Choose the lasso tool
![]()
Make a selection around the area that needs more work.
Step 5.
Press Shift+Delete (Shift+Backspace on Windows) this opens the fill dialog box.
It looks a lot better than it did.
Choose content Aware and press enter.
Step 6.
Now its time to hit the clone stamp to fix things up.
Create a new Layer, its best to clone onto a new layer.
Step 7.
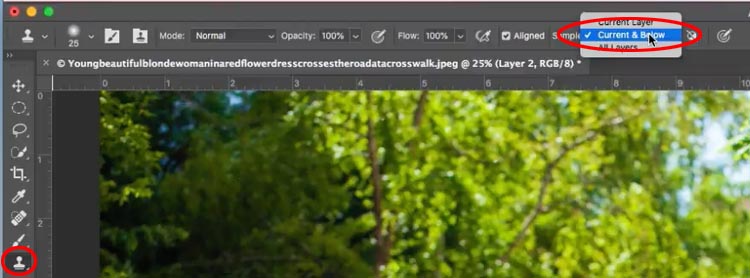
Choose the Clone Stamp Tool
Make sure you choose “Current and below” from the options so that the stamp isn’t blank.
Step 8.
Use the Clone Stamp: Hold down the Option/Alt key and click on the area you want to sample.
Click and drag to paint with the sampled area. (The video shows this in operation in detail)
Use the clone stamp to copy bits in the photo to plug in the holes and hide the areas that look weird. Resample often to avoid repetitive patterns.

Step 9.
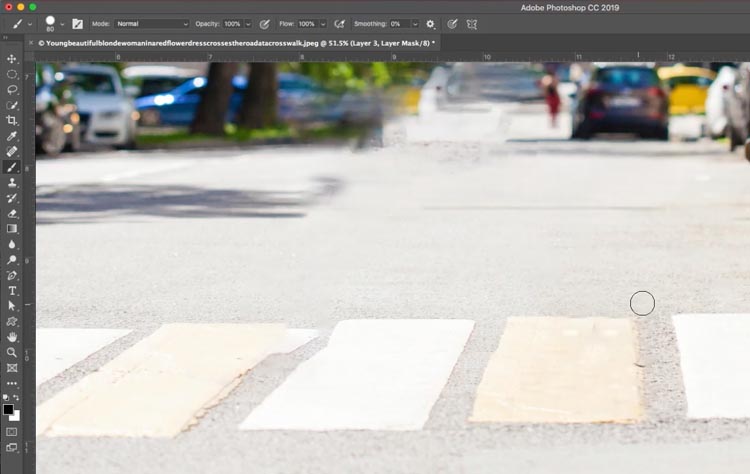
Finally we need to fix the shadow in the cross walk.
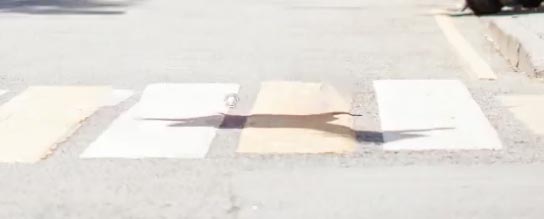
Press Alt/Option to sample. Move the brush until the edges line up and begin to paint with the clone stamp.
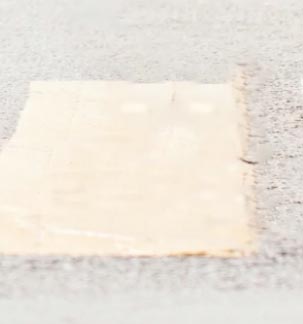
Sometimes you will come to a problem like this. The corner is missing.
Step 10.
Create a new layer
Step 11.
Clone on the new layer. Following the top edge and the side edge.
Don’t worry if you go over. We will fix that. In fact sometimes its better to go too far and then use layer masks to clean up.
Step 12.
Click the new Layer Mask icon in the Layers panel to create a layer mask.
Step 13.
Choose the brush tool
Press Cmd/Ctrl+D to reset the color.
Press the X key to swap foreground and background colors. The foreground should be black.
Choose the layer mask.
Paint on the edges of the shape to make away the excess.
Step 14.
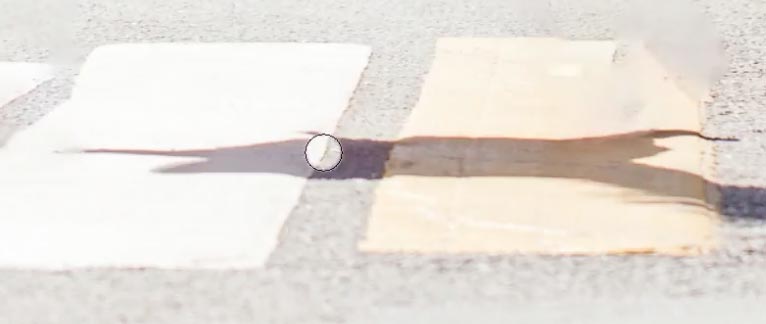
What if we want to sample from a different area and the angle is different. We want to copy the left yellow rectangle over the highlighted yellow rectangle. However the angles are different.
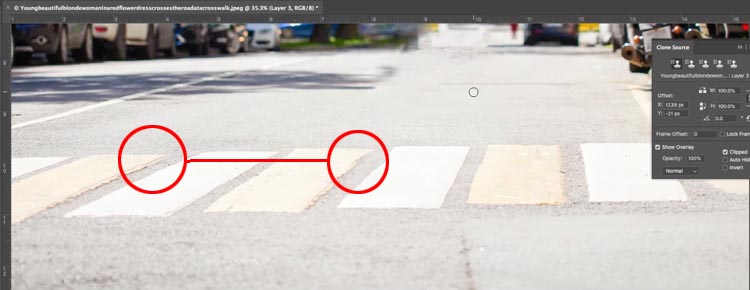
Step 15.
Choose Window>Clone Source to open the clone source panel.
Change the angle amount by dragging on it in the panel.
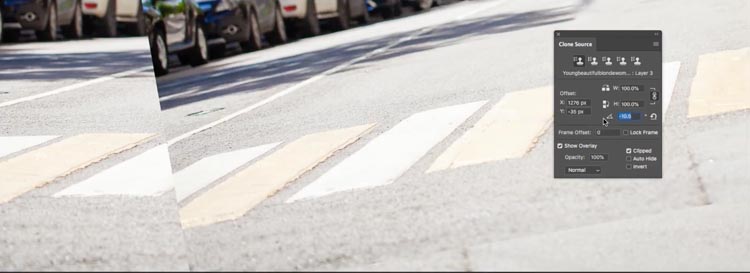
Now when you clone, the angle will change to match the new angle.

And we are all done.

For the thumbnail, I combined the top half of the image from the first technique and the cross walk from the second technique. It came out so good, I was accused of using a different image ?
I really hope that you found this video and written steps useful and that this helps you remove people from photos a couple of different ways. If it was helpful, please tell everyone about PhotoshopCAFE and share this tutorial on your social media.
Great to see you here at the CAFE
Colin
PS Don’t forget to join our mailing list and follow me on Social Media>
(Ive been posting some fun Instagram and Facebook Stories lately)
You can get my free Layer Blending modes ebook here
PHOTOSHOP CC SELECTION SECRETS
NEW COURSE BY COLIN SMITH
Stop struggling with selections. Learn how to select and cut out anything from people, hair, trees, complex shapes and even transparency.
Discover how to get perfect edges, without halos and jaggies. Colin shows you exactly how in 18 lessons.
All the images are included for you to follow along.
You will be able to select and cut out anything: faster and cleaner.
MORE INFO HERE
The post How to remove a person from a photo in Photoshop (Complex Background) appeared first on PhotoshopCAFE.